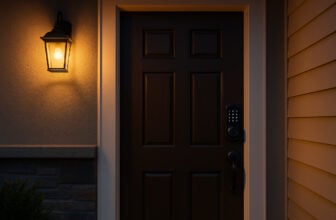
DIY security system wiring has surged in popularity among homeowners, with over 72% adopting or considering self-installed solutions this year.
These DIY security system wiring options fall into three wiring methods—wireless, offering tool-free, battery-powered sensors and rapid setup; hardwired, delivering uninterrupted power, minimal interference, and long-term reliability; and hybrid systems that blend wired and wireless components for balanced performance.
In this article, you’ll uncover the pros and cons of each approach, detailed cost comparisons, and expert best practices to ensure a seamless DIY installation that meets your security needs.
Understanding DIY Security System Wiring Methods
Here’s a concise overview of key wiring approaches, followed by a detailed breakdown of wireless, hardwired, and hybrid configurations:
DIY security wiring falls into three main categories—wireless, hardwired, and hybrid—each optimized for different needs. Wireless systems rely on RF, Zigbee, or Z-Wave mesh protocols to link battery-powered sensors and control panels for fast, non-invasive installs but require regular battery changes and can face interference.
Hardwired setups use Cat5/6 PoE or coaxial/Siamese cables to deliver continuous power and data to IP or analog cameras and sensors, offering rock-solid reliability at the cost of professional installation and wall modifications.
Hybrid systems marry the two, wiring critical zones for uninterrupted operation while deploying wireless devices in areas where cabling is impractical, delivering balanced performance and flexibility.
Wireless Wiring
Wireless systems communicate via RF, Zigbee, or Z-Wave protocols, forming mesh networks between sensors and control panels.
Zigbee, standardized under IEEE 802.15.4, supports low-data-rate, battery-friendly devices over 10–100 m LOS with mesh relays, while Z-Wave operates sub-1 GHz for longer ranges (up to 200 m LOS) and reduced interference.
Core components include battery-powered motion detectors, door/window contacts, and a wireless base station (e.g., SimpliSafe’s Base Station and Keypad) that often support cellular/Wi-Fi backup and mobile-app integration.
Hardwired Wiring
Hardwired systems use structured cabling—coaxial/Siamese for analog CCTV or Cat5e/Cat6 Ethernet for IP PoE cameras—to carry both power and data. Pelco notes that CCTV installs may utilize Siamese cables (integrated video + power) or separate runs, while IP cameras connect via PoE switches to an NVR/DVR.
Common topologies include star, zone, or dedicated cabling harnesses as outlined by FS, enabling centralized runs to panels or network closets.
Core components feature PoE-powered cameras, wired control panels (RS-485/Ethernet), and NVR/DVR units that ensure continuous operation without battery maintenance
Hybrid Configurations
A hybrid system blends wired backbones with wireless extensions. Alarm Grid defines it as a wired panel augmented by wireless sensors, supporting both hardwired zones and RF devices on one platform.
CCTV Camera World explains that hybrid recorders accept both PoE IP and Wi-Fi cameras, letting you wire key areas like main entries while placing wireless units in garages or remote wings. Use cases include:
- Critical zones wired: Entry points, vaults, and high-value rooms wired for fail-safe power.
- Secondary zones wireless: Attics, outbuildings, and rental units using battery sensors where cabling is tough.
Pros and Cons Comparison
DIY security system wiring methods each bring unique strengths—and trade-offs—to your DIY installation. Wireless solutions deliver plug-and-play simplicity, linking battery-powered sensors via RF, Zigbee, or Z-Wave in minutes, but can suffer signal interference and demand regular battery swaps.
Hardwired setups offer uninterrupted power and rock-solid stability with minimal upkeep, yet require professional installation, wall modifications, and are vulnerable to power outages without backup batteries.
Hybrid systems marry both worlds—wiring critical zones for reliability while deploying wireless sensors for flexibility—but introduce mixed-installation complexity that demands careful planning.
| System Type | Pros | Cons |
|---|---|---|
| Wireless | Easy install; Portability; No drilling | Signal interference; Battery upkeep |
| Hardwired | Stable connection; Low maintenance | Professional install; Wall cutting; Outage vulnerability |
| Hybrid | Balanced reliability and flexibility | Increased installation complexity |
Wireless Systems
- Easy installation & portability: You can position battery-powered sensors and cameras in under 30 minutes with no drilling, thanks to plug-and-play RF or Zigbee/Z-Wave setups.
- No structural modifications: Ideal for renters or historic homes—simply mount sensors with adhesive pads or small screws, then pair via the mobile app.
- Signal interference: RF transmissions can be disrupted by thick walls, large metal objects, or overcrowded wireless spectrums, leading to dropped connections or false alarms.
- Battery upkeep: Sensors require periodic battery replacements (typically every 6–12 months), adding ongoing costs and maintenance tasks.
Hardwired Systems
- Stable, uninterrupted power: PoE or low-voltage cabling delivers continuous energy and data streams, eliminating wireless dropouts and ensuring cameras record even if Wi-Fi fails.
- Low ongoing maintenance: Once professionally installed, hardwired sensors and cameras need virtually no upkeep beyond occasional firmware updates.
- Professional installation & wall cutting: Running cables through walls, ceilings, and attics typically requires drilling studs, patching drywall, and hiring certified technicians—driving up labor costs.
- Power-outage vulnerability: Without integrated battery backups or secondary power sources, a mains failure can disable your entire system until power is restored.
Hybrid Systems
- Balanced reliability & flexibility: Wire essential entry points and high-value areas for fail-safe protection, while using wireless sensors in hard-to-cable zones like garages or guest cottages.
- Scalable & customizable: Easily expand coverage by adding wireless components without re-running cables—or upgrade core wired elements over time.
- Installation complexity: Managing dual wiring protocols demands careful planning, extra configuration steps, and may require both networking and RF expertise to avoid conflicts.
By weighing these pros and cons against your property layout, technical skill, and maintenance tolerance, you can choose the DIY wiring strategy—wireless, hardwired, or hybrid—that secures your home most effectively.
Installation Considerations
Proper DIY security installation hinges on having the right tools, following clear, step-by-step procedures, and staying compliant with electrical standards.
A comprehensive toolkit—including drills, cables, connectors, and safety gear—paired with a systematic approach for wireless, hardwired, or hybrid setups ensures reliable performance and longevity.
Equally vital is adherence to codes like NFPA 731 and NEC 70, plus use of proper PPE to prevent accidents and know when professional help is warranted.
Tools & Materials Checklist
Gather these essentials before you begin your DIY security wiring:
| Tool / Material | Purpose |
|---|---|
| Cordless Drill & Bits | Drilling mounting holes; masonry bits for concrete |
| Fish Tape / Wire Puller | Routing cables through walls, attics, and ceilings |
| Cables | Cat5e/Cat6 for PoE cameras; Siamese/coaxial for analog |
| Connectors & Adapters | RJ45 crimps, BNC connectors, wire nuts, and terminal blocks |
| Battery Tester | Verifying sensor battery health before installation |
| Level & Tape Measure | Ensuring straight mounts and correct spacing |
| Screwdriver Set | Mounting brackets, faceplates, and control panels |
| Safety Gear | Insulated gloves, safety glasses, hard hat, arc-flash suit |
| Ladder & Work Light | Accessing high mounting points; clear visibility |
Step-by-Step Installation
1. Wireless System Setup
- Plan sensor layout: Map entry points and high-traffic areas, maintaining 10–30 ft sensor range.
- Mount control panel: Secure near home’s central hub (e.g., router) for best signal.
- Install sensors: Affix battery-powered door/window contacts and motion detectors using adhesive pads or small screws, then pair via the manufacturer app.
- Configure zones & alerts: Label zones in the panel UI and set notification preferences (push, SMS, email).
2. Hardwired System Wiring
- Run cabling: Use fish tape to pull PoE Ethernet or Siamese cables from an NVR/DVR location to each camera mount.
- Terminate cables: Crimp RJ45 connectors for PoE or attach BNC connectors for analog feeds; secure with cable boots to prevent moisture ingress.
- Mount cameras & control panel: Drill mounting holes, affix fixtures, and connect cables to the panel or PoE switch.
- Power & test: Power up the NVR; verify live feed on each camera and adjust angles as needed.
3. Hybrid System Tips
- Wire critical zones: Hardwire front doors, ground-floor windows, and high-value rooms for maximum uptime.
- Deploy wireless sensors: Use battery-powered units in garages, detached buildings, or areas with challenging cable runs.
- Unified management: Choose a hybrid-compatible panel that supports both PoE and RF sensors to streamline setup and monitoring.
Safety & Compliance
- Follow NEC 70 & NFPA 731: Ensure all wiring meets the National Electrical Code (NEC) and Premises Security Systems standard to prevent fire and shock hazards.
- Wear proper PPE: Use arc-flash rated clothing, insulated gloves, safety glasses, and helmets when handling live circuits.
- Know when to call a pro: If you encounter complex wiring routes, need to tap into mains power, or your local code requires licensed electricians, engage a certified professional to finalize installation and inspections.
Cost Analysis
Here’s a concise overview of the key cost considerations, followed by detailed breakdowns:
Upfront investment in a DIY security system ranges from $250–$1,000 for equipment packages, with professional installation adding $49–$500 in labor depending on system complexity and installer rates.
Ongoing expenses include monitoring fees of $10–$80 per month and sensor battery replacements at roughly $1.67 per unit every 6–12 months, plus backup batteries costing $15–$180 every few years (amazon.com).
Over time, homeowners often recoup these outlays through insurance premium discounts (5–20%) worth $200–$800 annually, up to 5% boost in home resale value, and reduced burglary losses—typically achieving full payback within 2–5 years.
Upfront Costs: Equipment vs. Labor
Your initial outlay depends on whether you self-install or hire a pro:
| Item | DIY Equipment Cost | Professional Labor Cost |
|---|---|---|
| Basic DIY package | $250–$400 (starter kits) | – |
| Mid-range system | $600–$1,000 (cameras, sensors) | – |
| Professional installation fee | – | $49–$250 per visit |
| Premium custom install | – | $300–$500 for complex multi-zone setups |
- Equipment costs reflect consumer-grade DIY bundles up to more comprehensive camera-and-sensor suites.
- Labor costs vary by provider, region, and job scope—basic hook-up vs. in-wall cable runs and network integration.
Ongoing Expenses: Monitoring Fees & Battery Replacement
Maintaining your system requires predictable monthly and periodic expenses:
| Expense Type | Typical Cost | Frequency |
|---|---|---|
| Monitoring fees | $10–$80 per month | Monthly |
| Interactive monitoring | $22–$25 per month | Monthly |
| Landline vs. cellular | $10–$30 vs. $40–$60 per month | Monthly |
| Sensor batteries (AA) | $1.67 each (Allmax lithium) (amazon.com) | Every 6–12 months |
| Backup SLA batteries | $15–$180 for 12V units | Every 2–3 years |
- Monitoring fees vary by service tier and connection type (landline vs. cellular), with DIY platforms often undercutting traditional providers.
- Battery upkeep is minimal in cost but critical—plan for small annual expenses to keep sensors online (amazon.com).
ROI: Long-Term Savings vs. Initial Investment
Quantifying your return helps justify the spend:
| ROI Factor | Benefit | Annual Value |
|---|---|---|
| Insurance premium discounts | 5–20% off homeowners insurance | $200–$800 saved |
| Reduced theft/damage losses | Up to 50% lower burglary rate | ~$2,500 average loss avoided |
| Home resale value uplift | Up to 5% higher sale price | $10,000 on a $200K home |
| Avoided professional monitoring | No-contract DIY saves $15–$30/month vs. pro | $180–$360 saved |
- Insurance savings alone can offset your equipment and labor within 1–3 years.
- Property value gains and loss prevention further accelerate payback, making DIY security both a safety and a financial win.
- Long-term ROI typically occurs in 2–5 years, after which you benefit from virtually free ongoing protection.
Performance & Reliability
Consistent performance and iron-clad reliability are non-negotiable when protecting your home—whether you’re relying on wireless connectivity, backup batteries, or routine upkeep, each element must function flawlessly under stress.
Wireless protocols like Zigbee and Z-Wave offer solid coverage but demand proactive interference mitigation, while built-in battery backups and UPS solutions ensure your system stays online during outages.
Finally, a disciplined maintenance schedule—ranging from monthly lens cleanings to annual professional inspections—keeps sensors, cameras, and control panels in peak condition and minimizes downtime.
Signal Range & Interference Mitigation
Wireless security hinges on clear radio-frequency paths and smart network design. Zigbee devices typically manage 10–100 m indoors and up to 300 m outdoors, while Z-Wave often delivers about 30–150 m in real-world conditions, despite manufacturer claims of 150–600 m line-of-sight.
However, everyday obstacles—thick walls, metal studs, and crowded 2.4 GHz channels—can slash that range by half or more. To mitigate interference:
- Channel selection: Place Zigbee on a channel that doesn’t overlap common Wi-Fi bands (e.g., channel 15 or 20).
- Mesh repeaters: Use powered smart-bulb or outlet repeaters every 20–30 m to reinforce connectivity.
- Physical placement: Avoid installing sensors near large metal appliances or mirrors; mount at least 1.5 m off the ground for optimal Fresnel zone clearance.
| Protocol | Indoor Range | Outdoor Range | Key Mitigation Strategies |
|---|---|---|---|
| Zigbee | 10–100 m | Up to 300 m | Non-overlapping channels; mesh repeaters; clear line of sight |
| Z-Wave | 30–150 m (real-world) | Up to 150 m typical | Install repeaters; avoid dense obstacles; proper antenna alignment |
Power-Outage Resilience (Battery & Backups)
Even the sturdiest hardwired systems can falter when the grid goes down; integrating robust battery backups keeps critical zones armed for hours, or even days. Most alarm panels include sealed lead-acid (SLA) batteries that deliver 4–24 hours of operation, with high-end UPS units extending runtime to 48 hours under light loads.
Wireless sensors generally rely on AA or CR123 lithium cells lasting 6–12 months per replacement, while cellular/Wi-Fi backup modules ensure monitoring signals transmit even if broadband fails. For maximum uptime:
- Dual-chemistry batteries: Pair SLA panel backups with lithium-ion UPS for rapid recharge and longer cycle life.
- Regular load testing: Perform monthly power-fail tests to verify backup activation within 30 seconds.
| Backup Type | Typical Runtime | Replacement Interval |
|---|---|---|
| SLA Panel Battery | 4–24 hours | Every 2–3 years |
| UPS Module | 24–48 hours | Every 3–5 years |
| Sensor Batteries | 6–12 months | Annually (AA/CR123) |
Maintenance Schedules
A proactive maintenance regimen nips small issues in the bud and preserves system integrity. Industry experts recommend:
- Monthly visual inspections: Wipe camera lenses and sensor windows to remove dust and ensure sharp imaging.
- Quarterly functionality tests: Arm/disarm zones, trigger motions, and confirm alerts—especially after firmware updates or network changes.
- Biannual professional checkups: Verify wiring terminations, battery health, and panel diagnostics with a certified technician.
- Annual full system audit: Update control panel firmware, review monitoring agreements, and stress-test backup power under load.
| Interval | Task |
|---|---|
| Monthly | Clean lenses/sensors; visual inspection |
| Quarterly | Functional testing; firmware/software updates |
| Biannual | Professional inspection; battery/load testing |
| Annual | Full audit; backup power stress test |
By addressing signal integrity, ensuring uninterruptible power, and adhering to a disciplined maintenance cadence, you’ll maximize uptime and keep your DIY security system performing at its best—rain or shine.
Smart Home & Monitoring Integration
Modern DIY security systems don’t just protect your home—they seamlessly integrate with broader smart-home ecosystems and offer flexible monitoring choices to match every lifestyle.
Protocols like Zigbee and Z-Wave drive low-power mesh networks for sensors and locks, while Wi-Fi hubs centralize control of cameras, alarms, and third-party devices—even Eero’s new Wi-Fi 6 hubs now support smart-home routing alongside internet traffic.
On the monitoring front, you can opt for self-monitoring at no monthly cost—managing alerts yourself via smartphone—or subscribe to professional monitoring plans ($10–$60/month) that dispatch emergency services on your behalf.
Below, we’ll break down compatibility requirements and compare monitoring options so you can tailor a security setup that’s both high-tech and hassle-free.
Compatibility with Zigbee, Z-Wave & Wi-Fi Hubs
Most leading DIY brands support multiple protocols to ensure your sensors, locks, cameras, and even lighting speak the same language.
| Protocol/Hub | Description | Range (Indoor) | Key Benefits | Example Integrations |
|---|---|---|---|---|
| Zigbee | IEEE 802.15.4 low-power mesh network operating at 2.4 GHz | 10–100 m | Highly energy-efficient; mesh relaying improves coverage | Philips Hue, Amazon Echo Plus, SmartThings |
| Z-Wave | Sub-1 GHz mesh protocol designed for smart-home control | 30–150 m | Less interference; longer range per node | ADT Pulse, Vivint Smart Hub, 2GIG Edge Panel |
| Wi-Fi Hub | Centralized control over Wi-Fi–enabled devices; often dual-band or Wi-Fi 6 for high throughput | 50–100 m (2.4 GHz) | No extra gateway needed for IP cameras; high bandwidth | Eufy HomeBase S380, Ring Alarm Pro, Google Nest Hub |
| Multi-Protocol Hubs | Hubs supporting Zigbee, Z-Wave, Thread, Matter, and Wi-Fi | Varies by protocol | Ultimate device flexibility; future-proof with Matter | Aqara M2 Hub, Samsung SmartThings Hub |
- Zigbee’s market is set to expand from $1.4 B in 2020 to $4.4 B by 2025, driven by demand for battery-friendly sensors and lights.
- Z-Wave remains a top choice for secure, long-range device links, with the overall market reaching $12.67 B in 2025 and a CAGR of 13.5% through 2032.
- Wi-Fi hubs leverage existing home networks to simplify camera and video doorbell setups, often integrating AI features like facial recognition on outdoor displays.
Self-Monitoring vs. Professional Monitoring Options
Choosing how your system is monitored affects both your budget and peace of mind.
| Option | Cost | Responsibilities | Response Time | Best For |
|---|---|---|---|---|
| Self-Monitoring | $0–$10/month (app fees) | You receive alerts; you call authorities | Dependent on you noticing and reacting│ Tech-savvy owners; tight budgets | |
| Professional | $10–$60/month | Monitoring center alerts first responders | 30–60 seconds typical │ Families; frequent travelers | |
| Hybrid | $5–$35/month combined plan | Mix of app alerts + backup pro monitoring | Faster backup coverage | Those wanting both control & backup |
- Self-monitoring is often free but requires constant vigilance; you’ll handle all alarm responses yourself via push or SMS alerts.
- Professional monitoring plans start around $10/month for basic landline and up to $60/month for cellular-backup services, ensuring 24/7 alarm response—even if you’re unreachable.
- Hybrid offerings let you self-monitor routine alerts but automatically escalate to professionals if you don’t acknowledge within a set timeframe.
By integrating the right protocols and selecting a monitoring strategy that fits your lifestyle and risk tolerance, you’ll build a smart-home security system that’s both powerful and personalized.
Troubleshooting Common Issues
Below is a comprehensive look at troubleshooting the most common DIY security system issues, backed by expert tips and real-world statistics.
When tackling common DIY security hiccups—weak wireless signals, false alarms, power-outage vulnerabilities, and sensor pairing woes—applying targeted strategies can restore robust, reliable protection.
Optimizing device placement and using repeaters clears dead zones; proper sensor siting and code management slash false alarms; integrating battery backups or UPS systems wards off power interruptions; and following precise enrollment procedures ensures every sensor stays connected.
Resolving Weak Signals & Dead Zones
Wireless cameras and sensors operate over RF or Wi-Fi and can suffer “dead spots” when signals hit obstacles or congested channels.
To pinpoint trouble areas, walk your property with a signal-strength app, noting where coverage drops off.
Reconeyez recommends clearing barriers like metal filing cabinets or thick walls, then relocating devices to maintain a direct line-of-sight whenever possible.
Installing mesh repeaters every 20–30 m can extend range and heal gaps in coverage.
Finally, shifting your network to less crowded channels (e.g., Zigbee channel 15) reduces RF interference from neighboring Wi-Fi and Bluetooth devices.
Common Obstacles & Mitigation Strategies
| Obstacle | Impact | Mitigation |
|---|---|---|
| Thick walls | Signal attenuation | Relocate device; add mesh repeater |
| Metal furniture | Reflection & absorption | Move sensor; clear metal objects from path |
| Crowded spectrum | Packet loss & interference | Change wireless channel; use dual-band hubs |
Table: Identify and address physical and RF barriers to restore full signal coverage.
False Alarm Prevention
False alarms often stem from user errors, pets, or environmental triggers and can incur fines or desensitize responders.
To minimize mistakes, assign unique user codes and train every household member on arming/disarming routines.
Pet-immune motion sensors or adjusted sensitivity settings keep your dog or cat from tripping detectors.
Avoid placing sensors near HVAC vents or insect-prone spots—airflow and critters can both trigger unwanted alerts.
False Alarm Causes & Remedies
| Cause | Prevention |
|---|---|
| Incorrect keypad use | Assign distinct codes; conduct regular drills |
| Pet movement | Install pet-immune sensors; adjust sensitivity |
| HVAC drafts | Relocate sensors away from vents |
| Insect/insect nests | Seal gaps; spray repellant around sensors |
Table: Targeted adjustments to sensor placement and settings can cut false alarms by over 80%.
Power-Failure Contingencies
A reliable backup keeps your alarm live when the grid goes down. Most DIY panels include sealed lead-acid (SLA) batteries delivering 4–24 hours of runtime, while UPS modules can extend coverage to 48 hours under light load.
Dedicated battery backups—for cameras, hubs, and sensors—ensure continuous monitoring through brownouts and outages.
With home battery systems forecast to grow by 20% annually, resilience during power failures is more affordable than ever.
To verify readiness, simulate a blackout monthly and confirm your system switches to battery power within 30 seconds.
| Backup Type | Runtime | Replacement Interval |
|---|---|---|
| SLA Panel Battery | 4–24 hours | Every 2–3 years |
| UPS Module | 24–48 hours | Every 3–5 years |
| Sensor Battery (AA) | 6–12 months | Annually |
Table: Maintain uninterrupted security by pairing panel batteries with UPS modules and fresh sensor cells.
Sensor Enrollment & Pairing Fixes
Offline sensors usually result from low batteries or pairing missteps. First, swap in fresh batteries to ensure a strong RF handshake.
During enrollment, position each sensor within 5–10 ft of the hub or control panel to maximize signal strength.
Follow manufacturer-specific enrollment—some panels use sections (e.g., Section 804 for DSC) and numbered slots for each device.
If pairing fails, perform a hard reset: remove batteries for 10 seconds, re-insert, then retry enrollment to clear memory conflicts.
By systematically addressing signal integrity, alarm accuracy, power resilience, and enrollment protocols, you’ll keep your DIY security system rock-solid—no professional required.
Recommendations & Best Practices
DIY security system wiring isn’t one-size-fits-all. Your property’s layout, construction type, and your comfort with tools should guide your choice of wireless, hardwired, or hybrid methods.
Hybrid setups combine the best of both worlds—hardwiring critical entry points for maximal uptime while using wireless sensors in hard-to-cable areas.
Finally, knowing when a project exceeds DIY scope—especially mains connections or in-wall cabling—can save you costly mistakes and insurance headaches.
Matching Wiring Method to Property Type & Skill Level
Older homes with plaster walls or historical charm often make hardwired runs invasive and expensive; here, wireless systems shine with adhesive mounts and no-drill installs.
Conversely, new construction or unfinished basements allow clean cable routes—making hardwired PoE cameras and sensors both cost-effective and reliable over time.
If you’re a hands-on DIYer comfortable with fish tape, drills, and basic networking, hardwiring can reduce long-term maintenance; if “power tools” makes you nervous, stick to wireless kits that take under an hour to set up.
Hybrid Strategies for Balanced Performance
Hybrid systems let you wire high-risk zones—front doors, garage entries, and ground-floor windows—for uninterrupted power, while using wireless motion sensors and door contacts in attics, guest wings, or rental units.
This strategy lowers overall cable mileage and labor time yet maintains fail-safe protection where it counts most.
Choose a control panel that supports both PoE and RF devices (e.g., 2GIG Edge or Honeywell Lyric) to simplify setup and centralize monitoring.
Defining When to DIY vs. Call a Professional
Simple sensor mounts, panel placement, and app configuration are prime DIY tasks, saving you $150–$500 in labor fees.
However, any job involving mains-powered sirens, in-wall camera conduit, or tapping into household electrical circuits should be handled by a licensed electrician to comply with code and preserve insurance coverage.
If your home insurance policy excludes work done by non-professionals, or if drilling through firewalls or load-bearing walls is required, call a pro rather than risk fines or voided coverage.
| Task Complexity | Recommended Approach |
|---|---|
| Mounting wireless sensors | DIY |
| App-based panel setup | DIY |
| In-wall cable runs & conduit | Professional electrician |
| Power supply integration | Professional electrician |
| Custom network integration (VLAN) | Professional network technician |
Tailor your wiring method to your home’s quirks and your toolbox comfort. Hybrid installations deliver optimal uptime without breaking the bank, and knowing your limits ensures a safe, code-compliant security system that won’t cost you more in repairs or lost coverage down the road.
Conclusion
With wireless, hardwired, and hybrid wiring methods each offering distinct advantages—from the plug-and-play ease of RF and Zigbee sensors to the rock-solid reliability of PoE cabling and the balanced flexibility of mixed systems—you now have the insights to match your home’s layout, budget, and DIY skill level to the right setup.
Ready to get started? Download our free, printable DIY wiring checklist for step-by-step guidance, then explore our hand-picked recommended DIY security kits—or schedule a professional consultation—to ensure your installation is safe, code-compliant, and tailored to your needs.
FAQs
What’s the biggest benefit of wireless DIY security?
Wireless systems install fast—often under 30 minutes—with no drilling or cable runs required.
Are hardwired systems worth the extra labor?
Yes—PoE and low-voltage cabling guarantee uninterrupted power and minimal interference, ideal for mission-critical zones.
How much does a hybrid setup cost compared to pure wireless?
Hybrid kits start around $300, combining wired cameras ($150–$300) with wireless sensors ($70–$150), plus optional pro labor.
What maintenance does a DIY security system need?
Plan monthly lens/sensor cleanings, quarterly functionality tests, and annual pro inspections to keep everything peak-performance.
When should I hire a professional installer?
Call a pro for in-wall cable runs, mains-powered siren wiring, or any task that taps household AC circuits to stay code-compliant.
Main Tips
- Map out sensor and camera locations on paper before buying gear.
- Label each cable and sensor zone during installation to simplify troubleshooting.
- Use mesh repeaters every 20–30 m for wireless to avoid dead spots.
- Test backup batteries quarterly and swap sensor cells annually.
- Document your system layout and settings in a homeowner’s manual.