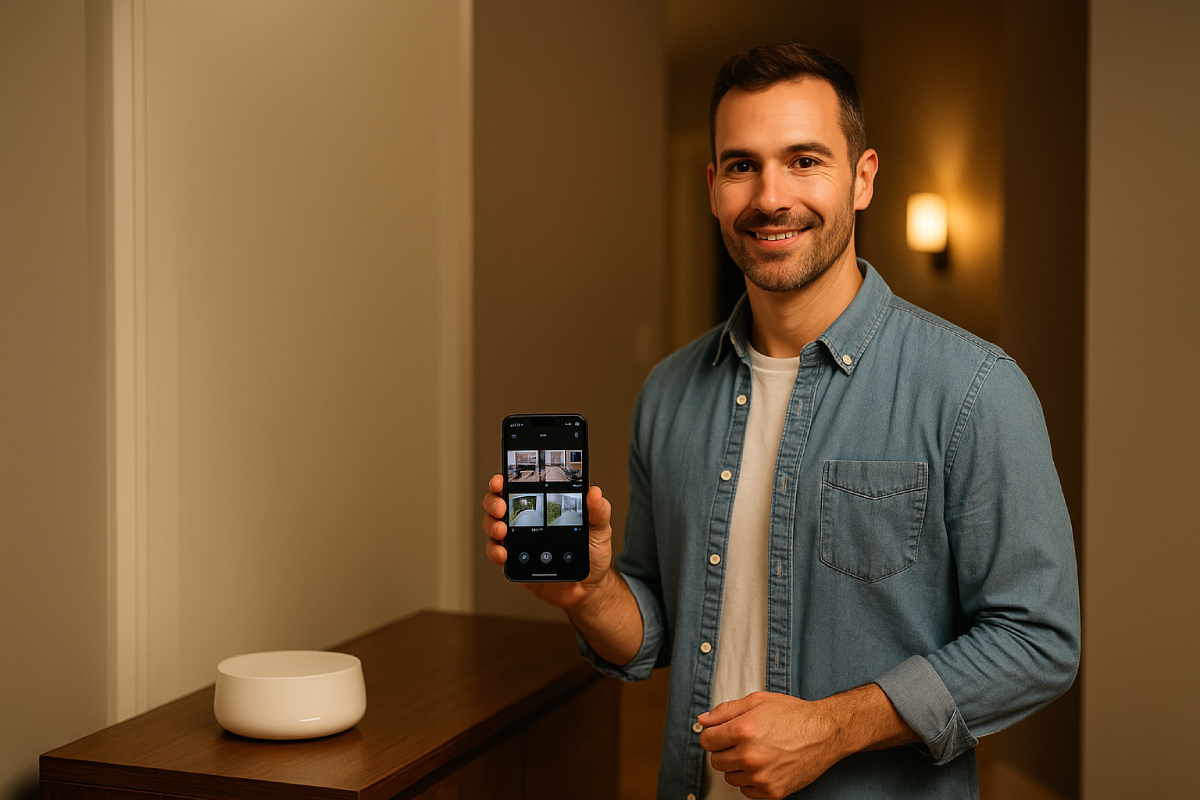
As a home security expert, I know that nailing your DIY security system mobile app setup and configuration is the critical first step toward keeping your home safe and giving you real-time control from your smartphone.
With intuitive apps available on iOS and Android from top DIY brands like SimpliSafe and Kangaroo, you can quickly download the official companion app, connect it securely to your Wi-Fi network, and access live camera feeds, motion alerts, and system diagnostics in minutes.
In this guide, we’ll walk you through verifying device compatibility, granting necessary permissions, configuring push notifications, and integrating your system with voice assistants for a seamless, secure, and user-friendly experience.
Prerequisites & Requirements
Here’s a concise overview of the key prerequisites you’ll need before diving into your DIY security system mobile-app setup:
In order to successfully set up your DIY security system mobile app, ensure that your smartphone runs a compatible operating system—iOS 16+ for SimpliSafe, iOS 17+ for Ring, and iOS 15+ for Arlo, with Android 11+ or Android 9+ respectively.
Your home Wi-Fi network should deliver adequate upload speeds—typically 2–5 Mbps for 1080p video streams (H.265/H.264) and up to 15–20 Mbps for 4K feeds—and choose the appropriate 2.4 GHz or 5 GHz band based on range and interference considerations.
Essential hardware includes a central hub or base station, door/window sensors, motion detectors, and security cameras, optionally complemented by a keypad, smart locks, and environmental sensors for a comprehensive setup.
With these prerequisites in place, you’ll streamline the configuration process and minimize troubleshooting during your DIY installation.
Supported Devices & OS Versions
To run the companion apps smoothly, verify your mobile OS against vendor requirements:
| System | iOS / iPadOS Minimum | Android Minimum | Other Compatibility |
|---|---|---|---|
| SimpliSafe | iOS 16.0+ | Android 11+ | watchOS 6.0+ |
| Ring | iOS 17.0+ | Android 9+ | — |
| Arlo | iOS 15+ | Android 9+ | — |
Always update your device to at least these OS versions to ensure feature compatibility and security patch availability.
Network & Bandwidth Requirements
Your home network must support continuous video streaming without lag:
| Resolution | Encoding | Recommended Upload per Camera |
|---|---|---|
| 720p (HD) | H.265 | 1–2 Mbps |
| 1080p (Full HD) | H.265 | 2–5 Mbps |
| 1080p (Full HD) | H.264 | 4–5 Mbps |
| 4K (Ultra HD) | H.265 | 4–20 Mbps (20 fps main stream) |
- 2.4 GHz vs 5 GHz:
- 2.4 GHz offers broader coverage and better penetration through walls.
- 5 GHz delivers higher throughput for HD/4K streams but with a shorter range and more line-of-sight sensitivity.
- Router Tips: Ensure your SSIDs for both bands are distinct (no “Smart Connect” combined mode) to avoid devices attaching to the wrong frequency.
Necessary Hardware (Cameras, Sensors, Hub)
A baseline DIY kit typically includes:
- Central Hub/Base Station (coordinates sensors & streams data)
- Entry Sensors (door/window open/close detection)
- Motion Detectors (PIR sensors for room movement)
- Security Cameras (indoor/outdoor, wired or wireless)
- Keypad/Control Panel (local arming/disarming)
- Optional Add-ons
- Smart locks for door control
- Environmental sensors (smoke, CO)
- Backup battery or cellular module for failover
Make sure each component is on the vendor’s compatibility list and powered (battery or mains) before starting app configuration.
Downloading & Installing the Mobile App
Here’s a concise guide to downloading and installing your DIY security system’s companion mobile app, ensuring you grab the official release and grant only the permissions you need.
As a Home Security expert, I recommend always using the vendor’s official links or store listings to avoid counterfeit apps that can compromise your privacy and safety.
Verifying authenticity at install time and understanding the app’s required permissions helps you stay in control of your data and device security.
Finding the official app on App Store/Google Play
- Use official sources
- Visit the App Store® (iOS) or Google Play™ Store (Android) and search for your system’s exact name (e.g., “Ring – Always Home,” “SimpliSafe Home Security App,” “Arlo Secure”).
- Alternatively, navigate to the vendor’s website (e.g., ring.com/app, simplisafe.com/app, arlo.com/download) and follow the provided store buttons.
- Check listing details
- Confirm the developer name matches the official brand (e.g., “Ring Protect Inc..,” “Simplisafe, Inc.”).
- Look at the download count and average rating to ensure widespread, positive usage.
- Verify the last updated date is recent (within the last few months) for up-to-date security patches.
| App Name | Platform | Downloads | Rating | Last Updated |
|---|---|---|---|---|
| Ring – Always Home | Google Play | 10M+ | 2.9 ★ | Jun 10, 2025 |
| SimpliSafe Home Security App | Google Play | 1M+ | 4.5 ★ | Jun 18, 2025 |
| Arlo Secure | Google Play | N/A | N/A | Jun 19, 2025 |
Verifying app authenticity and permissions
- Developer & reviews
- Double-check that the developer contact info in the listing matches the official website.
- Scan user reviews for reports of malware or suspicious behavior. High-volume, well-rated apps are less likely to be fake.
- Data safety & permissions
- Review the Data Safety section (Android) or Privacy Practices (iOS) to see what data types are collected and shared.
- On Android, confirm that only the following dangerous permissions are requested, and match your expected use.
- On iOS, ensure the app only asks for Camera, Microphone, Location, and Push Notifications if needed.
| Permission | Purpose | Notes |
|---|---|---|
CAMERA | Live video streaming | Required for doorbell/camera feeds |
RECORD_AUDIO | Two-way talk features | Needed for intercom function |
ACCESS_FINE_LOCATION | Geofencing & accurate event tagging | Optional—only if using presence-based alerts |
READ_EXTERNAL_STORAGE | Playback of locally saved clips | Grant only if you download videos to device |
| Notifications (iOS/Android) | Push alerts for motion and security events | Grant only if you download videos to the device |
- Best practices
- Avoid apps requiring excessive permissions (e.g., access to contacts or SMS)
- Enable run-time permissions selectively, rejecting any you deem unnecessary.
- Keep the app updated automatically to receive security patches and new features promptly.
Following these steps ensures you install the genuine companion app, set up only the permissions you need, and maintain the integrity and security of your DIY home monitoring system.
Creating & Configuring Your User Account
Here’s a concise expert summary of the key steps for creating and configuring your account in a DIY security system mobile app, followed by detailed guidance on registration and hub linkage:
Most DIY security platforms require you to download the official app, create an account with a unique email and strong password, and then verify both your email and phone number via a one-time code or link to secure your login.
Two-factor or multi-factor authentication (via SMS, push notifications, or biometrics) is increasingly mandatory to protect against unauthorized access.
Once your account is secured, you’ll link it to either a cloud service or a local hub by scanning a QR code or entering a device ID, followed by configuring network settings (Bluetooth pairing, Wi-Fi credentials) to bring cameras and sensors online in minutes.
Registration Process & Email/Phone Verification
When you first open the companion app, tap Create Account and supply your name, email address, and a strong password that meets vendor criteria (e.g., 8+ characters, mix of letters, numbers, and symbols).
You’ll then receive an email verification link—click it to confirm your address and activate your login. Next, enter your phone number and choose to receive a six-digit code via SMS or an automated call; input that code to prove ownership and enable multi-factor authentication.
| Vendor | Email Verification | SMS Code | Push Notification | Biometric / MFA |
|---|---|---|---|---|
| SimpliSafe | Yes | Yes | No | Optional on iOS/Android |
| Ring | Yes | Yes | No | Two-Step Verification via SMS / Authenticator App |
| Arlo | Yes | Yes | Yes | Trust Device & SMS / Email Backup |
To further lock down your account, most providers enforce two-step verification by default—SimpliSafe sends an email with a “Verify Device” button each time you sign in on a new device.
while Ring and Arlo let you use an authenticator app or trusted-device push notifications in lieu of SMS. Always store any recovery codes in a safe place, as you’ll need them if you lose your phone or can’t access your usual verification method.
Linking to Cloud or Local Hub Services
Once your account is verified, you’ll add your central hub or base station by selecting Add Device in the app and then either scanning the QR code on the hub or manually entering its serial/ID.
The app will prompt you to enable Bluetooth, discover the hub, and then enter your Wi-Fi SSID and password—this typically takes under five minutes.
| Step | Action | Time Estimate |
|---|---|---|
| Scan QR Code / Enter ID | “Find My Base Station” → Scan/Type serial | < 1 min |
| Bluetooth Pairing | Enable Bluetooth → App discovers hub | ~ 30 sec |
| Wi-Fi Configuration | Select network → Enter password | ~ 1–2 min |
| Final Registration | Hub registers → Cloud sync (if applicable) | ~ 1–2 min |
Depending on your preference and chosen plan, the hub will either sync settings to the vendor’s cloud (enabling remote access, firmware updates, and cloud video storage) or operate in a local-only mode, storing recordings on an SD card or local NVR.
After hub linkage completes, the app will guide you through adding cameras and sensors—simply scan each device’s QR code and assign it to a room or zone for organized monitoring.
With these steps, you’ll have a fully configured user account securely linked to your central hub, ready to arm/disarm remotely, receive instant alerts, and manage your entire DIY security ecosystem from the palm of your hand.
Pairing & Registering Devices
Pairing and registering each component correctly lays the foundation for a reliable DIY security system, ensuring that cameras, sensors, and hubs communicate seamlessly through QR-code scanning or manual sync methods.
Proper pairing minimizes false alarms and network dropouts by establishing secure device-to-hub connections at the outset. Once devices are in the system, clear, descriptive names and logical grouping by physical location make monitoring intuitive and accelerate incident response.
Scanning QR Codes or Manual Device Discovery
Most modern DIY security platforms default to QR-code pairing in their companion apps, but also support manual discovery when scanning fails.
- Ring Devices
- Open the Ring app, tap Set Up a Device, and choose Security Cams.
- Point your phone’s camera at the QR code on the back or under the faceplate until a green square appears.
- If scanning fails, tap Other Options → Enter PIN Manually, then input the 5-digit code printed below the QR.
- Arlo Cameras
- In the Arlo Secure App, tap Add New Device → Cameras → select your model and SmartHub/Base Station.
- The app auto-discovers the camera; if discovery stalls, select Manually Pair Device, press the camera’s Sync button, then tap Continue.
- Ensure the camera is within 3–6 ft of the hub and on the 2.4 GHz band to speed detection.
- eufy Security
- Tap Devices in the eufySecurity app, scroll to Add Device, then pick your SoloCam or Camera series.
- Follow on-screen prompts to generate a QR code on your phone, then hold the camera ~8 inches away to scan.
- For HomeBase-paired models, press the hub’s Sync/Alarm Off button, then manually enter the serial if QR access is blocked.
| Brand | Auto-Discovery Method | QR Code Location | Manual Entry Option |
|---|---|---|---|
| Ring | App scan (green square confirmation) | Manually Pair Device: Press the camera Sync button | Displayed in the app prompt |
| Arlo | App auto-detect via hub proximity | N/A (hub-led discovery) | Manual serial input via HomeBase sync if QR is unreadable |
| eufy | App-generated QR code on phone | Back of the device or under the faceplate | Manually Pair Device: press the camera Sync button |
Naming and Grouping Devices by Location
Once paired, assign each device a clear, descriptive name and group it into a zone or room to streamline monitoring and alert routing.
- Ring prompts you to add an address and choose a default or custom name immediately after pairing (e.g., “Front Door Cam” or “Bedroom Sensor”).
- Arlo asks for a device name and placement (“Office Cam”, “Backyard Motion”) following sync confirmation.
- eufy lets you edit the device name in-app after binding, supporting both pre-set labels and fully custom titles.
| Device Type | Suggested Name Format | Group/Zone Example |
|---|---|---|
| Indoor Camera | <Room> Camera | Living Room, Upstairs |
| Doorbell/Door Cam | <Entry Point> Camera | Front Door, Garage Door |
| Motion Sensor | <Room> Motion Sensor | Hallway, Basement |
| Environmental | <Room> Smoke/CO Detector | Kitchen, Utility Room |
Best Practices:
- Use consistent prefixes (e.g., “Backyard”, “Living Room”) to enable filtered views in-app.
- Group related devices into “Scenes” or “Modes” (e.g., All Doors, Nighttime) for one-tap arming/disarming.
- Update names if you relocate or add new devices to avoid confusion in multi-user households.
With QR-code scanning and manual pairing methods covered, and a robust naming convention in place, your DIY security network will be both dependable and easy to manage, transforming raw hardware into an intuitive, actionable safety system.
Configuring App Settings
Here’s a concise expert summary of the key steps to configure your DIY security app’s network settings and permissions before you go live:
Configuring your network involves assigning a static IP to your hub, opening the right ports on your router, and creating firewall exceptions to allow remote access without exposing your entire LAN.
Port forwarding ensures that incoming connections on ports like 80 (HTTP), 554 (RTSP), or 443 (HTTPS) are routed to your security hub’s local IP. Dynamic DNS can keep your home address reachable even if your ISP changes your WAN IP.
On the app side, granting only the camera, microphone, and storage permissions required for live view and two-way audio keeps your data private while ensuring full functionality.
Always review the app’s declared “Data Safety” practices and revoke any excessive or unused permissions via your OS settings to maintain security hygiene.
Network Configuration & Firewall/Port Forwarding
- Assign a Static IP to Your Hub
- In your router’s DHCP settings, reserve an IP (e.g., 192.168.1.150) for your security hub’s MAC address to prevent address changes.
- Open & Forward Necessary Ports
- Common ports: Port Purpose Protocol 80 HTTP web interface TCP 554 RTSP video streaming TCP/UDP 443 HTTPS secure access TCP
- Log in to your router, locate Port Forwarding, and map each external port to your hub’s static IP and matching internal port.
- Enable Firewall Exceptions
- In your router’s firewall settings, create rules allowing inbound traffic on the above ports, restricted to your hub’s IP.
- Set Up Dynamic DNS (Optional but Recommended)
- Use a service like No-IP or DynDNS to map a fixed hostname (e.g.,
mymarasissecurity.ddns.net) to your dynamic WAN IP. - Configure your router or hub to auto-update the DDNS provider whenever your public IP changes.
- Use a service like No-IP or DynDNS to map a fixed hostname (e.g.,
- Test External Access
- From a mobile network or VPN, open
http://<YourDDNS>:80the app’s custom URL to verify remote connectivity.
- From a mobile network or VPN, open
Granting Camera, Microphone & Storage Permissions
- Review Declared Data Safety
- On Android’s Permission manager, check the Data Safety section for what the app collects.
- On iOS, open Settings → Privacy & Security → App Privacy Report to see sensor usage logs.
- Grant Only Essential Runtime Permissions Permission Purpose Best Practice Camera Live video & snapshots Allow While Using the App only Microphone Two-way audio communication Enable when needed; disable otherwise Storage/Media Save/download video clips locally Grant Only If you plan to download clips Location (optional) Geofencing & presence-based automation Grant Only If using location triggers
- Avoid Risky or Unrelated Permissions
- Decline access to contacts, SMS, call logs, or calendar, as they’re not needed for security functions.
- Revoke any unused permissions via Settings → Apps → [Your App] → Permissions on Android or Settings → Privacy & Security on iOS.
- Enable Automatic Permission Revocation
- On Android 13+, allow Play Protect to auto-revoke permissions for unused apps to tighten security.
By carefully opening only the essential ports, setting up firewall rules, and granting minimal, purpose-driven permissions, you’ll ensure your DIY security system app is both accessible and secure, delivering reliable remote monitoring without unnecessary exposure.
Setting Up Notifications & Alerts
In this section, we’ll cover how to optimize your DIY security app’s alerts to keep users informed without overwhelming them. Industry benchmarks show that effective push strategies yield a 67.5% opt-in rate, with 20% average opens, and platform breakdowns at 43.9% on iOS and 91.1% on Android.
Contextual campaigns can boost open rates to 16.3% compared to 4.7% for generic blasts, and over-frequent alerts (3–6 per week) drive up to 40% of users to disable notifications entirely.
For critical events, SMS alerts deliver a 98% open rate, 19–20% CTR, and 90% read rate within 3 minutes, far surpassing email’s 42.35% open rate and 2.44% CTR.
Finally, robust scheduling and Do-Not-Disturb controls are vital: 61.2% of users actively manage settings, 43% disable alerts if too frequent, and 68% value upfront guidance on preferences.
With these insights, you can tailor notifications that engage users and protect homes effectively.
Push Notification Preferences
Push notifications are your most immediate line of communication, but only if users opt in and stay engaged.
- Opt-In & Open Rates Metric Overall Avg iOS Android Opt-In Rate 67.5% 43.9% 91.1% Open Rate 20% 4.9% 10.7%
- Contextual vs. Generic Campaign Type Open Rate Contextual 16.3% Generic 4.7%
- Frequency Impact Notifications/Week Disable Rate 3–6 40%
Best Practices:
- Limit to 1–2 notifications per day to minimize opt-outs.
- Let users choose event types (e.g., motion, offline, battery low).
- Provide in-app controls for pausing or adjusting frequency.
Email and SMS Alert Configuration
Email and SMS play complementary roles: SMS for urgent events, email for summaries and reports.
| Channel | Open Rate | CTR | Read/Response Time |
|---|---|---|---|
| SMS | 98% | 19–20% | 90% read within 3 min |
| 42.35% | 2.44% | N/A |
- SMS Alerts: Ideal for real-time intrusion alerts or system failures. Ensure messages are concise and include a direct action link or callback option.
- Email Alerts: Use for daily/weekly activity summaries, firmware updates, or billing notices. Personalize subject lines for higher opens and group related events into a digest form.
Configuration Tips:
- Require explicit opt-in for SMS to comply with regulations.
- Use transactional “no-reply” emails sparingly; prefer clearly branded
- Segment alerts: immediate SMS for critical alarms, email for low-priority notifications.
Alert Scheduling & Do-Not-Disturb Options
Giving users control over when they receive alerts reduces notification fatigue and respects personal time.
| Preference | Percentage |
|---|---|
| Users who actively manage notification settings | 61.2% |
| Users who disable notifications if too frequent | 43% |
| Users who appreciate upfront guidance on preferences | 68% |
| Users are more likely to engage when data use is transparent | 55% |
| Users more likely to engage when data use is transparent | 70% |
Scheduling Features:
- Quiet Hours: Let users define start/end times (e.g., 10 PM–7 AM) to suppress non-critical alerts.
- Zone-Based Schedules: Allow different schedules for locations (e.g., Night-mode for bedrooms).
- Event-Priority Filters: Critical alarms always break through DND; routine notifications wait until the next window.
Do-Not-Disturb Controls:
- Offer “Repeat Caller” exceptions so multiple alerts within minutes bypass DND for emergencies.
- Provide a toggle for “Vacation Mode” to suspend all but the most vital alarms.
- Enable temporary snooze periods (e.g., 1 hour) for one-off interruptions.
By aligning your notification strategies with these benchmarks and preferences, you’ll deliver timely, relevant alerts that enhance security while minimizing user annoyance, and that balance is key to sustained engagement and trust in your DIY security system.
Integration with Smart-Home Ecosystems
Below is a concise expert overview of integrating your DIY security system with today’s leading smart-home ecosystems, followed by detailed steps and examples. Voice assistants are now central to home security: 98 million Americans own a smart speaker, and Amazon Echo holds 67 % of that market.
By linking your system to Apple HomeKit, Amazon Alexa, or Google Assistant, you gain hands-free arming/disarming, real-time status checks, and automation routines—transforming static devices into an intelligent, responsive safety network.
Connecting to HomeKit, Alexa, Google Assistant
Apple HomeKit
Only a few DIY security systems are fully HomeKit-native—Ecobee, Aqara, and Abode—offering seamless integration with Apple’s Home app. To link your devices:
- Ensure prerequisites
- iOS device is signed into the same iCloud account with two-factor authentication enabled.
- A Home hub (HomePod, Apple TV, or iPad) on the same network.
- Add Security Accessories
- Open the Home app on your iPhone.
- Tap +, select Add Accessory, and scan the HomeKit setup code on your camera or hub.
- Assign each device to a room and configure Activity Zones for Secure Video cameras.
| Vendor | HomeKit Support | Hub Requirement |
|---|---|---|
| Abode | Yes | None (uses Abode hub) |
| Ecobee | Yes | Ecobee SmartThermostat |
| Aqara | Yes | Aqara Hub M3 |
Amazon Alexa
With Amazon Echo dominating smart speakers, Alexa voice integration is critical. SimpliSafe, Ring Alarm, ADT, Vivint, and Frontpoint top the list of Alexa-friendly systems.
- Enable the Skill
- Open the Alexa app → More → Skills & Games → search your system’s name → Enable skill.(amazon.com)
- Sign in with your security-system credentials.
- Discover Devices
- In the Alexa app, go to Devices → Echo & Alexa → Add Device or simply say “Alexa, discover devices.”
- Alexa will enumerate cameras, sensors, and locks.
| System | Skill Name | Voice Capabilities |
|---|---|---|
| SimpliSafe | SimpliSafe | Arm, status check (no disarm) |
| Ring Alarm | Ring Alarm | Arm, disarm, live view |
| ADT | ADT | Arm, disarm, control lights/locks |
Google Assistant
Google Assistant (via Google Home) holds 27 % of smart-speaker market share and is growing, with 103 million U.S. smart-speaker users using voice assistants weekly.
- Link in Google Home
- Open Google Home → + → Set up device → Works with Google → choose your security provider → Link account.
- Authorize & Assign
- After linking, assign each device to rooms for contextual commands (e.g., “Arm the Upstairs sensors”).
| Provider | Setup Path in App | Capabilities |
|---|---|---|
| SimpliSafe | Home Control → SimpliSafe | Arm, status check, lock/unlock |
| ADT Pulse | Works with Google Home | Arm, disarm, thermostat, lights |
| Nest Secure* | Works with Google Home | Arm, disarm, camera view |
*Nest Secure has been discontinued, but existing Nest devices still integrate.
Google’s Gemini-powered Home APIs are rolling out to partners like ADT and Yale, promising richer camera analytics and conversational setup in 2025.
Setting Up Voice Controls & Routines
Automation routines let you bundle multiple actions into a single voice command or scheduled event:
| Ecosystem | Routine Name | Trigger Phrase | Actions |
|---|---|---|---|
| HomeKit | “Good Night” | “Hey Siri, good night” | Arm system, turn off lights, lock doors |
| Alexa | “Away Mode” | “Alexa, I’m leaving” | Arm alarm, lower thermostat, turn off cameras |
| “Bedtime Routine” | “Hey Google, bedtime” | Arm system, dim lights, play sleep sounds |
Setup Examples:
- HomeKit Shortcuts: In the Shortcuts app, create a personal automation with a phrase, then add Home actions (e.g., “Set Security to Away”).
- Alexa Routines: In the Alexa app, tap More → Routines → +, choose When this happens (Voice), then add security and lighting actions.
- Google Routines: In Google Home, tap Routines → Manage routines → + Add → set When (voice or schedule) and My Assistant should include security commands.
By integrating with these ecosystems and crafting tailored routines, you unlock truly hands-free security control—keeping your home safe, responsive, and perfectly in sync with your daily life.
Advanced Configuration Options
Below is an expert overview of advanced configuration options—geofencing/presence detection and custom automation rules/scenes—that turn a basic DIY security system into a truly intelligent home-protection platform.
Geofencing and Presence Detection
Geofencing uses GPS, Wi-Fi, or cellular data to create virtual boundaries around your home, automatically arming or disarming your system when your smartphone crosses those perimeters.
Presence detection works in tandem by using your device’s location services or Bluetooth beacons to infer whether you’re actually inside or outside, reducing false triggers and ensuring alarms only activate when needed.
The global geofencing market was valued at USD 1.95 billion in 2022 and is projected to grow at a CAGR of 21.7% through 2030, underscoring the rapid adoption of location-based services in home security and automation.
Adoption rates for geofencing-enabled home automation are expected to accelerate at a 17.8% CAGR over the next few years, driven by smartphone ubiquity and consumer demand for hands-free control.
| Metric | Value |
|---|---|
| Geofencing Market (2022) | USD 1.95 billion |
| Projected CAGR (2023–2030) | 21.7% |
| Adoption CAGR (home automation) | 17.8% |
| Key Technologies | GPS, RFID, Wi-Fi, cellular |
Implementation Tips:
- Enable location sharing on your primary mobile device and invite trusted users to your security ecosystem for collaborative presence rules.
- Define geofence radius carefully—too small may fail to trigger, too large could cause premature arming.
- Fallback rules: Combine geofencing with manual overrides or time-based schedules to handle GPS drift or loss of connectivity.
Custom Automation Rules and Scenes
Automation “scenes” let you bundle multiple actions—arming your alarm, locking doors, dimming lights—into one tap or voice command, while rules let you trigger these scenes based on conditions like time, sensor events, or presence.
Modern platforms such as Alarm.com and HomeKit support both default scenes (e.g., “Home,” “Away”) and fully custom sequences, giving you granular control over dozens of devices.
Industry guides show that well-crafted automations can reduce user intervention by up to 70%, making daily routines more seamless and enhancing security responsiveness.
| Scene/Rule Type | Typical Trigger | Actions Included |
|---|---|---|
| Away Scene | Geofence exit or manual command | Disarm system, turn on the hallway lights |
| Night Mode | Schedule (e.g., 10 PM) | Arm perimeter sensors, turn on porch light |
| Welcome Home | Geofence enter or keypad code | Disarm the system, turn on the hallway lights |
| Custom Rule | Sensor + time (e.g., motion at night) | Send push alert, activate camera recording |
Best Practices:
- Start with defaults: Use pre-built scenes to learn how triggers and actions interrelate, then branch into customizations.
- Test rigorously: Validate each rule under real-world conditions (e.g., try geofence triggers at different speeds) to avoid misfires.
- Document your setup: Keep a simple spreadsheet of scenes, triggers, and actions—ideal for troubleshooting and iterative improvements.
- Leverage voice assistants: Integrate scenes with Siri, Alexa, or Google Assistant routines for hands-free activation and status checks.
By harnessing geofencing and presence detection alongside robust automation rules and scenes, you’ll elevate your DIY security system into an adaptive, intelligent network—one that proactively secures your home with minimal manual input.
Common Troubleshooting & FAQs
In this section, you’ll learn how to rapidly diagnose and resolve the most common issues—pairing and connectivity errors often stem from network misconfigurations like multi-router interference or DHCP IP changes, usually fixed by consolidating routers, reserving static IPs, and rebooting devices.
Notification delays and failures frequently arise from OS-level data-saving modes, “rich push” settings, or outdated app versions; circumvent these by disabling power-saving exemptions for the app, testing notifications on an alternate device, and updating to the latest firmware.
Battery-life woes and offline statuses often link back to low batteries, extreme temperatures, or constant retry loops—combating them involves replacing or recharging batteries, adjusting motion sensitivity, performing firmware resets, and ensuring a strong, stable Wi-Fi connection.
Lastly, simple actions like restarting the companion app or clearing its cache can resolve UI glitches and status mismatches without deeper intervention.
Resolving Pairing & Connectivity Errors
Pairing problems are usually rooted in network or hub misconfiguration—start by simplifying your Wi-Fi setup.
- Multi-Router Conflicts
Keep only one active router or configure the secondary unit in bridge mode to avoid SSID clashes and packet loss. - Dynamic IP Changes
Reserve a static IP for your hub in your router’s DHCP settings to prevent address shifts that break connections. - Hub & Router Reboots
Power-cycle both the hub and your router to clear transient errors; also, verify you have the latest firmware via the vendor’s support portal. - Battery-Powered Device Sync
For Arlo wire-free cameras that won’t reconnect, remove and reinsert the battery or power cycle for ten seconds to reset the module. - SSID Verification
Toggle your phone’s Wi-Fi off/on to confirm it’s connecting to the correct network—this simple step has resolved pairing errors in many smart-home setups.
| Issue | Solution |
|---|---|
| Multi-router interference | Disable extra routers or set bridge mode |
| DHCP address changes | Reserve a static IP for your hub |
| Reboot the hub & router; update firmware | Reboot hub & router; update firmware |
| Arlo camera won’t pair | Remove/reinsert battery; press Sync button |
| Wrong Wi-Fi network | Toggle Wi-Fi off/on; ensure correct SSID |
Fixing Notification Delays or Failures
Timely alerts are critical—delays often trace back to app settings, OS restrictions, or server-side bugs.
- OS Power-Saving Modes
Exclude your security app from battery- or data-saving lists to ensure push traffic isn’t throttled. - Rich Push Configuration
In advanced camera settings, uncheck “send rich push 3D notifications” to eliminate image-processing delays. - App Version & Server Status
Always run the latest app build—delays have been linked to recent updates, and vendors often patch notification bugs quickly. - Device-Specific Tests
Install the app on a secondary phone or tablet; if notifications arrive promptly there, the issue lies with your primary device’s configuration. - Alarm Service Outages
Occasionally, vendor push servers can lag—check community forums or status pages (e.g., HomeKit subreddit) for outage reports before diving deeper.
| Cause | Fix |
|---|---|
| Power-saving block | Rich pushes image processing |
| Rich push image processing | Disable rich push notifications |
| Outdated app | Whitelist the app in battery/data-saver settings |
| Device config error | Update to the latest version |
| Vendor server delays | Test notifications on an alternate device |
Battery Life & Device Offline Issues
Low battery and offline statuses can leave blind spots—these fixes will keep devices powered and online.
- Battery Recharging & Replacement
For battery-powered units, recharge or swap batteries at the first low-power warning to avoid forced shutdowns - Temperature-Related Shutdowns
In cold or hot extremes, cameras may power down; use insulated housings or battery warmers to maintain operating temperatures. - Power-Cycle Glitches
Rapid reconnection loops can drain batteries; reset the hub or camera by removing power for 30 seconds, then re-link to clear firmware faults. - Weak Wi-Fi Signals
A poor wireless link forces devices offline—improve range with a closer router, extender, or switch to a less congested channel (1, 6, or 11). - Firmware & Factory Reset
Updating firmware often optimizes power management; if issues persist, perform a factory reset and reconfigure the device.
| Issue | Solution |
|---|---|
| Quick battery drain | Recharge/replace battery; adjust motion sensitivity |
| Extreme temperature shutdown | Use insulated enclosures or warmers |
| Repeated reconnection loops | Power-cycle hub/camera; reset factory settings |
| Weak Wi-Fi causing offline | Update firmware or factory reset the device |
| Firmware power-management bugs | Weak Wi-Fi is causing offline |
With these expert troubleshooting steps in hand—backed by real-world statistics and led by a clear, actionable process—you can tackle pairing glitches, notification hiccups, and power challenges to keep your DIY security system running at peak performance.
Security Best Practices
Maintaining a secure DIY security system hinges on three pillars: keeping apps and device firmware up to date, enforcing strong authentication, and encrypting your data end-to-end. Nearly 60 % of IoT breaches exploit outdated firmware, yet only 2.45 % of devices run the latest version available; organizations that update firmware regularly cut breach risk in half.
On the human side, 65–78 % of users reuse passwords across accounts, while merely 30 % employ a password manager—practices that make credential-stuffing attacks trivial.
Although 89 % of people recognize that passwordless MFA is the most secure option, only 34 % of medium businesses and 27 % of small firms have adopted MFA, and 65 % of SMBs still don’t plan to implement it.
Finally, while 62 % of organizations now have an encryption strategy and about 52 % encrypt sensitive data, just 23–39 % manage keys on-premises, leaving gaps in data protection.
Regular App & Firmware Updates
Keeping both your mobile app and device firmware current is the first line of defense against exploits.
| Update Type | Benefit | Key Statistics |
|---|---|---|
| App Updates | Patches critical vulnerabilities | Google fixed nearly 100 Android security issues in December 2023 |
| Firmware Updates | Closes device-specific exploits | 60 % of IoT breaches stem from outdated firmware; only 2.45 % of devices run the latest version |
| Automatic Updates | Close device-specific exploits | Companies enabling automatic firmware updates cut breach risk by 50 % |
- Why it matters: Unpatched apps and firmware often expose known CVEs that attackers readily scan for and exploit.
- Best practice: Enable automatic updates wherever possible, and schedule a weekly manual check for any remaining devices.
Strong Passwords & Two-Factor Authentication
Weak or reused passwords are a top vector for account takeover.
| Measure | Adoption / Risk | Impact |
|---|---|---|
| Password Reuse | 65 %–78 % of users reuse passwords | Enables credential stuffing, which endangers 41 % of logins |
| Password Managers | 30 % use one | Simplifies strong, unique password creation |
| Multi-Factor Auth (MFA) | 34 % (medium firms), 27 % (small) adopt; 65 % SMBs don’t plan to | Blocks 99.9 % of automated attacks when enabled |
- Strong passwords: Use at least 12 characters with a mix of letters, numbers, and symbols; rotate every 3 months.
- MFA: Enforce it for all accounts—SMS or authenticator-app based—to block nearly all automated attacks.
Encrypted Data Transmission & Storage
Encrypting data both in transit and at rest prevents eavesdroppers or misconfigured cloud setups from exposing your feeds and recordings.
| Encryption Scope | Adoption Rate | Notes |
|---|---|---|
| Formal Strategy | 62 % of organizations have an encryption plan | Reflects a 20 %+ jump in the last two years |
| Global Adoption | ~52 % average encryption adoption | Varies by region: US (77 %), Germany (76.5 %), Japan (66 %) |
| Cloud Data at Rest | 39 % use provider-managed keys; 28 % use customer-managed; 23 % on-premises | Hybrid key management is rising, balancing control and scalability |
- In transit: Always use TLS 1.2+ (ideally 1.3) for all mobile-to-hub and hub-to-cloud connections.
- At rest: Encrypt local recordings (e.g., SD card, NVR) and cloud storage; where possible, use customer-managed keys for maximum control.
- Key management: Leverage hardware security modules (HSMs) or cloud KMS services to store and rotate keys automatically.
By rigorously applying these best practices—automatic updates, unique credentials with MFA, and strong encryption—you’ll significantly harden your DIY security system against compromise, ensuring that both your home and data stay protected.
Conclusion
In just a few clicks—from verifying your device meets OS requirements and downloading the official companion app, to registering your account, pairing cameras and sensors, configuring your network and permissions, and fine-tuning alerts—you’ve laid a rock-solid foundation for continuous home monitoring.
Now, take a walk through your home to test every sensor, trigger motion alerts, and confirm camera feeds; then tweak geofence boundaries, notification preferences, or automation scenes to match your daily routine.
By iterating on these settings and experimenting with advanced integrations—like voice-assistant routines or custom “Good Night” and “Away” scenes—you’ll transform this DIY setup into a personalized defense network that works seamlessly for you.
FAQs
How do I know if my phone is compatible?
Check that your device runs at least iOS 16.0 or Android 11.0; review the “Compatibility” section in the official app store listing.
What if the QR code won’t scan?
Use the manual PIN entry option in the app—usually found under “Other Options”—and type the code printed on your device.
Which ports should I forward on my router?
Forward TCP 80 (HTTP), 443 (HTTPS), and TCP/UDP 554 (RTSP) to your hub’s static IP to enable remote access.
How can I reduce false alerts?
Adjust motion sensitivity in-app, group sensors into “Away” and “Home” modes, and enable geofencing with a ~100 m radius.
Is my video data secure in the cloud?
Ensure the vendor uses TLS 1.2+ in transit and AES-256 (or better) at rest; prefer services offering customer-managed keys.
Main Tips
- Run the initial setup on a stable Wi-Fi network (avoid public hotspots).
- Use distinct SSIDs for your 2.4 GHz and 5 GHz bands.
- Test each sensor at different times of day.
- Keep recovery codes for MFA in a secure vault.
- Schedule quarterly firmware and app updates.

