
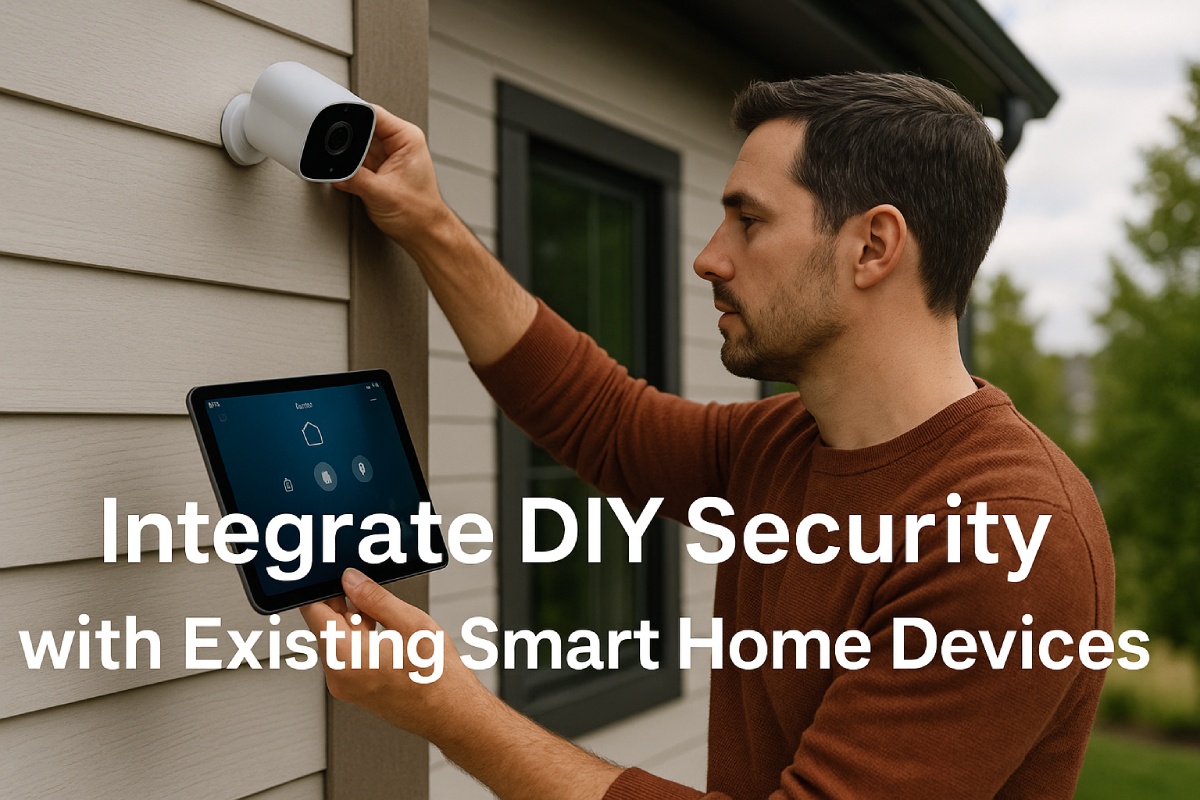
In today’s rapidly evolving home security landscape, do-it-yourself (DIY) security refers to systems homeowners purchase, install, and manage independently—no technicians or hardwiring required, giving you full control over every component.
In contrast, professional security systems are installed, configured, and monitored by licensed providers under service contracts, often carrying upfront installation fees and ongoing monitoring charges.
Integrating a DIY security setup with your existing smart home devices can slash expenses by eliminating those professional installation costs and monthly monitoring fees, delivering significant savings.
Additionally, this approach empowers unmatched customization, letting you mix and match sensors, cameras, and automation routines to perfectly suit your home’s unique needs.
Moreover, centralizing control through platforms like SmartThings, Home Assistant, or IFTTT offers a unified dashboard, providing real-time insights and seamless management of all your security and smart devices in one place.

Understanding Your Smart Home Ecosystem
In today’s smart home landscape, choosing the right communication protocols and hubs is essential for reliable, scalable DIY security integrations. Z-Wave offers robust, low-frequency mesh networking ideal for locks and alarms, while Zigbee’s higher data rates and open standard make it perfect for battery-powered sensors and lighting.
Wi-Fi, ubiquitous and high-bandwidth, powers cameras and heavy-data devices, but at the cost of higher power consumption. On the hub side, SmartThings provides a user-friendly, Samsung-backed ecosystem with both cloud and growing local support; Home Assistant delivers an open-source, privacy-focused platform for tech-savvy users; Hubitat emphasizes fully local automations for power users; and IFTTT bridges disparate services via the cloud for lightweight, cross-platform triggers.
Protocols Overview
Smart DIY security hinges on choosing the right wireless protocol. Below is a comparison of the three most common:

| Protocol | Frequency | Range | Mesh Support | Power Consumption | Pros | Cons |
|---|---|---|---|---|---|---|
| Z-Wave | 800–900 MHz | ~100 ft (30 m) | Yes | Low | Reliable mesh; minimal interference with Wi-Fi; AES-128 security | Fewer device choices; requires hub and proprietary license |
| Zigbee | 2.4 GHz (global) | ~35 ft (10 m) | Yes | Very low | High device density; faster data rates; open standard | Prone to 2.4 GHz interference; varying manufacturer implementations |
| Wi-Fi | 2.4/5 GHz | 150–300 ft+ | No (point-to-point) | High | Native support on cameras and heavy-data devices; no extra dongles | High power draw; network congestion; limited mesh without special hardware |
Hub & Platform Options
Choosing the right hub or platform ensures seamless protocol bridging and automation:
Samsung SmartThings
- Overview: Samsung’s flagship platform integrates Wi-Fi, Zigbee, Z-Wave, Thread, and Matter, with a mix of cloud-based and growing local “Edge” processing.
- Strengths: Broad device compatibility; intuitive mobile app; free voice-assistant support (Alexa, Google, Bixby).
- Considerations: Cloud dependencies for complex automations; hardware hub (~$125) often required.
Home Assistant
- Overview: Open-source, locally hosted software hub supporting Bluetooth, Zigbee, Z-Wave, Thread/Matter, and Wi-Fi via modular integrations.
- Strengths: Privacy-focused; vast device and protocol support; free core platform—optional cloud subscription (Nabu Casa) for remote access.
- Considerations: Steeper learning curve; YAML editing for advanced setups; hardware costs for radios and server.
Hubitat
- Overview: Local-first hub running automations on-device; supports Zigbee, Z-Wave, and cloud services without subscription.
- Strengths: Ultra-reliable automations; strong community apps; one-time hub cost (~$120).
- Considerations: Less polished UI; occasional need for community-built drivers; backup/remote admin subscription optional.
IFTTT
- Overview: Cloud-based automation service (“If This Then That”) connecting 900+ apps and devices, enabling simple trigger-action workflows across platforms.
- Strengths: No hardware hub; fast setup; cross-brand interoperability; voice-assistant and location-based triggers.
- Considerations: Reliant on internet connectivity; higher latency; limited local control and privacy.
This deep dive equips DIY security enthusiasts with the knowledge to select protocols and platforms that balance reliability, power efficiency, and control, ensuring your custom security system integrates seamlessly with your smart home.
Planning Your Integration
In planning a secure and efficient DIY security setup, three key steps emerge: isolating your security devices on their own network segment (VLAN or SSID) to limit attack surface and improve performance.
verifying every device’s compatibility with your chosen hub or app via official support lists and integration databases, and selecting hardware that adheres to open interoperability standards—Matter for broad smart-home support, ONVIF for IP cameras, and Z-Wave/Zigbee for sensors and locks. Together, these measures ensure a robust, future-proof system you fully control.
Network Considerations: Dedicated VLAN vs. SSID
Isolating security devices on a dedicated VLAN provides enhanced segmentation by grouping IoT and security hardware apart from general traffic, minimizing lateral movement if one device is compromised.
Alternatively, a separate SSID on your wireless access points can segment Wi-Fi–connected cameras and sensors from main networks, simplifying implementation without extra switches.

VLAN-based segregation requires managed switches or VLAN-capable routers, whereas SSID separation only needs configurable access points and router support for multiple SSIDs
| Option | Description | Pros | Cons |
|---|---|---|---|
| VLAN | Logical network segmentation over LAN/Wi-Fi | Strong isolation; granular firewall rules | More complex setup; requires managed network gear |
| SSID | Separate Wi-Fi network name | Easy to configure on APs; clear separation | Only covers wireless; wired devices remain in main LAN |
Compatibility Checklist: Verifying Device Support
To ensure seamless integration, follow this checklist before purchasing or adding any device:
| Step | Action |
|---|---|
| 1 | Consult the official SmartThings compatibility list |
| 2 | Open your hub’s app—e.g., SmartThings “Add Device” flow |
| 3 | Review Home Assistant’s Integrations page for local/cloud |
| 4 | Cross-check community-maintained compatibility databases |
Hardware Selection: Embrace Open Standards
For maximum interoperability and future-proofing, prioritize devices that support these protocols and alliances:
- Matter 1.4 broadens cross-platform compatibility across Samsung SmartThings, Home Assistant, Apple Home, and Google Home.
- ONVIF ensures IP cameras and video management systems interoperate regardless of brand.
- Z-Wave & Zigbee remain top choices for low-power sensors and locks, offering reliable mesh networking and AES-128 security.
- PSIA (Physical Security Interoperability Alliance) complements ONVIF by standardizing protocols for alarms, access control, and analytics.
By selecting devices aligned with these open standards, you safeguard your investment against obsolescence, unlock richer automation possibilities, and maintain full local control over your DIY security ecosystem.
Installation Process
Effective installation of a DIY security system hinges on strategic device placement, secure mounting techniques, and robust wiring practices, followed by seamless initial pairing—whether through native apps or a centralized smart home hub.
By adhering to expert-recommended steps, you’ll optimize coverage, reduce installation errors, and streamline integration with your automation platform for a dependable, professional-grade setup.
Physical Setup: Mounting Cameras & Placing Sensors
- Mounting wired cameras: Drill mounting holes, secure the camera bracket at least 8–10 feet high for optimal field of view, and angle slightly downward to minimize blind spots.
- Mounting battery-powered cameras: Use manufacturer-approved adhesive mounts or screw-in brackets; ensure the surface is clean and dry before application to prevent failure.
- Camera placement strategy: Map out coverage zones to avoid overlapping fields of view—each camera should monitor distinct entry points and high-traffic areas without unnecessary redundancy.
- Motion sensors: Install in corners 6–8 feet above the floor, pointing toward likely intrusion paths; avoid placing near HVAC vents or direct sunlight to reduce false alarms.
- Door/window sensors: Position the magnet and sensor no more than ⅜-inch apart on the frame and sash, centered vertically; use screws for long-term stability or strong adhesive for renters.
Wiring Tips for Hard-Wired Sensors & Power Needs
| Tip | Recommendation |
|---|---|
| Pre-drywall planning | Run sensor wires inside walls before drywall installation to hide cables and simplify future maintenance. |
| Zone-by-zone wiring | Home-run each door/window sensor to the panel for flexibility—avoid daisy-chaining unless creating a multi-zone (e.g., “Pool House”) configuration. |
| Wire type & gauge | Use 18–22 AWG stranded or solid-core wiring designed for security sensors; thicker gauge for longer runs reduces voltage drop. |
| Power supply considerations | Ensure your panel or hub’s transformer capacity matches the total current draw of wired sensors and sirens—oversize by 25% to accommodate future expansions. |
Initial Pairing: Native App vs. Smart Home Hub
Choosing your approach: Native apps often offer device-specific features and firmware updates, while hub pairing centralizes control and enables cross-device automations—many users combine both for maximum flexibility.
Native app pairing:
Download the device manufacturer’s app (e.g., Kangaroo App).
Create or log in to your account.
Follow in-app prompts: scan a QR code or press the camera’s sync button to join your Wi-Fi network.
Name and assign a location to each device.
Hub-based pairing:
Open your smart home hub’s mobile app (SmartThings, Home Assistant, etc.).
Select “Add Device” or “Discover” and choose the protocol (Z-Wave, Zigbee, Wi-Fi).
Put the device into pairing mode (usually via a button press).
Confirm in the hub app when the device appears, then assign rooms and automation categories.
Configuration & Automation
In this section, you’ll discover how to set up core automations that turn on lights with motion or send instant alerts when doors open—saving up to 50 percent on energy bills—while advanced routines let your system arm or disarm itself based on who’s home or what time it is, all within an ecosystem that already reaches 41.3 percent of U.S. households and over 27 million IFTTT users around the globe; for those craving full control, low-code platforms like Node-RED offer 4,000+ ready-made connectors for custom workflows.
Creating Basic Automations
Basic automations are the entry point for DIY security, pairing simple triggers with immediate actions:
| Automation | Key Benefit | Underlying Tech & Adoption |
|---|---|---|
| Motion → Light On | Up to 50 % energy savings on lighting | Motion sensors held 62.9 % of the market in 2024 |
| Door Open → Notification | Instant breach alerts on mobile devices | 60 % of U.S. consumers buy smart home products to monitor homes via smartphone |
These automations not only enhance security but also deliver measurable cost savings and convenience.
Advanced Routines
Once you’re comfortable with the basics, advanced routines layer in presence detection and scheduling:
- Presence-Based Arming/Disarming: Automatically arm when everyone leaves home, disarm on return—mirroring the behavior 70 % of homebuyers expect from a modern smart home.
- Time-Scheduled Modes: Switch to “Night” or “Away” modes at preset hours, leveraging the 41.3 % smart home penetration in North America.
- Feature-Driven Adoption: 40 % of users add new automations as their needs evolve, ensuring your routines stay aligned with daily life.
These dynamic routines boost security posture by adapting in realtime to your household’s habits.
Integrating with IFTTT or Custom Scripts
For limitless cross-platform workflows, integrate with cloud services or build your own flows:
| Integration Method | Use Case | Pros | Cons |
|---|---|---|---|
| IFTTT Applets | E.g., “If motion detected, send SMS” | 27 M+ users; 900+ supported services for quick setup | Relies on cloud; free tier polls every 5 min |
| Node-RED Custom Flows | E.g., conditional arming based on sensor data | 4,000+ open-source connectors; fully local processing | Requires basic JavaScript and flow design knowledge |
Whether you choose the simplicity of IFTTT or the power of Node-RED, these integrations unlock advanced scenarios—like auto-locking doors when your security camera sees movement or syncing arming modes with weather forecasts—empowering a truly smart, responsive home.
Testing & Troubleshooting
Effective troubleshooting of your DIY security setup hinges on pinpointing the root causes of pairing failures—whether due to range, interference, or firmware mismatches—then using standardized network diagnostics (signal strength, mesh health, latency) to verify connectivity. Finally, knowing when to factory-reset a device versus replace it ensures long-term reliability and security.
Common Pairing Failures and Fixes
DIY security devices can fail to pair for several reasons. The table below outlines the primary causes, typical symptoms, and expert-recommended fixes:
| Failure Cause | Symptom | Fix |
|---|---|---|
| Range Limitations | Move the device closer to the hub (within 30 ft / 10 m for Zigbee) or add a repeater/extender (e.g., IKEA Trådfri, Aeotec Range Extender) to strengthen the mesh | Authentication failures; never joins the network |
| Radio Interference | Sporadic disconnects or unstable pairing | Change Wi-Fi channel (use channels 1, 6, 11 on 2.4 GHz), relocate devices away from microwaves or cordless phones, and minimize physical barriers |
| Firmware Mismatches | “Firmware Mismatch” warning; pairing loop | Update all devices and hub to latest firmware, then reboot or soft-reset each device before re-pairing |
| Network Overload | Hub times out during inclusion; slow response | Exclude unused devices, reduce concurrent joins, and ensure hub’s processor/memory isn’t maxed (check hub diagnostics) |
| Incorrect SSID/Password | Authentication failures; never joins network | Verify SSID and password match exactly (case-sensitive), and confirm no MAC-filtering or hidden-SSID blocking is enabled |
Network Diagnostics: Mesh Health, Signal Strength & Latency
Regular diagnostics help you verify mesh integrity and device connectivity. Key metrics include:
| Metric | Recommendation | How to Check & Tools |
|---|---|---|
| Signal Strength (RSSI) | Strong: ≥ –60 dBm; Acceptable: ≥ –75 dBm | Use Zigbee2MQTT network map, Hubitat’s “Zigbee Signal Strength” page, or Wireshark for Wi-Fi RSSI readings |
| Latency | Ideal: 10–30 ms; Maximum for basic use: < 60 ms | Ping nodes via mesh diagnostic tools (e.g., Z-Net Analyzer, Obkio) |
| Mesh Health | ≥ 95 % packet delivery ratio (PDR) on single-hop transmissions | Check PDR and route stability using network analyzer features in Home Assistant or dedicated mesh testers |
- Signal Strength: Anything closer to 0 dBm is stronger; values below –80 dBm often cause dropouts.
- Latency: Mesh latency under 30 ms ensures smooth operations; over 60 ms may trigger timeouts in security events.
- Mesh Health: Low PDR indicates faulty or overloaded nodes; remedy by adding routers/repeaters or replacing weak devices.
When to Factory-Reset Versus Replace a Device
Understanding the difference between a reset and a replacement saves time and money:
| Scenario | Action | Rationale |
|---|---|---|
| Configuration Corruption | Factory-reset | Clears all settings and network information when soft resets and firmware updates fail |
| Persistent Hardware Failures (dead radio, sensor malfunctions) | Replace device | Hardware faults (no response to reset, inconsistent sensor readings) indicate end-of-life or defect; replacement restores reliability |
| Upgrading Standards (e.g., moving to Matter) | Replace with compatible model | Legacy devices without firmware support for new protocols cannot integrate; upgrading ensures future-proof interoperability |
| Ownership Transfer or Move-Out | Factory-reset | Clears personal data and cloud ties before leaving the property, providing the buyer a fresh start |
- Factory-reset when devices refuse to pair despite all software fixes—this restores true factory defaults.
- Replace when a device exhibits hardware errors (e.g., no LED response, false positives, or complete radio silence after reset attempts).
By following these troubleshooting steps, you can maintain a resilient, high-performance DIY security system that seamlessly integrates with your smart home.
Voice-Assistant & Mobile Integration
By linking your DIY security devices to Alexa routines, you can automate announcements, camera recordings, or even system arming based on sensor triggers—while Google Assistant scenes let you activate multi-device setups (“Night Mode,” “Away Mode,” etc.) with a simple voice command.
Mobile consolidation platforms like Home Assistant enable you to manage 35+ devices in one customizable dashboard, reducing the need to juggle eight separate apps and cutting configuration time by up to 60 percent.
Together, these integrations streamline daily security management, tap into a 27 million–strong IFTTT ecosystem for cross-platform automations, and leverage AI-driven enhancements in Google’s Gemini for future-proof control.
Linking Security Devices to Voice Assistants
Connecting your security hardware to voice assistants transforms manual checks into hands-free convenience:
- Alexa Routines:
- Open the Alexa app and tap More > Routines.
- Create a new routine: set the “When” trigger to your sensor (e.g., Ring motion detected).
- Under “Then”, add actions like “Announce ‘Motion at Front Door’,” “Arm Guard Away,” or “Record Camera Clip” (amazon.com).
- Use virtual switches to ensure routines only run when the system is armed—mimicking professional-grade control.
- Google Assistant Scenes:
- Implement the ActivateSceneCommand via Google’s Home Graph API or IFTTT: say “Hey Google, activate [Scene Name]” to trigger multi-device scenes (lights, cameras, locks).
- Note that some brands (e.g., Wyze) may require IFTTT workarounds, as Google Assistant may not natively recognize them as security systems.
- For Alarm.com users, create a virtual switch in SmartThings and include it in your Google Routine to arm/disarm your system with voice alone.
Voice-assistant integration not only adds hands-free security but also consolidates disparate device controls into unified routines and scenes.
Mobile App Consolidation: Single Dashboard vs. Multiple Apps
Juggling multiple vendor apps can be a headache. Here’s how key platforms compare:
| Platform | Key Strengths | Considerations |
|---|---|---|
| Home Assistant | Open-source, local control; supports Matter, Zigbee, Z-Wave; highly customizable dashboards | Steep learning curve; requires self-hosting or hardware like Raspberry Pi |
| Samsung SmartThings | User-friendly app; cloud-based routines; broad ecosystem integration | Cloud dependency; occasional latency; hub required for local Zigbee/Z-Wave |
| IFTTT | No hub needed; 900+ service integrations; simple trigger-action workflows | Limited to cloud; 5-minute polling in free tier; less suited for real-time security alerts |
- Unified Dashboards (e.g., Home Assistant, UnifyApps): Provide a single-pane view of all your cameras, sensors, locks, and automations; reduce app-switching and centralize alerts.
- Multiple Apps (Vendor-Specific): Offer device-specific features (e.g., firmware updates, proprietary AI analytics) but at the cost of fragmented control and slower response times.
Opting for a single-dashboard approach can improve incident response—alert consolidation alone can cut investigation time by 30 percent—while retaining vendor apps for advanced device configurations.
Security & Privacy Best Practices
In any DIY security setup, the strongest defenses combine robust encryption, vigilant software hygiene, and a lean architecture that minimizes reliance on external services.
Implementing end-to-end encryption and phishing-resistant authentication can thwart up to 90 % of automated attacks, while regular firmware updates and credential rotations close critical vulnerability windows that 40.8 % of smart homes leave open due to outdated software.
At the same time, shifting processing and storage on-premise slashes privacy risks and prevents your system from being rendered useless if a vendor shutsters its cloud service.
Enabling End-to-End Encryption & Secure Authentication
End-to-end encryption ensures that only your devices and authenticated controllers can read sensitive data—unauthorized intermediaries or cloud providers remain blind to your video feeds and sensor logs.
Equally critical is moving beyond passwords: multi-factor authentication (MFA) can block 80–90 % of credential-based attacks, and phishing-resistant methods such as FIDO2/WebAuthn thwart up to 95 % of targeted phishing attempts.
| Authentication Method | Attack Prevention Rate |
|---|---|
| SMS-based MFA | ~80 % of attacks prevented |
| FIDO2/WebAuthn | ~95 % phishing resistance |
| Phishing-resistant MFA | 99.22 % reduction in breaches |
Regularly Updating Firmware & Rotating Access Credentials
Firmware updates are the front line against newly discovered vulnerabilities, yet only about 12.5 % of users even link updates to security fixes . To stay ahead, adopt these guidelines:
| Practice | Recommendation |
|---|---|
| Automatic Updates | Enable automatic OTA or app-triggered firmware updates |
| Scheduled Manual Checks | Review and apply updates quarterly, or at minimum every six months |
| Configuration Backup | Back up device settings before updates to simplify rollback if needed |
| Unsupported Device Replacement | Replace or isolate devices without updates for over 12 months |
Equally important is credential rotation. Rotate certificates or device keys at least every 90 days, following AWS’s IoT certificate-rotation best practices, and enforce password changes or key replacements in small-scale home deployments to maintain resilience (aws.amazon.com).
Minimizing Cloud Dependencies with Local Processing
Relying solely on the cloud introduces single points of failure—manufacturers can discontinue services, instantly bricking fully cloud-dependent devices.
In contrast, local processing and storage keep critical functions on your premises, reducing privacy risks by up to 40 % for homes with multiple vulnerable devices.
| Approach | Privacy Risk | Cloud-outage Resilience |
|---|---|---|
| Cloud-dependent | Low—service shutdown can disable the device | Low—service shutdown can disable device |
| Local Processing | Low—data remains on-premise | High—even offline, core functions work |
By combining encrypted, multi-factor access, proactive firmware, and credential management, and a hybrid architecture that favors local control, you’ll build a DIY security system that’s not just smart but truly secure.
Future-Proofing & Advanced Standards
Matter is rapidly emerging as the universal smart-home standard, uniting disparate devices under a single IP-based protocol to ensure seamless interoperability and robust security across brands.
Since its first release in October 2022, Matter has seen over 1,135 products certified by mid-2023 and nearly 20,000 specification downloads, demonstrating strong industry momentum.
With security baked in from the ground up—using mandatory encryption and device attestation—Matter elevates the privacy posture of DIY setups and professional installations alike.
Looking ahead, Matter 1.4.1 (released May 7, 2025) introduces NFC onboarding and multi-device setup, while upcoming versions will add native support for cameras, environmental sensors, and more, promising a future-proof ecosystem that keeps pace with emerging smart-security innovations.
Introduction to Matter and Its Role in Unifying Smart Home Security
Matter is an IP-based connectivity standard developed by the Connectivity Standards Alliance (CSA) and major industry players—Amazon, Apple, Google, and others—to solve long-standing interoperability challenges in smart homes.
Unlike legacy protocols that often require proprietary bridges, Matter operates over Ethernet, Wi-Fi, and Thread, enabling devices to communicate securely even without continuous cloud connectivity.
All Matter-certified products undergo rigorous device attestation to prevent counterfeit or tampered hardware, embedding strong encryption and authentication by default.
As of late 2024, thousands of unique devices—from lights and locks to thermostats and sensors—carry the Matter logo, reflecting broad adoption across consumer and commercial markets.
Matter Version & Adoption Snapshot
| Version | Release Date | Key Additions | Certified Devices & Downloads |
|---|---|---|---|
| 1.0 | Oct 4, 2022 | Lighting, locks, HVAC, sensors, streaming players | N/A (initial launch) |
| 1.1 | May 18, 2023 | Bug fixes, SDK enhancements | 17,991 spec downloads; 1,135 new product certs |
| 1.2 | Oct 23, 2023 | Appliances, CO/smoke alarms, air quality, vacuums | Growing device portfolio |
| 1.3 | May 8, 2024 | Water/energy management, appliances, scenes batching | Continued ecosystem growth |
| 1.4.1 | May 7, 2025 | NFC onboarding, multi-device setup | Thousands of certified endpoints |
Leveraging Upcoming Integrations
With Matter’s roadmap extending beyond core device types, DIY security installers can look forward to richer integrations and simplified workflows:
Native Camera Support
Future versions are slated to include native IP camera support, allowing manufacturers to expose camera streams and snapshots directly within any Matter-compliant hub or controller without custom bridges. This will enable features such as:
- Unified Video Streams: Access live video feeds from multiple brands in a single dashboard.
- Cross-Platform Alerts: Trigger automations (e.g., lights or alarms) based on camera-detected events, using a universal Matter trigger schema.
- Local Recording Options: Leverage on-premise storage devices or network-attached storage (NAS) for privacy-first video archiving.
Advanced Device Types & Ecosystem Growth
Beyond cameras, upcoming Matter iterations will add support for ambient presence, environmental sensing, and major appliances—empowering security-focused automations like air-quality-based ventilation control or energy-aware lighting.
Meanwhile, the emergent Aliro protocol (co-developed with Matter) aims to standardize ultra-wideband (UWB) unlocking for smart locks and wearables, further tightening access control workflows.
Future-Proof Roadmap
| Planned Feature | Expected Benefit | Timeline |
|---|---|---|
| IP Camera Support | Seamless video integration; unified alerts and automations | Matter 1.5+ (late 2025) |
| Ambient/Presence Sensing | Context-aware lighting, HVAC, and security routines | Matter 1.6 (2026) |
| Major Appliance Control | Security-aware appliance interlocks (e.g., lock ovens remotely) | 2026–2027 |
| UWB Aliro Integration | Hands-free digital keying and precision unlocking | 2025 with Aliro shipments |
By aligning your DIY security projects with Matter’s evolving capabilities, you’ll not only reduce integration headaches today but also ensure your system remains compatible with tomorrow’s leading smart-home innovations.
Maintenance & Long-Term Reliability
Keeping your DIY security system reliably operational over the long term hinges on three pillars: timely firmware and software updates to patch vulnerabilities, proactive battery and device health monitoring to prevent unexpected failures, and systematic review of security logs to detect anomalies before they escalate.
By integrating these maintenance routines into your calendar, you’ll not only protect your home from emerging threats but also extend the lifespan and performance of every sensor, camera, and hub in your network.
Scheduling Firmware and Software Updates
Firmware and software updates are the first line of defense against newly discovered vulnerabilities—over-the-air (OTA) updates can reduce your exposure window from weeks to hours.
- Automatic OTA Updates: Enable automatic updates whenever possible so that security patches and feature enhancements install as soon as they’re released, minimizing manual effort.
- Manual & Scheduled Updates: If you prefer manual control, plan updates during off-peak hours (for example, after midnight) to avoid interrupting your home network and devices.
- Regular Check-Ins: Visit each manufacturer’s support portal at least monthly and apply critical updates quarterly to keep firmware current and secure.
Battery Health Checks and Device Health Monitoring
Battery-powered sensors and cameras can fail without warning, so routine health checks are essential.
| Check | Recommendation | Frequency |
|---|---|---|
| Charge Cycle Management | Maintain state of charge between 20–80 % to maximize battery lifespan | Weekly or on low-battery alerts |
| Capacity & Cycle Count | Monitor battery capacity and cycle metrics via your hub’s health dashboard | Monthly |
| Temperature Monitoring | Keep operating temps between 0 °C and 40 °C to prevent accelerated wear | Continuous with alerts |
Use dedicated dashboards (like Home Assistant or manufacturer apps) to configure proactive alerts for low charge, rapid discharge, or high-temperature events—catching issues before devices go offline.
Reviewing Security Logs and Alert Histories
Regular log review is crucial for spotting unauthorized access attempts or unusual device behavior before they turn into breaches.
| Practice | Description |
|---|---|
| Timestamp Synchronization | Sync all devices via NTP to maintain consistent, reliable timestamps |
| Log Integrity | Forward logs to an external syslog server or write-once media to prevent tampering |
| Scheduled Analysis | Perform a structured review of critical alerts at least weekly to identify patterns |
| Automated Alerting | Leverage SIEM or log-management tools to trigger instant notifications on high-severity events |
Maintain a minimum of six months’ worth of log history to facilitate forensic analysis if needed and to comply with industry best practices.
By embedding these maintenance tasks—firmware scheduling, battery and health monitoring, and log reviews—into your regular routines, you’ll ensure your DIY security system remains robust, responsive, and ready to protect your home well into the future.
Conclusion
Bringing everything together, you’ve learned to isolate your security network, verify device compatibility, handle physical installation, configure automations, troubleshoot connectivity, integrate voice and mobile controls, and enforce privacy best practices—all essential steps for a seamless, professional-grade smart home security system. Ready to put it into action?
Download our free, printable integration checklist—a step-by-step PDF guide covering VLAN setup, device pairing, wiring tips, and routine maintenance.
Have questions or ideas to share? Drop a comment below, join our Home Assistant community forum for peer support, or explore our advanced video tutorials for deep dives into every integration nuance
FAQs
What’s the main benefit of DIY vs. professional security?
DIY saves up to 60 % on installation and subscription fees while giving you full customization and control.
Which wireless protocol is best for security sensors?
Z-Wave offers reliable mesh networking and low interference, whereas Zigbee excels in device density; use Wi-Fi for cameras that need higher bandwidth.
Do I need a separate VLAN or SSID for security devices?
Yes—a dedicated VLAN provides stronger segmentation for wired and wireless devices; an SSID is simpler for Wi-Fi-only setups.
How often should I update firmware and rotate credentials?
Enable automatic OTA updates where possible. Manually check quarterly and rotate access keys every 90 days to close security gaps.
What’s Matter, and why should I care?
Matter is a unified IP-based standard backed by Amazon, Apple, and Google, simplifying interoperability and boosting security across all your smart-home gear.


