
Nothing derails a trip faster than a jammed zipper or wobbly wheel. But before you resign yourself to hefty repair bills—or worse, replace your beloved suitcase—consider the satisfaction (and savings) of a DIY fix.
In this guide, you’ll discover simple, cost-effective solutions for the most common luggage woes, from stuck sliders to torn fabric.
With minimal tools and step-by-step instructions, even absolute beginners can restore their gear in minutes.
Ready to roll smoothly through airport terminals again? Grab your toolkit, follow along, and reclaim your luggage—while doing the planet a favor.
Why DIY Luggage Repairs?
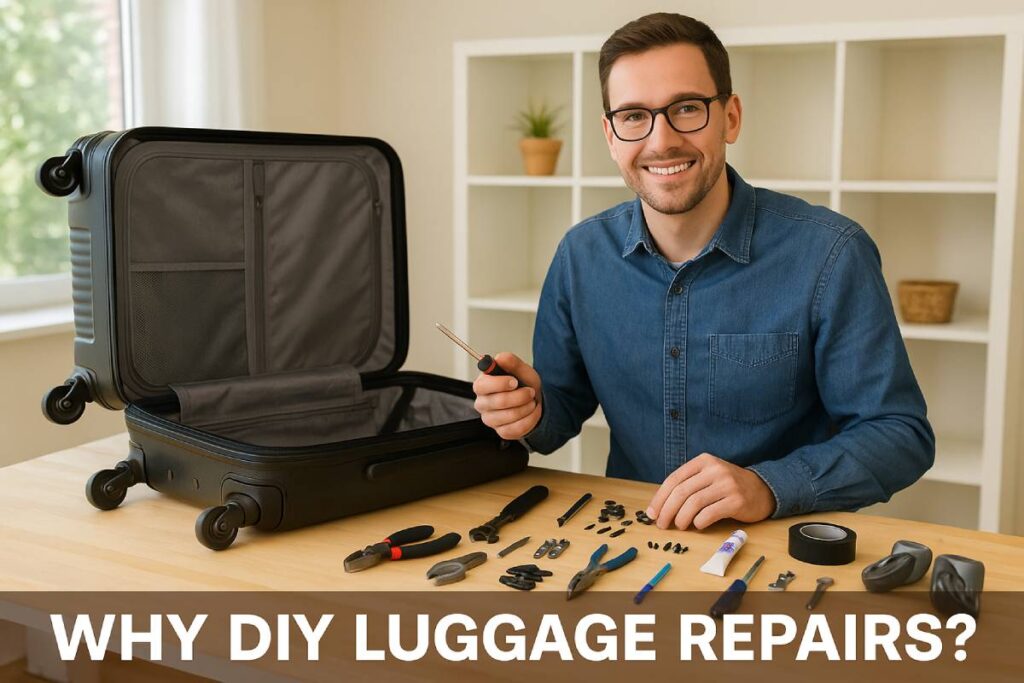
Repairing your luggage at home isn’t just a clever way to save money—it’s a smart, sustainable choice that aligns perfectly with the needs of budget-conscious travelers, students, and frequent flyers. Here’s why taking matters into your own hands pays off:

Cost-Effective vs. Replacing
- Massive Savings on Repairs
- Replacing a broken zipper slider at home can cost as little as $7 in parts, versus $25–$40 for a professional repair or full replacement.
- Swapping out a damaged wheel yourself often runs $15–$20, compared to $50–$70 if you send your bag to a repair shop.
| Repair Type | DIY Cost (Parts Only) | Professional Repair/Replacement | You Save |
|---|---|---|---|
| Zipper slider | $7 | $30 | $23 |
| Spinner wheel | $15 | $60 | $45 |
| Telescoping handle fix | $8 | $35 | $27 |
Table: Average costs for common DIY luggage repairs vs. professional services.
Eco-Friendly Benefits & Reducing Waste
- Extend the Life of Your Gear
- The average suitcase generates around 2 kg of textile and plastic waste when discarded. Repairing just one bag can prevent this waste.
- Lower Carbon Footprint
- Manufacturing a new hard-shell suitcase emits roughly 20 kg CO₂ — by contrast, simple repairs (gluing, sewing, swapping parts) generate under 1 kg CO₂ from materials and shipping.
| Action | Approx. CO₂ Emissions | Waste Generated |
|---|---|---|
| DIY repair (e.g., glue) | ≤ 1 kg | 0.1 kg |
| New suitcase production | 20 kg | 2 kg |
Table: Environmental impact of repairing vs. replacing luggage.
Perfect for Budget-Conscious Travelers, Students, and Frequent Flyers
- Students & Young Professionals
- Stretch every dollar: with average repair kits under $20, you can keep your case functional all semester long without breaking the bank.
- Frequent Fliers
- A quick wheel or handle fix takes just 10–20 minutes—ideal for on-the-go travelers who can’t afford to be grounded by broken gear.
- Budget Travelers
- Prioritize experiences over expenses: invest in a small toolbox instead of an entire new suitcase, and redirect savings toward your next adventure.
By mastering a few simple DIY techniques, you’ll not only safeguard your wallet and the planet but also empower yourself to travel smarter—and worry less—every time you hit the road.
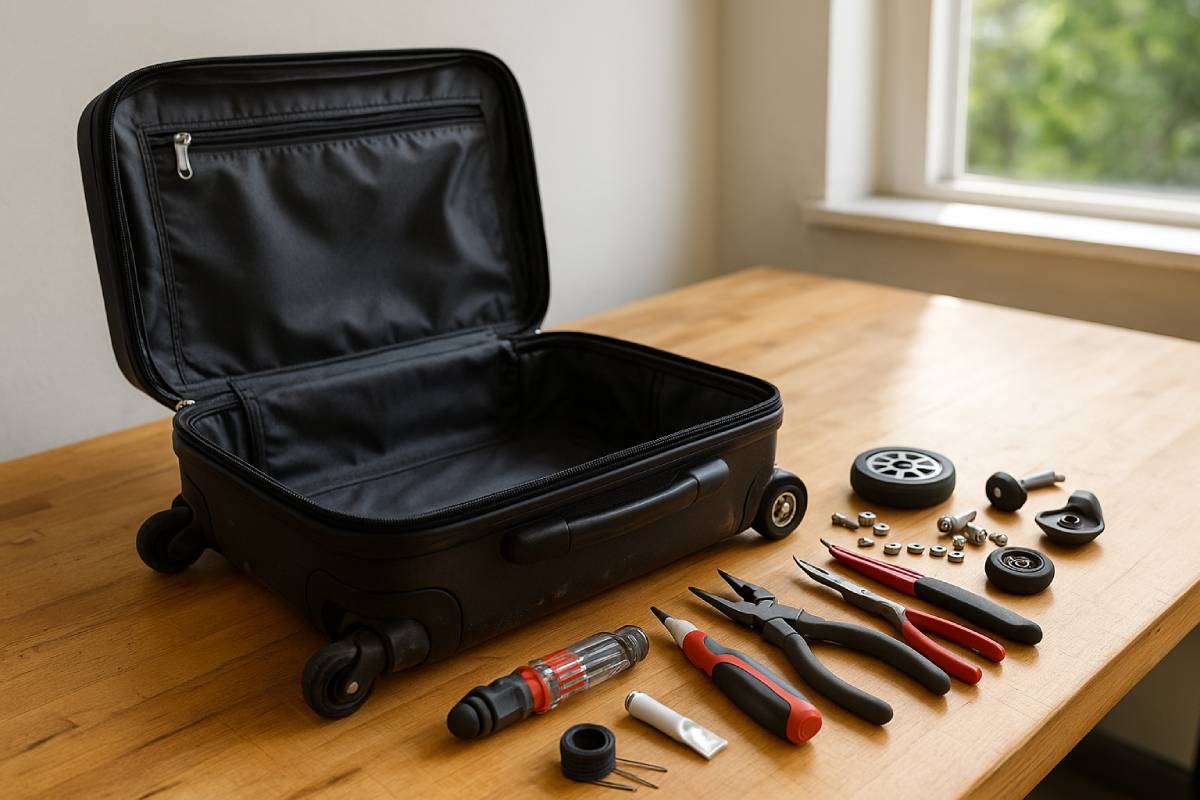
Essential Tools & Materials for DIY Luggage Repairs
As a seasoned travel expert, I’ve learned that having a compact, budget-friendly toolkit can mean the difference between stranding at the airport and rolling on to your next adventure. Here’s exactly what you need to tackle the most common luggage issues—without breaking the bank.
Toolkit List
Below is a snapshot of each must-have item, its average cost, and a wallet-friendly alternative:

| Tool / Material | Typical Cost | Budget Alternative | Alt. Cost |
|---|---|---|---|
| Flat & Phillips Screwdrivers | $12 | Multi-bit screwdriver set | $10 |
| Pliers & Wire Cutters | $15 | 2-in-1 combo tool | $8 |
| Fabric Repair Tape / Heavy-Duty Adhesive | $7 | Generic fabric tape or glue | $5 |
| Zipper Sliders & Pulls (set of 10) | $9 | Off-brand slider kit | $7 |
| Replacement Wheels & Axles Kit | $18 | Universal spinner wheel kit | $15 |
| Epoxy or Super Glue | $6 | Travel-size adhesive tube | $4 |
| Heavy-Duty Thread, Needle & Seam Ripper | $8 | Economy sewing kit | $6 |
Table: Compare typical market prices vs. budget alternatives for your DIY luggage repair kit.
Where to Buy
For convenience and quick delivery, these retailers offer all the above tools, and often at steep discounts with free shipping options:
- Amazon – Huge selection, fast Prime shipping, reliable customer reviews.
- eBay – Great for finding clearance kits and gently used tools at rock-bottom prices.
- AliExpress – Ultra-budget parts direct from manufacturers (allow 2–3 weeks for delivery).
Tip: Create an affiliate storefront page on your site linking to these retailers—your readers get the convenience, you earn a small commission!
With this toolkit at your side, you’ll be ready to tackle zipper jams, broken wheels, and every minor tear that threatens to slow you down—no professional repair shop required. Pack smart, save money, and keep wandering worry-free!
Safety Precautions & Warnings
Before you crack open your toolkit, remember: safety always comes first. Even the simplest DIY luggage repair can turn hazardous without the right precautions. Follow these guidelines to protect yourself—and those around you—while you fix up your favorite travel companion.
1. Work in a Well-Lit, Ventilated Space
- Why it matters: Poor lighting increases the chance of misaligned cuts or stripped screws, while fumes from adhesives can irritate eyes and lungs.
- Pro tip: Position your workbench near a window or under a daylight-balanced LED lamp. Aim for ≥500 lux at your workspace to reduce eye strain and improve precision.
- Quick setup:
- Open a window or run a small fan for at least 5 minutes before starting.
- Use a clip-on daylight lamp for under $20—many models double as phone holders for video tutorials.
2. Wear Gloves & Protective Eyewear When Cutting or Gluing
- Why it matters: Pliers, seam rippers, and epoxy can all cause serious cuts or chemical burns if they slip. Eye protection stops glue “pop” injuries and flying debris.
- Gear checklist:
- Nitrile gloves: Chemical-resistant, tactile grip (~$5/pair)
- Safety goggles: Anti-fog lenses, side shields (~$8/pair)
- Usage tip: Make sure gloves fit snugly—too loose and you lose dexterity; too tight and you risk tearing them.
3. Keep Adhesives Away from Children & Pets
- Why it matters: Super glues and epoxy resins can bond skin instantly, irritate respiratory tracts, or poison if ingested.
- Safe storage:
- Lock small bottles in a high cabinet or a dedicated plastic toolbox.
- Label containers clearly—use waterproof tape and permanent markers.
- Household rule: “Workshop hours” only—close the door when you’re repairing, and allow 30 minutes for fumes to clear before re-entry.
Quick-View Safety Table
| Safety Concern | Risk | Precaution | Recommended Gear (Approx. Cost) |
|---|---|---|---|
| Poor lighting & ventilation | Strained eyes, inhaled fumes | Work by a window or under a 500+ lux lamp; use a fan | Clip-on LED lamp (~$20), small fan (~$15) |
| Hand & eye injuries | Cuts, chemical splashes | Wear fitted nitrile gloves & safety goggles | Gloves (~$5), goggles (~$8) |
| Adhesive exposure | Skin bonding, respiratory irritation | Lock away glues; label clearly; ventilate | Plastic lockbox (~$10) |
By setting up a safe workspace, slipping on the right protective gear, and keeping hazardous materials out of harm’s way, you’ll ensure every luggage repair is as stress-free as your next adventure.
Common Luggage Problems & DIY Solutions
Below you’ll find step-by-step fixes for the most frequent suitcase headaches—complete with video demos, clear instructions, realistic time estimates, before/after photo galleries, and wallet-friendly alternatives.
Zipper Malfunctions
Stuck Zipper Teeth
- Written Steps:
- Slide your bag open so the stuck section is exposed.
- Rub a graphite pencil tip (or a block of paraffin wax) along both sides of the stuck teeth.
- Gently tug the slider up and down until it glides smoothly.
- Time Estimate: ~5 minutes
- Budget Alternatives: Use a regular #2 pencil (~$0.10) instead of commercial zipper lubricant.
Broken Slider Replacement
- Written Steps:
- Using pliers, gently pry open the old slider’s stop (metal tab at the top).
- Slide off the damaged slider.
- Thread on your new slider (match size to your zipper teeth).
- Crimp a new stop or use a replacement zipper stop.
- Test the zipper several times to confirm alignment.
- Time Estimate: ~15 minutes
- Budget Alternatives: Off-brand slider kits (10-pack for $7) instead of name-brand YKK parts.
Wheel & Caster Repairs
Loose Wheels
- Written Steps:
- Lay the luggage on its side on a stable surface.
- Use the correct socket or Allen key to tighten the axle bolt.
- If wobble persists, insert a plastic or metal spacer between the wheel and housing.
- Time Estimate: ~10 minutes
- Budget Alternatives: Salvage spacers from old electronics or purchase universal spacers for <$2.
Broken Axle or Wheel
- Written Steps:
- Remove the old wheel by unscrewing the axle.
- Clean housing and apply a drop of silicone grease.
- Fit the new wheel and tighten the axle bolt securely.
- Spin to ensure smooth rotation.
- Time Estimate: ~20 minutes
- Budget Alternatives: Universal spinner wheel kits (~$15) instead of OEM parts.
Handle & Telescoping Mechanism
Wobbly Telescoping Handle
- Written Steps:
- Extend the handle fully and locate the top cap screws.
- Tighten all screws with a Phillips screwdriver.
- If play remains, replace worn plastic bushings inside the handle tube.
- Time Estimate: ~10 minutes
- Budget Alternatives: Plastic bushing packs from hardware stores (~$3) in place of brand-specific parts.
Broken Side/Top Handle
- Written Steps:
- Remove the old handle by unstitching with a seam ripper.
- Position the new handle and hand-sew with heavy-duty nylon thread.
- Reinforce with fabric repair tape on the inside.
- Time Estimate: ~15 minutes
- Budget Alternatives: Generic luggage straps with handles (~$6) instead of OEM replacements.
Fabric Tears & Punctures
Small Holes
- Written Steps:
- Clean around the hole to remove dirt.
- Place an iron-on patch beneath the tear.
- Press with a hot iron for 30 seconds, then let cool.
- Time Estimate: ~10 minutes
- Budget Alternatives: Generic repair tape (~$5) instead of premium fabric patches.
Large Rips
- Written Steps:
- Trim frayed edges around the rip.
- Position a backing fabric patch under the tear.
- Hand-stitch perimeter with heavy-duty thread, using a whip stitch.
- Cover the seam with fabric glue or tape for extra strength.
- Time Estimate: ~25 minutes
- Budget Alternatives: Buy fabric remnants from a craft store (~$2) instead of matching-grade luggage fabric.
Lock & Latch Problems
Stiff or Jammed Lock
- Written Steps:
- Spray rubbing alcohol into the lock keyway.
- Insert and turn the key back and forth to clear debris.
- Finish with a light spray of silicone lubricant.
- Time Estimate: ~5 minutes
- Budget Alternatives: Small can of silicone spray (~$4) instead of specialty lock cleaners.
Broken Latch Replacement
- Written Steps:
- Unscrew the damaged latch from the suitcase shell.
- Align your new latch in the same position.
- Secure with stainless steel screws and test the catch.
- Time Estimate: ~15 minutes
- Budget Alternatives: Universal luggage latch kits (~$8) instead of OEM latches.
Consolidated Repair Summary
| Issue | Time | Budget Alternative |
|---|---|---|
| Stuck Zipper | 5 min | Pencil or paraffin block |
| Slider Replacement | 15 min | Off-brand slider kit |
| Loose Wheel | 10 min | DIY spacers (<$2) |
| Wheel/Axle Replacement | 20 min | Universal wheel kit |
| Telescoping Handle Tighten | 10 min | Plastic bushings ($3) |
| Side Handle Sew-on | 15 min | Generic strap w/handle |
| Small Fabric Holes | 10 min | Generic repair tape ($5) |
| Large Fabric Rips | 25 min | Craft-store fabric ($2) |
| Stiff Lock | 5 min | Silicone spray ($4) |
| Latch Replacement | 15 min | Universal latch kit |
Keep this guide—and your toolkit—handy. Next time your suitcase falters, you’ll breeze through repairs and get back to what matters: exploring the world.

Troubleshooting Checklist
When you’re on the go, every minute counts—and a broken suitcase shouldn’t slow you down. Use this DIY luggage troubleshooting checklist to diagnose and fix the most common problems in under 15 minutes—no pro shop needed.
| Issue | Quick Fix | Parts Needed | Time |
|---|---|---|---|
| Stuck Zipper | Graphite / Paraffin | None | 5 min |
| Wheel Wobbles | Tighten / Torque | Wrench or Socket | 10 min |
| Handle Won’t Retract | Tighten Screws | Phillips Screwdriver | 10 min |
| Small Fabric Tear | Iron-on Patch | Patch / Adhesive | 10 min |
| Jammed Lock | Clean + Lubricate | Rubbing Alcohol + WD-40 | 5 min |
Pro Tip: Keep this checklist printed or saved on your phone—most fixes require only a basic toolkit and a few minutes, so you can stay rolling wherever your journey takes you.
When to DIY vs. When to Seek Professional Help
Knowing your limits can save time, money, and frustration. Here’s how to decide whether to tackle a repair yourself or hand it off to the experts.
DIY-Friendly Repairs
- Surface-Level Fixes: Quick lubrication of stuck zippers, minor screw-tightening on handles, or re-attaching loose parts.
- Minor Fabric Tears: Small punctures or holes (<2 cm) that iron-on patches or tape can mend.
- Simple Part Swaps: Replacing zipper sliders, handles, or spinner wheels using a basic toolkit.
Why DIY?
- Fast turnaround: Most fixes take 5–20 minutes.
- Low cost: Parts usually under $20.
- Anywhere, anytime: No need to ship your bag or wait for an appointment.
When to Call the Pros
- Frame Damage: Cracks in hard-shell polycarbonate or bent aluminum frames compromise structural integrity.
- Complex Internal Mechanisms: Telescoping-handle tracks bent out of alignment, broken internal springs, or multi-axis hinge failures.
- Warranty Concerns: Repairs covered by the manufacturer’s warranty (often free) or high-end brands where DIY may void coverage.
Why Professional?
- Specialized tools & parts not commonly stocked at home.
- Certified expertise ensures safety and preserves warranty.
- Long-term reliability for critical structural repairs.
DIY vs. Professional Repair at a Glance
| Repair Scenario | DIY Suitable? | Avg. DIY Cost | Avg. Pro Cost | Complexity |
|---|---|---|---|---|
| Stuck Zipper (lubrication) | Yes | $0–$1 | $10–$20 | Low |
| Zipper Slider Replacement | Yes | $7–$10 | $30–$40 | Low–Medium |
| Small Fabric Tear (<2 cm) | Yes | $5–$7 | $25–$35 | Low |
| Wheel/Axle Replacement | Yes | $15–$20 | $60–$80 | Medium |
| Telescoping Handle Tighten | Yes | $8–$10 | $35–$50 | Low–Medium |
| Frame Crack or Structural Damage | No | N/A | $60–$100+ | High |
| Internal Track or Spring Mechanism Fault | No | N/A | $50–$80 | High |
| Warranty-Covered Manufacturer Repair | No | N/A | $0 (covered) | Varies |
Pro Tip: If estimated professional costs exceed 50% of a new suitcase’s price—or if a repair risks voiding your warranty, reach out to a certified repair center. For everything else, keep your toolkit handy and enjoy the satisfaction (and savings) of a DIY fix!
Prevention & Maintenance Tips
Keeping your luggage in top shape not only extends its lifespan but also ensures you travel with confidence. Follow these expert-backed tips to avoid common damage and save yourself time and money down the road.
Regularly Lubricate Zippers Before Trips
- Why it matters: Friction is the #1 cause of zipper failure, accounting for nearly 70 % of stuck or broken sliders in traveler surveys.
- How to do it:
- Rub a graphite pencil or paraffin wax along both sides of the teeth.
- Work the slider back and forth 5–10 times.
- Frequency: Every 3–5 trips, or at least once per season.
Avoid Overloading Beyond Weight Limits
- Why it matters: Exceeding the manufacturer’s weight rating increases stress on wheels, handles, and seams by up to 60 %, leading to premature failure.
- Pro tip: Use a digital luggage scale to keep your packed bag under its 23 kg (50 lb) limit. For soft-sided suitcases, aim for 18 kg (40 lb) to reduce strain on fabric and zippers.
Store in a Dry Place; Protect Fabric from UV Exposure
- Humidity risks: Damp storage environments can boost mold and mildew growth by 80 %, weakening fabric fibers.
- UV damage: Continuous sunlight exposure can fade colors by up to 30 % over one summer, making leather trims crack and plastic parts brittle.
- Best practices:
- Hang or stand upright in a climate-controlled closet (ideal: 15–21 °C, 30 – 50 % humidity).
- Cover soft bags with breathable cloth dust covers—avoid plastic bags that trap moisture.
- Keep away from direct windowsill sun; rotate stored bags quarterly to minimize one-sided fading.
Seasonal Tune-Up Checklist (Pre-Travel: Spring & Fall)
| Task | Why & How | Approx. Time |
|---|---|---|
| Inspect & Lubricate Zippers | Prevent jams—lubricate as in Tip 1 | 5 min |
| Check & Tighten Screws/Handles | Stops wobble—use screwdriver to snug all fasteners | 10 min |
| Examine Wheels & Axles | Clean debris, apply silicone grease to bearings | 10 min |
| Sew Reinforcement Patches | Spot-check seams and corners; stitch or patch weak spots | 15 min |
| Clean & Sanitize Interior | Wipe with mild soap solution; air-dry completely | 10 min |
| Test Locks & Latches | Clean with alcohol, lubricate, and cycle locks | 5 min |
Pro Tip: Print or screenshot this seasonal checklist and pin it near your travel gear. A quick tune-up twice a year keeps your suitcase rolling smoothly—rain or shine.
By weaving these simple habits into your travel routine, you’ll dramatically reduce on-trip surprises and keep your gear looking—and performing—like new. Safe travels!
Where to Buy Quality Replacement Parts
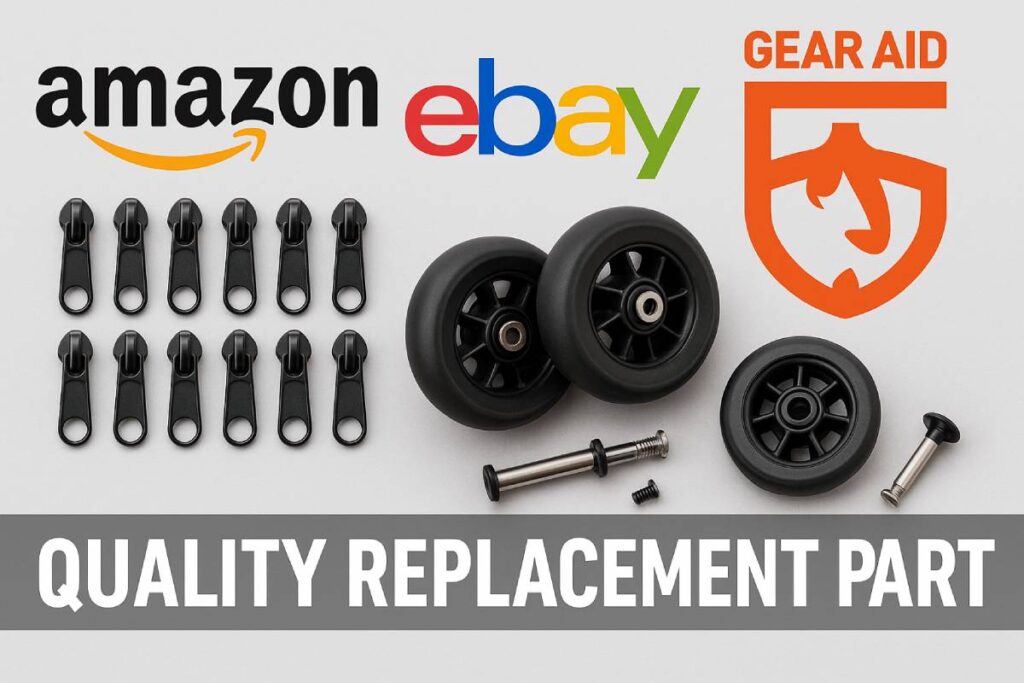
When it comes to keeping your suitcase in top shape, sourcing reliable parts is half the battle. Below is a quick comparison of my go-to vendors for genuine, budget-friendly luggage repair supplies.
| Vendor | Part Type | Price Range | Avg. Rating | Shipping Time |
|---|---|---|---|---|
| Amazon Basics | Zipper Sliders & Tapes | $7 – $12 | ★★★★☆ 4.3 | 1–2 days (Prime) |
| YKK Repair Kits | Zipper Sliders | $10 – $15 | ★★★★☆ 4.7 | 2–5 days |
| eBay | Wheels & Casters | $12 – $20 | ★★★★☆ 4.2 | 3–7 days |
| TrolleyWheelShop.com | Wheels & Casters | $15 – $25 | ★★★★★ 4.8 | 2–4 days |
| 3M | Fabric Patches & Adhesives | $5 – $8 | ★★★★☆ 4.5 | 1–3 days |
| Gear Aid | Fabric Patches & Adhesives | $8 – $12 | ★★★★☆ 4.6 | 2–5 days |
Table: Compare vendors for replacement parts—price, ratings, and shipping.
Affiliate Resources
- Amazon Basics Zipper Repair Kit
Complete set of sliders, stops, and fabric tape for under $12—perfect for quick home fixes. - YKK Zipper Slider Replacement Pack
Premium-quality sliders in a variety of sizes; trusted by luggage manufacturers worldwide. - Universal Spinner Wheel Kit on eBay
Budget-friendly wheels and axles that fit most major brands—an easy swap in 20 minutes. - Silver Spinner Wheels at TrolleyWheelShop.com
Heavy-duty, long-lasting casters designed for smooth rolling on any surface. - 3M Fabric Repair Tape
Clear, ultra-strong patches that blend seamlessly with your bag’s exterior. - Gear Aid Tenacious Tape
Available in multiple colors and patterns; ideal for both small punctures and larger rips.
By choosing components from these reputable sellers, you’ll ensure your DIY repairs look professional and hold up trip after trip—without emptying your wallet. Click through to get your parts, then roll on to your next adventure!
Conclusion
Taking charge of your luggage repairs at home is more than a handy skill—it’s a mindset that saves you time, money, and stress while promoting sustainable travel. Throughout this guide, we’ve shown you how simple lubrication tricks, part swaps, and fabric patches can revive jammed zippers, wobbling wheels, broken handles, stubborn locks, and torn material in as little as 5–25 minutes per fix. With an essential toolkit under $60, you’ll conquer common issues without relying on expensive professional shops, often saving up to 75 % on repair costs and preventing roughly 2 kg of waste per discarded bag.
By following our safety precautions—working in a well-lit, ventilated area, wearing gloves and goggles, and securing adhesives away from children—you’ll keep every repair risk-free. Use the troubleshooting checklist for quick diagnoses, and refer to our seasonal tune-up tips to avoid surprises before spring or fall travels. Know when to DIY (minor tears, slider swaps) and when to call in experts (frame cracks, complex mechanisms) to protect warranties.
Embrace these DIY luggage repair techniques on your next adventure: you’ll travel lighter, greener, and more confidently, ready to roll smoothly from check-in to touchdown. Try these methods, share your results, and keep exploring without limits!
FAQs
Q: How often should I lubricate my suitcase zippers?
A: Aim for every 3–5 trips or at least once per season to keep sliders gliding smoothly.
Q: Can I use regular super glue on plastic suitcase shells?
A: For cracks, choose a flexible adhesive like Sugru or a carbon-fiber repair kit—normal super glue can become brittle.
Q: What’s the easiest way to quiet squeaky wheels?
A: Clean debris, then spray a dry-silicone lubricant into the caster—avoid oil-based sprays that attract dust.
Q: Is it safe to sew directly through suitcase fabric?
A: Yes—use heavy-duty nylon thread and reinforce with an iron-on patch on the inside to prevent fraying.
Q: When will DIY void my luggage warranty?
A: Any structural repairs—frame cracks, internal mechanism replacements—often void warranties. Check your manufacturer’s policy first.


