
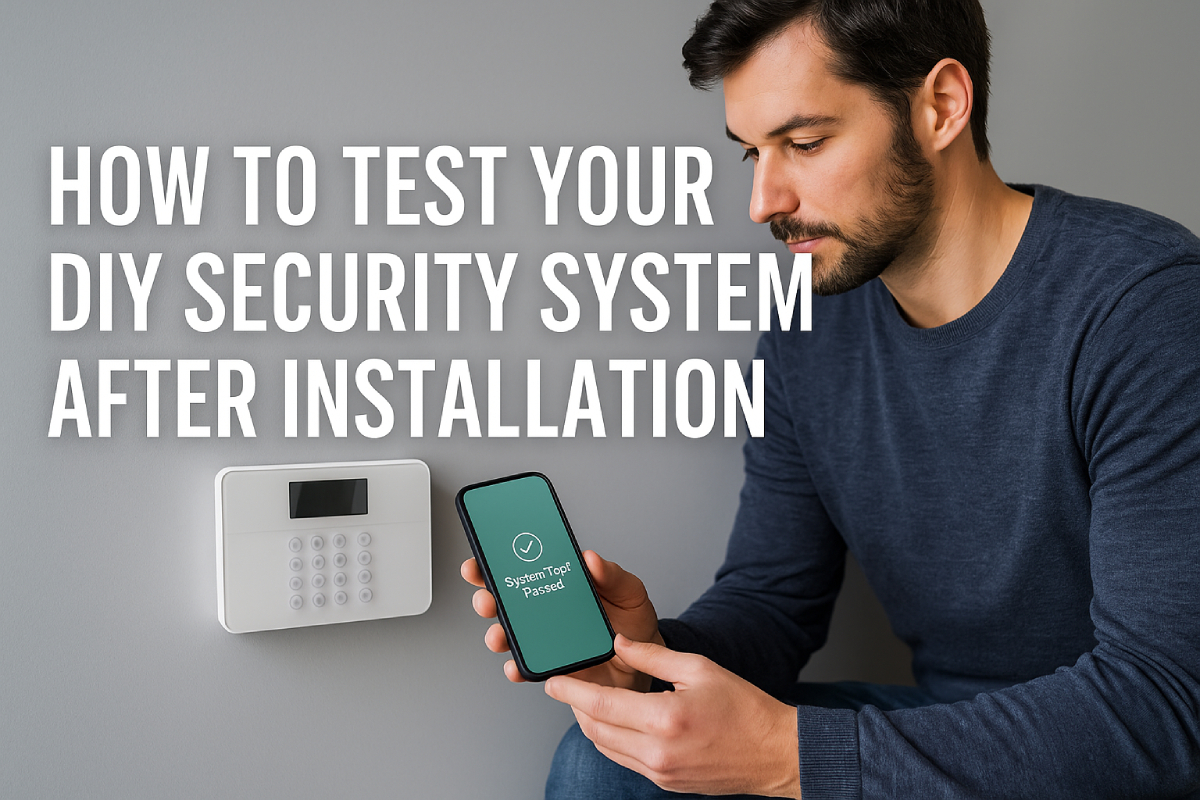
As a home security expert, I can’t stress enough that post-installation testing is the cornerstone of effectively testing your DIY security system, ensuring every sensor and camera responds precisely when it counts.
Without a thorough functional check—verifying contact, motion, and glass-break sensors, as well as sirens and mobile app alerts—you risk undetected vulnerabilities and false confidence in your setup.
By entering Test Mode, walking through each device sequentially, and confirming live-feed video streams and notification workflows, you’ll catch configuration hiccups before they become critical security gaps.
Following this structured testing workflow lays the foundation for reliable, long-term protection and peace of mind.
Preparing for the Test
Activating Test Mode prevents live emergency dispatches during diagnostic checks, ensuring you can simulate alarms and verify sensor communication without triggering authorities.

Equipping yourself with a precise toolkit—including smartphone access to your monitoring app, a reliable flashlight or headlamp, a sturdy ladder, and device manuals—streamlines each step, letting you efficiently walk through door, motion, glass-break sensors, and camera checks.
Before diving into detailed diagnostics, start by activating Test Mode on your system to avoid live dispatches, then gather the right tools to streamline your walkthrough.
Activate Test Mode
- Purpose: Suppress emergency alerts sent to monitoring centers so you can safely trigger alarms without calling authorities.
- SimpliSafe: On the keypad, press Menu → Test Mode; follow the voice prompt to confirm Test Mode entry.
- Alarm.com: In the Alarm.com app, tap More → Monitoring Settings → System Test Mode, select desired duration, then tap Start Test Mode to engage it.
- ADT Self Setup: Via the ADT+ app or MyADT web portal, navigate to System Test, choose a test period, and enable Test Mode to pause dispatches for that interval.
Gather Necessary Tools
To verify every device efficiently, assemble a compact kit of essentials:

| Tool | Purpose |
|---|---|
| Smartphone or web portal access | Arm/disarm system remotely and view live logs during tests |
| Flashlight or headlamp | Illuminate low-light areas around sensors and wiring |
| Sturdy ladder | Reach ceiling-mounted or high-wall sensors and cameras safely |
| System manuals | Reference device-specific test procedures and error codes |
| Security alarm tool kit(multimeter, wire strippers, screwdrivers) | Troubleshoot wiring, measure signal, and adjust sensor alignment |
| Network/tool kit for cable prep | Prepare and test coax, Ethernet, and power cables when installing cameras |
Sensor Testing
A robust sensor-testing routine is essential to verify that each component of your DIY security system is communicating correctly, minimizing blind spots and false alarms.
A Walk Test lets you sequentially fault each door/window contact without triggering actual dispatches, while motion detectors must be walk-tested across their 6.5–70 ft field to confirm LED or panel activation.
Glass-break sensors can be validated by pressing their built-in test button and performing a sharp hand clap or by playing a calibrated glass-break audio clip within a 20-foot radius.
Regular testing not only ensures reliable detection but also helps reduce the 94–98% of false alarms that overload emergency services each year.
Sensor Statistics at a Glance
| Sensor Type | Typical Detection Range | Typical Battery Life |
|---|---|---|
| Door/Window Sensors | Instant contact fault (<1 in) | 1–3 years |
| Motion Detectors | 6.5–70 ft | ~2 years |
| Glass-Break Sensors | Up to 20 ft | ~3 years |
Door and Window Sensors
Begin with Test Mode enabled so that tripping a contact only logs a fault without alerting authorities.
Open and close each door and window slowly to confirm your control panel registers the zone fault within a split second.

If any sensor fails to register, inspect magnet alignment, battery status, and mounting position, then recalibrate per the manufacturer’s instructions.
Motion Detectors
Place your system in Walk Test mode, stand still for a few seconds, then walk through the sensor’s coverage area at varying distances and heights.
Watch for the sensor’s LED flash or a corresponding panel alert, ensuring it accurately detects movement within its 6.5–70 ft field.
If detection is spotty, adjust the sensitivity settings or reposition away from heat sources, direct sunlight, and large metallic objects that can cause interference.
Glass-Break Sensors
Activate the sensor’s built-in test button to lower its threshold, then clap sharply near the window—your base station should announce “Glassbreak Sensor” if functioning correctly.
For a more realistic simulation, play a calibrated glass-break sound clip at full volume within the 20 ft detection zone and verify consistent triggering.
If triggers are inconsistent, check the sensor’s mounting height, ensure it’s aimed properly at the glass, and remove any obstructions between the sensor and the window surface.
Camera Testing
Verifying both daytime and nighttime performance is essential for a reliable DIY camera setup. Begin by confirming that each camera’s live feed streams smoothly at your chosen resolution—ranging from 1080p to 4K—without buffering or pixelation, and ensure your network and recording devices are all 4K-capable if you opt for ultra-HD.
Next, test low-light and infrared modes under true darkness or simulated conditions to validate that IR diodes or starlight sensors automatically engage, providing clear footage up to 100–200 ft—and in advanced models even beyond—while maintaining correct encoding and metadata integrity for evidentiary use.
Together, these checks guarantee your system delivers crisp, 24/7 surveillance coverage.
Live Video Feed & Resolution
Begin by opening each camera’s live feed in your app or NVR dashboard to confirm a stable, real-time stream with no lag or dropped frames.
Check that the resolution setting matches your intent—whether 2 MP (1080p), 4 MP (1440p), or 8 MP (4K)—and zoom in on fine details like license plates or text to verify clarity and sharpness.
If you experience stuttering or blurriness, ensure every link in your chain (camera, PoE/NVR, HDMI cable, monitor) supports your chosen resolution—true 4K requires all four components to be 4K-capable.
For rigorous compliance, perform slanted-edge tests using ISO 12233 charts in line with IEC 62676-5 to measure the actual horizontal and vertical line pairs for each camera.
| Resolution | Megapixels | Common Name |
|---|---|---|
| 2 MP | 2 million | 1080p |
| 4 MP | 4 million | 1440p |
| 5 MP | 5 million | 1920p |
| 8 MP | 8 million | 4K/2160p |
Night Vision & Recording
Switch to low-light conditions—either after sunset or by covering the lens—to ensure your camera seamlessly transitions into IR or starlight mode without manual intervention.
Trigger recording and examine clips to verify the frame rate remains consistent, with minimal noise or grain even in total darkness.
Measure effective IR range by placing objects at known distances; most home cameras reliably capture clear detail up to 100–200 ft, while premium starlight cameras can extend beyond this under ambient light.
Use your smartphone to detect IR diode illumination—misaligned or faulty LEDs often lead to dark zones in your footage.
Finally, review playback metadata for accurate timestamps and motion-event markers to guarantee that recordings serve as credible evidence when needed.
Alarm and Notification Verification
Testing your alarm and notification systems ensures both the audible deterrent and digital alerts work flawlessly when it matters most. Sirens should emit at least 85 dB—ideally around 105 dB—to be heard throughout your home and meet NFPA requirements of 15 dB above ambient noise.
Meanwhile, modern push notifications deliver roughly 90 % of alerts successfully, with fallback channels like email and SMS pushing reliability above 95 %, and professional monitoring centers boast near-perfect uptime (99.99 %) and average response times under 30 seconds.
By tripping sensors in Test Mode and verifying each notification path end-to-end, you confirm that intruders will trigger both a blaring alarm and timely alerts to you—and to responders—every time.
Siren Activation & Volume
Trip any sensor (door, motion, glass-break) while in Test Mode and use a sound level meter or smartphone app to confirm your siren meets these thresholds:
| Siren Output (dB) | Reference Sound | Industry Insight |
|---|---|---|
| 85 dB | Vacuum cleaner | Meets minimum industry standard for home security sirens |
| 95 dB | Food blender or lawn mower | Loud enough for medium-sized homes |
| 105 dB | Jackhammer | Optimal deterrence without exceeding comfort limits |
| 110–120 dB | Jet plane takeoff (outside) | Maximum “pain threshold” sirens for commercial or high-risk applications |
| NFPA Requirement | 15 dB above ambient or ≥ 75 dB | Ensures audibility even in noisy or sleeping areas |
Pro Tip: If your siren is under 85 dB, consider adding a secondary external siren or upgrading to a model rated at ≥ 105 dB for complete coverage.
App Notifications & Monitoring Signals
After triggering a siren, ensure your digital alerts follow:
| Channel | Avg. Delivery Rate | Avg. Response Time | Notes |
|---|---|---|---|
| Push Notification | ~90 % | < 5 seconds | Native app alerts via APNs/FCM; 90 % delivery rate, ~40 % click-through within 1 hr |
| Email Alert | ≥ 95 % | 10–30 seconds | Reliable fallback; bounce rates < 3 % when properly authenticated |
| SMS/Text Message | ~98 % | < 10 seconds | High open rates but may incur per-message fees |
| Monitoring Center Signal | 99.99 % uptime | 16–30 seconds average | Hosted on redundant Tier III/IV data centers; rapid dispatch protocols |
- Push & App Alerts: Trigger a sensor and watch for the push notification on your phone. A delivery rate near 90 % is normal; investigate low delivery (< 80 %) by checking token refresh and background permissions.
- Email & SMS Fallbacks: Confirm emails land in your inbox within 30 seconds and SMS deliver consistently. These channels bolster reliability above 95 % overall.
- Central Monitoring: Verify with your provider that Test Mode signals are received and logged. Top-tier centers average < 30 seconds to alert emergency contacts or dispatch services.
Key Insight: Multi-channel notifications paired with professional monitoring create a robust, redundant alert network—ensuring that neither technical glitches nor false alarms leave you unprotected.
By rigorously testing both your siren’s audibility and every alert pathway—from mobile pushes to monitored dispatch—you guarantee a comprehensive security net that deters intruders and mobilizes help in seconds.
Smart Home Integration Check
Integrating your DIY security system with smart home devices transforms passive sensors into an active defense network, triggering lights, locks, and thermostats based on system state to both deter intruders and streamline daily routines.
Leading platforms like Alexa-friendly SimpliSafe, Ring Alarm, and ADT highlight the value of verifying these connections, as 70 % of successful smart-home setups leverage at least one automated security routine to enhance safety and convenience.
Open-source hubs such as Home Assistant enable granular IF-THEN rule creation—“if outdoor motion is detected AND system is armed, THEN turn on floodlights for five minutes AND send a mobile alert”—but only reliable testing confirms these chains fire consistently.
As with any critical system, a structured test of both individual device integrations and end-to-end automation workflows is essential to catch misconfigurations before they become security gaps.
Automation increases both security and usability, but misfires can create blind spots or false confidence. In this section, you’ll learn how to verify device-level routines (6.1) and then test full automation scenes and triggers (6.2).
Integration with Devices
Begin by checking each smart-home device linked to your security system:
- Lights and Switches: Arm your system and confirm that designated smart bulbs or switches illuminate automatically. For ADT users, the ADT Mobile App shows smart-light status and confirms routines fire when the alarm is armed.
- Smart Locks: Lock and unlock doors via your security dashboard or voice assistant; verify that locking routines engage your alarm and that disarming routines release locks with a single command.
- Thermostats & Outlets: Test energy-saving automations—such as dropping HVAC settings when the system senses an empty house—to ensure temperature-based security scenes activate on arming and disarm when you return.
| Device Type | Routine Example | Test Method |
|---|---|---|
| Smart Lights | Turn on exterior lights when system is armed | Arm system → observe lights; check app logs for “Routine Executed” status |
| Smart Lock | Auto-lock doors upon arming | Arm via keypad/app → test manual unlocking; verify lock state in app |
| Smart Thermostat | Set eco-mode on arming; return to comfort on disarm | Arm at away mode → confirm temp drop; disarm → confirm temp reset |
Automation Workflows
Once individual devices respond correctly, validate multi-step automations that tie sensors, devices, and alerts together:
- Scene Execution: Create a “Goodnight” scene—arming the alarm, locking doors, dimming lights, and setting the thermostat—and trigger it from the app or voice command. Confirm each action fires within 5 seconds of activation.
- Conditional Triggers: Test an “Intrusion Response” workflow: trip an entry sensor after dark to ensure exterior floodlights switch on, cameras start recording, and a push notification is sent, all without manual input.
- Failure Handling: Simulate a device offline scenario (e.g., power-cycle a smart plug) to verify the system gracefully logs the error and continues other routines, maintaining overall protection.
Pro Tip: Document each automation in a checklist—trigger method, expected devices, and verification steps—to streamline periodic retests and rapid troubleshooting.
By rigorously testing both device-level integrations and your most critical automation workflows, you’ll ensure that your DIY security system operates cohesively, delivering seamless protection and smart-home convenience night after night.
Maintenance & Retesting
Regular maintenance and retesting are vital for ensuring that your DIY home security system remains reliable over time.
While monthly sensor and alarm checks catch day-to-day issues, comprehensive diagnostics—including system calibration, software updates, and power backup verification—should occur every six to twelve months per manufacturer guidance.
Keeping firmware current patches vulnerabilities and optimizes performance, with quarterly to annual updates recommended by device makers and security professionals.
Battery inspections prevent communication failures and false alarms, with replacement advised every two to three years based on environmental factors and load.
Scheduling Regular Tests
Experts recommend scheduling a full system retest every six to twelve months to verify sensor calibration, alarm functionality, and integration workflows.
Although quick monthly walk-throughs (door/window, motion, glass-break) help catch immediate faults—something ADT and SafeWise advise doing at least once a month—reserve in-depth checks (including firmware verification and battery health) for your semi-annual or annual reviews.
| Maintenance Task | Recommended Interval |
|---|---|
| System Calibration & Test | Every 6–12 months |
| Firmware Updates | Quarterly–Annual |
| Battery Replacement | Every 2–3 years |
Firmware Updates
Firmware serves as the “operating system” for your security hardware, delivering critical bug fixes and security patches.
Industry best practices call for checking and applying updates quarterly, with high-priority patches installed immediately upon release to mitigate emerging threats.
Enabling auto-update where available speeds this process, but manual reviews ensure no device—especially those from smaller or discontinued product lines—is overlooked.
Keep a firmware log documenting version numbers and installation dates to streamline troubleshooting and demonstrate compliance during audits.
Battery Inspections
Weak or failing batteries are a leading cause of communication failures and false alarms in DIY systems. For sealed lead-acid and lithium-ion cells, test voltage levels and inspect for corrosion or swelling biannually—and plan replacement every two to three years in standard home environments.
If you see low-battery warnings or experience frequent false alarms, swap in fresh batteries sooner—often recommended every three years to maintain optimal performance.
During each inspection, use a multimeter to confirm voltage meets manufacturer specifications, and replace any unit showing more than a 20 % drop from nominal capacity.
Troubleshooting Common Issues
Here’s a concise summary and detailed troubleshooting guide to help you resolve the most common DIY security system issues, backed by industry stats and best practices.
Troubleshooting your DIY security system starts with eliminating sensor connectivity failures—often caused by poor placement near AC vents, metal ductwork, or unshielded wiring—by repositioning sensors and using shielded cable.
Next, camera offline problems usually stem from weak Wi-Fi (below –70 dBm) or unstable power; aim for an RSSI above –55 dBm and verify solid power connections to maintain continuous streams.
Finally, false alarms plague up to 90 % of systems, often due to overly sensitive detectors; adjusting motion thresholds, enabling pet-friendly or chime modes, and recalibrating glass-break sensors can slash nuisance alerts by over 30 %.
Sensor Connectivity Failures
Improper placement, RF interference, and poor wiring are the top culprits when your door/window or motion sensors fail to report faults.
- Check Sensor Placement: Keep contact sensors away from HVAC vents, reflective glass, and large metal objects to avoid false disconnects.
- Minimize RF/EM Interference: Household appliances, steel beams, and ductwork can block sensor signals—relocate devices or install repeaters as needed.
- Verify Wiring Quality: For wired sensors, use shielded twisted-pair cable, ground shields on one end only, and keep cable lengths minimal to prevent signal degradation.
Common Interference Sources
| Source | Impact | Mitigation |
|---|---|---|
| HVAC vents & ductwork | Reflects RF, causing dropped signals | Move sensors ≥ 1 ft from vents; reroute ducts |
| Steel framing | Absorbs/blocks wireless transmissions | Install repeaters or reposition devices |
| Unshielded cabling | Picks up EMI from motors, wiring runs | Switch to shielded cable; shorten runs |
Camera Offline Problems
Ensuring consistent video streams requires both strong network connectivity and reliable power.
- Check Wi-Fi Signal Strength: Aim for RSSI > –55 dBm; anything below –70 dBm risks frequent dropouts and buffering.
- Confirm Power Supply: Verify that each camera’s adapter or PoE injector provides stable voltage (± 5 %) and inspect connectors for corrosion or loose contacts.
- Review Network Settings: Ensure cameras join the correct SSID and band (2.4 GHz vs. 5 GHz) and aren’t isolated on a guest or IoT VLAN without proper routing.
Recommended Wi-Fi RSSI Thresholds
| RSSI (dBm) | Performance |
|---|---|
| > –55 dBm | Optimal streaming (no lag) |
| –55 to –70 dBm | Acceptable, occasional lag |
| < –70 dBm | Unstable, frequent dropouts |
False Alarms & Chime Mode
High sensitivity and miscalibrated thresholds can trigger unwanted alarms, eroding confidence in your system.
- Adjust Motion Sensitivity: Lower PIR sensitivity or enable pet-friendly modes to reduce triggers from pets or minor movements.
- Use Chime/Walk-Test Modes: Activate chime for door/window sensors or walk-test modes for motion detectors to audit coverage without full alarm activation.
- Recalibrate Glass-Break & Other Sensors: Press the test button, perform claps or calibrated audio tests, and set thresholds so only genuine glass-break sounds trigger the alarm.
False Alarm Statistics
| Metric | Value |
|---|---|
| % of alarms that are false | > 90 % |
| Avg. false alarms per residential system | 0.8 per year |
| Owners experiencing ≥ 1 false alarm/yr | 62 % |
By following these targeted checks—optimizing placement, verifying connectivity, and fine-tuning sensitivity—you’ll minimize service interruptions, improve detection reliability, and maintain confidence in your DIY security setup.
Conclusion
In summary, thoroughly testing every component of your DIY security setup—from activating Test Mode and walking through each sensor to checking live camera feeds, siren output, and notification workflows—cements your system’s reliability under real-world conditions.
Coupling these diagnostic checks with regular maintenance—scheduling full-system retests every six to twelve months, applying critical firmware updates, and inspecting or replacing batteries—prevents unexpected failures and extends the lifespan of your equipment.
This proactive approach not only catches wear, drift, and vulnerabilities before they compromise protection but also delivers lasting peace of mind, ensuring your home remains safeguarded year after year.
FAQs
How often should I test my DIY security system?
Quick walk-throughs (door/window, motion, glass-break) are recommended monthly, while full-system diagnostics—including camera, siren, and app alerts—should occur every 6–12 months or after home modifications.
What is Test Mode and why should I use it?
Test Mode suspends live emergency dispatches so you can trigger sensors without calling authorities. It’s accessed via your keypad or app (e.g., SimpliSafe’s Menu → Test Mode) and logs “User Initiated Test” events for troubleshooting.
How do I ensure my sensors are aligned correctly?
Door/window contacts require ≤0.4 in (10 mm) gap between magnet and sensor; motion detectors need clear line-of-sight and minimal RF interference for reliable activation.
What resolution should my security cameras be set to?
Aim for at least 1080p (2 MP) for general use, 4 MP (1440p) for enhanced clarity, or 4K (8 MP) for license-plate detail—adjust based on coverage area and bandwidth.
How can I reduce false alarms?
Lower PIR sensitivity, enable pet-friendly modes, use chime/walk-test to audit coverage, and recalibrate glass-break thresholds to filter out non-threat noises.
Main Tips
- Schedule full-system tests every 6–12 months.
- Apply critical firmware patches quarterly, with manual vetting.
- Replace sensor and camera batteries every 2–3 years.
- Document test results in a checklist for quicker audits.
- Keep wiring tidy and shielded to reduce RF interference.


