
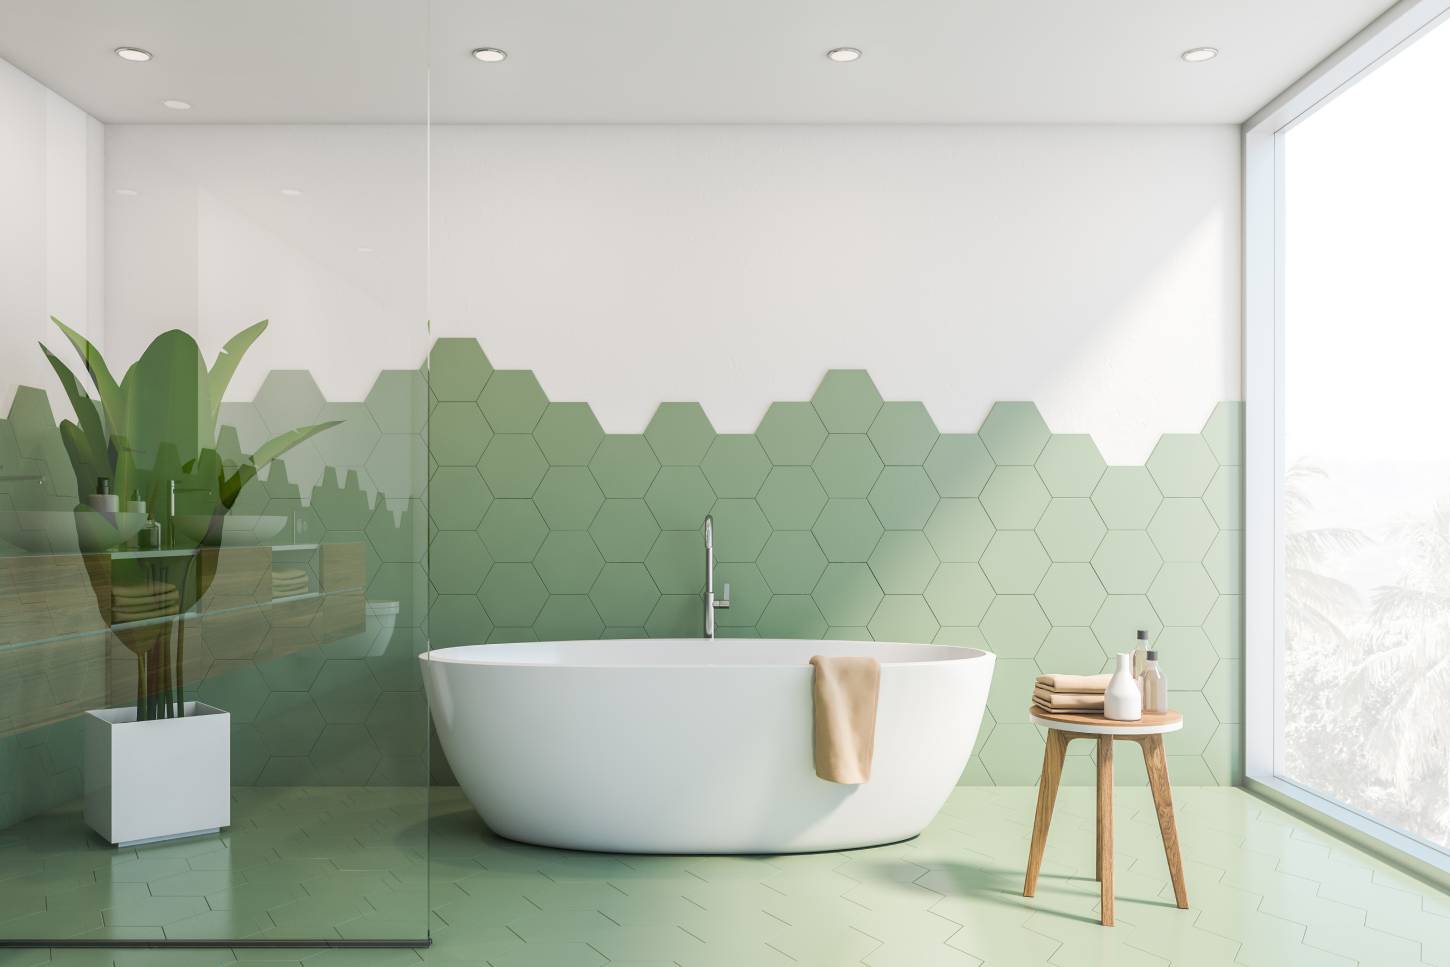
Thinking about giving your bathroom a fresh new look? A DIY bathroom remodel might just be the perfect project for you! Not only can you transform your space into a personal oasis, but doing it yourself brings a host of benefits that go beyond just aesthetics.
First off, let’s talk about the perks. One of the biggest advantages of a DIY bathroom remodel is the cost savings. By rolling up your sleeves and getting hands-on, you can significantly cut down on labor costs, freeing up more of your budget for high-quality materials and stylish fixtures. Plus, there’s nothing quite like the personal satisfaction of looking around your newly revamped bathroom and knowing you did it all yourself.
But it’s not just about saving money. Taking on a DIY project gives you complete creative control. You get to decide every little detail, from the tiles on the floor to the color of the walls, ensuring the final result is exactly what you envisioned.
So, why not take the plunge? With a bit of planning, some elbow grease, and a positive attitude, you can conquer your bathroom remodel and create a space you’ll love. Ready to get started? Let’s dive into this step-by-step guide and turn your bathroom dreams into reality!
Step 1: Planning Your Remodel
Hey there, DIY enthusiasts! Before diving into your bathroom remodel, the first and most crucial step is planning. A clear plan can save you time, money, and lots of stress down the road. Let’s break down how to get started on the right foot.

Importance of Having a Clear Plan
Having a well-thought-out plan is your roadmap to success. It helps you visualize the end result, keeps you organized, and ensures you don’t overlook any critical steps. A clear plan also allows you to anticipate potential challenges and come up with solutions before they become costly problems.
Tips for Measuring Your Space Accurately
Accurate measurements are the foundation of a successful remodel. Here’s how to do it:
- Start with a Sketch: Draw a rough outline of your bathroom, noting the location of doors, windows, fixtures, and electrical outlets.
- Measure Twice: Use a tape measure to record the dimensions of your bathroom. Double-check your measurements to avoid errors.
- Include Fixtures and Furniture: Measure the size of existing fixtures and any furniture you plan to keep. This helps in planning the layout and ensuring everything fits perfectly.
- Note Heights and Depths: Don’t forget to measure the height of walls and the depth of countertops and cabinets.
How to Create a Realistic Budget
Creating a budget is essential to keep your project on track financially. Here’s how to make it realistic:

- List All Expenses: Start by listing all potential expenses, including materials, tools, fixtures, and any professional help you might need.
- Research Costs: Look up the prices of items on your list. Don’t forget to factor in shipping costs or delivery fees.
- Include a Contingency: Set aside an extra 10-15% of your budget for unexpected expenses. Surprises can and will happen!
- Prioritize Spending: Decide which elements are non-negotiable and where you’re willing to compromise. This helps you stay within budget without sacrificing key features.
Choosing a Design Style That Suits Your Taste
Your bathroom should reflect your personal style. Here’s how to choose a design that suits you:
- Gather Inspiration: Browse through magazines, websites, and social media for ideas. Save images that resonate with you.
- Consider Your Home’s Aesthetic: Ensure your bathroom design complements the rest of your home’s decor.
- Think About Functionality: Choose a style that’s not only beautiful but also practical for your daily needs.
- Make it Personal: Incorporate elements that reflect your personality, whether it’s a bold color palette or unique fixtures.
Tools and Materials Checklist
Before you start, make sure you have all the necessary tools and materials. Here’s a handy checklist:
Tools:
- Tape measure
- Level
- Screwdrivers (flathead and Phillips)
- Power drill
- Tile cutter
- Plumber’s wrench
- Caulking gun
- Paintbrushes and rollers
- Safety gear (gloves, goggles, dust mask)
Materials:
- Tiles (floor and wall)
- Grout and adhesive
- Paint and primer
- New fixtures (sink, toilet, shower/tub)
- Plumbing supplies (pipes, fittings)
- Electrical supplies (outlets, light fixtures)
- Vanity or cabinets
- Hardware (handles, knobs)
- Sealant and caulk
Having a solid plan in place will set you up for a smooth and successful DIY bathroom remodel. So grab your notebook, tape measure, and let’s get planning!

Step 2: Demolition Day
Alright, it’s time to roll up those sleeves and get down to business—demolition day is here! This step can be both exciting and a bit daunting, but with the right approach, you’ll sail through it smoothly. Let’s break it down.
Safety First: Precautions and Protective Gear
Before you start swinging that sledgehammer, safety should be your top priority. Here’s what you need to keep in mind:
- Wear Protective Gear: Equip yourself with safety glasses, gloves, a dust mask, and sturdy work boots to protect against flying debris and sharp edges.
- Turn Off Utilities: Ensure that the water supply and electricity to the bathroom are turned off to avoid any accidents.
- Ventilation: Open windows and use fans to ventilate the area, especially if you’re dealing with old materials that may contain dust or mold.
- Use the Right Tools: Make sure you’re using the correct tools for each task to minimize the risk of injury.
How to Properly Remove Old Fixtures and Tiles
Removing old fixtures and tiles can be a bit tricky, but with these tips, you’ll handle it like a pro:
- Start with Fixtures: Begin by removing the sink, toilet, and shower/tub. Disconnect plumbing carefully, and keep a bucket handy to catch any residual water.
- Remove Cabinets and Vanities: Unscrew and detach any cabinets or vanities from the walls. Take care to support heavy items to prevent them from falling.
- Take Out Tiles: Use a hammer and chisel to break the first few tiles, then work your way across the wall or floor. A pry bar can help lift stubborn tiles.
- Handle Electrical Components: If you need to remove light fixtures or outlets, ensure the power is off and follow proper procedures to avoid electrical hazards.
Tips for Disposing of Debris Responsibly
Demolition can produce a lot of waste, and disposing of it responsibly is crucial:
- Rent a Dumpster: Consider renting a small dumpster for easy disposal of large amounts of debris.
- Separate Recyclables: Separate materials like metal, glass, and certain types of tiles, can often be recycled.
- Use Heavy-Duty Bags: For smaller debris, use heavy-duty construction bags that won’t tear under the weight.
- Check Local Regulations: Familiarize yourself with local regulations regarding the disposal of construction waste. Some areas have specific guidelines or facilities for debris disposal.
Dealing with Unexpected Issues
Demolition can sometimes reveal hidden problems. Here’s how to tackle them:
- Mold and Mildew: If you uncover mold, stop work and address it immediately. Small areas can be cleaned with a bleach solution, but extensive mold may require professional remediation.
- Structural Damage: Discovering damage to walls or floors can be alarming. Assess the extent and, if necessary, consult a professional to ensure repairs are done correctly.
- Plumbing Surprises: Old or faulty plumbing may need to be updated. If you’re not comfortable handling plumbing work, this might be a good time to call in a pro.
- Stay Flexible: Keep a positive attitude and be prepared to adjust your plan as needed. Unexpected issues can be frustrating, but they’re part of the process.
Demolition day is a significant milestone in your DIY bathroom remodel journey. By prioritizing safety, removing fixtures and tiles methodically, disposing of debris responsibly, and staying prepared for surprises, you’ll pave the way for a successful renovation. Ready to move on to the next step? Let’s keep this momentum going!
Step 3: Plumbing and Electrical Work
Alright, DIY warriors, you’ve conquered the planning and demolition stages—now it’s time to tackle the plumbing and electrical work. This step is critical for the functionality of your new bathroom, so let’s dive in with some practical advice.
When to Call in a Professional vs. DIY Tasks
Knowing your limits is key to a successful remodel. Here’s a quick guide on when to DIY and when to dial a pro:
1. Call a Professional When:
- You need to move major plumbing lines.
- Electrical wiring requires extensive work or rewiring.
- Local codes require professional installation for plumbing or electrical systems.
- There are complex issues like gas lines or structural changes.
2. DIY-Friendly Tasks:
- Installing new fixtures like faucets, showerheads, and toilets.
- Replacing or adding electrical outlets and switches (if you have basic electrical knowledge).
- Running new water supply lines if they’re straightforward and accessible.
Basic Plumbing Changes: Installing New Pipes and Fixtures
Let’s get your plumbing in tip-top shape. Here’s how to make some basic changes:
1. Installing New Pipes:
- Turn Off Water Supply: Always start by shutting off the water supply to avoid any flooding.
- Measure and Cut Pipes: Use a pipe cutter for precise cuts. Ensure the pipes are the right length before installing them.
- Connect Pipes: Use proper fittings and soldering techniques for copper pipes, or push-fit connectors for PEX and PVC pipes.
- Test for Leaks: Once installed, turn the water back on and check for any leaks. Tighten fittings as needed.
2. Installing New Fixtures:
- Faucets and Showerheads: Follow the manufacturer’s instructions for installation. Typically, this involves screwing the new fixture into place and sealing it with plumber’s tape.
- Toilets: Position the toilet over the flange, secure it with bolts, and connect the water supply. Don’t forget to check for leaks around the base.
Ensuring Electrical Safety: Installing New Lights and Outlets
Electrical work can be daunting, but with the right precautions, you can handle basic tasks. Here’s how:
1. Safety First:
- Turn Off Power: Always switch off the power at the breaker box before starting any electrical work.
- Use a Voltage Tester: Double-check that the power is off to avoid any nasty shocks.
2. Installing New Lights:
- Mounting: Attach the mounting bracket to the electrical box. Connect the wires (black to black, white to white, and ground to ground) using wire nuts.
- Securing the Fixture: Screw the light fixture to the bracket and install the bulbs. Turn the power back on and test the light.
3. Adding Outlets:
- Wiring: Cut a hole in the wall and run new wires from an existing outlet. Connect the wires to the new outlet (black to brass, white to silver, and ground to green).
- Mounting: Secure the outlet in the electrical box, attach the cover plate, and restore power to test your work.
Tips for Working with Existing Plumbing and Electrical Systems
Working with existing systems can be tricky, but these tips will help you navigate the process:
- Match Materials: Use compatible materials for connections (e.g., don’t mix copper and galvanized steel pipes without proper adapters).
- Label Wires: When dealing with multiple wires, label them to keep track of what goes where.
- Plan for Access: Ensure that new pipes and wires are accessible for future repairs or upgrades.
- Follow Codes: Adhere to local building codes and obtain necessary permits to ensure your work is safe and compliant.
By knowing when to call in the pros, handling basic plumbing and electrical tasks with care, and ensuring safety throughout, you’ll be well on your way to a successful bathroom remodel. Ready to move on to the next phase? Let’s keep this project rolling!
Step 4: Flooring and Tiling
You’re halfway through your DIY bathroom remodel, and now it’s time to add some flair with new flooring and tiles. This step is where your style really starts to shine, so let’s get into the details and help you achieve a professional look.
Choosing the Right Tiles for Your Bathroom
Selecting the perfect tiles can be overwhelming with so many options available. Here’s how to narrow it down:
- Consider Durability: Bathroom floors need to endure moisture and frequent use. Porcelain and ceramic tiles are excellent choices for their durability and resistance to water.
- Size and Scale: Large tiles can make a small bathroom feel more spacious, while smaller tiles can add intricate detail. Balance is key.
- Style and Color: Think about the overall aesthetic you want. Neutral tones can create a calm environment, while bold patterns add character. Choose something that complements your design style.
- Texture and Finish: Matte finishes are less slippery than glossy ones and are ideal for floors. For walls, you have more flexibility.
Step-by-Step Guide to Laying Floor Tiles
Laying tiles might seem intimidating, but with the right approach, you can do it like a pro. Let’s break it down:
1. Prepare the Surface:
- Clean and Level: Ensure the floor is clean, dry, and level. Use a leveling compound if necessary.
- Install Backer Board: Lay down a cement backer board to provide a stable base and prevent moisture issues.
2. Plan Your Layout:
- Dry Lay Tiles: Lay out the tiles without adhesive to visualize the pattern and make any necessary adjustments.
- Mark Guidelines: Use a chalk line to mark the center of the room and create straight lines to guide your tile placement.
3. Apply Adhesive:
- Mix Thin-Set Mortar: Follow the manufacturer’s instructions to mix the adhesive.
- Spread Adhesive: Using a notched trowel, spread the mortar in small sections to prevent it from drying out.
4.. Lay the Tiles:
- Set Tiles in Place: Press each tile firmly into the adhesive, using spacers to maintain even gaps.
- Cut Tiles as Needed: Use a tile cutter for straight cuts and a tile nipper for curves and corners.
5. Allow to Set:
- Drying Time: Let the tiles set for at least 24 hours before walking on them.
Grouting Tips for a Professional Finish
Grouting might seem like a small detail, but it’s crucial for durability and aesthetics. Here’s how to do it right:
1. Mix the Grout:
- Prepare Grout: Mix the grout according to the manufacturer’s instructions until it reaches a smooth, peanut-butter-like consistency.
2. Apply the Grout:
- Fill Joints: Use a rubber grout float to spread the grout over the tiles, pressing it into the gaps.
- Remove Excess: Hold the float at a 45-degree angle to scrape off excess grout from the surface.
3. Clean the Tiles:
- Wipe with a Sponge: After about 15-30 minutes, use a damp sponge to wipe off any grout residue from the tiles.
- Final Clean: Once the grout has dried, use a soft cloth to buff away any remaining haze.
Wall Tiling: Patterns and Techniques
Wall tiles can elevate your bathroom’s style. Here’s how to achieve a polished look:
1. Choose a Pattern:
- Subway Tiles: Classic and versatile, these can be laid in a traditional or herringbone pattern.
- Mosaic Tiles: Great for adding intricate detail and creating focal points.
- Vertical or Horizontal Lines: Vertical lines can make the room feel taller, while horizontal lines can make it feel wider.
2. Install Wall Tiles:
- Start with a Level Line: Use a level to draw a straight line at the base of your tiling area.
- Apply Adhesive: Spread tile adhesive on the wall using a notched trowel.
- Place Tiles: Press tiles into the adhesive, using spacers for even gaps. Work from the bottom up.
- Cut and Fit: Use a tile cutter for any necessary adjustments around edges and fixtures.
3. Grout and Clean:
- Apply Grout: Similar to floor tiles, use a grout float to fill the gaps.
- Clean and Buff: Wipe off excess grout and buff the tiles to a shine.
By choosing the right tiles, following a step-by-step approach to laying floor tiles, mastering grouting, and exploring various wall tiling techniques, you’ll add both beauty and functionality to your bathroom. Keep up the great work, and let’s get ready for the next exciting step in your remodel!
Step 5: Installing Fixtures and Features
You’ve made it to the exciting part—installing the fixtures and features that will bring your newly remodeled bathroom to life! Let’s walk through the steps for installing a bathtub or shower, sink, and vanity, fitting new toilets, and adding storage solutions. With a bit of patience and a can-do attitude, you’ll have your bathroom looking fabulous in no time.
How to Install a New Bathtub or Shower
Installing a new bathtub or shower can transform your bathroom into a luxurious retreat. Here’s how to do it:
1. Choose Your Bathtub or Shower:
- Bathtub: Measure your space and choose a tub that fits your bathroom layout. Options include alcove, freestanding, and corner tubs.
- Shower: Decide between a prefabricated shower stall or a custom-tiled shower. Take into account the space and your design preferences.
2. Prepare the Area:
- Remove Old Fixtures: Carefully remove the old bathtub or shower. Disconnect plumbing and ensure the area is clean and dry.
- Check for Level: Ensure the floor is level. Use shims if necessary to create a stable base.
3. Install Plumbing:
- Install Drain Assembly: Attach the drain assembly to the tub or shower base according to the manufacturer’s instructions.
- Connect Water Lines: Use flexible hoses to connect the water supply lines to the new fixture.
4. Set in Place:
- Position the Bathtub or Shower: Carefully place the tub or shower base in the designated area. Check for level and make adjustments as needed.
- Secure the Fixture: Use the provided brackets or screws to secure the tub or shower base to the wall studs.
5. Seal and Finish:
- Seal Joints: Apply a bead of silicone caulk around the edges to prevent water leakage.
- Finish Surround: If installing a tiled shower, proceed with tiling the walls. For a prefabricated unit, attach the wall panels.
DIY Sink and Vanity Installation
A new sink and vanity can elevate both the style and functionality of your bathroom. Follow these steps for a smooth installation:
1. Remove the Old Vanity:
- Disconnect Plumbing: Turn off the water supply and disconnect the plumbing. Remove the old sink and vanity.
- Prepare the Area: Patch any holes and clean the space thoroughly.
2. Assemble and Position the New Vanity:
- Assemble Vanity: Follow the manufacturer’s instructions to assemble the vanity unit.
- Position: Place the vanity in the desired location and ensure it’s level. Use shims if necessary.
3. Install the Sink:
- Attach Sink to Vanity: Secure the sink to the vanity using the provided clips or adhesive.
- Connect Plumbing: Reconnect the water supply lines and drain pipe to the new sink. Check for leaks and tighten connections as needed.
4. Secure Vanity:
- Attach to Wall: Use screws to secure the vanity to the wall studs. Ensure it’s firmly in place.
Tips for Fitting New Toilets
Installing a new toilet might sound like a daunting task, but with these tips, you’ll have it done in no time:
1. Choose Your Toilet:
- Size and Style: Measure your space and select a toilet that fits your bathroom. Options include one-piece or two-piece toilets, and various styles to match your decor.
2. Remove the Old Toilet:
- Turn Off Water Supply: Shut off the water supply and flush the toilet to empty the tank and bowl.
- Disconnect and Remove: Disconnect the water line and unscrew the bolts at the base. Lift the old toilet off the flange.
3. Prepare the Area:
- Clean the Flange: Scrape off any old wax ring residue from the flange.
- Install New Wax Ring: Place a new wax ring on the flange.
4. Install the New Toilet:
- Set in Place: Carefully lower the new toilet onto the flange, ensuring the bolts go through the holes in the base. Press down firmly to seat the wax ring.
- Secure and Connect: Tighten the nuts on the bolts to secure the toilet. Reconnect the water supply line and turn on the water. Check for leaks.
Adding Storage Solutions Like Shelves and Cabinets
Smart storage solutions can make a big difference in the functionality of your bathroom. Here’s how to add shelves and cabinets:
1. Plan Your Storage:
- Assess Needs: Determine what items you need to store and where.
- Select Storage Options: Choose from wall-mounted shelves, cabinets, or a combination of both.
2. Install Shelves:
- Mark Placement: Use a level to mark where the shelves will go. Ensure they’re evenly spaced.
- Secure Brackets: Attach the brackets to the wall studs using screws.
- Mount Shelves: Place the shelves on the brackets and secure them in place.
3. Install Cabinets:
- Position Cabinets: Hold the cabinet in place and mark the mounting points.
- Attach to Wall: Use screws to secure the cabinet to the wall studs. Double-check for level.
By following these steps to install a new bathtub or shower, sink and vanity, fitting a new toilet, and adding practical storage solutions, you’ll complete your bathroom remodel with style and efficiency. Keep up the great work, and soon you’ll be enjoying your beautiful, newly renovated bathroom!
Step 6: Painting and Finishing Touches
Congratulations! You’re in the home stretch of your DIY bathroom remodel. Now it’s time to add those final touches that will bring your space together. Let’s dive into choosing the best paint, mastering painting techniques, and accessorizing with decor and greenery to create a fresh and inviting bathroom.
Best Types of Paint for a Bathroom Environment
Bathrooms are unique environments that require special consideration when it comes to paint. Here’s what you need to know:
1. Moisture Resistance:
- Choose Semi-Gloss or Satin Finish: These finishes are ideal for bathrooms because they’re moisture-resistant and easy to clean. They also add a slight sheen that can brighten up the space.
- Mold and Mildew Resistant Paint: Look for paints specifically formulated for bathrooms, which often contain mildew-resistant properties to keep your walls looking fresh and clean.
2. Color Selection:
- Light and Bright: Light colors can make a small bathroom feel larger and more open. Whites, pastels, and light grays are popular choices.
- Bold Accents: If you’re feeling adventurous, consider an accent wall in a bold color to add personality and depth.
Painting Tips to Avoid Streaks and Drips
A flawless paint job can make all the difference. Follow these tips to achieve a professional look:
1. Preparation:
- Clean and Sand: Ensure the walls are clean and smooth. Sand any rough spots and wipe down the walls to remove dust and debris.
- Use Painter’s Tape: Apply painter’s tape along edges and trim to achieve crisp lines and protect surfaces.
2. Priming:
- Apply Primer: A good primer is essential for creating a smooth base, especially if you’re painting over dark colors or new drywall.
3. Painting Technique:
- Use Quality Brushes and Rollers: Invest in high-quality brushes and rollers to avoid streaks and achieve even coverage.
- Apply in Thin Coats: Multiple thin coats are better than one thick coat. Allow each coat to dry completely before applying the next.
- Maintain a Wet Edge: Work in small sections and maintain a wet edge to prevent lap marks.
4. Avoid Drips:
- Don’t Overload the Brush or Roller: Dip just the tip of the brush or roller into the paint to avoid excess that can cause drips.
- Watch for Drips: Keep an eye out for drips as you paint and smooth them out immediately.
Accessorizing: Choosing the Perfect Mirrors, Towels, and Decor
Accessories can transform your bathroom from functional to fabulous. Here’s how to choose and arrange them:
1. Mirrors:
- Size and Placement: Choose a mirror that complements the size of your vanity and the overall space. Place it at eye level for the best functionality.
- Style: Frameless mirrors offer a sleek, modern look, while framed mirrors can add a touch of elegance or rustic charm.
2. Towels:
- Color Coordination: Select towels that match or complement your bathroom’s color scheme. Consider using a mix of solid colors and subtle patterns.
- Display: Fold or roll towels neatly and place them in a decorative basket, on a shelf, or hang them on stylish hooks.
3. Decor:
- Functional Decor: Choose decor items that add both style and functionality, such as stylish soap dispensers, toothbrush holders, and storage baskets.
- Wall Art: Add a touch of personality with framed artwork or photographs. Ensure they’re moisture-resistant or protected by glass.
Adding Plants and Greenery for a Fresh Look
Plants can breathe life into your bathroom, adding a touch of nature and freshness. Here’s how to incorporate greenery:
1. Choose the Right Plants:
- Low-Light Tolerant: Bathrooms often have limited natural light, so choose plants like pothos, snake plants, or ferns that thrive in low-light conditions.
- Humidity Lovers: Bathrooms are humid environments, making them perfect for plants like peace lilies, spider plants, and bamboo.
2. Placement:
- Shelves and Countertops: Place small potted plants on shelves, countertops, or windowsills to add greenery without taking up too much space.
- Hanging Planters: Use hanging planters to save floor space and create a stunning visual effect.
3. Maintenance:
- Watering: Ensure your plants are watered appropriately. Most bathroom-friendly plants prefer to be kept moist but not waterlogged.
- Light: Rotate plants occasionally to ensure even growth, especially if they’re receiving light from a single source.
By choosing the right paint, mastering painting techniques, accessorizing with style, and adding a touch of greenery, you’ll complete your bathroom remodel with flair and finesse. Enjoy the fruits of your labor and the fresh new look of your beautifully renovated bathroom!
Step 7: Final Checks and Clean-Up
You’ve made it to the grand finale of your DIY bathroom remodel! It’s time to ensure everything is in perfect working order, give your space a thorough clean, and celebrate your hard work. Let’s dive into the final steps to make sure your bathroom is ready for use and looking fabulous.
Ensuring All Fixtures Are Properly Installed and Functional
Before you start using your newly remodeled bathroom, it’s crucial to double-check that all fixtures are correctly installed and fully functional. Here’s what to look for:
1. Bathtub and Shower:
- Check for Leaks: Run water through the bathtub and shower, checking for leaks around the drain and fixtures. Ensure the water flows smoothly and the showerhead is securely in place.
- Test Water Pressure: Make sure the water pressure is adequate and consistent.
2. Sink and Vanity:
- Inspect Plumbing Connections: Check all plumbing connections for leaks, including supply lines and drain pipes. Tighten connections if necessary.
- Test Faucets: Turn on the faucets and check for smooth operation and proper water flow.
3. Toilet:
- Check for Stability: Ensure the toilet is firmly attached to the floor and does not wobble.
- Flush Test: Flush the toilet several times to ensure it operates correctly and there are no leaks.
4. Lights and Outlets:
- Test Electrical Fixtures: Turn on all lights and test outlets to ensure they are working properly. Check that GFCI outlets are functioning by pressing the test and reset buttons.
Tips for a Thorough Clean-Up
A clean bathroom is a happy bathroom. Follow these tips for a thorough clean-up to make your space sparkle:
1. Remove Dust and Debris:
- Vacuum and Sweep: Begin by vacuuming and sweeping the entire area to remove dust and debris.
- Wipe Down Surfaces: Use a damp cloth to wipe down all surfaces, including countertops, shelves, and fixtures.
2. Clean Tiles and Grout:
- Scrub Tiles: Use a mild cleaner and a soft brush to scrub tiles. Pay special attention to grout lines to remove any residue.
- Polish Fixtures: Clean and polish all fixtures, including faucets, showerheads, and handles.
3. Mop Floors:
- Mop Thoroughly: Mop the floors with a suitable cleaner to remove any remaining dirt and grime. Allow the floor to dry completely.
4. Clean Mirrors and Glass:
- Streak-Free Shine: Use a glass cleaner and a lint-free cloth to clean mirrors and any glass surfaces for a streak-free shine.
Final Inspection: What to Look For Before Your Bathroom Is Ready for Use
Performing a final inspection ensures that your bathroom is not only beautiful but also safe and functional. Here’s what to check:
1. Safety First:
- Check Ventilation: Make sure the bathroom fan is operational and provides adequate ventilation to prevent moisture buildup.
- Secure Fixtures: Ensure all fixtures, including towel racks and shelves, are securely attached to the walls.
2. Functionality:
- Test Everything: Double-check that all plumbing, electrical, and mechanical systems are working correctly.
- Operational Doors and Drawers: Open and close all doors and drawers to ensure smooth operation and proper alignment.
3. Aesthetic Details:
- Final Touches: Look for any paint touch-ups or minor adjustments that need to be made. Ensure all caulking and sealing are neat and complete.
- Symmetry and Alignment: Check that all fixtures and decor items are aligned and symmetrical for a polished look.
Celebrating Your Accomplishment
After all your hard work, it’s time to celebrate! Here are some fun ways to enjoy your newly remodeled bathroom:
1. Relax and Unwind:
- Take a Soothing Bath: Fill your new bathtub with warm water, add some bath salts or bubbles, and enjoy a relaxing soak.
- Try Out Your New Shower: Experience the luxurious feel of your new shower with a refreshing rinse.
2. Show Off Your Work:
- Share with Friends and Family: Invite friends and family over to admire your handiwork. Share before and after photos to showcase your transformation.
- Post on Social Media: Share your remodeling journey on social media with photos and tips to inspire others.
3. Treat Yourself:
- Add Personal Touches: Celebrate by adding personal touches like scented candles, plush towels, or a new bathrobe.
- Enjoy a Spa Day: Treat yourself to a spa day at home with facemasks, lotions, and a calming playlist.
By ensuring all fixtures are properly installed, performing a thorough clean-up, conducting a final inspection, and celebrating your accomplishment, you’ll wrap up your DIY bathroom remodel on a high note. Enjoy your beautiful new space and the satisfaction of a job well done!
Conclusion
Congratulations on completing your DIY bathroom remodel! You’ve tackled each step with dedication and creativity, transforming your bathroom into a beautiful and functional space. Let’s recap the key steps you’ve accomplished:
- Planning and Preparation: You laid the groundwork with careful planning and gathered all necessary materials.
- Demolition: You bravely dismantled the old to make way for the new.
- Plumbing and Electrical: You ensured all systems were up to code and ready for the next steps.
- Flooring and Tiling: You chose the perfect tiles and installed them with precision.
- Installing Fixtures and Features: You put in new fixtures that add both style and function.
- Painting and Finishing Touches: You selected the best paint, accessorized with flair, and added greenery for a fresh look.
- Final Checks and Clean-Up: You performed thorough checks and a deep clean to ensure everything was perfect.
Now, it’s time to bask in the glory of your hard work. We’d love to see your transformation! Share your before-and-after photos with us and inspire others on their DIY journey.
Feel free to share your experiences and ask any questions in the comments below. Your insights could be incredibly valuable to fellow DIY enthusiasts.
Once again, congratulations on taking the DIY route and bringing your bathroom remodel vision to life. You’ve not only saved money but also gained invaluable skills and the satisfaction of creating something beautiful with your own hands. Enjoy your stunning new bathroom and the pride that comes with a job well done!


