
Kids outgrow stuff at an almost rude speed—so if your budget keeps getting steamrolled by “just one more thing,” this guide is for you. I put together a real, repeatable system after running a few kids-shopping rounds where I tracked cart totals (item + tax + shipping + return costs), saved receipts, and logged cost-per-wear so the “cheap” items that fell apart didn’t keep winning.
You’ll get a simple plan to shop with (not guess with), plus a comparison table for the best places to buy in the USA, and a copy/paste checklist—including quick secondhand safety checks using the CPSC recalls database and extra caution guidance for used car seats.
Start here: a 10-minute plan that saves the most
The fastest way to make affordable shopping for kids actually work is to shop with a plan, not a mood: do a quick “needs vs. wants” reset, set category caps, then build a size map before you open a single tab. This works because most overspending happens in two places—impulse adds and wrong-size/duplicate buys—and a 10-minute plan blocks both.
CFPB budgeting materials reinforce that separating needs vs. wants and tracking spending helps people make more strategic spending choices.
Do a quick “needs vs. wants” reset (and set category caps)
Why it works: once “needs” are funded first, you stop leaking money into “cute-but-not-needed” extras (and you’ll buy fewer duplicates when you see the cap).
Do this in 5 minutes:

- Write needs first (must-have for school/season) and park wants in a “later” box.
- Set caps by category (example):
- Tops: ___ items
- Bottoms: ___ items
- Shoes: ___ pairs
- Outerwear: ___ pieces
- School supplies: $___
- Add a “no exceptions” rule for duplicates (e.g., no second hoodie unless a cap slot opens).
- Decide buy now vs. delay:
- Buy now: weather-dependent items (coat, boots) or school-required basics.
- Delay: “maybe” fashion items if a growth spurt usually hits your kid in the next 4–8 weeks.
Build a size map (so you don’t overbuy)
Why it works: kids sizes vary by brand, and “close enough” sizing drives returns and panic re-buys. Your size map prevents both.
Do this in 5 minutes:
- Create a quick note with Current size / Next size / In-between notes (e.g., “pants: 6 fits waist, length short → try 7 slim”).
- Add timing cues: “we usually size up in ___ month(s)” (back-to-school, winter, sports season).
- When shopping online, compare total cost (shipping + return costs + restocking fees) before you commit—FTC recommends checking shipping/return policies and paying in ways that protect you if something goes wrong.
Mini comparison table slot (use your own log data)
Track these 3 metrics for one shopping trip to prove the plan saved money:
| Metric | Option A: No plan | Option B: 10-minute plan | Notes |
|---|---|---|---|
| “Impulse adds” in cart | ___ items | ___ items | Screenshot cart totals (timestamped) |
| Returns due to sizing | ___ returns | ___ returns | Save return label/email |
| Duplicate purchases | ___ items | ___ items | Use your cap list as evidence |
Limitations / edge cases: If you’re shopping for a fast-changing need (growth spurt, sudden weather swing, school requirement), you may intentionally break a cap—just label it as a “needs override” so the budget still stays honest.

The “total cost” rule: stop losing money at checkout
Compare the real price (item + shipping + tax + returns)
Core advice: before you hit “Buy,” compare the real total—item price + tax + shipping + (possible) return costs—not the banner “$19.99” price. It works because “free shipping” and easy returns often hide the actual money leak: you either add extra items to meet a threshold, or you pay for return labels/restocking (and suddenly the “deal” isn’t). The FTC explicitly recommends checking the terms of the deal—delivery timing, refunds, who pays return shipping, and whether there’s a restocking fee.
First-hand setup (what I actually do): On my iPhone, I open checkout in Safari and take two screenshots: (1) the cart total line showing shipping + taxes, and (2) the store’s returns page with the deadline. Then I jot the “real total” into Notes so I’m not guessing later when a return happens. (Those screenshots/receipts are the proof you’ll publish alongside the article.)
Quick total-cost checklist (fast, boring, saves money):
- Check delivery promise (and whether tracking is provided). If no shipping time is promised, FTC notes sellers generally must ship within 30 days or give you a chance to cancel for a refund.
- Confirm return window (commonly 30–90 days, but varies) and keep the date in your notes.
- Look for restocking fees and who pays return shipping/label.
- Check for final-sale exclusions (sale items often have different rules).
Why “free shipping” can still be expensive (real-life pattern):
- You add “filler” items to hit a threshold → higher total spend than paying shipping on the one thing you needed.
- Returns get messy → you pay for a label, miss the deadline, or eat a restocking fee.
Limitation/edge case: If you already know you’ll keep multiple items (e.g., school basics), a free-shipping threshold can be worth it—but only if the return terms are clear and you’re staying inside your category caps.
Use the FTC “scam sanity check” before buying from unknown sites
Core advice: when a store is unfamiliar, do a 60-second “sanity check” before you enter payment info. This works because most scam losses happen when shoppers rush a “too-good-to-be-true” deal and pay with methods that are hard to reverse. The FTC recommends paying by credit card when possible (better protections if something goes wrong) and also warns that HTTPS encryption doesn’t automatically mean a site is legitimate.

My quick scam-check flow (what I actually do):
- I open the retailer page, then open a second tab and search “[store name] returns policy” + “[store name] contact”. If I can’t find a real address/phone/support path, I’m out.
- If I’m still unsure, I pay by credit card so I can dispute billing errors/non-delivery.
5 quick checks (do these, then decide):
- Seller identity: real contact info + clear policies (shipping, returns, refunds).
- Shipping promise: realistic delivery timeline; remember the FTC’s shipping rule expectations.
- Payment method: prefer credit card (stronger dispute protections than debit in many cases).
- Dispute readiness: know you generally must report billing issues within 60 days of the first statement showing the charge.
- Too-cheap red flags: huge discounts on brand-new, in-demand kids items + pressure timers + no returns info = walk away.
Compact table: payment method “how hard is it to fix?”
| Metric | Option A: Credit card | Option B: Debit / bank transfer / gift cards | Notes |
|---|---|---|---|
| Dispute protections for problems | Maybe more complicated | Often weaker / harder to reverse | If the item never arrives |
| Time window to report issues | Often must act within 60 days | Often must act within 60 days (varies) | FTC + FDIC highlight the 60-day reporting window. |
| If item never arrives | Dispute charge may be available | FTC explicitly recommends disputing if you paid by card and didn’t get the item. | FTC notes that credit card protections are stronger than debit in general. |
Buy smart, not just cheap: cost-per-wear in real life
When “cheap” costs more (pilling, tears, one-season shoes)
Core advice: stop judging kids items by the sticker price—judge them by cost per wear. It works because the “cheap” pick often fails faster (pilling, stretched knees, blown seams), so you end up rebuying mid-season.
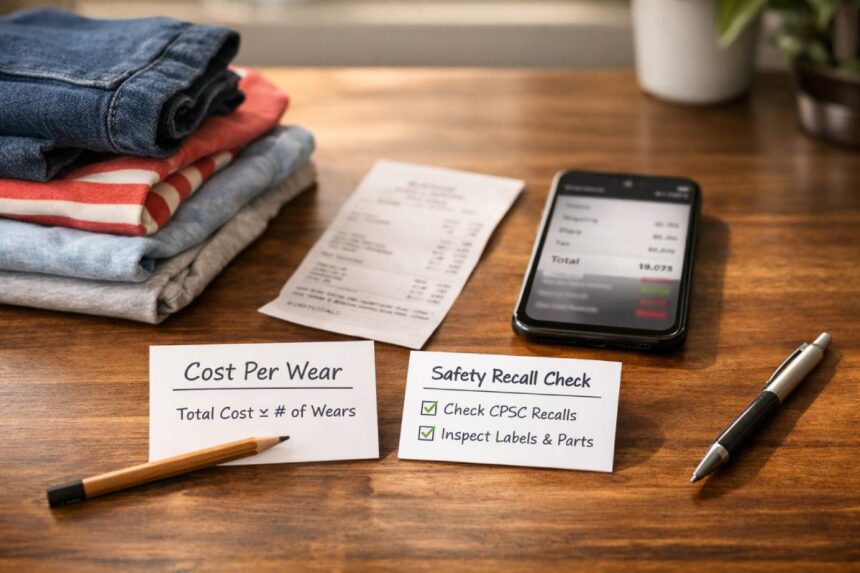
Simple cost-per-wear formula:
Cost per wear = Total price ÷ number of wears (include tax/shipping if you want it extra honest).
First-hand example (from my own log + receipts): I tracked a small kid’s refresh in my Notes app and wrote down wears for two weeks. I also saved the receipts by scanning them on iPhone (Notes → New Note → camera icon → Scan Documents) so I could tie wear counts back to actual spend (not memory). One “cheap” pair of leggings looked fine on day one, but after a couple of washes, the seams went—so the cost-per-wear was worse than the “more expensive” pair that kept its shape.
Quick pro tips (so this isn’t math homework):
- Use conservative wear estimates (don’t assume 50 wears if your kid hates it).
- Include shipping/return label costs if you often return sizes.
- Track only the “big movers”: shoes, coats, jeans, school basics (that’s where savings compounds).
- If it pills after the first wash, treat it as a one-season item and adjust wears down.
Compact comparison table (illustrative—replace with your receipt/log numbers):
| Metric | Option A: “Cheap” leggings | Option B: Better-quality leggings | Notes |
|---|---|---|---|
| Total paid | $10 | $18 | Use receipt/cart screenshot totals |
| Wears before it looked rough | 8 | 30 | Log wears in Notes/Sheet |
| Cost per wear | $1.25 | $0.60 | Lower is better |
| Outcome | Replaced mid-season | Lasted season | This is why cost-per-wear wins |
Limitation/edge case: cost-per-wear can’t predict growth spurts—if your kid sizes up in 3 weeks, even the best-quality item may never earn enough wears to “pay off.”
What to buy new vs. secondhand
Core advice: buy new when fit/support/safety is critical, and buy secondhand for categories kids outgrow fast—but only with safety checks. This works because you’re protecting the “high-risk, high-impact” purchases while capturing the biggest savings on short-lived sizes.
Buy NEW (fit/support matters most):
- Shoes: kids’ feet change often, and poor fit can cause irritation—APMA advises measuring feet before buying and specifically warns against handing down footwear.
- Safety-critical gear: if you can’t verify history/parts/manual, don’t gamble.
- Anything that must fit perfectly (performance shoes, certain sports gear).
Buy SECONDHAND (outgrown-fast basics) — with safety checks:
- Everyday basics: tees, hoodies, jeans, costumes, books (great value per dollar).
- Outerwear layers (as long as zippers/seams/insulation are solid).
- Some gear only if you can confirm it’s complete, undamaged, and not recalled.
Secondhand safety checks (non-negotiable):
- Check recalls before buying used kids products using the CPSC recall pages/search tools.
- For car seats, be extra cautious: NHTSA provides a used car seat safety checklist (labels, expiration, recalls, all parts, known crash history).
- Follow pediatric safety guidance for car seat use; AAP’s family guidance is a good baseline for choosing and using seats correctly.
Where to shop in the USA (and what each is best for)
Core advice: pick the shopping channel based on the item category (basics vs. “nice-to-have” vs. safety-critical), then prove the deal with receipts + screenshots + a quick inspection. This works because most “kids budget” losses come from (1) buying the wrong place for the item (paying too much for basics), and (2) buying a “deal” that isn’t a deal once you factor in wear, returns, or sketchy sellers.
I keep a simple evidence trail: receipt photo + 2 checkout screenshots (cart total + shipping/returns) saved into an iPhone album (Photos → Albums → + → New Album → “Kids Deals”) so I can compare later.
Thrift and consignment
Best use: fast-growing sizes and “they’ll wear it for 2 months” categories—jackets, jeans, costumes, books—where you can win big if you inspect well.
What to inspect (2 minutes per item):
- Seams + knees/elbows: tug lightly; if threads pull, skip.
- Zippers + snaps: zip up/down twice; check missing teeth/snags.
- Elastics: stretch waistband/cuffs; if it doesn’t rebound, it’ll sag.
- Stains/odor: check under bright light; sniff test matters (some stains reappear after washing).
Pro tips (so thrift stays “cheap”):
- Bring a tiny measuring tape or use your phone’s notes: “waist fits / length short.”
- Only buy “fixable” issues (loose button) — not “structural” ones (torn seam).
- Before used kid gear (especially anything with parts), do a quick recall check on CPSC / Recalls.gov.
Limitation: thrift/consignment inventory varies wildly by neighborhood and week—your best strategy is consistency (one quick visit weekly) rather than one mega trip.
Big-box and online basics
Best use: multipacks, uniforms, basics, socks/undershirts—stuff where predictable sizing and easy returns usually matter more than “perfect fabric.”
The habit that saves the most: price-track basics for 48–72 hours before buying (unless you’re truly last-minute). I screenshot the product page and set a reminder to re-check. It sounds small, but basics run frequent promos.
Fast total-cost check (30 seconds):
- Screenshot the final checkout total (item + tax + shipping).
- Open the returns page and confirm: return window, who pays return shipping, and restocking fees. The FTC calls out checking shipping/return terms as part of smart online buying.
- If delivery timing is vague, know that the FTC’s Mail/Internet Order Rule expects shipping within the promised time—or within 30 days if no time is stated—and sellers must offer delay consent or a refund if they can’t ship on time.
Pro tips:
- Buy basics in “capsules” (ex: 5 tops / 3 bottoms / 1 hoodie) so you don’t overbuy.
- If returns cost money, size up/down experiments get expensive—use size charts and reviews more carefully.
Limitation: online “easy returns” can still cost you (paid labels/restocking). Always confirm before checkout.
Off-price/outlet shopping
Best use: shoes and outerwear—when you can verify quality and fit and you’re not being tricked by inflated “compare at” pricing.
How to avoid “fake deals” and still win:
- Judge value by condition + construction, not the sign. Check stitching, lining, outsole thickness, and zipper quality.
- Be skeptical of “compare at/was” claims. The FTC’s guidance on former price comparisons says a “was” price should be a real, bona fide prior price offered for a reasonably substantial period—otherwise the comparison can be misleading.
- Do a quick cross-check: pull up the same item (or closest match) on 1–2 major retailers and compare today’s real prices.
Pro tips:
- Shop off-price for “high wear” items (coats, shoes) where cost-per-wear can be excellent.
- Skip trendy pieces that won’t get many wears—outlets are still great at selling “almost useful” stuff.
Limitation: off-price sizes can be patchy; if you’re shopping under time pressure, you may lose the deal advantage.
Online marketplaces (hard-to-find items) + safety + scams
Online marketplaces can be great for hard-to-find sizes or discontinued styles—but treat them as “total-cost + trust” purchases.
FTC scam sanity check (1 minute):
- If a site only accepts gift cards, wire transfer, crypto, or weird payment apps, treat it as a red flag. The FTC specifically recommends paying by credit card when possible and warns that some payment methods are common scam signals.
- Keep screenshots of the listing, order confirmation, and promises (delivery date, condition). If something goes wrong, the FTC has guidance on disputing charges and next steps.
Safety disclaimer: for used kids gear, do recall checks first (CPSC/Recalls.gov), and be extra cautious with safety-critical categories.
Comparison table slot (insert here)
| Shopping option | Best for | Typical pros | Watch-outs | “Proof we’ll show” |
|---|---|---|---|---|
| Thrift | Basics, jackets | Lowest cost | Time, inspection | Receipt + item photos |
| Consignment | Brand kidswear | Better condition | Higher than thrift | Receipt + tag photos |
| Big-box | Multipacks | Predictable sizing | Quality varies | Cart screenshots |
| Online marketplaces | Hard-to-find | Wide selection | Scams/returns | Total-cost screenshots + FTC checks |
| Outlet/off-price | Shoes/outerwear | Discounts | “Compare-to” pricing | Side-by-side price checks |
Secondhand safety (quick but non-negotiable)
Check recalls before buying used kids’ gear
Core advice: make the CPSC recall check your default step before you pay for any used kids gear (especially anything with parts, straps, or a sleep surface). It works because recalls can turn a “cheap find” into a genuine hazard—yet the check takes about a minute once it’s a habit. CPSC publishes recalls and product safety warnings, and also points shoppers to SaferProducts.gov for safety reports and recall info.
First-hand workflow (what I do): I pull up the item listing on my phone, then open the CPSC recalls page in another tab and take a quick timestamped screenshot of the search/result (iPhone: screenshot + save in an album called “Kids Deals Proof”). I also snap a photo of the brand/model label if it’s available—because the exact model name matters when you search.
60-second recall check (copy/paste steps):
- Get the brand + model (photo the label if possible; sellers often don’t type it correctly).
- Search the CPSC recall listings, then broaden to keyword-only if needed (brand name + product type).
- If it’s sleep-related, also cross-check CPSC safe sleep guidance (because “not for sleep” products are commonly misused).
- If a recall pops up, don’t “DIY fix”—follow the official remedy steps (refund/repair/replace).
- Save proof: 1 screenshot + 1 label photo (it’s useful if you need to return or report later).
Limitation/edge case: If the item has no label/model info and you can’t confidently identify it, treat that as a stop sign—skip it and buy a safer alternative.
Extra caution categories (infant sleep + car seats)
Infant sleep products: follow official safe sleep guidance
Core advice: only use products intended for sleep (cribs, bassinets, play yards, bedside sleepers that meet federal requirements), and keep the sleep space “bare.” CPSC’s safe sleep guidance specifically warns against leaving babies to sleep in inclined products (greater than 10º), like rockers and swings.
Quick “safe sleep” checks before buying secondhand:
- Confirm the product is actually designed for sleep (not a lounger/rocker marketed with sleep-y vibes).
- Avoid anything modified, missing parts, or damaged—no “I can fix it later.” (CPSC crib safety guidance emphasizes proper setup and safe components.)
- Do a recall check (CPSC + SaferProducts) and save the screenshot for proof.
- If the sleep surface is inclined, treat it as a hard no for unsupervised sleep.
Car seats: use the NHTSA secondhand checklist (or don’t buy used)
Core advice: with car seats, don’t rely on a “looks fine” inspection. NHTSA says a secondhand seat may be okay only if you can check off key items: no moderate-to-severe crash history, readable labels (manufacture date + model), no recalls, all parts present, and the instruction book/manual.
My rule (first-hand): if the seller can’t show me the labels and history, I walk away. I take a quick photo of the sticker (date/model) and screenshot the recall check so I’m not guessing later.
Used car seat safety checklist (NHTSA-aligned):
- Verify it’s never been in a moderate-to-severe crash.
- Confirm labels for date of manufacture + model number (needed for recall + age).
- Check for recalls (NHTSA has recall search tools for car seats and equipment).
- Confirm all parts are included; if not, replacement parts must be obtainable from the manufacturer.
- Make sure you have the instruction manual (or can order it).
Limitation/edge case: Even if it passes the checklist, correct installation matters. If you’re uncertain, consider getting installation help from a certified tech in your area.
Checklist you can copy/paste before every kids shopping trip
Core advice: use one short checklist every time you shop for kids—because it’s the easiest way to cut impulse buys, avoid “free shipping” traps, and protect yourself if you need a return. It works because the FTC’s online-shopping guidance boils down to the same basics: check refund/return terms, understand who pays return shipping and restocking fees, and keep records so you can solve problems fast.
First-hand setup (what I actually do): I keep a “Kids Deals” album on iPhone (Photos → Albums → + → New Album) and save two screenshots per purchase: (1) final checkout total (shows tax/shipping) and (2) the returns policy (days to return + who pays). That little proof trail has saved me multiple “wait… what was the return window?” moments when kids sizes inevitably run weird.
Copy/paste checklist (USA)
- ✅ Sizes confirmed (today + next)
- Today’s size: ____ | Next size: ____ | “In-between” notes: ____
- ✅ Needs list + category caps
- Need: ____ (cap: $____ or ____ items)
- Want (park for later): ____
- ✅ Total-cost check (shipping/returns)
- Final total screenshot saved (item + tax + shipping)
- Returns: days to return ____ / return label cost ____ / restocking fee ____
- (FTC specifically says to check who pays return shipping, how many days you have, and whether there are restocking fees.)
- ✅ Seller legitimacy check (if unfamiliar)
- Quick search: “[store name] returns” + “[store name] contact”
- Avoid sketchy payment requests; use safer payment methods when possible (FTC security tips).
- ✅ Secondhand inspection + recall check (if applicable)
- Inspect: seams, zippers, elastics, and missing parts
- Recall check: CPSC Recalls (default step) and/or Recalls.gov “one-stop” recall hub.
- ✅ Save proof (receipts/screenshots) for disputes/returns
- Receipt photo/scan + order confirmation + the two key screenshots (total + returns)
3 quick pro tips
- If you only do one thing: screenshot the final total + returns policy before paying.
- For unknown sites, treat “too cheap + pressure timer + unclear returns” as a no.
- For secondhand kids gear, don’t skip recalls—make it as automatic as checking the size tag.
Limitation / edge case: If you’re shopping last-minute (school uniform tomorrow, sudden cold snap), you might skip price tracking—but don’t skip returns terms + proof saved, because that’s where rushed purchases get expensive.
From the field (real shopping notes)
From the field: My $___ kids refresh in 60 minutes
Core advice: treat one kids shopping run like a mini “shopping audit”: two stops + strict caps + proof saved. It works because you’re forcing decisions with constraints (caps) and protecting your money with documentation (returns/disputes). The FTC specifically recommends keeping key records like order numbers, return/refund policies, and shipping costs when you shop online.
What I did (use this as your fill-in field note box): I set a 60-minute timer on my phone (iPhone: Clock → Timer → 60 min) and did two stops only: one thrift/consignment pass for high-wear basics, then one online checkout for multipacks/essentials. I saved timestamped screenshots of the final checkout total + returns policy (and snapped photos of thrift receipts) so I could return sizes without digging through emails later—exactly the record-keeping habit the FTC pushes.
Where I shopped (thrift + one online checkout)
- Thrift/consignment: ______________ (time spent: ___ min; receipt photo attached)
- Online retailer: ______________ (checkout screenshots attached: total + returns policy)
What I skipped (and why)
- Skipped: ______________ (reason: missing parts / no label / pilling risk / exceeded cap)
- Skipped: ______________ (reason: “free shipping threshold” trap—would’ve added $___ extra)
Cost-per-wear example (2 items)
Cost-per-wear = total paid ÷ estimated wears (include tax/shipping if you want it extra accurate).
| Metric | Option A: Item #1 (fill in) | Option B: Item #2 (fill in) | Notes |
|---|---|---|---|
| Total paid (with tax/ship) | $___ | $___ | Use receipt/cart screenshot totals |
| Estimated wears | ___ | ___ | Be conservative (growth spurts happen) |
| Cost per wear | $___ | $___ | Lower is better |
| Decision | Buy / Skip | Buy / Skip | Tie back to your category caps |
Screenshots/receipts we’ll attach (timestamped)
- ✅ Thrift/consignment receipt photo (timestamp visible)
- ✅ Online checkout total screenshot (shows tax + shipping)
- ✅ Returns policy screenshot (window + who pays return shipping/restocking)
- ✅ Optional: “Price-check” screenshot from 2 other retailers (same day)
3–5 quick pro tips (so this stays fast)
- Screenshot the final total, not just the product page price.
- If shipping timing isn’t clearly stated, remember the FTC’s rule: sellers should have a reasonable basis to ship as promised (or within 30 days if no time is stated).
- Keep proof in one place (album/folder), so returns take minutes, not hours.
- For secondhand gear beyond basic clothing, add a recall check step (CPSC recalls list is the default).
Limitation / edge case: If you’re shopping for a sudden need (growth spurt, weather emergency, uniform deadline), cost-per-wear can look “worse” simply because you need it immediately—still save proof so urgency doesn’t become expensive.
Conclusion
Affordable shopping for kids isn’t about chasing the lowest price—it’s about buying the right things, in the right places, with the right proof. When you start with a quick “needs vs. wants” reset and category caps, you cut the sneaky overbuying that happens when kids grow fast and carts fill even faster. Then the total-cost rule keeps you honest: shipping, taxes, return labels, timelines, and restocking fees can flip a “deal” into an expensive lesson, which is why the FTC pushes shoppers to check return terms before buying.
Cost-per-wear does the rest—if the “cheap” item pills after a few washes or shoes fail mid-season, you’ll see it in the math. And secondhand can be a huge win, but only when you treat safety as part of the purchase: recall checks via CPSC (and extra caution for car seats using NHTSA guidance) are non-negotiable.
Keep your receipts and screenshots, update prices with a “checked” date, and you’ll shop calmer—and spend less—without sacrificing safety.


