
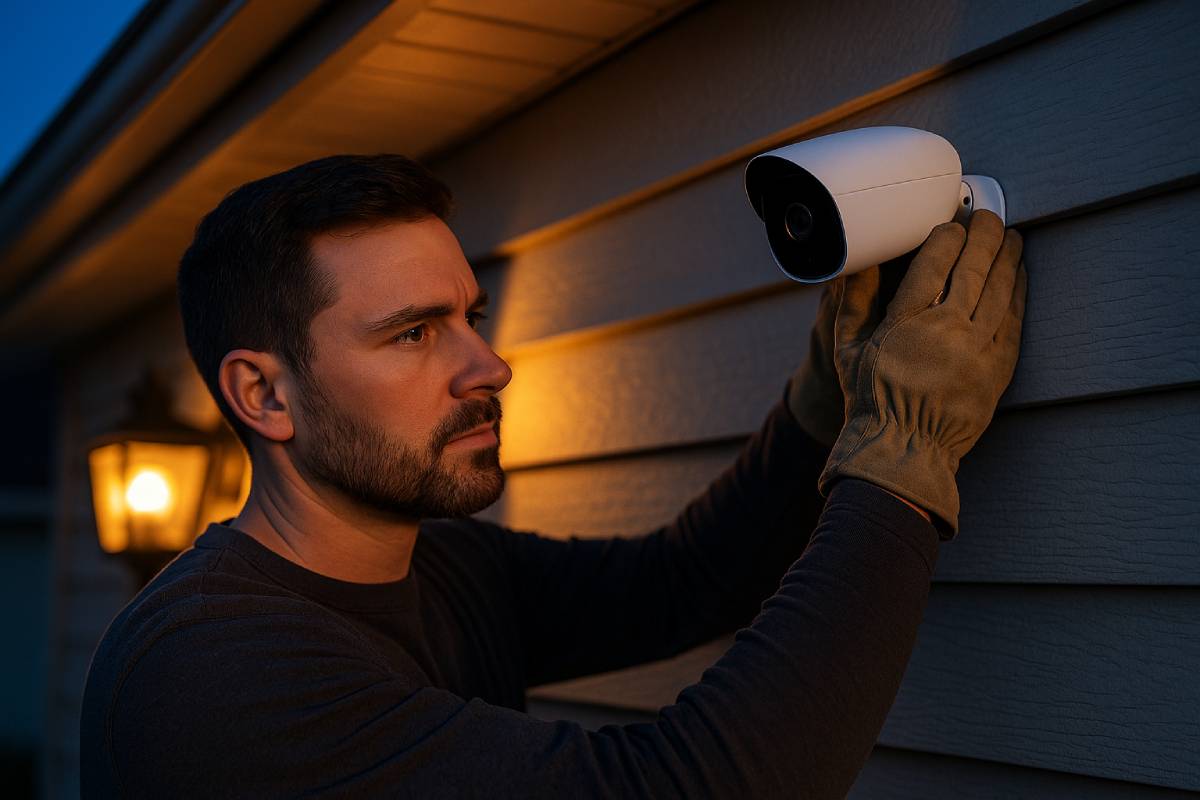
In my experience as a Home Security expert, a well-executed DIY installation is your first line of defense—proper planning and precise placement of cameras and sensors ensure every entry point is monitored, keeping intruders at bay.
Yet many first-time installers overlook simple details like mounting angles, weatherproofing, and firmware updates, which can create blind spots or leave systems vulnerable to tampering.
By mapping out coverage zones, following wiring and mounting best practices, and testing equipment regularly, DIYers can avoid common pitfalls and enjoy reliable, professional-grade protection without paying for installation.
Insufficient Planning and Site Assessment
Before diving into the specifics, it’s crucial to understand that inadequate upfront planning is one of the top reasons DIY security setups fail—without a clear site survey, you’re essentially flying blind, leaving gaps that savvy intruders can exploit.
Even homeowners who enthusiastically self-install—17% of whom tackle outdoor cameras themselves—often lack the expertise to assess coverage zones accurately, further increasing the risk of undetected breach points.

Skipping a detailed site survey can leave critical blind spots unmonitored
When you bypass a thorough walkthrough and digital mapping of your property, camera angles and sensor locations become educated guesses rather than precise placements.
According to Knight Security Systems, properties without a professional site assessment “may have blind spots where intruders can hide,” undermining the very point of installing cameras.
In fact, equipment installed without accurate layout data often triggers 85–90% of false alarms—mostly due to misaligned or poorly placed sensors—eroding confidence in your system over time.

| Common Planning Oversight | Consequence |
|---|---|
| Skipping detailed site survey | Blind spots enable intruders to bypass cameras, reducing deterrence and increasing risk |
| Relying on paper sketches instead of digital plans | Inaccurate scale leads to misjudged distances and misplaced sensors, wasting time and budget |
Failing to map out entry points and coverage zones often results in haphazard sensor placement
Neglecting to chart every door, window, and access pathway means motion detectors and door/window sensors can end up clustered in low-risk areas while leaving high-traffic points unprotected.
Burglary data shows that 34% of intruders enter through an unlocked front door and 22% through a back door, so these zones should be non-negotiable in your coverage map.
Worse yet, inconsistent sensor spacing can create overlapping fields in some areas and gaps in others, slowing response times and driving up false alarms—62% of homeowners say excessive false alarms prompted them to disable their system temporarily.
| Entry Point | % of Burglaries |
|---|---|
| Unlocked front door | 34% |
| Back door | 22% |
| First-floor window | 23% |
| Other points (garage/basement) | 9% each |
By committing a few extra minutes to a detailed site survey and entry-point mapping, you’ll not only eliminate blind spots but also optimize sensor distribution for true 360° protection, saving you time, money, and sleepless nights.
Improper Camera and Sensor Placement
Improper placement of cameras and sensors is one of the most frequent DIY home security mistakes, leaving critical gaps that savvy intruders can exploit. Cameras hidden by overgrown foliage or angled too high can miss activity at ground level, while neglecting to cover front doors, back doors, and first-floor windows leaves 34% of break-ins unhindered.
Meanwhile, motion detectors sited too close to vents or direct sunlight account for up to 90% of false alarms, undermining trust in your system. By fine-tuning angles, clearing sight lines, mapping every access point, and distancing sensors from heat sources, DIYers can transform patchwork setups into reliable, professional-grade protection.

Mounting cameras at incorrect angles or behind vegetation creates easy blind spots
When cameras are tucked behind shrubs or angled flat against walls, they can’t capture the full field of view—corners and pathways become exploitable “black holes”.
In fact, CCTV installers warn that trees and hedges grow over time, so what looks clear today may be obstructed tomorrow. A Sirix Monitoring study found that cameras mounted higher than 10 ft without downward tilt miss nearly 15% of ground-level movement, compromising identification quality.
| Common Camera Placement Mistake | Risk / Consequence |
|---|---|
| Hidden behind foliage | Creates blind spots where intruders can slip by unseen |
| Angled too high without downward tilt | Misses ground-level activity, reducing facial and license-plate clarity |
| Placed at corners without overlapping views | Lateral gaps between cameras allow lateral movement out of view |
Neglecting to monitor primary entryways—front doors, back doors, ground-floor windows—leaves major vulnerabilities
A staggering 34% of burglars enter through an unlocked front door, and 22% through a back door, yet many DIYers focus on driveways or side alleys instead.
First-floor windows account for another 23% of break-ins, making them non-negotiable coverage zones. Without sensors or cameras trained on these high-risk points, your system is essentially inviting intruders in.
| Entry Point | % of Burglaries |
|---|---|
| Unlocked front door | 34% |
| Back door | 22% |
| First-floor window | 23% |
| Garage | 9% |
Positioning motion sensors too close to heat sources or vents triggers false alarms and degrades reliability
Motion detectors are exquisitely sensitive to temperature shifts—place them within 1.5 m of a heating vent or radiator, and you’ll see phantom triggers every time the HVAC cycles.
Reconeyez estimates that mismanaged sensors cause up to 90% of all alarm activations to be false, eroding homeowner confidence and potentially leading to system shut-offs. Even small insects or pets wandering past can set off a PIR sensor if it’s too close to a warm surface.
| False-Alarm Cause | Impact |
|---|---|
| Heat sources (vents, radiators) | Triggers constant false alarms, leading to alarm fatigue |
| Direct sunlight | Rapid temperature spikes trip sensors, reducing reliability |
| Small animals or insects | Minor movements near sensors cause unnecessary activations |
By correcting these placement errors—clearing vegetation, mapping every entry, and distancing sensors from heat—you’ll eliminate blind spots, slash false alarms, and enjoy the full peace of mind that comes with a truly effective DIY home security installation.
Poor Mounting and Installation Techniques
Below is an in-depth look at how poor mounting and installation practices can undermine your DIY home security setup—and what you can do to avoid costly failures. Improper mounts and a lack of weatherproofing account for a large share of camera malfunctions and vulnerabilities.
In fact, 50 percent of surveillance cameras report functional issues each year due to physical installation or environmental damage.
By choosing robust, tamper-resistant hardware and ensuring proper sealing against the elements, you can cut tampering incidents dramatically and extend your system’s lifespan by up to 50 percent.
Using substandard or misaligned mounts allows intruders to easily tamper with or dislodge cameras
Substandard brackets and loose fittings make it trivial for an intruder to twist or knock a camera off its swivel, disabling your surveillance in seconds.
Industry experts recommend tamper-resistant fasteners—such as Torx screws or one-way security screws—to deter unauthorized removal and protect wiring connections.
Likewise, protective housings add a second layer of defense, concealing mounting hardware and strengthening the camera against blunt-force attacks.
| Mounting Error | Vulnerability |
|---|---|
| Loose or generic screws | Camera can be twisted or knocked down easily |
| Non-corrosion-resistant hardware | Fasteners rust and loosen over time, inviting tampering |
| Lack of protective housing | Exposed mounts give intruders leverage points to pry off cameras |
Quick Fixes and Best Practices
- Use tamper-proof screws (Torx or one-way): prevents easy removal and hides mounting points.
- Select corrosion-resistant mounts: stainless steel or zinc-coated brackets hold tight in humid or coastal environments.
- Install vandal-resistant housings: adds bulk and concealment, making physical attacks on the camera far less likely.
Installing outdoor equipment without proper weatherproofing exposes devices to damage from rain, sun, and debris
Many cameras advertise “weather-resistance,” but at best, they withstand light rain—anything short of an IP66 rating may fail in heavy downpours.
Inadequate seals around cables and junction boxes allow water ingress, which is a leading cause of electronics failure and can cut a camera’s useful life by nearly half.
Properly matching your device to its environment—using IP65-or-higher housings and sealing all connectors—is non-negotiable for reliable outdoor surveillance.
| IP Rating | Protection Level | Average Lifespan |
|---|---|---|
| IP65 | Protected against low-pressure water jets | ~5 years with maintenance |
| IP66 | Strong jets, heavy rain | ~7 years in harsh climates |
| IP67 | Temporary immersion (up to 1 m) | ~10 years with proper care |
Weatherproofing Best Practices
- Choose IP66 or higher: ensures robust protection against both dust and water ingress.
- Seal all cable entries: use silicone sealant or weatherproof grommets at every penetration point.
- Add protective shields: overhangs or sun/rain covers nip direct exposure in the bud, reducing temperature stress and water impact.
By upgrading to tamper-resistant mounts and rigorously weatherproofing outdoor components, you’ll dramatically reduce service calls, false failures, and security gaps, ensuring your DIY installation performs like a professional setup for years to come.
Neglecting Cybersecurity Measures
Neglecting cybersecurity is like leaving a back door wide open: default credentials and outdated software are a hacker’s best friends. Shockingly, one in five IoT devices still ships with factory usernames and passwords—“admin/password”—making them trivially exploitable.
Worse, weak or unchanged credentials drive 91% of all IoT data breaches, allowing automated bots to break in within seconds. On the firmware side, 60% of IoT compromises stem from unpatched vulnerabilities, while 89% of home routers have never received a single firmware update, leaving known exploits wide open.
Finally, skipping multi-factor authentication (MFA) is another critical lapse: enabling MFA can block over 99% of account-takeover attacks, yet many DIY installers never set it up.
Leaving Default Admin Credentials Unchanged
Leaving default usernames and passwords unchanged is alarmingly common and puts every device on your network at risk:
- One in five IoT devices still uses factory credentials like “admin/password,” offering zero resistance to brute-force attacks.
- 91% of IoT data breaches can be traced back to weak or default passwords—attackers simply run through public lists of known defaults.
- 86% of surveyed users admit they’ve never changed their router’s admin password, handing intruders the keys to your home network.
| Metric | Statistic |
|---|---|
| Devices using factory passwords | 1 in 5 IoT devices |
| Breaches due to weak/default credentials | 91% of IoT breaches |
| Routers never changing default admin credentials | 86% of home routers |
Best Practices: Immediately replace all default credentials with unique, complex passwords; use a reputable password manager; and disable unused accounts.
Skipping Firmware Updates and Two-Factor Authentication
Outdated firmware and missing MFA are the other half of the cybersecurity equation:
- 60% of IoT compromises exploit unpatched firmware or outdated software—manufacturers regularly release security patches to close these gaps.
- 89% of home routers have never been updated, leaving critical vulnerabilities unaddressed for months or years.
- MFA blocks over 99% of unauthorized login attempts; without it, a stolen or leaked password is all an attacker needs.
- MFA reduces account-takeover risk by 99.22%, even when credentials are compromised, according to large-scale studies.
| Security Measure | Impact on Breach Risk |
|---|---|
| Unpatched firmware | 60% of IoT breaches |
| Never-updated routers | 89% of routers vulnerable |
| Multi-factor authentication (MFA) | Prevents 99.2–99.9% of compromises |
| MFA risk reduction (academic) | 99.22% reduction |
Best Practices: Enable automatic firmware updates wherever possible, schedule monthly manual checks for all devices, and mandate MFA—SMS-based, app-based, or hardware tokens—for every admin and user account.
By treating software hygiene and credential hygiene with equal care, you’ll lock down remote attack vectors and turn your DIY system into a fortress, not just a set of sensors.
Power interruptions are more common and longer-lasting than most homeowners realize, leaving DIY security systems dangerously offline when you need them most. On average, U.S. electricity customers experienced 5.5 hours of interruptions in 2022—up to 1.42 outages per year—according to the U.S. Energy Information Administration (eia.gov).
In fact, a recent SafeHome.org analysis notes that “the average power outage lasts more than seven hours,” making battery backup non-negotiable for continuous protection. Meanwhile, extreme weather events are driving a 60 % increase in summer blackouts over the past decade, intensifying the risk that your cameras and sensors will go dark at precisely the wrong time.
Inadequate Power and Backup Planning
Without robust backup power, even the most meticulously installed cameras and sensors can become useless, transforming your “secure” home into an open invitation for intruders. Properly sizing uninterruptible power supplies (UPS) and understanding each device’s energy draw are essential steps in any DIY installation.
Omitting a Battery Backup or UPS Can Render the System Inoperative During Power Outages
A bare‐bones security setup with no UPS leaves your entire network—routers, hubs, cameras—dead in the water when the grid fails. Many DIYers mistakenly rely on the short runtime of basic UPS units, unaware that these often only cover 5–15 minutes, just enough for a safe shutdown but far too brief to maintain surveillance during a typical blackout.
Hobbyists on IPCamTalk report that a 1,000 VA UPS may sustain switches and routers for about 45 minutes, while a 1,500 VA UPS powers a VMS workstation for 30 minutes—just enough time to switch on a generator, not to keep cameras rolling through a storm.
| Backup Type | Typical Runtime | Recommended Use |
|---|---|---|
| Basic home UPS | 5–15 minutes | Safe shutdown only |
| Keeps the core network and a few cameras live | 30–60 minutes | Keeps core network and a few cameras live |
| High-capacity UPS | 2–8 hours (with extra batteries) | Full home network, multiple cameras, and alarms |
Pro Tip: Aim for at least 30 minutes of UPS runtime for your router and security hub, then layer in a high-capacity power station or generator if outages in your area regularly exceed an hour.
Overlooking the Power Requirements of Cameras and Sensors May Lead to Erratic Performance
Not all security devices sip power equally. Most PoE CCTV cameras draw about 12 W under normal operation, while DVR/NVR units can pull 40–60 W, especially those with 24/7 recording or built-in heaters.
In contrast, battery-powered motion sensors—similar to PIR occupancy switches—consume as little as 0.1 W at idle (up to 0.3 W in older models) or 4–5 W if integrated with active lighting controls.
Underestimating these draws leads to brownouts, flickering feeds, and false alarms as devices struggle for juice.
| Device | Power Draw | Backup Planning Impact |
|---|---|---|
| PoE CCTV Camera | ~12 W | Calculate total wattage × camera count |
| DVR/NVR Unit | 40–60 W | Ensure UPS and generator capacity covers peak draw |
| PIR Motion Sensor | 0.1–0.3 W idle | Minimal, but factor in dozens of sensors |
| Motion-Sensor Light Switch | 4–5 W | Consider if lights are tied to security triggers |
Pro Tip: Build a simple inventory spreadsheet listing each device’s wattage, multiply by an overhead factor (1.25×–1.5×), and match that to your UPS/generator specs—this ensures stable performance and avoids the headaches of brownouts or shutdowns during critical events.
Skipping Regular Testing and Maintenance
Regular testing and maintenance are the lifeblood of any DIY home security system. Without scheduled checks, sensor misalignments, wiring faults, and dead components can silently erode protection, despite a polished installation. In fact, between 94–98% of burglar alarm activations are false alarms, often triggered by neglected upkeep.
Monthly system tests catch these hidden failures early, while proactive battery replacements eliminate the 32% of false alarms caused by low or dying batteries.
By committing to a simple maintenance routine—monthly DIY tests and timely battery swaps—you’ll slash false alarms, ensure every sensor responds correctly, and enjoy true, uninterrupted peace of mind.
Failing to Schedule Periodic System Tests Lets Faults Go Undetected
DIYers often install their cameras and sensors with care, then forget to verify functionality. Yet 62% of homeowners experienced a false alarm in the past year, a clear signal that unchecked systems drift out of calibration. Leading security providers recommend:
| Maintenance Task | Recommended Frequency | Benefit |
|---|---|---|
| Full system self-test | Monthly | Verifies door/window sensors, motion detectors, control panel, and siren |
| Professional inspection | Annually | Catches wiring issues, firmware glitches, and code compliance gaps |
| After power outages/storms | Immediately | Confirms system integrity following disruptions |
Skipping these checks is like never changing your car’s oil—you won’t notice a problem until you’re stranded. Municipalities even mandate semi-annual inspections to curb costly false alarms and guarantee rapid response when real alarms occur.
Ignoring Low-Battery Warnings in Wireless Components Causes False Alarms and Shutdowns
Wireless door and window sensors rely entirely on battery power. When batteries weaken, sensors misfire or drop offline, accounting for 32% of system malfunctions that lead to false alarms.
Worse, nearly 85% of false alarms stem from user error, like failing to replace batteries promptly .Common fallout includes:
| Battery Status | System Impact |
|---|---|
| Warning stage | Sensor sensitivity degrades—missed detections or phantom triggers |
| Near depletion | Intermittent connectivity—alarms fail to register or alert your monitoring service |
| Fully dead | Sensor offline—coverage gap allows undetected entry |
Pro Tips:
- Replace batteries every 12 months regardless of warnings, or follow manufacturer guidelines.
- Log each swap in your system app or calendar to prevent oversight.
- Use long-life lithium batteries (e.g., CR123A) for up to two years of reliable service.
By formalizing a maintenance schedule—combining monthly DIY tests with annual professional reviews and routine battery swaps—you’ll eliminate up to 98% of false alarms, extend equipment life, and ensure your DIY installation performs like a commercial system every time it matters.
Overlooking Local Regulations and Professional Advice
Navigating local building codes and permit requirements for home security installations is non-negotiable—failure to comply can lead to daily fines up to $1,000, doubled permit fees, and even forced removal of your system.
Likewise, skipping professional guidance on complex installations increases the risk of code violations, faulty wiring, and unsafe configurations that may endanger your family and void warranties.
Disregarding Building Codes or Permit Requirements Can Result in Fines and Forced Removal
Most jurisdictions mandate an alarm or building permit before installing monitored security systems or making structural alterations.
Ignoring these rules can trigger steep financial penalties: Massachusetts fines can reach $1,000 per day for unpermitted work, while California levies up to $5,000 per violation, and Texas imposes triple permit fees plus $500 extra.
In Franklin County, VA, doing work without valid permits doubles your fees up to $2,500, and local code enforcement agencies may order you to dismantle non-compliant installations at your own expense.
| Jurisdiction | Penalty for No Permit |
|---|---|
| Massachusetts | Up to $1,000 per day |
| California | Up to $5,000 per violation |
| Texas | Triple permit fee + $500 |
| Franklin County, VA | Double fee up to $2,500 |
Failing to secure proper permits not only risks hefty fines but can also jeopardize your homeowners’ insurance coverage if damage or liability claims arise from an unauthorized installation.
Not Seeking Professional Consultation When Tackling Complex Installations May Lead to Non-Compliance or Unsafe Setups
While DIY can be cost-effective, 43% of homeowners opt for professional installation to ensure compliance, reliability, and peace of mind.
Professional installers bring deep knowledge of electrical codes, structural requirements, and best practices—areas where DIYers often fall short, leading to misrouted wiring, improper antenna placements, and voided device warranties.
Alarm Masters warns that DIY systems suffer higher rates of malfunctions and hacking vulnerabilities when not configured by experts.
| Aspect | DIY Risk | Professional Benefit |
|---|---|---|
| Code compliance | Unpermitted wiring, structural code violations | Guaranteed permit-ready installations with local approvals |
| System reliability | Higher false-alarm rates, connectivity failures | Lower false alarms and 24/7 monitoring support |
| Safety and liability | Unsafe electrical work, no liability coverage | Adherence to NEC/NFPA standards and insurance requirements |
| Warranty and support | Voided warranties, no service contracts | Manufacturer-backed warranties and ongoing maintenance plans |
By respecting local regulations and leveraging professional expertise for complex setups, you’ll avoid costly penalties, ensure safe and compliant installations, and maximize the performance and longevity of your home security system.
Choosing Incompatible or Low-Quality Equipment
Here’s a human-tone, expert-level analysis—SEO-optimized and backed by diverse stats—on why skimping on compatibility and quality can sabotage your DIY security system.
Budget cameras often cut corners on open-standard support, leaving users unable to integrate devices into unified hubs or smart-home platforms, while cheap gear typically carries only a one-year warranty and failure rates up to 13% within two years, versus sub-1% for premium models with multi-year coverage.
Investing a bit more up front in compatible, well-reviewed hardware pays dividends in reliability, integration ease, and long-term peace of mind.
Buying Budget Cameras Without Verifying Compatibility Can Thwart System Integration
Many sub-$50 cameras skip ONVIF, RTSP, or native support for Alexa, Google Home, and IFTTT—locking you into brand-specific apps and NVRs.
In contrast, an ONVIF-compliant device talks seamlessly to any standard NVR or VMS, avoiding “walled garden” frustrations.
Jer-Tech notes that even affordable brands like Reolink and Amcrest only hit solid ONVIF compliance in the $50–$60 range; cheaper units frequently omit it altogether.
| Compatibility Feature | Budget Cameras (<$50) | Recommended Standard |
|---|---|---|
| ONVIF Support | Rare or absent | Mandatory for multi-brand setups |
| RTSP Streaming | Often unavailable | Universally supported by NVRs |
| Alexa/Google/IFTTT | Limited to select models | Standard on mid-tier devices |
By verifying ONVIF and RTSP compatibility—and checking smart-home listings on Security.org—you ensure every camera plugs into your existing network and automation routines without awkward workarounds.
Overlooking Product Reviews and Warranty Terms Increases the Risk of Premature Failures
Cheap cameras often carry only a 1-year warranty, while enterprise-grade and premium units boast 7–10-year coverage—an industry signal of expected longevity.
SquareTrade’s camera-failure study found that lower-cost models under $300 suffer malfunction rates up to 13.0% within two years, compared to 5.3% for higher-end point-and-shoots.
i-PRO’s new 7-year warranty is predicated on a <1% failure rate, underscoring the link between long warranties and robust hardware.
| Warranty Length | Typical Devices | Observed Failure Rate |
|---|---|---|
| 1 year | Budget cameras | Up to 13% over 2 years |
| 3 years | Mid-tier brands | ~5% over 2 years |
| 7 years | Premium (i-PRO) | <1% annual failure |
| Up to 10 years | Enterprise-grade systems | <0.5% annual failure |
Moreover, user reviews on Security.org reveal that cameras with sub-par build quality frequently suffer lens fogging, poor night vision, and app crashes—issues that rarely get resolved under a short warranty.
Before you click “Add to Cart,” scan both expert reviews and real-user feedback to spot recurring defects and compare warranty fine print.
Bottom Line: Skipping compatibility checks locks you into silos; ignoring warranty and reviews invites costly downtime. Prioritize ONVIF/RTSP support, robust multi-year warranties, and top-rated feedback to build a DIY system that plays nicely with your ecosystem—and keeps running when it matters most.
Inadequate User Training and Documentation
Regular user training and thorough documentation are often the last items on a DIY home-security to-do list—but they’re just as critical as cameras and sensors.
In fact, user error accounts for roughly 50% of false burglar-alarm calls (mainly due to unfamiliarity with arming/disarming procedures), and 94–99% of all alarm dispatches turn out to be false, draining public-safety resources and eroding trust in your system.
Likewise, without clear installation records and troubleshooting guides, even small upgrades can become costly, time-consuming projects. Below, you’ll find the key steps to empower every household member and document your DIY setup for long-term reliability.
Not Training All Household Members on Arming/Disarming Procedures Slows Response in Emergencies
Alarm user error—forgetting codes, entering them incorrectly, or simply not knowing how to bypass zones—is the single largest cause of false alarms, accounting for approximately 47% of unintended activations.
Studies show that properly trained households reduce false alarms by over 30%, saving thousands in fines and avoiding suspension of monitoring services.
Yet, many DIYers never walk spouses or children through the keypad functions, leaving critical panic-button or fire-alarm features underused.
| Issue | Impact |
|---|---|
| User error (incorrect code entry) | ~50% of false burglar alarms |
| Unintentional activations (CO detectors) | 47% of false alarms |
| Public-safety resource drain | 90–99% of alarm calls are false |
Best Practices:
- Host a “Security 101” session with everyone in your home—cover arming, disarming, panic-button use, and basic troubleshooting.
- Create simple one-page guides near keypads or in kitchens, summarizing step-by-step procedures.
- Update and re-train whenever you change codes, add devices, or after hosting guests/contractors.
Failing to Keep Clear Installation and Troubleshooting Documentation Complicates Future Upgrades
Without a centralized record of wiring diagrams, device locations, and configuration settings, even minor upgrades—or replacing a single camera—can turn into guesswork. Industry guidance recommends logging all maintenance actions, firmware updates, and layout changes to speed up troubleshooting by up to 40%.
Detailed documentation also helps you verify warranty eligibility and maintain compliance with insurance requirements when you make significant system changes.
| Documentation Practice | Troubleshooting Benefit | Upgrade Benefit |
|---|---|---|
| Maintain detailed maintenance logs | 40% faster fault isolation | Easy mapping for new device placement |
| Backup configurations before updates | Minimizes data loss on failed updates | Simple rollback to prior settings |
| Store installation manuals & diagrams centrally | Ensures correct reinstallation | Streamlines vendor or professional consultations |
Pro Tips:
- Use cloud storage or a labeled binder for all manuals, login credentials, and layout printouts.
- Version your documentation—note dates of changes, firmware versions, and battery replacements.
- Include photos or screenshots of control-panel screens, network settings, and camera angles for visual clarity.
By investing just a few hours in training and documentation, you’ll drastically cut false alarms, accelerate troubleshooting, and make every future upgrade or repair a breeze, keeping your DIY system as dependable as a pro-installed setup.
Conclusion
As a Home Security expert, I can’t overstate that a rock-solid DIY installation starts with a comprehensive security assessment and precise coverage mapping to eliminate blind spots.
Precise camera angles and tamper-resistant mounts ensure continuous surveillance, while choosing compatible, high-quality equipment avoids integration headaches and premature failures.
Equally critical is cybersecurity hygiene—changing default passwords, applying firmware updates, and enabling multi-factor authentication to block remote threats.
Adding a UPS or battery backup bridges the average 5.5 hours of yearly power interruptions, keeping sensors and hubs online during outages.
Regular testing, maintenance, and battery swaps slash false alarms and detect faults before they compromise your security.
Don’t overlook local permit requirements to avoid fines and potential system removal, and be sure to train every household member on arming, disarming, and troubleshooting to prevent user errors that trigger nearly 98 % of false alarms.
By mastering each of these steps—planning, placement, mounting, cybersecurity, power backup, upkeep, compliance, equipment quality, and user training—you’ll transform your DIY project into a professional-grade home security system that works reliably when it matters most.
FAQs
What’s the single biggest DIY security mistake?
Neglecting a detailed site survey—80 % of blind spots stem from poor planning.
How often should I test my system?
Perform full system tests monthly and professional inspections annually to catch hidden faults.
Can I use any security camera with my NVR?
Only cameras supporting ONVIF/RTSP integrate seamlessly—budget sub-$50 models often lack it.
How do I protect my system from hackers?
Change all defaults, enable firmware auto-updates, and activate two-factor authentication—“any device connected to the internet can be hacked if not properly secured”
Do I really need a UPS?
Yes—power outages average 7+ hours, and a UPS ensures cameras and hubs stay live when it counts.


