
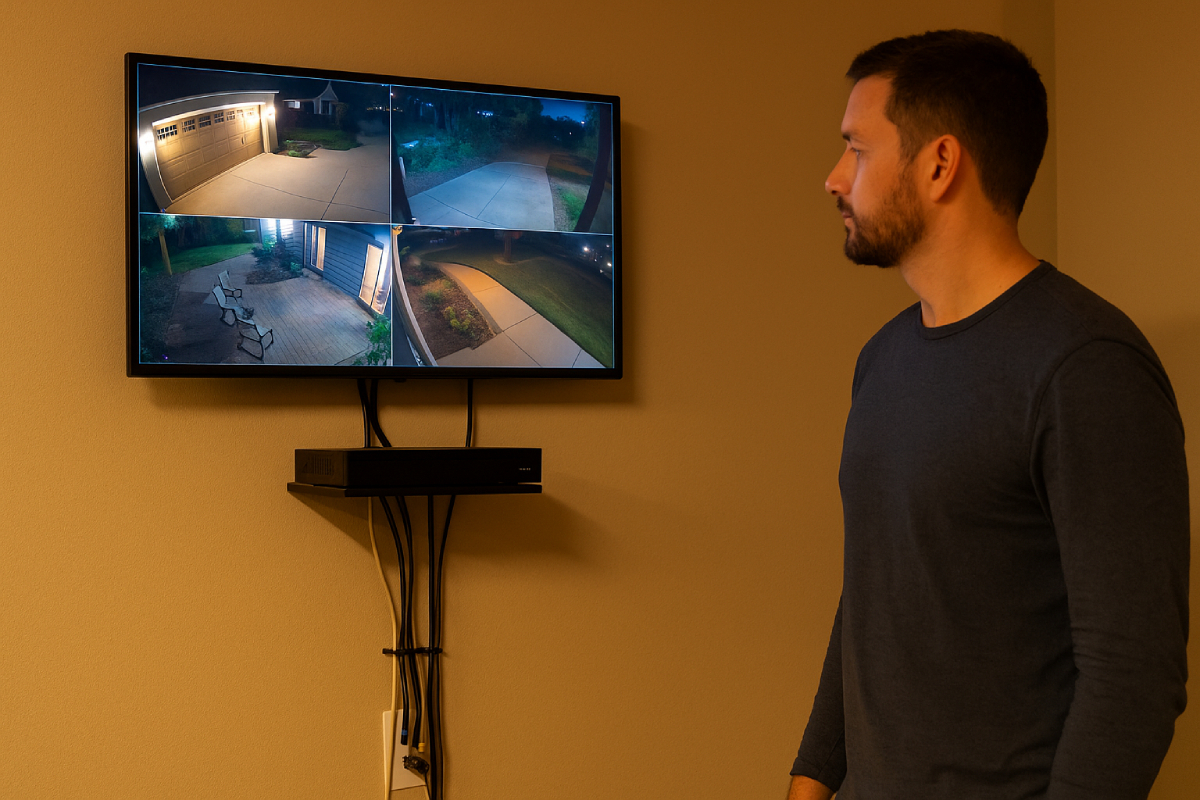
As a home security expert, I know that maintaining stable connectivity is the lifeline of any DIY security camera system, ensuring continuous video streams and timely alerts.
When connections drop due to power supply hiccups, weak Wi-Fi signals, or IP conflicts, you risk blind spots that expose your property to intruders and delay critical responses.
By following a methodical troubleshooting approach—verifying power and cabling, checking network credentials and signal strength, and updating firmware—you can swiftly restore reliable operation and keep your home protected around the clock.
Common Connection Issues
DIY security camera systems can experience connectivity failures across five main areas: power and hardware faults, network misconfigurations, wireless interference, firmware/software glitches, and recorder or PoE port failures. Power supply hiccups and voltage drops often lead to cameras failing to power on or rebooting unexpectedly.
Damaged or improperly terminated cables typically manifest as video flicker or signal loss while underpowered or faulty PoE injectors can leave perfectly good cameras dark.

At the network layer, incorrect Wi-Fi credentials or SSID mismatches block camera onboarding, and IP address conflicts cause streams to drop or flip between devices.
Missing router firewall rules or misconfigured port-forwarding prevents both local NVR connections and remote viewing. Environmental factors—such as weak signals, physical obstructions, or loose antennas—introduce intermittent dropouts.
Outdated firmware and incompatible client apps harbor bugs that randomly disconnect cameras. Finally, malfunctioning NVR/DVR ports or PoE switch failures isolate otherwise healthy cameras, making port-swap tests a must.

Understanding and methodically diagnosing each of these areas is key to restoring reliable operation and keeping your home secure.
Power and Hardware Problems
Cameras rely on stable power delivery and intact cabling. Even minor hardware faults can interrupt both video and data transmission.
| Issue | Symptoms | Quick Fix |
|---|---|---|
| Power supply failures & voltage drops | Camera won’t power on or reboots intermittently | Verify adapter output rating; replace faulty power brick |
| Damaged or improperly terminated cables | Video flicker, static, or no signal | Inspect cables for wear; reseat or replace damaged runs |
| Faulty PoE injectors/adapters | Camera offline despite network link | Swap injector or move camera to known-good PoE port |
Network and Configuration Errors
Even when hardware is perfect, misconfigurations at the network level can block camera registration or interrupt streams.
- Incorrect Wi-Fi credentials and SSID mismatches: Entering the wrong password or SSID prevents the camera from joining the network.
- IP address conflicts and DHCP issues: Duplicate IP addresses cause dropouts, “no network video” errors, or streams flipping between cameras.
- Router firewall and port-forwarding misconfigurations: Blocked ports or absent forwarding rules disrupt NVR connections and remote access.
Wireless Signal Interference
For Wi-Fi cameras, signal strength and RF interference are critical for stable connections.
- Weak Wi-Fi signal and poor router placement: Cameras typically need at least two bars of signal; anything less risks frequent drops.
- Physical obstructions (walls, metal surfaces): Solid barriers can attenuate or reflect signals, causing intermittent outages.
- Misaligned or loose external antennas: Even factory-mounted antennas can lose optimal orientation—ensure they’re tight and angled toward your router.
Firmware and Software Glitches
Software bugs in camera firmware or client apps are often overlooked but can sever connections.
- Outdated camera firmware: Many connectivity bugs are fixed in manufacturer updates; always run the latest firmware.
- Incompatible or outdated client/mobile apps: Viewing software mismatches can prevent live feeds or drop connections unexpectedly.
- Factory-reset benefits and risks: Resetting clears corrupted configs but forces full re-onboarding; use it judiciously.
Recorder/NVR/DVR Port Failures
Even with perfect cameras, a failing port on your recorder or PoE switch will isolate devices.

- Testing and swapping video input ports: Moving the camera cable to a known-good NVR/DVR channel quickly isolates port failures.
- Diagnosing DVR hardware malfunctions: Reboots, firmware flashes, or hardware faults in DVR modules can disable channels; consult logs and swap ports.
- Impact of PoE switch failures: Overloaded or faulty PoE switches may drop power unexpectedly—verify the PoE budget and test with another port or injector.
Diagnostic Steps
A structured diagnostic workflow is essential for pinpointing and resolving DIY security camera connection issues. By verifying power sources and cable integrity, you eliminate up to 40–50% of common video-loss causes.
Power-cycling and factory resets often clear transient glitches and firmware lockups in minutes.
Checking network settings—from SSID/password accuracy to IP assignments and port-forwarding—ensures cameras can register on both local and remote networks.
Measuring and optimizing Wi-Fi signal strength through strategic router placement or extenders prevents up to 30% of dropouts in wireless setups.
Testing NVR/DVR ports and PoE equipment isolates hardware faults on recorders or switches.
Finally, updating firmware and client software removes known bugs and compatibility gaps that cause intermittent disconnects. Following these steps methodically will restore reliable video streams and maintain robust home security.
Verifying Power Sources and Cable Integrity
Cameras powered under-voltage or suffering from cable faults often exhibit flicker, black screens, or complete outages.
- Inspect power adapters: Confirm output voltage/current matches camera specs. Replace adapters showing wear or heat damage.
- Test cable continuity: Use a multimeter or swap in a known-good cable to rule out breaks or shorts.
- Check PoE injectors/switches: For PoE setups, confirm the switch or injector is delivering the full IEEE 802.3at/af power budget; try an alternate PoE port if available.
Power-Cycling and Factory Resets
Rebooting clears temporary software states, while factory resets restore default configurations—both essential for stubborn faults.
- Power-cycle: Unplug camera power or PoE cable, wait 15–30 seconds, then reconnect.
- Soft reset via UI: Use the camera’s web/app interface (if accessible) to reboot before hardware unplugging.
- Factory reset: Press the camera’s reset button per manufacturer guidelines, then reconfigure SSID and credentials.. (Note: Wyze Outdoor cams cannot be hard-reset for security reasons.)
Checking and Correcting Network Settings
Misconfigurations at this layer block camera onboarding and remote access even when hardware is flawless.
| Checkpoint | Action |
|---|---|
| SSID & Password | Re-enter credentials exactly (case-sensitive) |
| IP Conflicts | Use arp -a or router’s DHCP table; assign static IP if needed |
| Firewall & Port-Forwarding | Ensure HTTP/RTSP ports are open and mapped to the camera’s IP |
Measuring and Optimizing Wi-Fi Signal Strength
Wireless cameras need a strong, stable link—typically ≥ –70 dBm (2+ bars) for HD streaming.
- Check RSSI/Signal Bars: View signal in the camera’s app; values above –70 dBm indicate reliability.
- Reposition router or camera: Target central, elevated locations; avoid basements or appliance-dense areas.
- Use extenders or mesh: For large properties, add PoE-powered access points or mesh nodes near cameras.
Testing NVR/DVR Ports and PoE Equipment
A failing recorder port or PoE switch often masquerades as a camera fault.
- Port swap test: Move the camera’s cable to a known-good channel on the NVR/DVR; persistent failure signals port issues.
- Inspect recorder logs: Check DVR/NVR system logs for port or module errors and perform firmware reboots if available.
- Verify PoE budget: Ensure the total power draw of all cameras does not exceed the switch’s capacity; reduce camera count or upgrade switch if necessary.
Updating Firmware and Client Software
Outdated code is a common culprit for intermittent drops and authentication problems.
- Camera firmware: Download and install the latest release from the manufacturer’s support site.
- Client/app updates: Update desktop or mobile viewing apps to match camera firmware versions.
- Post-update re-pair: After firmware upgrades, factory reset or re-pair cameras to clear old configurations.
By systematically working through these six diagnostic steps, you’ll identify and resolve the root cause of most DIY security camera connection issues—minimizing downtime and keeping your surveillance system running smoothly.
Solutions and Best Practices
Ensuring a rock-solid DIY security camera setup goes beyond just mounting the cameras—it requires the right hardware, proper network configuration, and proactive maintenance. By using certified power adapters with surge protection, you guard against voltage spikes that can fry electronics.
Weatherproofing and securing cable runs keeps moisture and rodents from sabotaging your connection. Assigning static IPs or DHCP reservations eliminates stream-dropping address conflicts, while deploying Wi-Fi extenders or mesh systems fills in dead zones for wireless cams.
Scheduling regular firmware audits closes security holes and fixes bugs before they bite. Finally, keeping spare parts on hand lets you swap in a working component at a moment’s notice, minimizing downtime.
Using Certified Power Adapters and Surge Protection
High-quality, UL-listed adapters deliver stable voltage and include built-in protections against spikes, brownouts, and short circuits. Installing a dedicated surge protector—such as DITEK’s DTK-120X12—between your camera’s power source and the adapter can block dangerous transients before they reach sensitive circuitry.
Weatherproofing and Securing Cable Runs
Outdoor cables face UV exposure, moisture, and critters. To protect them:
- Use weatherproof RJ45 connectors and silicone sealant at entry points.
- Run cables through conduits or PVC piping to shield against abrasion and rodents.
- Anchor with rubber-lined staples to prevent over-tightening and chafing
| Material/Tool | Purpose | Notes |
|---|---|---|
| Weatherproof RJ45 boots | Seal connector ends | Pair with silicone around housing |
| UV-resistant conduit | Mechanical protection | Recommended for direct sunlight areas |
| Rubber-lined cable staples | Secure cables without crushing | Use one staple every 1–2 feet |
Assigning Static IPs or DHCP Reservations
Dynamic IP assignment can lead to multiple devices fighting for the same address, causing dropped streams. Best practice:
- Reserve an IP on your router for each camera’s MAC address (DHCP reservation).
- Alternatively, set a true static IP within the camera’s network settings, ensuring it stays outside the DHCP pool.
This guarantees consistent access, simplifies port-forwarding, and avoids “camera not found” errors in your NVR or viewing app.
Deploying Wi-Fi Extenders or Mesh Systems
Wi-Fi cameras need at least –70 dBm (≈2 bars) for reliable HD streaming. In larger properties or obstacle-dense areas:
- Add a plug-in extender near cameras to boost signal.
- Or implement a mesh Wi-Fi system (e.g., Netgear Orbi, Asus AiMesh) for seamless coverage and automatic roaming between nodes.
Place extenders/mesh nodes in line-of-sight of both the main router and cameras for optimal performance.
Scheduling Regular Firmware Audits
Firmware updates patch security vulnerabilities and fix connectivity bugs. Establish a routine:
- Monthly checks of camera and NVR firmware release notes.
- Apply critical updates that address security flaws or connectivity issues.
- Log each update with date and version to track history and rollback if needed.
| Frequency | Task | Responsible Party |
|---|---|---|
| Monthly | Check for firmware updates | Homeowner/Tech Admin |
| Quarterly | Apply non-critical enhancements | Homeowner/Installer |
| Annually | Professional audit & penetration test | Certified Installer |
Keeping Spare Parts for Rapid Swaps
Rapid replacement is vital when a component fails unexpectedly. Maintain a small kit:
| Spare Part | Quantity | Reason |
|---|---|---|
| UL-certified power adapter | 1–2 | Backup if main adapter or surge protector fails |
| 18 AWG outdoor-rated cable | 20 ft | Quick swap for damaged runs |
| PoE injector | 1 | For troubleshooting or if switch port fails |
| Replacement camera unit | 1 | Swap in to isolate camera-specific faults |
Keeping these essentials on-hand ensures that most outages can be resolved within minutes, not days.
Preventative Maintenance
A proactive preventative maintenance program is the cornerstone of a reliable DIY security camera system. Regular inspections catch 70% of connection faults—like frayed cables and loose connectors—before they cause downtime.
Pairing cameras with a UPS and surge protection boosts uptime by guarding against power outages and spikes.
Quarterly firmware audits are critical—70% of breaches occur when devices lack an update plan—while environmental tweaks such as clearing line-of-sight and trimming foliage maintain a strong signal.
. Finally, planning redundancy with hot-spare NVRs or backup cameras delivers near-zero downtime, seamlessly switching over in seconds if the primary system fails.
Routine Inspection Schedules
Regular visual and functional checks prevent most failures before they happen.
| Frequency | Task | Rationale |
|---|---|---|
| Monthly | Inspect cables, connectors, and mounts | 70% of system failures stem from loose or damaged connections |
| Biannually | Professional system audit | Experts recommend at least two pro checks per year |
| Annually | Full system review (lens cleaning, alignment) | Ensures optical clarity and correct positioning |
Installing UPS or Surge Protectors
Power interruptions and voltage spikes are common culprits in unexpected outages.
- UPS Benefits: Provides clean power and seconds-to-minutes of backup runtime during outages, safeguarding footage and keeping cameras online.
- Surge Protection: A quality surge protector diverts harmful transients, protecting sensitive camera electronics and NVRs from damage.
| Device | Function | Benefit |
|---|---|---|
| UPS (sine-wave output) | Continuous power during outages | Prevents data loss and downtime |
| Surge protector | Clamps voltage spikes | Extends camera/NVR lifespan |
Quarterly Firmware Update Checks
Staying current with firmware is vital for security and reliability.
- Schedule: Review manufacturer release notes every three months.
- Process: Download updates, stage rollouts, and verify post-update functionality.
| Interval | Action | Outcome |
|---|---|---|
| Quarterly | Check for firmware and software updates | Patches vulnerabilities; fixes connectivity bugs |
| After Update | Perform test recording and live view | Ensures no regressions in functionality |
Environmental Optimization
Maintaining clear sightlines and minimizing interference maximizes camera performance.
- Line-of-Sight: Trim foliage and remove obstacles within 10–15 ft of the camera’s view to prevent signal attenuation and false triggers.
- Mounting Height & Angle: Position cameras 8–10 ft high with a 30–45° downward tilt for optimal coverage and minimal glare.
- Weatherproofing: Use UV-resistant housing and seal mounts to guard against rain, wind, and dust ingress.
Planning Redundancy with Backup Cameras/NVRs
Redundant systems ensure continuous surveillance even during hardware failures.
- Hot-Spare NVRs: Configure a backup NVR that automatically takes over recording within seconds of detecting primary failures.
- Secondary Cameras: Deploy overlap coverage so that if one camera goes offline, adjacent units still monitor crucial zones.
- Off-Site Storage: Replicate footage to cloud or remote servers to protect against on-site damage or theft.
Implementing these preventative maintenance strategies will keep your DIY security camera network robust, minimize false alarms, and ensure seamless operation—even in challenging conditions.
Conclusion
By systematically verifying power sources, inspecting cable integrity, checking network credentials, measuring Wi-Fi signal strength, and applying firmware updates, you can resolve the vast majority of DIY security camera troubleshooting issues before they escalate.
Pairing these steps with proactive maintenance—routine inspections, UPS or surge protector installations, and quarterly firmware audits—prevents up to 70% of common faults and keeps your system running smoothly.
Embracing a methodical diagnostic approach not only restores reliable coverage quickly but also safeguards your home against unexpected surveillance gaps, ensuring continuous peace of mind.
Here’s a concise FAQ section to address common DIY security camera questions, complete with expert insights and citations to back up each point.
FAQs
Why does my security camera keep disconnecting?
Intermittent disconnections often stem from network disruptions—if your router, switch, or PoE injector glitches, the camera can drop offline unexpectedly.
Power outages or voltage fluctuations will also send wired cameras “to sleep” until power is restored.
For wireless models, a weak internet signal or insufficient bandwidth can cause the camera to repeatedly lose connection.
Finally, overloaded PoE switches may not supply enough power under heavy load, leading to random shutdowns.
How often should I update the camera firmware?
Best practice is to incorporate firmware updates into a regular maintenance schedule—at least quarterly—to patch security vulnerabilities and resolve connectivity bugs before they escalate.
Additionally, monitor manufacturer release notes monthly and apply critical fixes immediately to address emerging threats.
For major feature or stability releases, plan full updates as soon as they’re available and validate performance post-installation.
What are the best practices for extending Wi-Fi range?
- Run Ethernet or add a local AP: Whenever possible, pull Ethernet closer to your camera location or install a dedicated access point nearby to eliminate wireless dead zones.
- Use mesh systems or extenders: Modern mesh Wi-Fi kits (e.g., Netgear Orbi) deliver seamless coverage and automatic node switching, while plug-in extenders can fill small coverage gaps.
- Deploy outdoor APs with directional antennas: For perimeter coverage, mount an outdoor access point with removable, aimed antennas pointing toward camera clusters for robust signals.
- Consider point-to-point bridges: If cameras are more than 100 m away, a wireless bridge setup can maintain stable connectivity over long distances.
When should I call a professional installer?
If you’ve methodically ruled out power issues, firmware glitches, cabling faults, and network misconfigurations yet problems persist, it’s time to call in an expert.
Professional installers provide site surveys for optimal camera placement, concealed wiring pathways, and robust network designs that most DIY setups lack.
They can also manage complex multi-camera integrations—configuring PoE switches, NVRs, and secure remote-access tunnels—to ensure enterprise-grade reliability and peace of mind
Main Tips
- Label each cable run for rapid swaps.
- Use PoE switches with per-port surge protection.
- Reserve DHCP addresses for cameras in your router.
- Aim for signal strength > –70 dBm (≥ 2 bars).
- Document firmware versions and update dates.


