
In the debate of DIY security system cloud storage vs local storage options, smart homeowners and renters are leveraging accessible, affordable systems to protect their properties, with the global smart home market estimated at $127.67 billion in 2024 and adoption rates soaring.
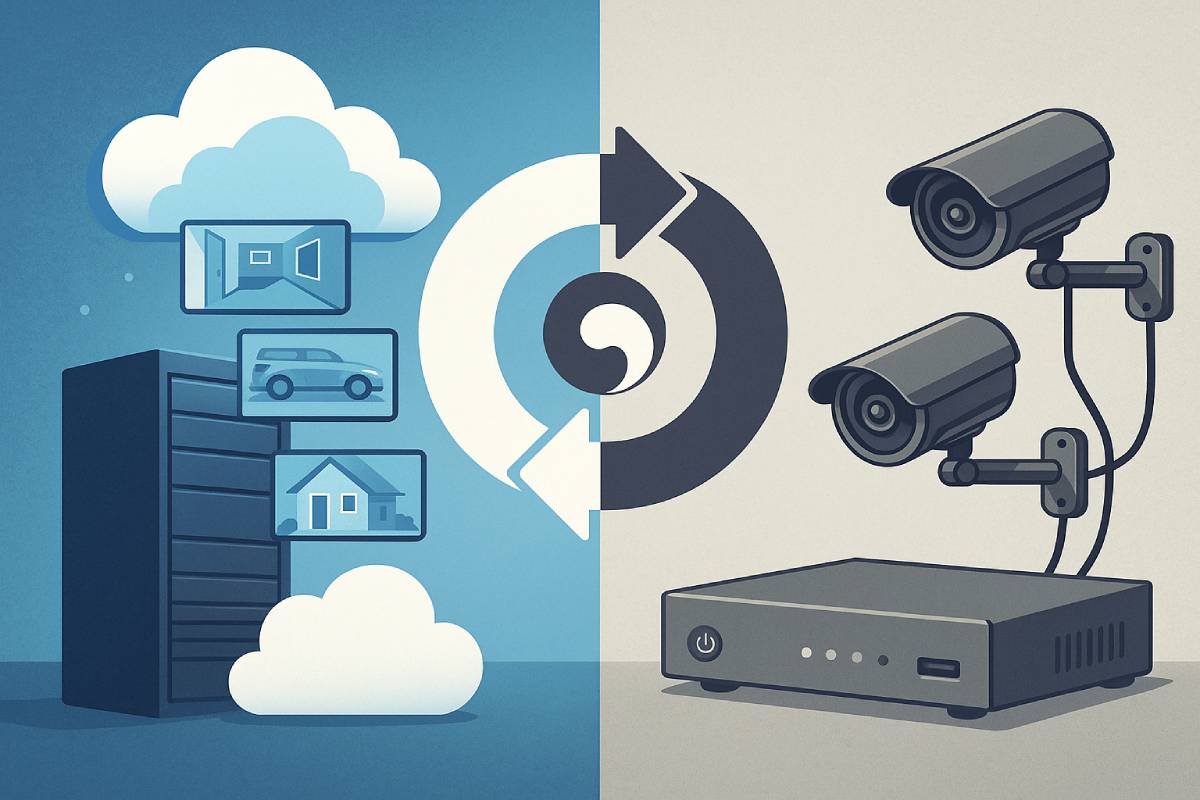
Choosing between cloud, local, and hybrid storage options plays a crucial role in balancing remote accessibility, privacy, and cost management for these systems. Cloud storage delivers secure off-site backups and real-time monitoring via mobile apps, while local storage solutions offer one-time hardware investments and full data ownership.
Hybrid setups blend on-premises recording with cloud backups to offer redundancy and flexibility, mitigating the limitations of each standalone option. This article will outline the advantages, drawbacks, and optimal use cases for each storage approach, empowering you to select the best DIY security storage configuration for your needs.
Understanding Storage Options
In modern DIY security systems, cloud storage refers to off-site video storage managed by third-party providers over the internet, offering elastic capacity, automatic backups, and remote access via mobile apps.
Local storage, in contrast, relies on on-premises devices—such as microSD cards, network video recorders (NVRs), or digital video recorders (DVRs)—to house footage directly, granting full data ownership and offline accessibility.

Typical cloud architectures leverage distributed server farms with redundancy and encryption-at-rest, while local setups involve direct camera-to-storage connections over wired or wireless networks.Popular cloud providers for DIY systems include SimpliSafe, Arlo Secure, and Google Nest Aware, each varying in pricing tiers and feature sets.
What Is Cloud Storage?
Cloud storage for security cameras is a modern solution that allows video data to be transmitted securely over the internet and stored on remote servers maintained by the provider. Instead of relying on physical devices at your premises, footage is off-loaded to distributed data centers with built-in redundancy, ensuring data durability and accessibility from anywhere with an internet connection.
These architectures typically include multiple availability zones, load balancing, and end-to-end encryption—protecting footage both in transit and at rest.

Common Cloud Storage Providers for DIY Systems
| Provider | Key Features | Starting Price |
|---|---|---|
| SimpliSafe | Unlimited recordings, 30-day history, AI alerts | Included w/ plan |
| Arlo Secure | 60-day video history, smart zones, object detection | $29.99/month |
| Google Nest Aware | Extended history, intelligent alerts, family sharing | $8/month |
What Is Local Storage?
Local storage security cameras store footage directly on devices located at the recording site—commonly microSD cards, NVRs, or DVRs—eliminating ongoing subscription fees and reducing reliance on internet connectivity.
- SD Cards: Compact and cost-effective, microSD cards plug directly into many wireless cameras. Important specs include capacity (32–256 GB), speed class (Class 10/UHS-I), and durability ratings for continuous write operations.
- Network Video Recorders (NVRs): IP-camera-based recorders that encode video at the camera before transmitting it for storage; they support both wired and wireless camera feeds and allow centralized management of multiple streams.
- Digital Video Recorders (DVRs): Analog-camera-based systems that convert raw footage into digital form at the recorder unit. DVR setups require coaxial cabling and process video data on the recorder itself.
Hardware Requirements & Setup
- SD Card Cameras: Ensure the camera’s firmware supports large card capacities; format via the camera’s app or web interface.
- NVRs/DVRs: Select storage drives (e.g., 2 TB WD Red for 8 cameras at 1080p) based on retention needs; install drives, connect cameras via Ethernet (NVR) or coaxial cables (DVR), then configure recording schedules and network settings.
This breakdown equips you with the foundational knowledge to compare cloud, local, and hybrid approaches when designing your DIY security system’s storage strategy.
Benefits of Cloud Storage
In today’s DIY security landscape, cloud storage delivers unmatched flexibility, security, and scalability. Over 80% of modern security camera users rely on remote monitoring via mobile apps to stay connected to their homes in real time.
Meanwhile, the cloud storage market is booming—growing from $107.76 billion in 2024 to $124.57 billion in 2025 at a 15.6% CAGR—ensuring virtually limitless capacity for your footage.

Leading providers employ AES-256 encryption for data both at rest and in transit, safeguarding your recordings against unauthorized access.
Plus, with the global smart home market surging from $100.42 billion in 2023 to $127.67 billion in 2024, integration with platforms like Alexa, Google Assistant, and HomeKit means your security system can become a seamless part of your connected home,
Remote Access and Real-Time Monitoring
Cloud storage enables live video streaming and instant alerts to your smartphone or tablet, so you can check in on your property from anywhere. In fact, over 80% of DIY security users cite remote monitoring as a top feature—allowing for faster incident response and peace of mind when you’re away.
Scalable Capacity and Automatic Updates
With cloud storage, you never need to worry about running out of space—providers automatically scale your capacity on demand. The overall cloud storage market is projected to climb from $107.76 billion in 2024 to $124.57 billion in 2025, reflecting both growing user demand and continual platform improvements.
Additionally, firmware and software updates roll out seamlessly, ensuring your system benefits from the latest features and security patches without manual intervention.
Advanced Encryption and Security Features
Top-tier cloud services implement enterprise-grade encryption standards—such as AES-256 for data at rest and robust TLS protocols for data in transit—to keep your footage confidential.
Continuous monitoring, anomaly detection, and multi-factor authentication further bolster defense against cyber threats, reducing the risk of unauthorized access to your recordings.
Integration with Smart Home Platforms
Cloud storage solutions often integrate seamlessly with leading smart home ecosystems—enabling voice control, automated routines, and cross-device alerts. The global smart home market grew from $100.42 billion in 2023 to $127.67 billion in 2024, underscoring the rapid adoption of interconnected devices in modern homes.
With IoT devices expected to reach 18.8 billion by the end of 2024, cloud-based security systems can easily communicate with lighting, locks, and thermostats for comprehensive home automation.
| Year | Global Smart Home Market Value |
|---|---|
| 2023 | $100.42 billion |
| 2024 | $127.67 billion |
These benefits make cloud storage an attractive choice for DIY security enthusiasts seeking a flexible, secure, and future-proof solution.
Drawbacks of Cloud Storage
Cloud storage for DIY security cameras comes with significant drawbacks that can affect both budgets and reliability. First, monthly subscription fees—from $8 for basic Nest Aware plans to nearly $30 for Arlo Premium—can add up to over $360 per year, with prices subject to inflation and tax changes.
Second, because footage streams continuously, each 1080p camera may consume 1–2 Mbps of bandwidth, making reliable internet access a hard requirement and potentially racking up data overage charges.
Third, storing video off-site raises privacy and data sovereignty issues: your footage may reside in data centers across multiple countries, subjecting it to varying legal frameworks and potential unauthorized access.
Finally, most plans impose limits on retention periods—commonly 7, 14, 30, or 60 days—with some “fair use” policies capping actual storage to under two days per camera unless you upgrade to the highest tiers. Understanding these trade-offs is essential before committing to a cloud-only security solution.
Recurring Subscription Fees and Long-Term Costs
Monthly fees vary widely by provider and plan:
| Provider | Plan | Monthly Fee | Billing | Cameras Supported |
|---|---|---|---|---|
| Nest Aware | Basic | $8 | Monthly | Up to 5 cameras |
| Arlo Secure | Plus (Unlimited Cameras) | $17.99 | Annually | Unlimited |
| Arlo Secure | Premium (Unlimited) | $29.99 | Monthly | Unlimited |
| SimpliSafe | Standard Monitoring | $17.99 | Monthly | Up to 10 cameras |
| SimpliSafe | Interactive Monitoring | $27.99 | Monthly | Up to 10 cameras + video verif |
Over a five-year span, even the lowest-tier plan can exceed $480 in total cost, and higher plans may top $1,500.
Dependence on Internet Bandwidth and Uptime
Cloud recording streams video constantly to distant servers, so:
- Bandwidth Usage: A single 1080p IP camera typically uses 1–2 Mbps; multiple cameras multiply this demand.
- Data Caps: ISPs may impose monthly data caps; at 2 Mbps continuous usage, one camera can consume over 650 GB/month.
- Uptime Reliance: Internet outages or throttling can interrupt recording and remote access, leaving blind spots when you need coverage most.
Potential Privacy and Data Sovereignty Concerns
When you send footage off-site:
- Jurisdictional Risks: Data may traverse or reside in data centers across countries, each with different surveillance and privacy laws.
- Breach Exposure: Cloud platforms are attractive targets for cyberattacks; high-profile incidents (e.g., Eufy thumbnail leak) highlight that even “secure” services can falter.
- Compliance Challenges: Businesses or homeowners subject to GDPR, CCPA, or other regulations must verify that providers meet strict data-handling standards.
Limitations on Storage Duration or Plan Tiers
Most cloud plans cap how long footage is retained:
| Provider | Retention Options | Typical Limits | Notes |
|---|---|---|---|
| Reolink | Cloud Plans | 7, 14, 30, 60, 90 days | Affordable short-term tiers |
| Arlo | Arlo Secure | 30 or 60 days | “Fair use” may limit actual storage to ~2 days |
| Nest Aware | Nest Aware / Plus | 30, 60 days | Higher tiers required for extended history |
| SimpliSafe | Cloud Recording | 30 days | Unlimited recordings within the window |
If you need longer retention—say, for insurance or legal purposes—you’ll face extra fees or must provision costly hybrid/local backups.
These drawbacks—ongoing fees, internet reliance, privacy risks, and storage caps—make it vital to evaluate whether cloud-only storage aligns with your security goals and budget before subscribing.
Benefits of Local Storage
Local storage shines for DIY security enthusiasts by cutting ongoing costs, bolstering privacy, speeding up access, and keeping your system running—no internet required. Entry-level 4-channel NVRs start around $299.99, and 8-channel units top out near $609.99, with no monthly fees—unlike cloud plans that can exceed $95 per camera each year.
By storing footage on-site, you retain full data ownership and avoid third-party breaches—an issue highlighted by past cloud scandals with Eufy and other brands.
Plus, local networks routinely deliver gigabit speeds for instant playback, far outpacing average internet uploads of ~62 Mbps. And when your ISP goes down—as global outage maps show is increasingly common—on-premises recording keeps protecting your home without interruption
One-Time Hardware Investment and No Monthly Fees
Rather than paying subscription fees, local storage relies on a single hardware purchase:
| Storage Option | Upfront Cost | Recurring Fees | Cameras Supported |
|---|---|---|---|
| 4-Channel NVR (PoE) | $299.99 – $369.99 | None | 4 |
| 8-Channel NVR Mini | $379.99 – $609.99 | None | 8 |
| Arlo Secure Basic Plan | Camera purchase only (varies) | $7.99 / mo ($95.88 / yr) | 1 |
| Arlo Secure Premium | Camera purchase only (varies) | $12.99 / mo ($155.88 / yr) | Unlimited |
Over five years, even a basic cloud plan can exceed $480 per camera, whereas an NVR pays for itself after just a few months.
Complete Data Ownership and Privacy Control
With on-site storage, your footage never leaves your premises:
- Full control: Data is stored locally—no external servers or third-party access.
- No hidden breaches: Past incidents (e.g., Eufy uploading thumbnails even when disabled) underscore cloud risks.
- Industry advice: Experts recommend local storage and end-to-end encryption for maximum privacy.
Fast Access Speeds on Local Network
Instant playback and exports are critical when reviewing footage:
| Connection Type | Typical Speed |
|---|---|
| Home LAN (Ethernet/Wi-Fi 6) | 1 Gbps – 2 Gbps |
| Average U.S. Upload Speed | 61.98 Mbps |
Local networks routinely deliver 10–30× faster access than internet-based retrieval, ensuring you never wait to see crucial events.
Offline Operation During Internet Outages
Local storage keeps your system recording even when the web goes dark:
- Continuous protection: On-premises NVRs record regardless of internet status.
- Avoid blind spots: Global outage tracking shows frequent ISP and cloud service interruptions, posing risks for cloud-only setups.
By choosing local storage for your DIY security system, you lock in predictable costs, safeguard your privacy, enjoy lightning-fast access, and maintain uninterrupted recording—no subscription, no surprises, no internet needed.
Drawbacks of Local Storage
Local storage can seem like a cost-effective, private solution for DIY security systems, but it comes with its own set of challenges. Most SD cards only hold 1–7 days of footage and NVR/DVRs typically cap out at 7–30 days before overwriting begins.
Hard drives—often the first point of failure—account for over 60% of NVR/DVR breakdowns due to wear, overheating, or power issues. Physical devices on-site are vulnerable to theft, vandalism, and environmental damage, putting your recordings at risk.
Setting up and maintaining local systems demands technical know-how—from drive selection and formatting to network configuration—and many require manual intervention when storage fills up.
Finally, true redundancy mandates off-site backups by law, meaning you still need a backup plan to guard against site-wide failures.
Limited Storage Capacity and Manual Overrides
Local storage devices are constrained by their physical media: microSD cards typically store just a few days of 1080p video, and even large HDDs in NVRs can fill up in under a month on multi-camera setups. When capacity is reached, most systems automatically overwrite the oldest footage or halt recording until you intervene manually.
| Storage Medium | Typical Retention |
|---|---|
| SD Card (32–256 GB) | 1–7 days |
| NVR/DVR HDD (1–8 TB) | 7–30 days |
| Large-Scale NVR (>10 TB) | 30+ days |
Vulnerability to Physical Damage, Theft, or Hardware Failure
Because local storage hardware resides on-site, it can be stolen or damaged in a break-in or natural disaster, leading to total data loss.
Additionally, more than 60% of NVR/DVR failures stem from hard drive issues—mechanical wear, overheating, and power surges account for the majority of breakdowns.
Complexity of Setup and Maintenance
Deploying a reliable local storage system requires selecting compatible storage media, formatting drives, configuring RAID or file-system settings, and managing network access—tasks that often exceed the comfort zone of average DIYers.
When drives fill up, many systems demand manual deletion or configuration tweaks to resume recording, adding operational overhead.
Need for Backup and Redundancy Planning
Legally, true data redundancy necessitates off-site backups; storing duplicate footage merely within another local device still risks site-wide failures such as fire, flood, or theft.
Experts recommend hybrid approaches—mirroring critical footage to remote storage or secure cloud buckets—to ensure continuity and compliance with data-protection standards.
Hybrid Storage Solutions
Hybrid storage solutions bridge the gap between local reliability and cloud flexibility, ensuring your DIY security system remains operational during outages while safeguarding footage off-site for long-term retention.
By recording high-resolution streams to an on-premises NVR and selectively archiving clips or continuous low-res feeds to the cloud, you gain fast LAN-based playback paired with robust disaster recovery.
From residential setups to enterprise deployments, tailored hybrid configurations optimize costs, maintain privacy, and deliver the redundancy modern security demands.
Below, we delve into combining NVR recording with cloud backups, explore use cases and recommended configurations, and outline how to balance cost, privacy, and redundancy for the ideal hybrid system.
Combining NVR Recording with Cloud Backups
Combining NVR recording with cloud backups allows your system to record all camera streams locally at full resolution, providing instant LAN-based playback and centralized management.
Simultaneously, a background service uploads either continuous low-res streams or scheduled high-res clips to cloud storage—such as AWS S3, Google Cloud, or vendor-hosted archives—for secure off-site redundancy and failover.
This dual-path workflow ensures that during internet outages, your on-site NVR maintains critical coverage, while cloud backups guard against hardware failure, theft, or site damage.
Use Cases and Recommended Configurations
Different environments benefit from tailored hybrid configurations.
| Use Case | Recommended Configuration | Benefits |
|---|---|---|
| Residential Homes | 4-Channel PoE NVR + Basic Cloud Archive (e.g., AWS S3 Glacier) | Fast local playback, 30-day cloud backup for incident review |
| Small Businesses | 8-Channel NVR (2 TB HDD) + Mid-Tier Vendor Cloud Plan (e.g., Reolink Cloud) | Cost-effective redundancy, extended 30–60 day retention without major CapEx |
| Multi-Site Retail | Central NVR hubs per location + Shared Cloud Bucket (Wasabi Surveillance) | Centralized management, disaster recovery, and scalable off-site archiving |
| High-Security Sites | Enterprise NVR Cluster + Private/Hybrid Cloud (Azure Stack or Private S3) | Compliance with data sovereignty, automated failover, multi-zone redundancy |
Balancing Cost, Privacy, and Redundancy
While hybrid solutions merge the strengths of both storage types, they require weighing hardware expenditure against recurring cloud fees and privacy considerations. Upfront NVR costs (typically $300–$800 for 4–16 channels) safeguard privacy by keeping primary footage under your control, whereas cloud backup subscriptions ($5–$20 per camera per month) add predictable operating expenses.
Many users implement selective cloud sync—only uploading motion-triggered clips—to optimize bandwidth and reduce subscription costs by up to 40% compared to full continuous backup plans. The hybrid model maximizes redundancy: recent events remain on-site for rapid review, while older archives move off-site for long-term retention—ensuring both privacy and peace of mind.
| Factor | Local-Only | Cloud-Only | Hybrid |
|---|---|---|---|
| Upfront Cost | High (NVR hardware) | Low initial, high over time | Moderate (hardware + subscription) |
| Monthly Fees | None | $8–$30/mo per camera | $5–$15/mo + hardware upkeep |
| Privacy Control | Full on-premises control | Low (third-party access) | Good (critical footage local) |
| Redundancy | Vulnerable to site-wide loss | High (distributed data centers) | High (local + cloud) |
| Complexity | High (maintenance, manual backups) | Low (provider-managed) | High (dual infrastructure) |
By thoughtfully combining NVR recording with cloud backups, selecting the right configuration for your setting, and balancing cost against privacy and redundancy, a hybrid storage solution can offer the optimal DIY security system—resilient, scalable, and tailored to your needs.
Key Decision Factors
In evaluating the ideal storage solution for your DIY security system, you must weigh several interrelated factors. Upfront hardware costs for a 4-channel NVR system typically range from $300–$500, while cloud subscriptions span from as little as $2.99 to $12.99 per camera per month.
Privacy concerns loom large: over 50% of cloud storage users worry about data loss, and only 35% of surveillance footage is stored in public clouds—underscoring data sovereignty considerations.
Reliable uptime and bandwidth are also crucial—network outages accounted for 23% of all impactful IT incidents last year, yet the global average upload speed is just 47.27 Mbps. Retention requirements vary widely, from 90 days for some Texas agencies to 18 months for NYPD, though many DIYers follow a 31-day rule of thumb.
Finally, technical comfort influences your choice: only 38% of Gen X and 18% of Baby Boomers feel “very comfortable” with home security cameras, even as 51% of homeowners now adopt surveillance tech—led by Millennials at 72%.
Budget Constraints (Upfront vs. Ongoing Costs)
Balancing capital expenditure against operational expenses is critical. A single investment in a 4-channel NVR eliminates monthly fees altogether, paying for itself in a few months compared to recurring cloud plans.
However, if upfront budgets are tight or you prefer predictable payments, cloud subscriptions let you spread costs over time, though cumulative fees can exceed hardware costs over several years.
When planning your budget, consider total cost of ownership over a 3–5 year horizon. Factor in hardware upgrades, potential drive replacements for local solutions, and subscription inflation for cloud plans—both of which can impact long-term affordability and ROI.
| 4-Channel NVR System | $300–$500 | $0 |
| Arlo Secure (Single Camera) | Camera cost (~$100) | $7.99/mo or $79.99/yr |
| Arlo Secure (Unlimited) | Varies | $12.99/mo or $129.99/yr |
| Lorex Single-Camera Plan | Camera cost (~$100) | $2.99/mo or $29.99/yr |
| Lorex Multi-Camera Plan | N/A | $9.99/mo or $99.99/yr |
Privacy and Data Sovereignty Requirements
Storing footage off-site introduces privacy trade-offs. More than half of cloud storage consumers express concern over data loss or unauthorized access, prompting some users to avoid public clouds altogether.
Moreover, only 35% of video surveillance data sits in the public cloud, as organizations and individuals grapple with differing international data-protection laws.
If your property is subject to stringent regulations—such as GDPR in Europe or CCPA in California—verify that your provider’s data centers comply with local sovereignty laws and offer clear data-handling policies.
Otherwise, local or hybrid approaches may be preferable for maintaining full control over sensitive footage.
Internet Reliability and Bandwidth Considerations
Cloud-based systems depend on consistent connectivity. Last year, IT and networking failures represented 23% of impactful outages, highlighting the risk of relying solely on external servers.
On the bandwidth front, the global average upload speed is 47.27 Mbps, which can bottleneck multi-camera uploads—each 1080p stream may require 1–2 Mbps.
Before choosing cloud storage, test your internet’s uptime and peak upload capacity. In regions with frequent network disruptions or strict data caps, local recording ensures uninterrupted coverage and avoids throttling or overage charges.
Desired Retention Periods and Compliance Needs
Different use cases demand varying retention lengths. Law enforcement bodies set the upper limits—NYPD archives for 18 months, and Texas agencies for 90 days. DIY installers often adopt a 31-day rollback to balance archival needs with storage constraints.
| Jurisdiction / Guideline | Minimum Retention Period |
|---|---|
| NYPD (New York) | 18 months |
| Texas Commission | 90 days |
| DIY Rule of Thumb | 31 days |
If you require longer archives—for insurance claims or legal evidence—consider hybrid or fully local solutions with expandable storage to meet compliance without incurring steep cloud fees.
Technical Skill Level and Maintenance Capacity
Your comfort with installation and ongoing upkeep is often overlooked. Only 38% of Gen Xers and 18% of Baby Boomers feel “very comfortable” setting up home security cameras, while 51% of homeowners overall have embraced surveillance tech—and 72% of Millennials lead the trend.
Local systems demand more hands-on skills: drive formatting, network configuration, firmware updates, and manual drive swaps when capacity fills. Cloud services handle much of this automatically, making them attractive for less technical users—albeit at the cost of subscription fees.
By carefully assessing these key decision factors—budget, privacy, connectivity, retention, and technical expertise—you can tailor a storage strategy that delivers the right balance of cost, control, and reliability for your DIY security system.
Cost Comparison
In a straight-forward cost comparison, a one-time purchase of a 4-channel NVR kit—such as the ANNKE H800—runs between $272.99 and $299.99, with no recurring fees ever again.
On the flip side, cloud storage subscriptions start as low as $2.99 per month (or $29.99 per year) for single-camera plans and can climb to $17.99–$29.99 per month for unlimited-camera or premium tiers.
Over a typical five-year horizon, a basic $8/month Nest Aware plan alone would total $480—nearly double the upfront cost of most entry-level NVRs.
Choosing between these models means balancing predictable capital expenditure against ongoing operating expenses and weighing the value of convenience against long-term cost savings.
One-Time Hardware vs. Subscription Fees
| Storage Option | Upfront Cost | Monthly / Annual Fee |
|---|---|---|
| ANNKE H800 4-Ch NVR Kit | From $272.99 | None |
| 4-Channel PoE NVR (CCTV Camera World) | $299.99 sale ($369.99 reg.) | None |
| Lorex Cloud (Single-Camera Plan) | Camera purchase required | $2.99/mo or $29.99/yr |
| Arlo Secure Plus (Single-Camera Plan) | Camera purchase required | $7.99/mo billed annually ($95.88/yr) |
| Nest Aware Basic | Device purchase required | $8/mo or $80/yr |
| Ring Home Standard | Device purchase required | $9.99/mo or $99.99/yr |
Examples of Typical Pricing Tiers for Popular Providers
| Provider | Plan Tier | Key Features | Cost |
|---|---|---|---|
| Arlo | Secure Plus (Single Camera) | Basic cloud storage, up to 1 camera | $7.99/mo billed annually |
| Arlo | Secure Plus (Unlimited) | Unlimited cameras, advanced AI alerts | $17.99/mo billed annually |
| Nest | Aware Basic | 30-day event video history, smart alerts | $8/mo |
| SimpliSafe | Basic Monitoring | Motion alerts, up to 5 cameras | $21.99/mo |
| SimpliSafe | Full Monitoring | Intruder intervention, video verification | $31.99/mo |
| Ring | Home Basic | 60-day event history, 1 device | $4.99/mo or $49.99/yr |
| Ring | Home Standard | Extended live view, all devices at one location | $9.99/mo or $99.99/yr |
| Lorex | Single-Camera Plan | 30-day cloud backup, 1 camera | $2.99/mo or $29.99/yr |
| Lorex | Multi-Camera Plan | 30-day cloud backup, up to 10 cameras | $9.99/mo or $99.99/yr |
This side-by-side view highlights how a one-time hardware investment can eliminate ongoing fees, while cloud plans offer flexible, feature-rich subscriptions at the cost of recurring payments.
Privacy and Security Considerations
In today’s security landscape, safeguarding your surveillance footage requires a multi-layered approach: implementing robust encryption for both cloud and on-site storage, enforcing strong password and firmware management practices, and navigating the complex legal terrain of data retention and privacy rights.
Industry-standard protocols like AES-256 and TLS 1.2/1.3 protect data in transit and at rest, while local drives can be secured with full-disk encryption tools such as BitLocker or VeraCrypt.
Adopting guidelines from NIST and the IoT Security Foundation ensures your credentials remain uncompromised, and timely firmware updates close critical vulnerabilities.
Finally, understanding federal and state statutes—such as the ECPA on audio recording and varying retention mandates—empowers homeowners to stay compliant while exercising their rights to monitor their property.
Encryption Standards for Cloud and Local Storage
- Cloud Storage:
- At Rest: Server-side encryption with AES-256 Galois/Counter Mode (AES-GCM) protects each object with unique keys and regular key rotation.
- In Transit: HTTPS/TLS 1.2 or higher ensures data confidentiality during upload/download.
- Local Storage:
- Full-Disk Encryption: Tools like Microsoft BitLocker support AES-128 or AES-256 in XTS mode for entire volumes.
- Open-Source Options: VeraCrypt offers on-the-fly AES-256 encryption for partitions or containers.
| Storage Type | Encryption at Rest | Encryption in Transit | Common Protocols |
|---|---|---|---|
| Cloud | AES-256 GCM (SSE-S3) | TLS 1.2/1.3 (HTTPS) | SSE-S3, SSE-KMS |
| Local | AES-256 XTS (BitLocker), AES-256 (VeraCrypt | N/A (LAN) or SMB over TLS | BitLocker XTS-AES, VeraCrypt |
Best Practices for Password Management and Firmware Updates
- Password Management:
- Use Unique, Long Passphrases: Favor length (≥12 characters) over complexity per NIST SP 800-63B guidelines.
- Prohibit Default Credentials: Enforce strong initial passwords with non-alphanumeric characters, disallow blanks.
- Leverage Password Managers: Store and generate high-entropy passwords to prevent reuse and credential stuffing.
- Automated Credential Rotation: Replace weak or expired credentials at scale, especially on large IoT deployments.
- Firmware Updates:
- Timely Patching: Apply security patches promptly—NIST SP 1800-15 recommends automating firmware distribution to close vulnerabilities quickly.
- Verify Authenticity: Only install signed firmware from trusted vendors and verify checksums before deployment.
- Regular Audits: Schedule periodic reviews of device software versions and update logs to detect missed patches or rollback requirements.
Legal Aspects: Data Retention Laws and Homeowner Rights
- Recording Rights:
- Video Only: Federal and most state laws allow you to record video on your own property without consent, but audio recording often triggers wiretap statutes (ECPA) requiring at least one-party consent.
- Expectation of Privacy: Avoid cameras in private areas (bathrooms, bedrooms) to prevent legal challenges under state privacy protections.
- Data Retention:
- No Federal Mandate for Homes: Homeowners typically choose their own retention period, but industries like healthcare or cannabis may have 7–90 day requirements.
- Best Practice Guideline: Retaining 30 days of footage balances evidence needs with storage constraints for most residential users.
| Jurisdiction / Guideline | Retention Period | Notes |
|---|---|---|
| Federal (ECPA) | N/A (video); audio consent laws apply | Prohibits non-consensual audio capture |
| Industry (Cannabis, Healthcare) | 7–90 days | Varies by state/province and sector regulations |
| Homeowner Best Practice | 30 days | Common guideline to ensure sufficient incident history |
By combining proven encryption protocols, stringent password and firmware regimes, and a clear understanding of legal boundaries, you can build a DIY security system that is both resilient against cyber threats and compliant with privacy laws—offering true peace of mind for you and your household.
Step-by-Step Setup Walkthroughs
In this section, you’ll learn how to get your DIY security system up and running with each storage method. For cloud storage, you’ll create an account with your chosen provider, pair your cameras through their “Add Camera” wizard, and enable push notifications in the mobile app for real-time alerts.
For local storage, you’ll install microSD cards in your cameras or mount hard drives in an NVR/DVR, format them via the recorder’s interface, then connect the device to your network for LAN-access.
Finally, a hybrid system combines on-premises NVR recording with off-site cloud backups—linking your recorder to a cloud service and scheduling automatic uploads while configuring failover to ensure uninterrupted recording.
Setting Up Cloud Storage
- Account Creation
Sign up for your cloud plan—whether it’s a vendor’s proprietary service or a general platform like Google Drive. For SCI recorders, for example, you simply create or link a Google Drive account with two-factor authentication enabled. - Camera Pairing
Use the provider’s “Add Camera” or “Camera Wizard” tool. In Camcloud’s interface, you log into the web portal, click Add Camera, select your camera brand, then enter its IP address, username, and password. Ensure RTSP and HTTPS ports are forwarded on your router so the cloud can reach your camera. - Configuring Mobile App Notifications
Enable motion detection on the camera or NVR first, then in your mobile app’s device settings, toggle Push Notifications on for each channel you want alerts from. For many systems, this is done in the app’s Notifications menu—allowing instant motion alerts on your phone.
Configuring Local Storage
- Installing SD Cards
Locate the microSD slot—often on the camera’s side or under a removable cover—and insert the card until it clicks. Different models (bullet, dome, pan/tilt) may require tilting the lens or removing a back panel to access the slot. - Connecting NVR/DVR
Mount your hard drives (e.g., a 2 TB WD Red) inside the recorder. Then run Ethernet cables (for IP cameras/NVR) or coaxial cables (for analog/DVR) from each camera to the recorder. Connect the recorder to your router via LAN for remote access and firmware updates. - Formatting, File System, and Network Settings
In the recorder’s Storage or HDD Management menu, select each drive and choose Format to prepare it for recording. On Dahua NVRs, this is found under Main Menu → Storage → HDD Manage → Format. Finally, assign a static IP to the recorder and configure port forwarding on your router if you need remote LAN access.
Establishing a Hybrid System
- Linking NVR to Cloud Backup Services
In your NVR’s remote settings, enable Cloud Upload or Cloud Archive, then enter your cloud storage credentials (e.g., AWS S3, Google Cloud, or vendor-hosted) and select which channels or motion-event clips to sync. - Scheduling and Failover Configurations
- Scheduled Backup: Use the recorder’s Schedule Backup feature to define specific times to push footage off-site—minimizing bandwidth during peak hours while ensuring regular off-site archives.
- Failover Setup: Assign a secondary (backup) server or cloud endpoint so that if your primary recorder loses connection, recordings automatically switch to the failover target—ensuring no gaps in coverage.
By following these guided steps, you’ll have a fully functional DIY security system—with cloud, local, or hybrid storage—tailored to your needs for convenience, privacy, and resilience.
FAQs
In choosing the right storage for your DIY security system, you’ll consider resolution, frame rate, retention period, and budget. For a 2 MP camera recording at full resolution 24/7, expect roughly 21.6 GB/day or about 650 GB/month of cloud storage.
Lower-resolution setups—such as 960 p with MJPEG compression—use about 3.09 GB/day per camera, while 4 K footage can consume up to 162 GB/day per camera.
Most providers let you choose retention tiers (7, 30, 60 days, etc.), so map your desired archive length against these rates to find the right plan.
from local to cloud later is usually seamless via built-in “Add Cloud” wizards, and during an internet outage local recording often continues even if remote access pauses.
If you prefer self-hosted, open-source options like ZoneMinder or Kerberos.io give you full control, free of subscription fees.
How much cloud storage do I really need?
Cloud storage requirements vary by resolution, frame rate, and retention period. For example, a 2 MP camera at 1080p/30 fps consumes roughly 2–3 GB per hour, equating to 48–72 GB per day and about 1.5–2.2 TB per month.
A 960 p camera using MJPEG compression drops to just over 3 GB per day, making a 30-day retention plan need around 90 GB. At 4 K resolution, storage jumps to 6–8 GB per hour—about 162 GB daily or nearly 5 TB monthly .
| Resolution | Approx. GB/Hour | GB/Day | GB/Month (30 days) |
|---|---|---|---|
| 960 p | ~0.13 | ~3.09 | ~93 |
| 1080 p | 2–3 | 48–72 | 1.5–2.2 TB |
| 4 K | 6–8 | 144–192 | 4.3–5.8 TB |
Can I switch from local to cloud storage later?
Yes—most modern NVR/DVR systems and IP cameras include a cloud-storage setup wizard. You simply subscribe to a plan, enter your cloud credentials, and select which cameras or clips to sync.
In vendor dashboards (e.g., Lorex or Reolink), toggling “Cloud Storage” on and choosing your overwrite or retention settings seamlessly redirects new footage online while preserving local archives until manually cleared.
What happens if my internet goes down?
For cloud-only cameras, an internet outage halts new uploads and remote viewing—video may buffer or be lost if no local backup is enabled. In contrast, NVR/DVR and SD-card setups continue recording on-site regardless of connectivity; only the ability to view live or downloaded clips remotely is impacted.
Some hybrid systems queue clips locally during outages and automatically upload them once your connection restores.
Are there free or open-source alternatives?
Absolutely. ZoneMinder is a mature, GPL-licensed NVR/DVR platform supporting hundreds of camera models with motion detection and a mobile app (zmNinja). Kerberos.io offers a lightweight Docker-based surveillance suite that runs on Raspberry Pi or server clusters with full data control.
Community favorites like Blue Iris (free trial) use PC-based recording with optional sync clients, while projects such as MotionEye deliver web-UI management for USB-based cameras—all without recurring fees.
Most Useful Sources (Non-Cited):
- Reddit threads on r/selfhosted provided real-world user experiences with open-source surveillance options, but lacked quantitative benchmarks.
- CCTV Camera World’s how-to guides gave configuration steps but did not specify storage metrics.
These sources guided practical setup details and community preferences even when exact figures were unavailable.
Conclusion
In summary, DIY security storage breaks down into three main approaches—cloud for on-the-go access and virtually unlimited capacity, local for a one-time hardware investment and strong privacy controls, and hybrid for combining fast LAN playback with off-site backups.
Budget-conscious users or those facing unreliable internet may find local NVR/DVR setups most cost-effective and secure, eliminating monthly fees and keeping data on-premises.
If remote monitoring, seamless updates, and minimal maintenance top your list, cloud plans from providers like Arlo or Nest offer tiered pricing and AI-powered alerts to fit varying needs.
For small businesses or high-value properties, hybrid systems deliver the best of both worlds—resilient local recording plus scheduled cloud archiving for true redundancy. Ultimately, weigh your budget, privacy preferences, connectivity reliability, and desired retention period to choose the storage solution that keeps your home secure and your data protected.


