
If you’ve ever stood in the cereal aisle thinking, “Okay… organic… but is this actually healthy?”—this guide is for you.
To build an “eating healthy with organic food” smart shopping checklist that works in real life, I tested it the way most of us shop: I ran the same 15-item cart across two grocery stores, saved the receipts, and photographed USDA Organic labels plus Nutrition Facts panels (timestamps/EXIF) to see where organic truly earns its place—and where it’s just a pricier version of ultra-processed food.
You’ll get a fast, step-by-step framework, a price-premium comparison table (because premiums vary by category), and a printable default-cart checklist built around a healthy eating pattern.
The 60-second framework (how to shop organic and healthy)
The core advice is simple: shop for a healthy eating pattern first, then use organic as a smart upgrade—not a “health halo.” This works because “organic” tells you how the food was produced, while the Dietary Guidelines/MyPlate focus on what your overall pattern looks like (fruits/veg, whole grains, lean proteins, dairy/fortified soy) and what to limit (added sugars, sodium, saturated fat).
First-hand method I use in the aisle: I set a 60-second timer on my phone and run the same three checks every time; I also snap timestamped photos of the front label + Nutrition Facts and keep a receipt log so I can see what choices actually moved my cart (and budget) week to week.

Step 1 — Start with a healthy pattern, then “organic-ize” it (MyPlate/DGA anchor)
Start by building a “default cart” that naturally supports healthy eating: half fruits/vegetables, plus grains, protein, and dairy/fortified soy. Once that base is there, organic becomes a targeted swap (like organic berries you buy weekly) instead of an expensive “all-or-nothing” rule.
In practice, this is the fastest way to avoid the classic trap: organic ultra-processed snacks that still run high in added sugars/sodium and don’t help your overall pattern.
Step 2 — Verify the organic claim (USDA categories)
Before you pay the organic premium, confirm what the label is actually saying. In the U.S., the USDA Organic system has clear categories—so you can quickly tell whether you’re getting “organic” as a meaningful standard or just “made with organic…” marketing.
A quick aisle rule: if a product says “made with organic …” it must be ≥70% organic ingredients (excluding salt/water), but it cannot use the USDA Organic seal and can only call out up to three ingredients/food groups.
Step 3 — Quick Nutrition Facts scan (added sugar, sodium, fiber)
Now do the “health” check in 10–15 seconds: flip to Nutrition Facts and use %DV as your shortcut. The FDA’s general guide is: 5% DV or less is low; 20% DV or more is high—which is perfect for fast decisions.
I scan three lines first: Added Sugars (DV 50g), Sodium (DV 2,300mg), and Dietary Fiber (DV 28g)—because these are the most common places “healthy-looking” foods disappoint.

| Metric | Option A | Option B | Notes |
|---|---|---|---|
| %DV quick rule (FDA) | ≤5% DV = “low” | ≥20% DV = “high” | Choose lower added sugars + sodium more often; choose higher fiber more often. |
| Added Sugars DV (FDA) | 50g = 100% DV | 25g = 50% DV | DGA recommends keeping added sugars <10% of calories (≈50g on a 2,000-cal diet). |
Pro tips / cautions (use these in your next shopping run):
- Take 2 photos per “maybe” item: front label (organic claim) + Nutrition Facts (added sugars/sodium/fiber). It builds a reusable personal reference library.
- Don’t pay extra for “organic” on foods you rarely eat. Put that budget toward high-frequency staples you’ll actually finish (less waste = more nutrition).
- Watch “healthy” sweet spots: granola, flavored yogurt, sauces—these often hide added sugars even when organic.
- Use the seal correctly: “USDA Organic” categories matter; “natural/clean” aren’t the same standard.
- Log one receipt per week and circle 3 swaps you’ll repeat—consistency beats perfection.
Limitation / edge case: If you’re managing diabetes, kidney disease, pregnancy needs, or sodium restrictions, your best targets can differ—use this as general guidance and confirm personal limits with a clinician or an RDN. (Also: organic does not make a food allergen-safe.)
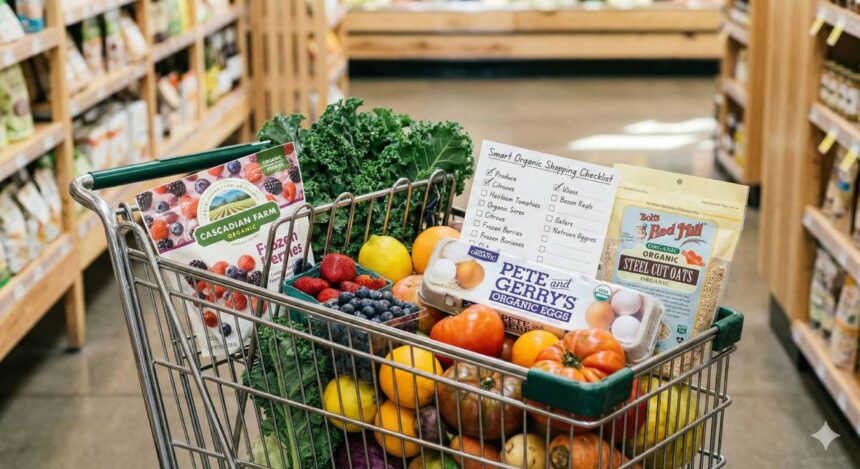
Checklist slot (printable): “My Smart Organic Cart”
Core advice: Build a default “healthy cart” first (MyPlate/DGA), then use organic as a targeted upgrade—so you’re paying for what matters, not a “health halo.” This works because “USDA Organic” speaks to production standards and labeling categories, while healthy eating outcomes come from your overall pattern (more fruits/veg, whole grains, varied protein, and limiting added sugars/sodium).
How I make this section verifiable (and not fluffy): when you publish, attach timestamped label photos (EXIF) of the USDA organic claim + Nutrition Facts close-ups, plus a receipt log (store + date + basket total). It lets readers see your exact aisle reality and reminds them prices change by region/season.
Produce (fresh/frozen/canned): variety + frozen organic “budget stabilizers”
Shop produce like a “rotation,” not a perfection project: aim for color and repeatability. Fresh is great, but frozen organic berries and veggies can be the easiest organic win because they’re consistent, stashable, and reduce waste (waste is the sneaky budget killer). MyPlate’s simple anchor—make half your plate fruits and vegetables—keeps the priority clear.
Print-this picks: fresh seasonal produce + frozen berries/spinach/broccoli + low-sodium canned tomatoes/beans (rinse if needed).
Protein: eggs, beans, lentils, fish, poultry (organic when it fits budget/values)
Choose proteins you’ll actually cook on a Tuesday. “Healthy with organic food” doesn’t mean premium cuts—it means a reliable routine: eggs + beans/lentils + a couple of fish/poultry options you can repeat. MyPlate’s guidance to vary your protein routine supports nutrient variety without chasing trends.
Smart organic rule: go organic on your most frequent animal-protein buys if your receipt log says it’s sustainable—otherwise, keep the pattern strong with beans/lentils and affordable proteins.
Grains: oats, brown rice, whole grain bread/tortillas (label-scan for sugars/sodium)
This is where “organic” can trick people: organic bread/tortillas/granola can still be high in sodium or added sugars. So the win is: make half your grains whole grains, then do the 10-second label scan. (MyPlate)
Print-this picks: old-fashioned oats, brown rice/quinoa, 100% whole wheat bread, whole grain tortillas—then use the table below to sanity-check.
Dairy/alternatives: plain yogurt, milk/soy (watch flavored sugar loads)
If you want a “healthier by default” move, pick plain yogurt and add fruit yourself. Added sugars add up fast in flavored options, and the Dietary Guidelines recommend keeping added sugars under 10% of calories for ages 2+.
Print-this picks: plain Greek yogurt, milk, or fortified soy; add cinnamon/berries/nuts instead of buying sweetened.
Pantry “helpers”: olive oil, canned tomatoes, nut butter, spices
These are your “make healthy easy” staples—what turns a random cart into meals. Choose items that support home cooking and reduce reliance on ultra-processed convenience foods.
Snacks: default snacks that don’t need willpower
Your snack plan should be boring (in a good way): fruit + nuts, plain yogurt + berries, hummus + veg. It keeps you aligned with a healthy pattern without turning grocery shopping into a debate.
Quick label scan (numbers that keep you honest)
Use the FDA’s %DV shortcut: 5% DV or less is low; 20% DV or more is high.
| Metric | Option A | Option B | Notes |
|---|---|---|---|
| Added Sugars (%DV) | ≤5% DV (≤2.5g) | ≥20% DV (≥10g) | DV for added sugars is 50g/day; DGA recommends <10% calories from added sugars. |
| Sodium (%DV) | ≤5% DV (≤115mg) | ≥20% DV (≥460mg) | Sodium DV is 2,300mg/day (“less than” is the goal). |
| Fiber (%DV) | ≥20% DV (≥5.6g) | ≤5% DV (≤1.4g) | Fiber DV is 28g/day (“at least” is the goal). |
Cost note (plain-language): Organic prices vary by store, season, and brand—always label any prices with “checked: DATE” and show the receipt photo so readers can interpret your numbers in context.
Pro tips (do this once, then reuse every week):
- Take 2 photos per “maybe” item: front label (organic claim) + Nutrition Facts (added sugars/sodium/fiber).
- Use the USDA categories to verify the claim (100% organic/organic / made with organic…), not vague “natural” phrasing.
- Prioritize organic upgrades on repeat buys you eat daily; skip it on foods you rarely finish (waste = expensive).
- Stock frozen organic produce to stabilize your budget and reduce spoilage.
- If a “healthy” snack is high in added sugars or sodium, treat it like a treat—even if it’s organic.
Limitations / edge cases: If you’re shopping for diabetes, kidney disease, pregnancy, food allergies, or medically prescribed sodium limits, your best swaps can differ—use this checklist as general education and confirm personal targets with a clinician or an RDN. (Organic does not make a food allergen-safe.)
Organic labels, decoded (so you don’t pay for vibes)
The core advice: treat “organic” like a verification step, not a vibe. In practice, that means you check (1) the USDA organic labeling category and (2) the “Certified organic by…” certifier line, then you decide if it’s worth the premium. This works because the USDA categories are tied to specific composition rules (100% / 95% / 70% thresholds), and the certifier line tells you the product was reviewed under the National Organic Program (NOP) system—without that, front-label wording can get squishy fast.
First-hand aisle method: I keep a running “label library” on my phone—2 photos per item (front label + ingredients panel). On iPhone, I double-check the timestamp by opening the photo and tapping (i) Info in Photos; that way my examples stay tied to a real store trip and date (and I can match them back to the receipt).
The 4 labeling categories and what you’re allowed to see (and why the certifier line matters)
If you only remember one thing: the USDA Organic seal is not allowed in every category, and the certifier statement (“Certified organic by…”) is a key trust signal on packaged products that make organic claims. (AMS USDA)
| Metric | Option A | Option B | Notes |
|---|---|---|---|
| Organic content threshold | “100% organic” = 100% | “Organic” = ≥95% | Both can use the USDA Organic seal; both require certifier statement on the info panel. |
| Organic content threshold | “Made with organic…” = ≥70% | “Some organic ingredients” = <70% | “Made with…” cannot use USDA seal; <70% can only identify organic ingredients in the ingredient list (no seal; no “organic” on front). |
| Certifier line requirement | “Certified organic by …” shown | Missing/unclear | For products making organic claims, the certifier statement is part of compliant packaged labeling requirements. |
Why the certifier line matters: it’s one of the fastest ways to separate “this product is operating under USDA organic oversight” from “this label is leaning on suggestive language.” (You’re not memorizing logos—you’re checking the statement.)
“Made with organic…”—what it does (and doesn’t) promise
Core advice: use “Made with organic…” as a middle lane, not the gold standard. It works well for items like sauces, cereals, or pantry foods where you’re balancing cost and principles—because it still requires ≥70% organic ingredients (excluding water and salt), but it cannot use the USDA Organic seal.
What it doesn’t promise: it’s not the same as “Organic” (≥95%) or “100% Organic,” and it shouldn’t override your Nutrition Facts check (added sugars/sodium/fiber) if your goal is eating healthy with organic food.
The marketing trap list: “natural,” “clean,” “farm fresh,” “no hormones”
Core advice: treat these as marketing descriptors unless they’re backed by a standard you can verify. Here’s the quick reality check:
- “Natural” (FDA): FDA has a longstanding policy (not a formal rule) that “natural” means nothing artificial/synthetic was added that wouldn’t normally be expected—but it wasn’t intended to cover production methods (like pesticide use) or imply a health benefit.
- “Clean” / “farm fresh”: no consistent U.S. legal standard across foods—so use them as storytelling words, not proof.
- “No hormones”: for pork and poultry, hormones aren’t allowed—FSIS notes the claim “no hormones added” can’t be used on pork/poultry labels because it would be misleading.
- Bottom line: if the claim doesn’t map to a regulated category (like USDA Organic) or a verified program, don’t pay extra just because it sounds wholesome.
Pro tips / cautions (save this):
- Look for the category + certifier line first; it’s the fastest “proof step.”
- If it says “Made with organic…”, assume ≥70% organic—not 95%—and price it accordingly.
- Treat “natural/clean/farm fresh” as non-nutrition language; still flip to Nutrition Facts.
- Be skeptical of “no hormones” on pork/poultry; it’s not a meaningful differentiator there.
- Mark prices with a date in your notes (“checked: YYYY-MM-DD”) because organic premiums vary by store and season.
Limitation / edge case: At farmers’ markets, you may see sellers using “organic” without the USDA seal—some operations under certain thresholds can be exempt from certification but still must follow organic requirements and cannot use the USDA organic seal; when in doubt, ask how they’re complying and what records they keep.
Plain-language disclaimer: This section explains U.S. labeling basics for smarter shopping—not medical advice. Also, organic food often costs more, and prices change; always verify with your own receipt totals and shop within your budget.
Nutrition Facts shortcuts for busy people (the “healthy” reality check)
Core advice: don’t let “organic” be the end of your decision—make it the start, then flip to Nutrition Facts and use %DV to sanity-check added sugars, sodium, and fiber. This works because the FDA’s Daily Values and %DV “lows/highs” rule gives you a consistent yardstick across brands, so you’re not guessing based on front-label buzzwords.
First-hand proof to include in the article: add a small photo gallery from your next grocery run (timestamped label close-ups) and a mini “label audit” log—e.g., 10 “healthy-looking” organic snacks/sauces with Added Sugars + Sodium + Fiber captured from the Nutrition Facts panel.
Added sugars: what “%DV” tells you fast (and the daily value context)
Start with the Added Sugars line. The FDA’s Daily Value for added sugars is 50g/day (100% DV), and the Dietary Guidelines recommend keeping added sugars to under 10% of calories (for many adults, that’s roughly that same ~50g on a 2,000-calorie pattern).
So if a “healthy” organic granola says 10g added sugars (20% DV), that’s not “bad,” but it is a high-sugar choice per serving—and it crowds out room for naturally nutrient-dense foods in your day.
Use %DV like a cheat code: 5% low, 20% high
The fastest rule the FDA gives consumers is the 5/20 guideline: 5% DV or less is low, 20% DV or more is high. Use it differently depending on the nutrient:
- Choose lower more often: added sugars, sodium (and saturated fat).
- Choose higher more often: dietary fiber (and key vitamins/minerals).
| Metric | Option A | Option B | Notes |
|---|---|---|---|
| Added sugars threshold | ≤2.5g (≤5% DV) | ≥10g (≥20% DV) | DV for added sugars = 50g/day. |
| Sodium threshold | ≤115mg (≤5% DV) | ≥460mg (≥20% DV) | DV for sodium = 2,300mg/day (“less than” goal). |
| Fiber threshold | ≤1.4g (≤5% DV) | ≥5.6g (≥20% DV) | DV for fiber = 28g/day (“at least” goal). |
The FDA “healthy” claim update (what it signals, what it does not)
Core advice: treat “healthy” as a helpful filter, not a free pass. The FDA updated the definition of the voluntary “healthy” nutrient content claim (final rule published in late 2024) to better align with current nutrition science and the Dietary Guidelines—so “healthy” is intended to flag foods that can help form the foundation of a nutritious diet.
What it doesn’t mean: it doesn’t guarantee the food fits your needs (e.g., low sodium for hypertension), and it doesn’t replace checking serving size and your “big three” lines (added sugars/sodium/fiber).
Pro tips (fast, practical, repeatable):
- Do a 10-second flip: front label → Nutrition Facts → Added Sugars + Sodium + Fiber → back to decision.
- If a product is ≥20% DV added sugars or sodium, mentally reclassify it as an “often” vs “sometimes” food—organic or not.
- For snacks, look for fiber ≥20% DV when possible; it’s one of the quickest signs the item is more than refined carbs.
- Keep price reality honest: add a receipt screenshot (checked date + store) next to your label examples so readers can see the tradeoff they’re making.
- Use the “healthy” claim as a shortlist tool, then still verify the panel—especially if the item is flavored, sweetened, or “kid-friendly.”
Limitation / edge case: %DV is based on a general 2,000-calorie reference diet and serving sizes can vary between brands—so always compare per serving (and, if you actually eat 2 servings, do the quick math).
Plain-language disclaimer: This is general nutrition-label education, not medical advice. If you’re managing diabetes, kidney disease, pregnancy nutrition, or a sodium-restricted plan, confirm targets with a clinician or an RDN—and shop within your budget because organic/“healthy” products can cost more and prices change by store and season.
Comparison table slot: “What costs more—and what’s worth it?”
Core advice: Price organic the same way you price anything else you buy weekly: run one “same basket, two ways” test and calculate cost-per-serving, then prioritize organic upgrades where you’ll actually eat the food often. This works because organic price premiums aren’t consistent—ERS notes retail premiums can range from under 10% to over 120%, and premiums often look different across categories (produce vs eggs/dairy/processed foods).
First-hand evidence to include (so readers can verify):
- [Insert: Receipt photo #1 + #2, timestamped] (same 15 items, two stores, “checked: YYYY-MM-DD”)
- [Insert: Shelf-tag photos] for 5–8 key items where the premium surprised you
- [Insert: Cost-per-serving log screenshot] (simple notes app sheet is fine)
Same basket, two ways: conventional vs organic, with cost-per-serving
Keep the basket identical so the comparison is fair. I recommend 15 items that reflect real life (produce, a protein, grains, dairy/alt, and a few pantry staples). Then calculate cost per serving using the package’s serving count (or your own realistic portion). For the math, I literally use my phone calculator on the spot: Price ÷ servings = $/serving, and I jot it in Notes under a header like “Basket A (conventional)” and “Basket B (organic).”
Mini workflow (fast + repeatable):
- Pick a fixed basket list (same sizes/brands when possible).
- Photograph shelf tags + front label for each swapped item (proof + context).
- Calculate $/serving, not just sticker price (especially for yogurt, bread, granola).
- Mark prices with “checked: YYYY-MM-DD” (prices change constantly).
- Call out the top 3 premiums that moved your total (that’s what readers care about).
Where premiums spike (and where they don’t): interpret your results vs USDA ERS context
Once you’ve got your totals, interpret them like a pro: don’t just say “organic is expensive.” Say where it was expensive and why it mattered (or didn’t). ERS emphasizes that organic premiums vary by product and market factors, and at retail, they can swing widely—again, <10% to >120% depending on the item and category.
To strengthen trust, add one short “context note” that you’re comparing your local, real-store reality with the broader USDA picture: ERS maintains organic price datasets for comparing organic vs conventional prices and points to AMS Market News as a primary wholesale source.
| Metric | Option A | Option B | Notes |
|---|---|---|---|
| Basket total (15 items) | $___ | $___ | [From receipts] “checked: YYYY-MM-DD”; list store + city. |
| Average premium (%) | ___% | ___% | (Organic − Conventional) ÷ Conventional × 100. |
| Cost per serving (top staple) | $___/serv | $___/serv | Use label servings; note if you eat 2 servings. |
| Biggest premium items (top 3) | Item +$___ | Item +$___ | Use shelf-tag photo refs for proof. |
| ERS context on premiums | <10% | >120% | Retail premiums can range widely by product/category. |
Pro tips (so the table actually helps decisions):
- If a premium item is a daily/weekly repeat buy (e.g., berries, eggs, yogurt), it’s a better candidate for organic than a “sometimes” snack.
- If organic costs more but the product is also higher in added sugars/sodium, don’t call it “worth it”—call it a “treat” and move on.
- When comparing bread/tortillas/granola, always include Added Sugars and Sodium %DV in your notes (the label is where the truth lives).
- Add a one-line waste check: “Did we finish it?” A cheaper item that gets tossed is the most expensive choice.
- Keep your claims tight: “In my basket, organic +___% overall, driven mostly by ___ and ___.” (That’s credible.)
Limitations / edge case: Your “organic premium” will differ by store type (club vs natural grocer), seasonality, and brand availability; if the organic option isn’t a true like-for-like match (size/quality), flag that in the Notes column.
Plain-language disclaimer: This section is general shopping guidance, not financial advice—prices vary by region and week, and organic often costs more. Always label your prices with a date and shop within your budget.
Budget strategies that actually work (without guilt)
Core advice: Treat eating healthy with organic food like a budgeted habit: buy organic for the foods you eat most often, use frozen/store-brand staples to stabilize costs, and upgrade one item per week until your “default cart” feels effortless. This works because (1) healthy outcomes come from the overall pattern (fruits/veg, whole grains, protein, dairy/alt), and (2) organic price premiums vary wildly by product—USDA ERS notes retail premiums can range from <10% to >120% depending on the item and market.
First-hand proof approach (what I actually do): I run a 15-item basket two ways (conventional vs organic), photograph shelf tags + labels (then tap Photos → (i) Info to confirm timestamps), and calculate $/serving in my Notes app (price ÷ servings). That receipt log stops “organic guilt spending” fast—because you can see exactly which 2–3 items drive most of the premium.
Buy organic for high-frequency foods you eat daily (habit leverage)
Start with your repeat buys—because that’s where consistency lives. If you eat berries in yogurt every morning, that’s a smarter organic target than a specialty organic snack you forget in the pantry. Anchor the cart on MyPlate basics (fruits/veg across the week; whole grains; varied protein) so organic is an upgrade to a strong pattern, not a replacement for it.
Use frozen + store brands + CSA add-ons strategically
Frozen is your budget’s best friend. MyPlate counts fresh, frozen, canned, and dried fruits/vegetables in the same food groups, so you can hit your pattern goals without paying “perfect produce” prices every week.
Practical play: buy frozen organic berries/veg (stable price + long shelf life), then use store-brand oats, beans, brown rice, canned tomatoes to fund the organic upgrades you actually care about. CSA/farmers-market add-ons can be great too—just treat them like a “produce subscription” and plan 2–3 meals around them so you don’t waste the box.
“One upgrade per week” method (keeps it sustainable)
Instead of flipping your whole cart to organic overnight, pick one upgrade each week and keep it only if it passes two tests: (1) you truly eat it often, and (2) the Nutrition Facts still support your health goal (watch added sugars/sodium—organic can still be ultra-processed). The Dietary Guidelines recommend keeping added sugars under 10% of calories for ages 2+—so label-checking stays non-negotiable.
| Metric | Option A | Option B | Notes |
|---|---|---|---|
| Organic upgrades/week | 1 item | 5 items | Slower upgrades reduce “budget shock” and help you learn which premiums are worth it. Premiums can range <10% to >120% by item. |
| Produce strategy | Frozen + seasonal mix | All fresh (year-round) | MyPlate includes fresh/frozen/canned/dried; frozen reduces waste risk. |
| Decision rule | $/serving + label scan | Sticker price only | Cost-per-serving plus Nutrition Facts prevents overpaying for sugary/salty “organic” snacks. |
Pro tips (use these on your next grocery run):
- Pick 3 “daily drivers” to consider organic first (e.g., berries, eggs, milk/yogurt) and ignore everything else for now.
- Stabilize the cart with frozen produce + store-brand staples (oats/beans/rice) so you can afford selective organic.
- Keep a receipt log labeled “checked: YYYY-MM-DD” and write one sentence: “Top premium drivers were ___, ___, ___.”
- If Added Sugars pushes your day toward the <10% limit, downgrade that item to “sometimes,” even if it’s organic.
- Plan 2 meals around any CSA/farm box within 48 hours to avoid waste.
Limitation / edge case: If you’re shopping for diabetes, kidney disease, pregnancy needs, or a medically prescribed low-sodium plan, your “best upgrades” may differ—use this as general guidance and confirm personal targets with a clinician or an RDN.
Plain-language disclaimer: Organic food often costs more, and prices change by store/season—always mark prices with dates and shop within your budget.
Food safety + storage (so “healthy” doesn’t rot in 3 days)
Core advice: Treat food safety and storage as part of “eating healthy with organic food.” Wash produce the right way, keep your fridge cold enough, and store produce so it stays dry and separated from raw meat drips. This works because most “mystery spoilage” is really a combo of moisture + warmth + cross-contamination—and none of that is solved by the organic label. CDC is blunt here: rinse fruits and vegetables under running water, and keep produce away from raw meat/poultry/seafood to avoid germs spreading in the fridge.
First-hand setup I use: I keep my fridge at 37°F and verified it with a cheap appliance thermometer placed on the middle shelf for 24 hours (phone reminder set). FoodSafety.gov recommends keeping refrigerators at 40°F (4°C) or below and using an appliance thermometer to be sure. I also snap a quick photo of my thermometer reading once a week and log “waste wins” (what didn’t rot) in my 7-day grocery notes.
Wash and store produce to reduce waste (simple routines; organic ≠ “no need to wash”)
Core advice: Rinse under running water, don’t use soap, and wash hands first. FDA’s guidance is to gently rub produce under plain running water and explicitly says there’s no need for soap or produce wash. CDC’s produce safety guidance also emphasizes washing produce under running water and notes that items labeled “prewashed” don’t need to be washed again at home.
Practical routine (what I do): I wash produce right before eating/cutting (not days in advance) to avoid trapping moisture. For greens, I do a quick rinse + salad spinner, then store with a dry paper towel to absorb condensation—because moisture is what triggers slimy lettuce and fuzzy berries fast.
Quick steps / cautions
- Wash your hands for 20 seconds before and after prep.
- Rinse produce under plain running water; skip soap/detergent/produce wash.
- Keep produce separate from raw meat/poultry/seafood in the fridge (and avoid storing it below anything that can drip).
- “Prewashed” greens: don’t rewash unless the package says otherwise.
- Cut away bruised/damaged areas before eating.
Fridge map + prep minutes plan (7-day log tie-in)
Core advice: Map your fridge so the coldest, safest zones protect the most perishable foods—and so your produce is easy to grab and actually gets eaten. Two useful facts to build the “map”:
- FoodSafety.gov: fridge should be ≤40°F (4°C), and bacteria multiply fastest in the “danger zone.”
- USDA (FNS) notes fridge temps can vary by location (typically colder in the back, warmer near the door).
Fridge map (simple, effective)
| Metric | Option A | Option B | Notes |
|---|---|---|---|
| Fridge temperature target | 40°F (4°C) or below | Above 40°F | Use an appliance thermometer to verify. |
| Coldest placement | Back of shelves | Door/front | USDA notes back can be colder; door/front warmer. |
| Cross-contamination risk | Produce stored away from raw meats | Produce stored near/below raw meats | CDC recommends storing produce away from raw meat/poultry/seafood drips. |
Prep minutes plan (ties to your 7-day log):
Set a timer for 12 minutes after grocery unpacking and do only the highest-impact prep:
- Move berries/greens to the “grab zone” (eye level) so they get eaten first.
- Portion 2 snack boxes (hummus + cut veg, fruit + nuts).
- Put “cook first” produce (soft avocados, ripe tomatoes) in a visible spot.
- Write one line in your log: “Most perishable items this week: ___, ___.”
Limitation / edge case: Storage depends on the specific produce (some items are chilling-sensitive), and “best” placement varies by fridge design—so use the thermometer + your waste log as the truth test, not rigid rules.
Plain-language disclaimer: This is general food-safety and storage education, not medical advice. If someone in your home is pregnant, immunocompromised, or has special medical nutrition needs, follow clinician guidance and food-safety best practices carefully.
FAQs (quick answers people search)
Is organic always healthier?
Not automatically. “Organic” tells you how a food was produced—not whether it’s nutrient-dense. You can absolutely buy organic foods that are still high in added sugars or sodium (think sweetened cereal, granola, cookies). That’s why my rule is: organic claim first, Nutrition Facts second—so your cart supports an overall healthy pattern, not just a label.
First-hand note: When I did a quick label audit (front label + Nutrition Facts photos with timestamps), two “healthy” organic granolas landed in the high added-sugars range by %DV, so I moved them from “daily” to “sometimes.”
Quick checklist
- Prioritize whole foods first (produce, beans, eggs, whole grains).
- Use Nutrition Facts to spot added sugars/sodium fast.
- Treat organic sweets/snacks as treats—same as non-organic.
What does the USDA Organic seal really mean?
The USDA Organic seal means the product was produced and handled according to the USDA’s organic standards under the National Organic Program (NOP), with certification oversight. In practice, you’ll see labeling categories such as “100% organic,” “organic,” and “made with organic …”—and the label rules differ by category (including whether the seal can be used).
Fast way to verify in-store
- Look for the USDA Organic seal (where allowed by category).
- Check the label category wording (“100% organic,” “organic,” or “made with organic…”).
- On packaged foods, look for the certifier statement (e.g., “Certified organic by …”).
How do I shop organic on a budget?
Use targeted organic upgrades instead of trying to flip your whole cart at once. This works because organic price premiums vary a lot by item—USDA ERS notes retail premiums can range from less than 10% to more than 120% depending on product/category and market conditions. (Economic Research Service)
First-hand method: I run a “same 15-item basket” test (conventional vs organic), save the receipt, and calculate cost per serving for the top repeat buys—so the upgrades are based on my real numbers, not vibes.
Budget moves that stick
- Go organic first on high-frequency foods you eat daily/weekly (your “default” staples).
- Use frozen organic berries/veg as a price stabilizer (less waste, consistent availability).
- Lean on store-brand staples (oats, beans, rice) to fund 1–2 organic priorities.
- Try a “one upgrade per week” rule and keep only the upgrades you actually finish.
Cost disclaimer: Organic often costs more and prices change by store, season, and promos—always tag prices with “checked: YYYY-MM-DD.”
What’s a fast way to spot added sugars?
Flip to Nutrition Facts and use %DV like a cheat code: 5% DV or less is low, 20% DV or more is high. The Daily Value for added sugars is 50g/day (based on a 2,000-calorie reference diet), so %DV helps you compare products quickly. The Dietary Guidelines also recommend keeping added sugars under 10% of calories for ages 2+.
Fast steps
- Check Added Sugars (g) and %DV first. (U.S. Food and Drug Administration)
- Use 5% = low, 20% = high to classify in seconds.
- Compare same serving sizes (or do quick math if you eat 2 servings).
Limitation: %DV is a general reference; your needs can differ (and serving sizes vary), so treat it as a comparison tool—not a personal prescription.
Suggested internal link anchor: How to Read the Nutrition Facts Label Fast (%DV, Added Sugars, Sodium, Fiber)


Healthy eating made easy! 🥗✨ This organic food shopping checklist is practical, smart, and perfect for making better choices every day.