
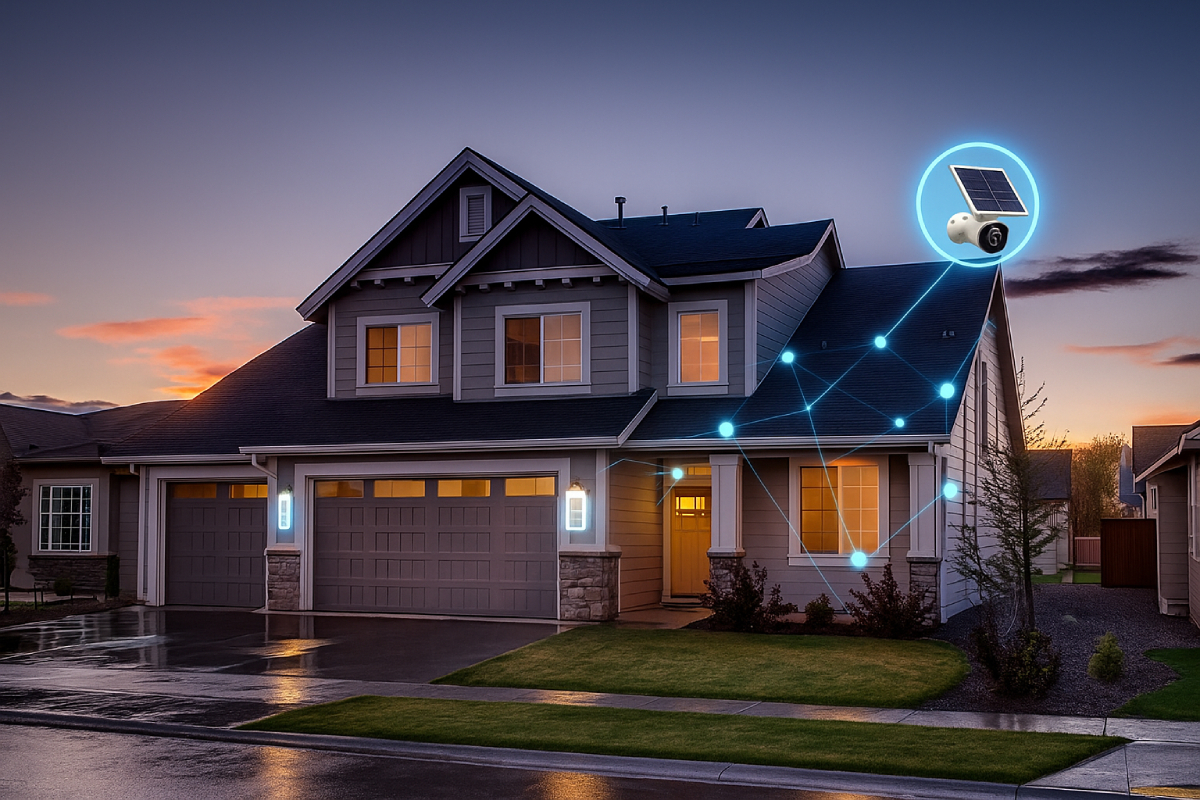
As a home security expert, I’ve observed that savvy homeowners are increasingly expanding their DIY security system to address new vulnerabilities—from unmonitored entry points to environmental hazards—because modular add-ons let you start small, control costs, and layer protection exactly where you need it most.
Today’s expansion options span magnetic door/window sensors and PIR motion detectors, high-resolution indoor/outdoor cameras, smart sirens and alarm modules, environmental monitors for smoke, CO, and water leaks, plus automation hubs that integrate lighting, locks, and more into a seamless, future-proof security network.
Assessing Your Existing Setup
Before you add new gear, a thorough audit of what’s already in place ensures you build on a solid foundation—inventorying every sensor, camera, and control panel lets you pinpoint exactly where protection exists and where it doesn’t, while mapping blind spots on a floor plan and running live tests reveals weak zones that new components can close.
Inventory Current Devices
Begin by cataloging every element of your DIY security system: note the make and model of your control panel or hub, list each door/window sensor and motion detector, and include all cameras—both indoor and outdoor—in your inventory.
Record each device’s physical location (e.g., “Front Door,” “Living Room Corner”) to visualize coverage on your floor plan.

Check battery levels and firmware versions as you go, since outdated or low-power devices can cause unexpected failures.
Finally, mark the operational status of each device—“Online,” “Offline,” or “Needs Maintenance”—to identify equipment that may require repair or replacement before expansion.
| Device Type | Model | Location | Status |
|---|---|---|---|
| Control Panel/Hub | Abode Essentials | Entry Hall | Online |
| Door/Window Sensor | Wyze Entry Sensor | Front Door | Battery Low |
| PIR Motion Detector | Eufy MotionSensor | Living Room Corner | Online |
| Indoor Camera | Wyze Cam v3 | Nursery | Firmware Update Needed |
| Outdoor Camera | Reolink Argus 3 Pro | Backyard Gate | Online |
Identifying Coverage Gaps
With your device inventory in hand, overlay each location on a scaled floor plan to spot unmonitored areas such as side entrances, blind corners, or garage zones.

Conduct a real-world test by walking every perimeter route and watching live camera feeds—mark any spots where motion isn’t detected or video feeds go dark.
Pay special attention to glare or obstructions (e.g., shrubs, pillars) that can create blind spots, and consider overlapping fields of view on adjacent cameras to eliminate gaps.
Finally, simulate intrusion scenarios—open windows, trigger sensors, and verify alerts—to ensure every critical entry point is covered before choosing where to place your new modules.
Choosing New Components
Below is a summary of key takeaways, followed by a detailed breakdown of each component category to help you choose the right devices for expanding your DIY security system.
Expanding your system means balancing targeted entry-point protection with broad-area coverage, opting for the right mix of sensors, cameras, alarms, and smart-home modules.
Contact (magnetic) door/window sensors are cost-effective for securing specific access points, while PIR motion detectors cover rooms and perimeters up to 40 ft away.
Security cameras range from fixed wired models offering 4K resolution and reliable PoE power to flexible wireless pan-tilt units with night-vision up to 30 m.
Sirens and alarms can be standalone 80–120 dB units or integrated into hubs for push notifications and two-way communication.
Finally, environmental sensors (smoke, CO, water-leak) and automation modules (smart lighting, appliance control) round out a future-proof, holistic security network.
Entry Sensors & Motion Detectors
Entry sensors (also called contact sensors) use a magnet and reed switch to detect when doors or windows open, making them ideal for pinpointing unauthorized access at specific points.
Passive infrared (PIR) motion detectors sense body heat over a wide area—typically up to 40 ft—and can cover whole rooms or driveways, though they may trigger false alarms from pets or rapid temperature changes.
| Feature | Door/Window Sensor | PIR Motion Detector |
|---|---|---|
| Coverage | Entry points only | Broad zones (up to ~40 ft radius) |
| Detection Mechanism | Magnetic contact/reed switch | Passive infrared (body heat) |
| Suitable Locations | Doors, windows, sliding glass | Rooms, hallways, backyards |
| False Alarm Risk | Low | Medium (pets, HVAC vents) |
| Average Cost (per unit) | $25 – $50 | $40 – $100 |
Security Cameras
Security cameras today come wired (Ethernet/PoE) or wireless (Wi-Fi or battery/solar). Wired cameras deliver consistent bandwidth for up to 4K resolution and uninterrupted power, making them ideal for critical areas.
Wireless models offer easy DIY installation and flexibility to mount anywhere without cabling, but depend on network strength and battery management.
Fixed-lens bullet cameras provide a dedicated field of view, while pan-tilt-zoom (PTZ) IP cameras let you remotely adjust angle and zoom to track movement—many support 1080p–4K video and infrared night vision up to 30 m.
| Camera Type | Resolution Options | Night Vision | Pros | Cons |
|---|---|---|---|---|
| Wired Fixed | HD–4K | IR up to 30 m | Stable connection; no battery changes | Complex install; limited placement |
| Wireless Bullet | 720p–1080p | IR up to 20 m | Easy install; portable | Wi-Fi dependent; battery recharges |
| Pan-Tilt-Zoom (PTZ) | 1080p–4K | IR + spotlight up to 25 m | Flexible viewing; motion tracking | Higher cost; power/cabling required |
Smart Alarms & Sirens
Standalone sirens emit 80–120 dB alarms—enough to deter intruders and alert neighbors—without wiring, while integrated siren modules plug into hubs for unified control and notifications.
A typical smart siren pairs with motion or door sensors to trigger both a loud on-site alarm and push alerts to your smartphone, and some offer two-way audio to communicate with visitors or monitoring centers.
Battery-backed units ensure protection during outages, and many support custom alert tones and strobe lights for enhanced visibility.
| Siren Type | Volume (dB) | Power | Integration |
|---|---|---|---|
| Standalone Siren | 80–120 dB | Battery or wired | Triggers on local sensor events |
| Integrated Module | 85–100 dB | Hub-powered + backup | Push notifications; two-way audio options |
Environmental & Automation Sensors
Beyond intrusion detection, environmental sensors safeguard against fire, gas, and water damage. Smoke and carbon monoxide detectors use photoelectric or electrochemical sensing to alert at the first sign of danger, while water-leak sensors notify you of pipe bursts or flooding.
Smart home automation modules—such as wireless lighting controllers and plug‐in appliance relays—extend security by triggering lights on motion or smoke events, deterring intruders and guiding occupants to safety.
IKEA’s new budget sensors (VALLHORN motion, PARASOLL entry, BADRING leak) under $10 expand functionality affordably when linked to a central hub.
| Sensor Type | Function | Typical Hub Protocol |
|---|---|---|
| Smoke / CO Detector | Detects smoke particles / CO gas | Z-Wave, Zigbee, Wi-Fi |
| Water-Leak Sensor | Senses moisture under appliances/pipes | Wi-Fi, proprietary RF |
| Smart Lighting Module | Automates lights on events or schedules | Zigbee Matter, Z-Wave |
These carefully chosen components will ensure your expanded DIY system is comprehensive, reliable, and future-proof—covering everything from break-ins to fires and floods while integrating seamlessly into a smart-home ecosystem.
Understanding Connectivity & Protocols
In modern DIY security networks, choosing the right connectivity protocol—Z-Wave, Zigbee, Wi-Fi, or the emerging Matter standard—ensures reliable, scalable, and secure communication between devices.
Each protocol operates on distinct radio frequencies or networking layers, impacting factors like range, interference, and power consumption.
Additionally, understanding hub and controller requirements is vital: some protocols mandate dedicated gateways or bridges, while others allow direct cloud integration for simplified setups.
Wireless Standards
A clear grasp of each wireless standard lets you optimize your DIY security system for performance, range, and compatibility.
| Protocol | Frequency | Topology | Typical Range | Power Use | Hub Required? | Notes |
|---|---|---|---|---|---|---|
| Z-Wave | 800–900 MHz | Mesh | 100–800 m (LR: 1.6 km) | Low | Yes (Z-Wave hub) | Region-locked; minimal Wi-Fi interference |
| Zigbee | 2.4 GHz (IEEE 802.15.4) | Mesh | 10–100 m | Low | Yes (Zigbee hub) | Open standard by CSA; some Wi-Fi overlap can cause interference |
| Wi-Fi | 2.4 / 5 GHz | Star (AP-based) | 30–100 m indoors | High | No (router/cloud) | Ubiquitous support; high bandwidth for video feeds |
| Matter | Wi-Fi, Thread (2.4 GHz), BLE | IP-based mesh | Depends on base (Thread ~30 m) | Medium–Low | Border router (Thread hub) | Backed by major ecosystems; emerging, improving interoperability |
Z-Wave
Z-Wave operates on a sub-1 GHz band, reducing interference with Wi-Fi and Bluetooth and providing extended range with its Long Range (LR) variant.
It uses a mesh topology where each device relays signals, but is region-specific—US and EU products aren’t interoperable without a compatible hub.
Zigbee
Zigbee runs primarily at 2.4 GHz under IEEE 802.15.4, delivering low-power, low-data-rate communications suitable for sensors and small actuators.
As an open-source standard maintained by the Connectivity Standards Alliance, Zigbee devices often bridge to IP networks via a hub for cloud or local control.
Wi-Fi
Wi-Fi devices connect directly to your home router and cloud services without a hub, offering high throughput for camera video streams but at the cost of greater power consumption and potential network congestion.
It’s universally compatible across smart-home platforms (Amazon, Google, Apple) without extra gateways.
Matter
Matter is an IP-based standard designed to unify smart-home interoperability across ecosystems like Apple Home, Google Home, and Amazon Alexa.
It leverages existing Wi-Fi, Thread, and BLE for device setup and operation, requiring a Thread border router (e.g., a compatible smart speaker or hub) to connect Thread devices to the wider network.
Hub & Controller Requirements
Choosing the right hub or controller setup is key to balancing simplicity, local control, and privacy.
- Z-Wave & Zigbee: Both require a dedicated hub or bridge to translate their radio protocols into IP for app and cloud control. Hubs like Samsung SmartThings, Aeotec, or Hubitat provide device management, automation, and local failover.
- Wi-Fi Devices: Connect straight to your home router and cloud services—no additional hub needed. While this streamlines setup, reliance on internet connectivity and third-party servers can raise privacy concerns.
- Matter Controllers: Matter’s design allows direct integration with existing Wi-Fi or Thread border routers. Devices join via BLE onboarding and communicate over IP, reducing the need for multiple proprietary hubs.
- Hybrid & Multi-Tech Hubs: For households using multiple standards, multi-protocol hubs (e.g., Home Assistant, Hubitat) support Z-Wave, Zigbee, Thread, and Wi-Fi, centralizing control while maximizing local automation and privacy.
By aligning your component choices with the right connectivity protocol and hub architecture, you’ll build a DIY security system that’s robust, scalable, and ready for future smart-home innovations.
Installation & Configuration
Before installing new devices, careful planning and configuration ensure reliable performance, minimal false alarms, and longevity of your DIY security system.
First, optimal device placement—mounting sensors at the recommended heights and covering entry points without dead zones—maximizes detection and deterrence.
Next, choosing between wired and wireless setups means trading installation complexity for convenience: hardwired devices offer rock-solid connectivity but require drilling and professional skills, while battery-powered units stick on with adhesive and can go almost anywhere—at the cost of periodic battery replacement.
Finally, a robust network and power plan—using a mesh Wi-Fi system or a healthy Z-Wave mesh with plenty of mains-powered repeaters, plus a battery-management routine—keeps sensors online and your home protected around the clock.
Planning Device Placement
- Sensor Height & Coverage: Mount motion sensors 6–8 feet off the floor to achieve a bird’s-eye view without creating low-level blind spots. Door/window contact sensors should align exactly when closed, with the magnet no more than ½ inch from the sensor body.
- Camera Positioning: Install cameras 8–10 feet high to maximize field of view and reduce tampering risk. Use corner-to-corner or mid-wall patterns to overlap coverage and eliminate blind zones.
- Avoid Obstructions: Keep sensors and cameras clear of furniture, plants, or decorative items. For outdoor cameras, angle them slightly downward, away from glare sources like streetlights or reflective surfaces.
| Device | Recommended Height | Key Tip |
|---|---|---|
| PIR Motion Sensor | 6–8 feet | Avoid corner “hot spots” |
| Door/Window Sensor | Aligned within ½ inch | Test with door/window open and closed |
| Indoor/Outdoor Camera | 8–10 feet | Overlap adjacent cameras by ~20 feet |
Wired vs. Wireless Setup
| Aspect | Wired Devices | Wireless Devices |
|---|---|---|
| Connectivity | Stable, interference-free via Ethernet or PoE | Relies on Wi-Fi or proprietary RF |
| Installation | Requires drilling, conduit/cabling, possible pro install | DIY-friendly adhesive mounts, minimal tools |
| Power Reliability | Constant main power with battery backup option | Battery-powered; 3–5 year life depending on use |
| Flexibility | Fixed locations; hard to reposition | Easily move or add devices anywhere |
| Maintenance | Battery only for backup (~10 years for smoke/CO) | Regular battery checks and replacements |
- Wired Pros: Uninterrupted signals, no RF interference, long-term low maintenance.
- Wired Cons: Higher upfront labor, visible cabling, less portable.
- Wireless Pros: Fast, tool-light install, perfect for rentals or finished basements.
- Wireless Cons: Battery depletion, possible Wi-Fi dead zones, periodic firmware updates.
Network & Power Considerations
- Wi-Fi Mesh Stability: A modern mesh system (e.g., Ubiquiti UniFi, Eero, Orbi) provides blanket coverage and seamless hand-off between nodes—critical for cameras and high-bandwidth alerts.
- Z-Wave Mesh Health: Z-Wave requires mains-powered devices (smart plugs, lamp modules) to act as repeaters—aim for at least one powered node every 30–50 feet to avoid dead links.
- Battery Management: Track battery status weekly via your hub’s dashboard; expect 3–5 years from lithium coin cells in door sensors and 1–2 years in PIR detectors, depending on usage. Replace rechargeable backup batteries in hubs and wired sirens every 5–7 years to maintain fail-safe operation.
- Power Redundancy: Consider adding a small UPS or 12 V SLA backup for your control panel and critical PoE switches to ride through short outages without losing coverage.
By following these best practices for placement, installation methods, and network and power planning, you’ll achieve a robust, reliable DIY security system that keeps your home safe and alert around the clock.
6. Testing & Troubleshooting
Below is a concise overview of the critical steps for testing, troubleshooting, and maintaining a DIY security system, followed by detailed best practices and tables to help you keep your setup rock-solid.
First, functional testing ensures every device—from sensors to cameras—operates as intended by walking through arming/disarming sequences, manually tripping sensors in test mode, and verifying live and recorded video feeds.
Next, understanding and fixing common issues—such as RF interference, false alarms from pets or wind, dead batteries, and pairing failures—dramatically reduces downtime and nuisance alerts.
Finally, a structured maintenance schedule with weekly, monthly, quarterly, and annual tasks (battery checks, firmware updates, full system drills, and backup battery replacements) maximizes reliability and extends device life.
Functional Testing
- Arming/Disarming Sequences: Use both the mobile app and keypad to arm and disarm your system, ensuring each command registers and sends push or SMS alerts.
- Sensor Trip Tests: Activate each sensor in “Test Mode” (if available) or manually trip door/window contacts and motion detectors—confirm the hub logs the event without triggering an actual alarm dispatch.
- Video Feed Checks: View live streams and play back recorded clips from each camera; test IR/night-vision performance in low light and ensure recording continuity during network fluctuations.
Common Issues & Fixes
| Issue | Symptoms | Fix |
|---|---|---|
| Signal Interference | Devices “drop off” network; missed alerts | Reposition Wi-Fi/Z-Wave repeaters; switch to less-crowded channels; enable QoS on router. |
| False Alarms | Random triggers from wind, pets, HVAC drafts | Lower PIR sensitivity; adjust sensor zones; trim vegetation; enable pet-immune sensors. |
| Dead Batteries | Chirping sensors; devices offline | Replace batteries proactively per manufacturer (lithium for door sensors: ~3–5 yr; PIR: ~1–2 yr). |
| Pairing Errors | Devices fail to join hub; red “unpaired” status | Bring device within 2 m of hub, reset to factory defaults, update firmware, then re-pair. |
Maintenance Schedule
Establish a recurring maintenance plan to catch issues before they escalate and keep your system up to date.
| Interval | Tasks |
|---|---|
| Weekly | • Inspect all entry sensors, motion detectors, and camera mounts• Check battery levels via app/dashboard• Wipe lenses and panels |
| Monthly | • Update firmware on all devices and the control panel• Update mobile app and run a full self-diagnostic• Clear old video logs |
| Quarterly | • Conduct a full system test: arm/disarm, trip every sensor, and verify video playback• Inspect wiring, mounts, and weather seals |
| Annually | • Replace control panel backup battery (every 3–5 yr) and any hub batteries• Review and update your preventative maintenance plan with a professional audit |
By rigorously following these testing protocols, troubleshooting guidelines, and maintenance intervals, you’ll keep false alarms to a minimum, ensure every sensor and camera stays online, and maintain peak performance for years to come.
Cost & Budgeting
Below is an overview of typical equipment costs for expanding a DIY security setup, followed by a discussion of one-time fees versus ongoing subscriptions—so you can budget effectively and choose the right mix of devices and monitoring services.
Equipment Cost Comparison
| Device | Average Price (USD) |
|---|---|
| Door/Window Sensor | $20 – Most basic contact sensors start around $20 each. |
| Motion Detector | $20 – Wyze’s PIR motion sensor retails at $20.98, while pet-friendly models run about $20. |
| Indoor/Outdoor Camera | $35–$70 – Wyze Cam v3 is $35.98, Reolink Argus 3 Pro about $69.99 for a single unit (amazon.com). |
| Smart Home Hub | $28–$120 – SmartThings Hub at €27.79 (~$30) to a Ring Alarm Base Station at $119.99. |
| Smart Siren | $18–$25 – Standalone smart sirens (e.g., ASHATA) can be as low as $18.61 (amazon.com). |
Subscription vs. One-Time Fees
Many DIY systems offer optional cloud recording and professional monitoring alongside purely one-time hardware purchases:
- Cloud Storage Plans:
- Wyze Cam Plus: $1.99/month or $14.99/year per camera for person-only detection and unlimited clip length.
- Ring Home Basic: $4.99/month or $49.99/year for one device with 180 days of event history; Home Standard: $9.99/month or $99.99/year for all devices; Home Premium: $19.99/month or $199.99/year for 24/7 continuous recording.
- Professional Monitoring:
- Ring Protect Pro: $20/month or $200/year adds cellular backup, 24/7 monitoring, and eero Secure.
- SimpliSafe Active Guard Outdoor Protection: $49.99/month (overnight) or $79.99/month (24/7) for live agent response on selected cameras.
When Subscriptions Are Worth It:
- Extended Video Retention: If you need more than local storage (e.g., legal evidence or long-term review), cloud plans provide off-site archives.
- Professional Response: For homeowners who travel frequently or have high-value assets, professional monitoring adds a rapid human layer of response.
- Advanced Features: AI-driven person/vehicle alerts, 24/7 continuous recording, and cellular backup protect against outages and false alarms.
When One-Time Fees Suffice:
- Basic Coverage: DIY enthusiasts on a budget can rely on local storage (microSD or NVR) and mobile-only alerts.
- Low-Risk Properties: For second homes or low-traffic areas, occasional manual checks may replace continual monitoring.
- Privacy Concerns: Local-only setups avoid cloud storage, reducing exposure of personal footage to external servers.
By balancing upfront equipment purchases with the right level of ongoing service, you’ll tailor costs to your security needs—whether you prefer a fully self-managed system or the peace of mind of professional monitoring.
Best Practices & Compliance
In today’s regulatory environment, homeowners must navigate a patchwork of electrical codes and permit requirements to install or expand DIY security systems safely and legally.
Ensuring your equipment carries recognized certifications—such as UL 681 for alarm installations and UL 827 for central station services in North America, or CE marking under the EN 54 series in the EU—demonstrates compliance with rigorous safety and performance standards.
Equally important is safeguarding user privacy: locking down administrative interfaces with multi-factor authentication, enforcing strong, unique password policies, and adhering to data protection laws like GDPR and COPPA builds trust and protects sensitive footage from unauthorized access.
Safety Warnings & Regulations
Before adding new devices, verify your jurisdiction’s low-voltage wiring codes: most CCTV systems require 12 V DC, 24 V AC, or even 120 V AC power in compliance with local standards to prevent fire or shock hazards.
In many areas, monitored alarm systems and smoke detectors also trigger alarm permit or building permit requirements—check with your city or county code enforcement office to avoid fines and installation delays. For equipment certification, look for UL Solutions marks:
- UL 681 for installation and classification of burglar and holdup alarm systems
- UL 827 for central station alarm services
In the European Union, CE marking under the EN 54 series is mandatory for fire detection and alarm products, ensuring compliance with safety, health, and environmental protection requirements before sale.
| Certification | Region | Applicable Standards | Purpose |
|---|---|---|---|
| UL 681/827 | North America | UL 681, UL 827 | Verifies alarm system performance and installation |
| CE (EN 54) | European Union | EN 54 (Parts 1–30) | Ensures fire/alarm products meet EU safety requirements |
Privacy & Data Security
Secure Administrative Interfaces: Only permit authorized devices to access control panels or camera dashboards; implement multi-factor authentication (MFA) to block brute-force or credential-stuffing attacks.
Strong Password Policies: Replace all default credentials with unique passwords at least 12 characters long—mixing letters, numbers, and symbols—and enforce periodic rotation to mitigate credential theft.
GDPR Compliance: In the EU, video surveillance must adhere to GDPR principles:
- Provide clear privacy notices explaining data collection and retention
- Apply data minimization—only record what’s necessary for security purposes
- Securely store footage with access logs and encryption
- Honor data subject rights to access, rectify, or erase personal video
COPPA Requirements: In the U.S., any system or service directed at children under 13 that collects personal information—such as video clips—must obtain verifiable parental consent, publish a clear privacy policy, and implement secure data handling and retention practices to comply with COPPA.
By rigorously following local safety regulations, obtaining proper certifications, and embedding privacy-by-design principles into your security network, you’ll build systems that are not only effective at deterring threats but also fully compliant with today’s stringent legal and ethical standards.
Future-Proofing Your System
Designing your DIY security system for the future means choosing modular, standards-based platforms that grow with your needs, integrating seamlessly into evolving smart-home ecosystems while maintaining privacy and reliability.
Platforms like Resideo’s ProSeries and Konnected’s Alarm Panel Conversion Kit let you add or swap sensors, cameras, and LTE modules without replacing the main control panel.
Embracing open protocols such as Z-Wave, Zigbee, and the upcoming Matter standard ensures broad device compatibility and simplifies future integrations.
Built-in Alexa support in ProSeries or through SmartThings bridges delivers hands-free control and richer automation routines.
Multi-protocol hubs like Samsung SmartThings unify RF and IP communications, making network health monitoring and troubleshooting more efficient (amazon.com).
For privacy-focused homeowners, local-first AI assistants such as FutureProofHomes’ Base Station offer offline voice control with optional cloud logic.
.Security.org experts also rank modular expandability as a critical criterion in their Best Home Security Systems of 2025 review.
Scalability & Modular Upgrades
Opt for platforms designed for seamless expansion—Resideo’s ProSeries supports plug-in modules for additional sensors, cameras, and LTE failover without system downtime.
Konnected’s Alarm Panel Conversion Kit repurposes existing wired sensors into modern DIY hubs, extending equipment lifespan and reducing e-waste.
Plan your RF mesh networks for at least 50 Z-Wave or Zigbee nodes, placing repeaters every 30–50 feet to maintain signal integrity as you add devices.
Document your current configuration and use VLANs or segmented SSIDs to isolate security traffic, streamlining future upgrades and troubleshooting.
| Platform | Expansion Model | Supports Existing Wiring | Comments |
|---|---|---|---|
| Resideo ProSeries | Plug-in modules via ProA7 panel | No | Built-in Alexa; LTE backup ready |
| Konnected Alarm Conversion | Retrofit wired sensors to modern hubs | Yes | Open-source kit; scalable design |
| SmartThings Hub + Modules | Add Z-Wave/Zigbee devices via SmartThings Hub | No | Multi-protocol support; broad device ecosystem (amazon.com) |
Smart Home Ecosystem Integration
Integrate voice assistants by linking your hub to Amazon Alexa and Google Assistant—SmartThings makes it easy to arm/disarm your system, check sensor status, and view camera feeds with simple voice commands.
For Apple users, devices compatible with HomeKit or Matter can leverage Siri controls and secure local automations via Homebridge or native support.
Use platforms like IFTTT, Home Assistant, or Node-RED to create custom routines—such as flashing lights on a motion trigger or sending SMS alerts when an alarm trips—for deeper personalization.
While cloud-to-cloud integrations offer convenience, always maintain critical local automations to ensure your security system remains operational during internet outages.
Conclusion
As you’ve seen, expanding your DIY security system starts with a thorough assessment of your existing devices and coverage gaps, then moves on to selecting the right mix of entry sensors, cameras, alarms, and environmental monitors; understanding connectivity standards and hub requirements; planning optimal placement; choosing between wired and wireless installations; and finally testing, troubleshooting, and budgeting wisely—all while adhering to safety regulations and future-proofing for seamless smart-home integration.
Ready to take the next step? Download our free “DIY Security Expansion Checklist” to map your upgrade journey and explore our expert-recommended component bundles to secure every corner of your home with confidence.
FAQs
What components do I need to expand my DIY security system?
Start with door/window sensors and motion detectors, then add cameras (wired or wireless), sirens, and environmental monitors for smoke or leaks.
Do I need a hub to add new devices?
Z-Wave and Zigbee devices require a compatible hub, while Wi-Fi and Matter-certified gadgets can often connect directly to your router or border router.
How often should I test and maintain my system?
Perform weekly battery and status checks, monthly firmware updates, quarterly full system drills, and annual backup-battery replacements.
Are wireless sensors reliable?
High-quality wireless sensors offer 3–5 years of battery life and robust RF mesh networks but may need occasional network re-pairing in case of interference..
Is professional monitoring worth the subscription?
If you travel often or have high-value assets, a $10–$20/month monitoring plan adds rapid human response and cellular backup during outages
Main Tips
- Always map existing devices before buying more
- Prioritize PoE cameras for main entryways to avoid Wi-Fi dropouts
- Use mains-powered Z-Wave devices as repeaters every 30 ft
- Run a full system test in “Test Mode” monthly
- Encrypt your hub and enable MFA on all accounts


