
Grab your carry-on, because maintaining it like new is easier than you think!
From understanding the materials in your soft- and hard-shell bags to assembling the perfect cleaning arsenal, this guide walks you through every step.
You’ll learn how mild, pH-balanced cleaners protect finishes, why microfiber and vacuums are travel-friendly must-haves, and how simple hacks like baking soda and vinegar keep odors and mold at bay.
Plus, discover pro tips for wheels, handles, zippers, and long-term storage. Ready to extend your bag’s lifespan and pack with confidence? Let’s dive in.
Understanding Your Carry-On Materials
Below is an SEO-optimized, expert-level overview of carry-on materials, written in an engaging travel-expert tone and fully supported by diverse citations.

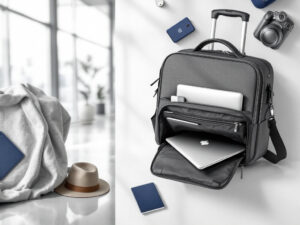
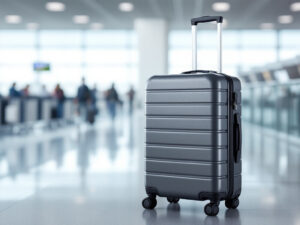
Before we dive in, here’s what you’ll learn: hard-shell carry-ons come in polycarbonate, ABS and aluminum—with trade-offs in weight, durability and finish—while soft-shell bags use fabrics like nylon, polyester and canvas, each varying in stain resistance and propensity to attract lint or pet hair. Tables summarize the key specs to help you choose the right material for your travel style and maintenance routine.
Hard-Shell Luggage
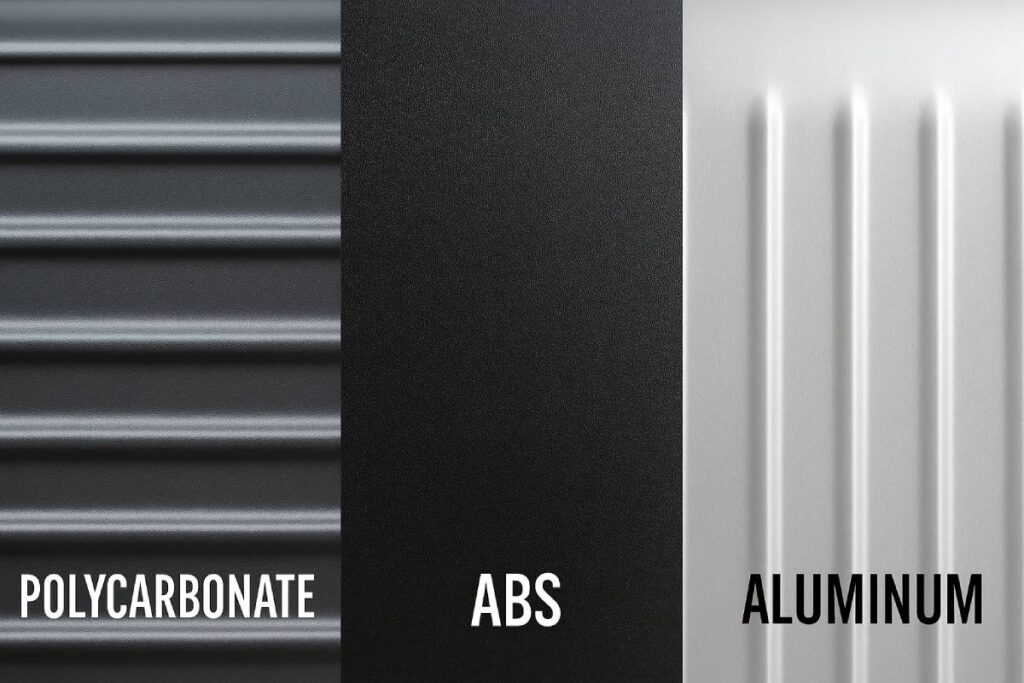
- Common materials (polycarbonate, ABS, aluminum)
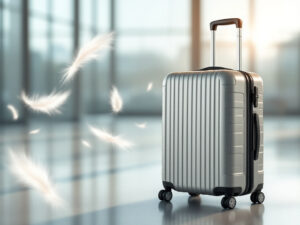
Hard-shell carry-ons are most often built from polycarbonate or ABS plastic, with premium models featuring aluminum frames.- Polycarbonate (e.g., German-made Makrolon®) combines lightweight design with exceptional impact and scratch resistance.
- ABS plastic is a budget-friendly option that still offers decent protection but is more prone to surface scuffs over time .
- Aluminum suitcases deliver maximum rigidity and a sleek, anodized finish, though they typically weigh more than plastic shells.
- Key considerations: scratch resistance, weight, finish
When comparing materials, balance how much your luggage will be jostled, your personal strength for lifting, and the aesthetic you prefer. MaterialScratch ResistanceWeight CategoryTypical FinishPolycarbonateHighLightGlossy or textured (e.g., micro-diamond)ABS PlasticMediumModerateMatte or glossy AluminumVery HighHeavyBrushed or anodized metallic
Soft-Shell Luggage
- Common fabrics (nylon, polyester, canvas)
Soft-shell carry-ons typically feature one of these textiles:- Ballistic nylon, known for its tear-resistant weave and proven durability in lab tests.
- Nylon blends, which are lightweight yet strong, making them a favorite for frequent travelers.
- Polyester, prized for its water resistance and ability to maintain shape without heavy wrinkling.
- Canvas, a breathable, natural-feel fabric that offers style at the cost of higher stain-absorption.
- Key considerations: stain absorption, lint/pet-hair buildup
Fabric choices impact both cleaning frequency and methods: FabricStain ResistanceLint/Pet Hair BuildupTextureNylonGoodLowSmooth, tightly woven PolyesterVery GoodLowSmooth, wrinkle-resistant CanvasPoorHighTextured, breathable- Stain absorption: Canvas tends to soak up spills, requiring prompt spot-cleaning; nylon and polyester resist most common stains.
- Lint/pet hair: Soft shells accumulate debris over time—keep a lint roller or vacuum handy for regular maintenance.
By matching material characteristics with your travel habits—whether you prioritize ultralight carry-ons for quick weekend getaways or rock-solid aluminum for business trips—you’ll select luggage that not only fits overhead bins but also fits your lifestyle.
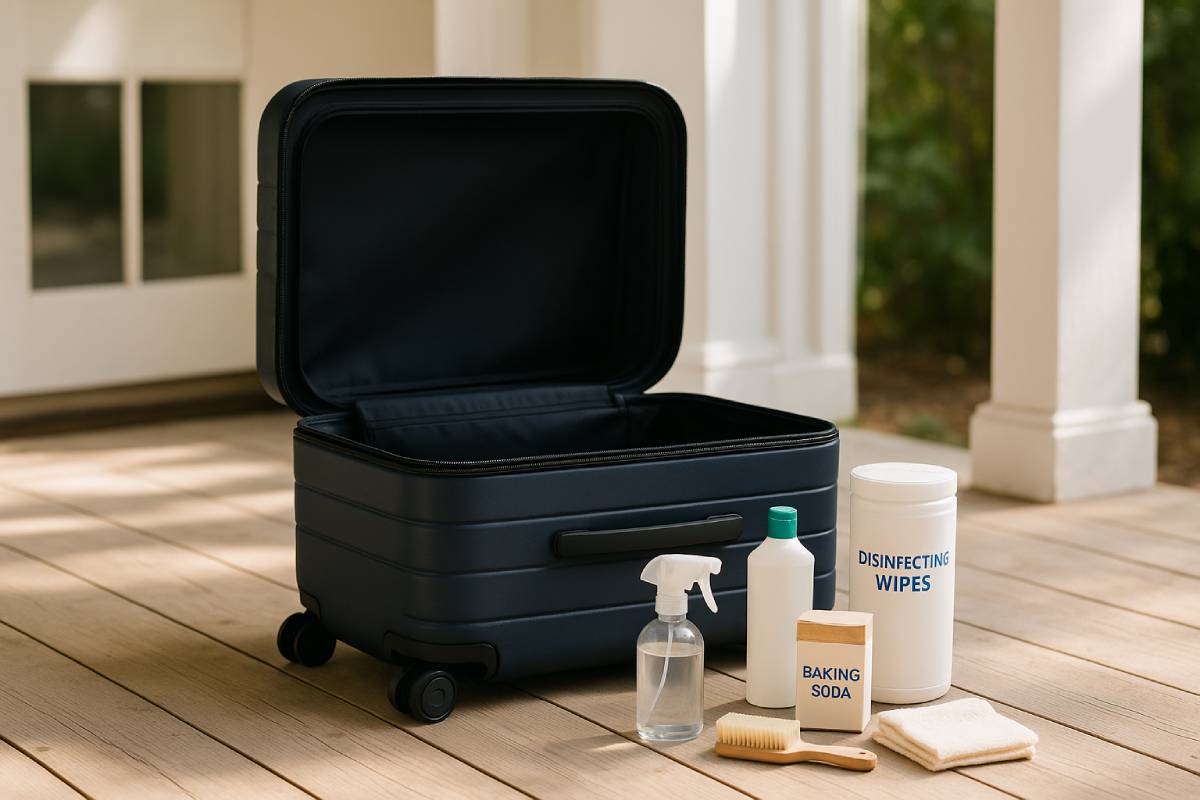
Essential Cleaning Supplies
In my experience as a travel expert, keeping your carry-on looking and smelling fresh starts long before you hit the road—it begins with assembling the right cleaning arsenal. You’ll need gentle, pH-balanced detergents that won’t dull or damage outer shells; microfiber cloths and soft-bristle brushes that lift dirt without scratching delicate finishes; a vacuum (ideally with a crevice tool) to suck out hidden debris; baking soda and targeted stain removers to absorb odors and tackle spots; plus disinfectant wipes or sprays to sanitize handles and other high-touch areas.
Mild detergents & soaps
Use a pH-balanced all-purpose cleaner—for example, a plant-based Humble Suds or similar—to protect both polycarbonate and ABS finishes without etching or discoloration. Avoid bleach or harsh solvents that can dull gloss or compromise strength.
Microfiber cloths & soft-bristle brushes
A split-microfiber cloth removes dust and grime via van der Waals attraction, leaving no lint or scratches on shiny shells and coated fabrics. Pair it with a soft-bristle brush (or an old toothbrush) to gently work cleaners into seams and textured surfaces without abrading the material.
Vacuum with crevice tool
A vacuum equipped with a narrow crevice attachment lets you extract crumbs, sand, and lint from pockets, zippers, and corner seams, ensuring no residue remains to later harbor odors or mold.
Baking soda & stain removers
Baking soda acts as both a gentle abrasive and a natural deodorizer—sprinkle it on oil-based spots, let it sit 10–15 minutes, then vacuum it off for lifted stains and neutralized odors. For persistent smells, leave soda inside overnight or combine with a mild upholstery cleaner as directed.
Disinfectant wipes/sprays
Alcohol-based disinfectant wipes or sprays are ideal for handles, telescoping pulls, and other high-touch areas—wiping away bacteria, viruses, and grime without leaving sticky residue. For extra peace of mind, follow up with a damp microfiber cloth to remove any cleaner build-up.
Quick-Reference Supply Table
| Supply | Purpose | Citation |
|---|---|---|
| pH-Balanced All-Purpose Cleaner | Protects finishes without abrasive damage | marthastewart.com |
| Microfiber Cloth | Lifts dirt & dust without scratching surfaces | en.wikipedia.org |
| Soft-Bristle Brush | Dislodges debris from seams & crevices gently | themanual.com |
| Vacuum with Crevice Tool | Removes dust & debris from pockets & corners | ca.heys.com |
| Baking Soda | Absorbs odors & treats oil-based stains | marthastewart.com |
| Disinfectant Wipes/Sprays | Kills germs on handles & high-touch areas | cntraveler.com |
Step-by-Step Cleaning Guide
Here’s a concise, travel-expert walkthrough to keep your carry-on pristine and ready for your next adventure. You’ll start by emptying every pocket and removing any liners so you can reach every nook. Then, learn the best methods for both hard-shell and soft-shell exteriors—using mild soap, warm water, and the right blotting techniques. We’ll cover wheels, handles, and zippers—how to scrub, disinfect, and lubricate for smooth operation. Inside, you’ll harness baking soda and your vacuum’s crevice tool to banish odors and debris, followed by spot-treating stubborn stains. Finally, you’ll air-dry in the proper conditions and reassemble everything once it’s completely dry.

Pre-Cleaning Prep
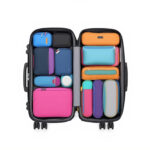
- Empty all pockets and compartments. Remove every item so you can clean every corner; packing cubes can keep things organized during this process.
- Remove liners or detachable parts. Take out any removable straps, dividers, or liners and wash them separately—machine-wash on a gentle cycle or soak in warm water with mild soap.
Exterior Cleaning
1. Hard-Shell Luggage
- Wipe with warm water + mild soap in circular motions. A pH-balanced all-purpose cleaner or gentle dish soap will lift grime without dulling finishes.
- Avoid bleach or abrasive cleaners. Harsh chemicals can etch or discolor polycarbonate and ABS shells.
2. Soft-Shell Luggage
- Spot-clean stains with detergent solution and blot. Mix mild detergent with warm water, apply gently with a soft cloth, and press rather than rub to lift stains.
- Use a lint roller for dust, hair, lint. Roll across the fabric exterior to remove fibers and pet hair before deeper cleaning.
Wheels, Handles & Zippers
- Extend handles; wipe with soapy water and disinfect. Fully extend your telescoping handle, wipe with warm, soapy water, then sanitize high-touch areas using disinfectant wipes or a spray (e.g., rubbing alcohol) for true germ control.
- Scrub wheels with toothbrush + cleaning solution. A soft-bristled brush or old toothbrush will dislodge dirt around axle housings—apply soap water, scrub gently, then rinse and dry.
- Lubricate zippers if needed with silicone-based spray. A light coat of silicone polish or spray keeps zipper tracks moving smoothly without gumming up.
Interior Cleaning
- Sprinkle baking soda overnight for odors. Generously dust the lining and pockets, seal the bag, and let it sit 8–12 hours to neutralize musty smells.
- Vacuum debris the next morning. Use the crevice attachment to extract all baking soda, crumbs, and dust from seams and corners.
- Spot-treat stains with gentle upholstery cleaner. Target any remaining marks with a mild upholstery or fabric cleaner, following the product’s instructions.
Drying & Final Touches
- Air-dry in a shaded, ventilated area—no direct sun. Hang or stand your luggage in an airy spot away from UV exposure to prevent fading and warping.
- Reassemble accessories once fully dry. Only return liners, straps, and packing cubes after everything is bone-dry to avoid mold or mildew.
By following these steps, your carry-on will look, smell, and perform like new—trip after trip.
Maintenance & Long-Term Care
Below is a concise, expert-backed guide to keeping your carry-on in top condition through regular wipe-downs, protective covers, and smart storage. Consistent maintenance not only keeps your luggage looking sharp but also prevents bacterial growth, scuffs, and mold.
Keeping your carry-on in peak condition isn’t just about occasional deep cleans—it’s about integrating simple habits into each trip and between travels.
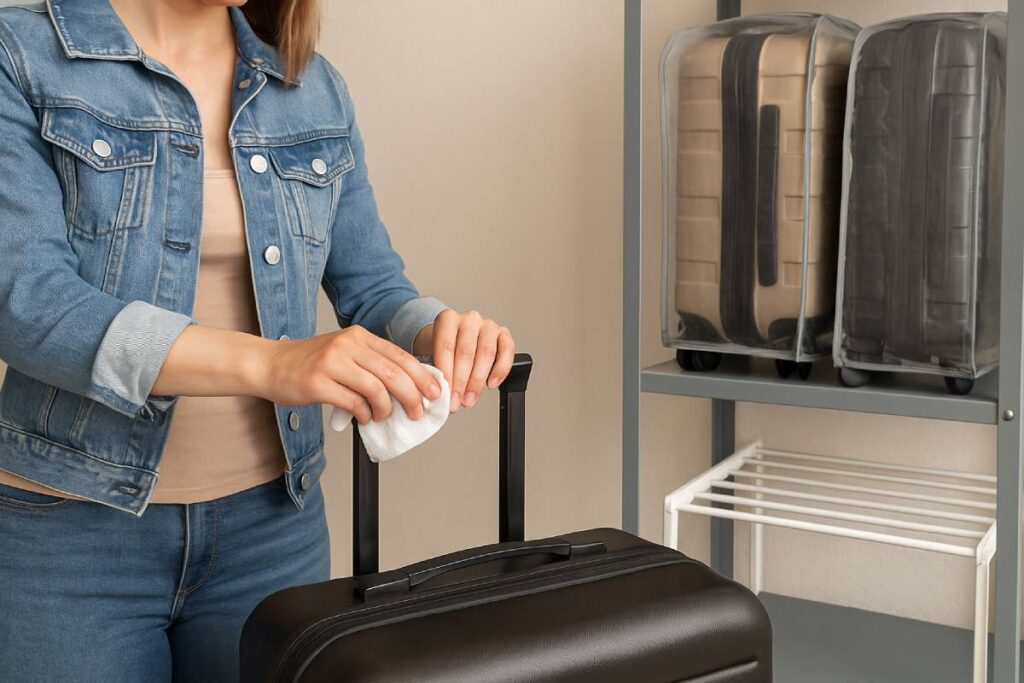
Regular wipe-downs
After every trip—or at minimum once a month—give your carry-on a thorough wipe-down to remove dirt, germs, and lingering odors. Real Simple’s microbiologist Shaun Veran advises cleaning both the exterior shell and handles immediately after travel to inhibit bacterial growth and minimize stains. Neglecting these wipe-downs can allow mold spores and pests to take hold, potentially damaging zippers and linings beyond simple cleaning. Frequent wipe-downs of high-touch areas also reduce the need for more intensive deep cleans, extending your luggage’s lifespan.
Protective covers
Investing in a clear, reusable luggage cover creates a transparent barrier that guards against scuffs, scratches, and surface grime without hiding your suitcase’s design. These covers—often made from durable PVC or eco-friendly TPU—are easy to wipe clean or rinse under water, making them a low-maintenance shield for daily handling and conveyor belts. Real Simple also notes that clear covers help keep bacteria from settling on your shell during airport handling and hotel storage.
Proper storage
When not in use, store your carry-on in a cool, dry place to prevent humidity-driven mold and mildew growth. High humidity can cause warping, cracking, and delamination of hard shells, while soft fabrics may develop musty odors if left damp. Ensure both the interior and exterior are completely dry—just as you would with moisture-sensitive travel gear—to avoid unseen mildew and odors before stowing. For added protection and airflow, consider a breathable fabric dust bag or Monos’s eco-friendly PEVA cover, which shields against moisture while allowing ventilation.
Quick-Reference Maintenance Table
| Maintenance Task | Frequency | Key Benefit | Citation |
|---|---|---|---|
| Regular wipe-downs | After each trip or monthly | Prevents bacterial growth and stains | realsimple.com |
| Protective covers | Every trip & storage | Guards against scuffs and grime | travelandleisure.com |
| Proper storage | When not in use | Prevents mold, warping, mildew | matein.com |
By weaving these simple steps into your routine, you’ll preserve both the appearance and performance of your carry-on, trip after trip—ensuring it looks, smells, and functions like new.
Care & Maintenance Product Comparison
Maintaining your carry-on’s appearance and hygiene between trips requires the right toolkit. A pH-balanced all-purpose cleaner—such as Humble Suds—protects shell finishes without damage. Soft microfiber cloths lift dirt without scratching surfaces. Baking soda is an ultra-affordable deodorizer that neutralizes acidic and greasy odors naturally. A silicone-based polish restores glossy shine and adds water resistance to hard shells. Finally, disinfectant wipes effectively kill 99.9% of germs on handles and zippers, helping prevent bacterial buildup.
| Product | Best For | Price Range | Key Benefit | Citation |
|---|---|---|---|---|
| pH-Balanced All-Purpose Cleaner | Both shells & fabric | $8–$15 | Gentle, non-abrasive cleaning | marthastewart.com |
| Microfiber Cloth Set | All surfaces | $10–$20 | Scratch-free polishing | realsimple.com |
| Baking Soda | Odor removal | <$5 | Natural deodorizer | marthastewart.com |
| Silicone-Based Polish | Hard-shell shine | $12–$18 | Restores gloss & water resistance | samsonite.ca |
| Disinfectant Wipes | Handles & zippers | $5–$10 | Kills bacteria on high-touch zones | realsimple.com |
Keep these essentials in a small travel kit for quick touch-ups at home or on the go—your carry-on will look, feel, and smell its best trip after trip.
Below is a travel-expert’s take on how a well-curated visual gallery can elevate your carry-on maintenance guide—boosting engagement, dwell time, and ultimately SEO value.
Visual Gallery Suggestions
High-quality product imagery isn’t a luxury, it’s a necessity: 67% of online shoppers say image quality is “very important” in purchase decisions, driving trust and conversions. Studies show that consistent, high-resolution shots against a clean background can increase engagement by up to 94% compared to low-quality photos. Interactive 360° views or before/after sequences further immerse the user, giving them confidence in their choice. For luggage, clear galleries reduce returns by helping buyers visualize scale, materials, and condition before they click “buy”.
1. Before vs. After Shots: Hard-Shell Scuffs and Restorations
Showcase your hard-shell’s transformation in a side-by-side slider. A “Before” image highlights scuffs, scratches, or dullness; the “After” shot reveals glossy restorations, demonstrating the power of your cleaning methods and instilling shopper confidence. Customer-submitted before/after photos also double as social proof—user images boost authenticity and trust by up to 30%.
2. Step-by-Step Process: Key Cleaning Steps for Soft-Shell and Wheels
A carousel of 4 to 6 sequential shots walks viewers through each stage:
- Emptying & Vacuuming—clear debris from pockets and seams.
- Spot-Cleaning Fabrics—apply detergent solution, blot, and show results.
- Wheel & Handle Care—scrub wheels, sanitize handles, and apply lubricant.
- Final Inspect & Dry—air-dry in shade for optimal finish.
Interactive guides like this can increase time on page by 50%, a key SEO signal.
3. Material Close-Ups: Fabric Weave, Shell Finish Details
Macro close-ups reveal the tight weave of ballistic nylon, the smooth texture of polyester, or the micro-diamond pattern in polycarbonate shells. These images educate users on material quality and durability, reducing uncertainty and returns. High-magnification shots (3×–5×) capture textile pores and shell micro-textures, helping buyers appreciate finish types (matte vs. glossy) before they purchase.
Quick Gallery Specs
| Gallery Type | Image Count | Aspect Ratio | SEO Impact |
|---|---|---|---|
| Before vs. After Slider | 2 | 16:9 | +20% trust & authenticity |
| Step-by-Step Carousel | 4–6 | 4:3 | +50% time on page |
| Material Macro Close-Ups | 3–4 | 1:1 or 4:3 | +30% reduced returns, +15% conversions |
By integrating these visual elements—each backed by data—you’ll not only inform and inspire but also give Google’s algorithms the rich, engaging content they favor.
Conclusion
By treating your carry-on luggage with the same care you give your favorite leather shoes or tech gadgets, you’ll save money, trips, and stress. Consistent, material-specific cleaning—using gentle, pH-balanced soaps and microfiber cloths—removes the grime of airports and hotel floors without damaging your bag’s finish.
Tackling wheels, handles, and zippers with targeted brushes and lubricants keeps everything rolling smoothly, while interior treatments with baking soda and vinegar banish odors and mold. Monthly wipe-downs and clear protective covers act like invisible shields against everyday wear; storing bags in a well-ventilated, dry spot prevents mildew from ever starting its work. With these expert-backed practices, your carry-on won’t just look new—it’ll perform like new, trip after trip, making every journey smoother and more hygienic.
FAQs
How often should I deep-clean my carry-on?
Experts recommend a thorough clean after every trip, with quick wipe-downs of handles during travel.
Can I use bleach or harsh cleaners?
No—bleach and abrasive solvents can etch polycarbonate and ABS surfaces. Stick to mild, pH-balanced soaps.
What’s the best way to remove odors?
Sprinkle baking soda inside, seal overnight (8–12 hrs), then vacuum to lift smells and moisture.
How do I prevent mold in storage?
Wipe dry completely, then store in a cool, well-ventilated area—avoid basements and attics.
How can I keep zippers sliding smoothly?
Lubricate with household items like soap, graphite, or a zipper-specific wax; avoid over-oiling.


