
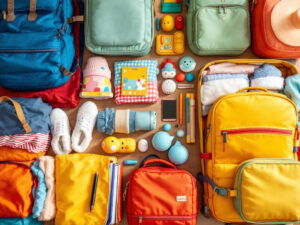
Picture this: you’ve just returned from an adventure, and your trusty suitcase looks like it survived a hurricane—with scuffs, stains, and maybe even mold lurking inside.
Luggage maintenance isn’t just vanity; keeping your bags clean and functional protects your investment, blocks germs, and ensures smoother travels every time.
From quick post-trip wipe-downs to seasonal deep cleans and emergency DIY patches, our comprehensive guide will show you how to maintain hard-shell, soft-sided, and leather luggage like a pro.
No jargon, just easy steps, expert tips, and product recommendations to keep your bags looking—and performing—like new on every journey, any time, guaranteed.
Understanding Your Luggage Materials
Understanding the material your luggage is made from is the first step in keeping it looking—and performing—like new. Hard-shell, soft-sided, and leather cases each have unique properties that dictate how you clean, maintain, and troubleshoot them. By tailoring your care routine to the material, you’ll prevent common wear points (from scuffs and tears to drying and fading), extend the lifespan of your bags, and save money on replacements or repairs. Below, you’ll find a breakdown of each material’s key traits and typical issues.
Hard-Shell Luggage
Characteristics
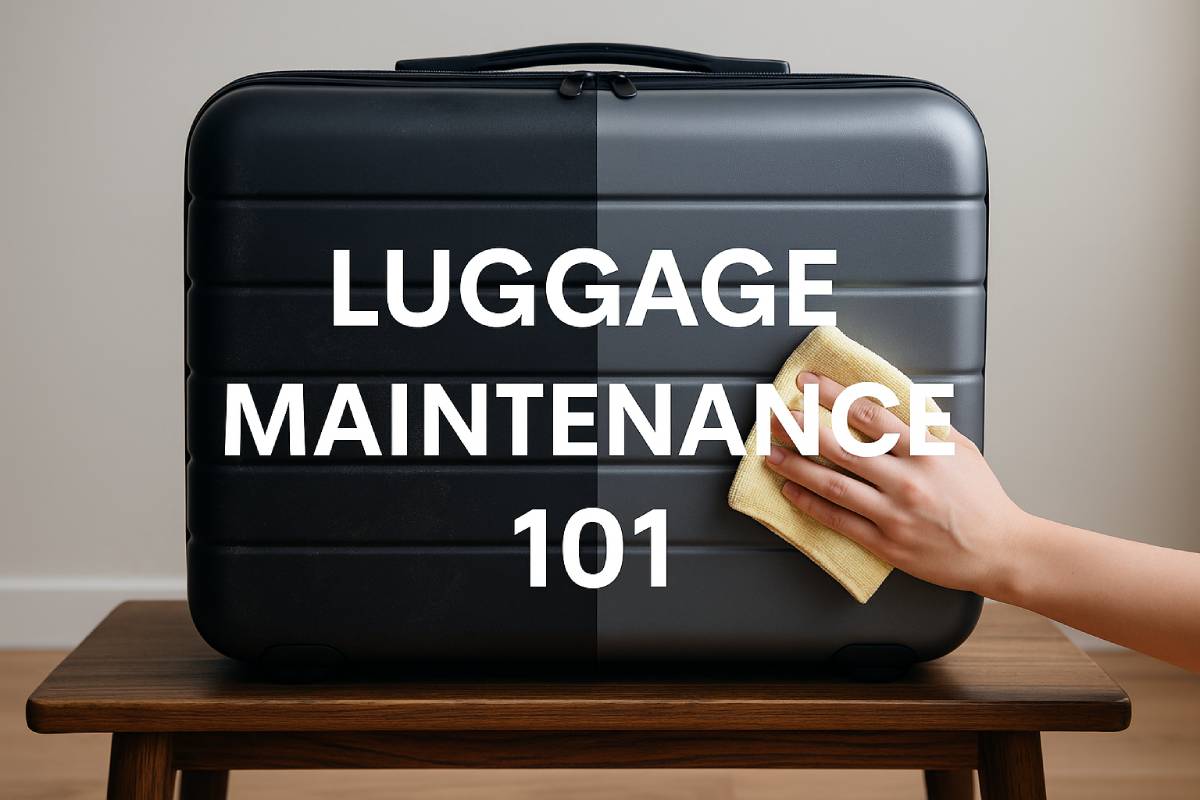
Hard-shell luggage is prized for its rigidity and resilience, often constructed from materials like polycarbonate or ABS that resist impacts and repel water. This makes these cases exceptionally durable and easy to wipe down after a trip—just grab a microfiber cloth and mild detergent for a quick clean .
Common Problems
- Surface Scratches & Scuff Marks: Rough handling on conveyor belts can leave visible marks. Most minor scuffs buff out easily using a slightly dampened magic eraser or a specialty plastic polish.
- Hinge Wear: Frequent opening/closing under pressure can loosen or misalign hinges. Travelers sometimes apply duct tape for a temporary fix, but replacing the hinge plate or riveting in a new one ensures smooth operation long-term.
Soft-Sided Luggage
Characteristics
Soft-sided luggage typically uses durable fabrics such as ballistic nylon or polyester. These materials make the case lightweight, slightly expandable for over-packing, and flexible enough to squeeze into tight overhead bins.

Common Problems
- Fabric Stains: Dirt, spills, and ink marks embed easily in fabric surfaces. A combination of a soft-bristle brush, lukewarm soapy water, and gentle spot treatments usually lifts stains without damaging the weave.
- Seam Tears: Stress points—especially around pockets and zippers—can fray over time. Small rips respond well to iron-on repair patches or a dab of clear fabric glue.
- Odor Retention: Synthetic fibers tend to trap sweat and odors. For a fresh interior, sprinkle baking soda, let sit 24–48 hours, then vacuum; or toss in an enzyme-based cleaner to break down odor molecules.
Leather & Specialty Materials
Characteristics
Leather cases offer a premium look and unique patina that develops with age. However, leather must be handled gently—avoid harsh soaps or excessive moisture—to preserve its natural oils and supple feel.
Common Problems
- Drying & Cracking: Without routine conditioning, leather can lose moisture and become brittle. Applying a pH-balanced leather conditioner every 3–6 months prevents cracks and keeps the grain supple.
- Color Fading: Prolonged sun exposure or contact with chemicals can strip dyes. Store leather luggage in a cool, shaded spot and treat with a color-restoring balm when necessary to maintain vibrancy.
By matching your maintenance routine to the material—hard shell, soft side, or leather—you’ll tackle the right problems at their source and keep your bags traveling in top shape.
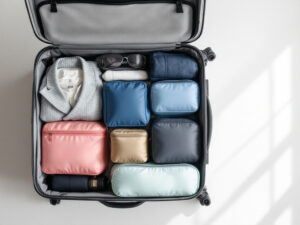
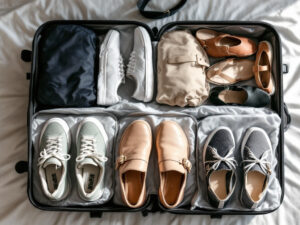
Routine Maintenance: Step-by-Step Cleaning Procedures

Below is a detailed, step-by-step routine to keep your luggage pristine—both inside and out. By following material-specific exterior cleaning methods and a thorough interior refresh, you’ll prevent dirt build-up, odors, and wear, ensuring your bags travel well for years to come.
Exterior Cleaning
Hard-Shell
- Method: Mix a few drops of mild dish soap into warm water. Dip a soft microfiber cloth into the solution and wipe the entire exterior using gentle, circular motions. Rinse residue with a damp cloth and dry immediately with a clean microfiber towel.
- Avoid: Abrasive pads or scouring sponges, which can scratch the polycarbonate or ABS surface.
Soft-Sided
- Method:
- Vacuum the exterior fabric with a brush attachment to remove surface dust and loose dirt.
- Spot-clean by mixing warm water with a mild liquid detergent. Dip a soft brush into the solution and gently scrub any stained areas.
- Blot excess moisture with a clean towel and let air-dry fully before use.
Leather & Specialty Materials
- Method:
- Clean: Apply a PH-balanced leather cleaner to a slightly damp microfiber cloth. Wipe the leather in smooth, circular strokes—never spray cleaner directly onto the bag.
- Condition: Once dry, work a thin layer of leather conditioner into the surface to replenish natural oils and prevent cracking.
- Protect: Store away from direct sunlight and excessive humidity.
Interior Cleaning & Deodorizing
1. Unpack & Shake Out
- Remove all contents, zip open every compartment, then take the bag outside and give it a firm shake to dislodge loose debris like sand and crumbs.
2. Vacuum & Wipe
- Vacuum: Using the brush attachment, vacuum the entire lining—corners, crevices, and pockets—to lift fine dirt.
- Wipe: Mix a small amount of mild laundry detergent with warm water. Dip a soft cloth into the mixture, wring out thoroughly, and gently wipe the lining to remove any remaining spots.
3. Deodorize
- Baking Soda: Sprinkle a thin layer of baking soda over the interior surfaces and let sit 24–48 hours; then vacuum it out to neutralize odors.
- Linen Spray: Combine ¼ cup witch hazel with around 40 drops of your favorite essential oils (e.g., lavender, lemon) in a spray bottle; mist lightly and allow to air-dry.
By systematically cleaning both the outside and inside—tailoring methods to your luggage’s material—you’ll avoid common pitfalls like scratches, stains, and musty odors. Incorporate these steps after every trip or at least monthly, and your bags will look and perform like new for countless journeys.
Preventive Care & Storage Best Practices
Below is your comprehensive guide to preventive care and storage best practices—tailored for every traveler who wants luggage that looks and performs like new for years. You’ll learn how to incorporate seasonal upkeep, optimize storage conditions, and choose the right protective accessories to safeguard your investment and streamline future trips.
Seasonal Maintenance Routines
- Inspect & Clean Before Storing
At the end of each travel season, give your luggage a thorough inspection: check for stains, mold spots, or trapped moisture, then clean according to its material to prevent mildew growth and lingering odors. - Quarterly Lubrication of Zippers & Wheels
Every three months, apply a silicone-based lubricant to zipper teeth and wheel casters—this prevents rust, keeps zippers gliding smoothly, and ensures wheels roll without friction or squeaks.
Proper Storage Techniques
- Cool, Dry, & Shaded Environment
Store luggage in a well-ventilated area with a consistent, moderate temperature—avoid basements or attics prone to dampness, and never leave bags in direct sunlight, which fades colors and degrades materials over time. - Loosely Zipped & Dust-Proof
Keep your cases partially zipped (not fully closed) to relieve stress on seams and frames, and cover them with old sheets or dedicated luggage covers to block dust, insects, and stray moisture.
Protective Accessories
Choose accessories that add an extra layer of defense without complicating your travel routine:
| Accessory | Function | Example & Source |
|---|---|---|
| Clear PVC Luggage Cover | Shields against scratches, scuffs, and spills | T Tersely Clear PVC Suitcase Cover |
| Stretch-Fit Fabric Cover | Blocks dust and minor impacts while in storage | “The Large Check-In Luggage Cover” by BÉIS |
| TSA-Approved Lockable Strap | Secures contents, lets TSA access without damage | Travel Sentry–certified straps |
| Silicone Lubricant Spray | Keeps zippers and wheels operating smoothly | Briggs & Riley recommendation |
By scheduling these simple seasonal routines, optimizing your storage environment, and investing in targeted accessories, you’ll dramatically reduce damage risks—keeping your luggage ready for any adventure while safeguarding your wallet from premature replacements.
Troubleshooting Common Luggage Problems
Before you reach for a repair shop or consider replacing your suitcase, many common issues can be prevented—or quickly fixed—on the go. By keeping zipper pulls centered, regularly lubricating moving parts, and handling wheels and handles correctly, you’ll avoid most wear points. When damage does occur, simple DIY solutions—like silicone spray for stuck zippers, WD-40 for stiff wheels, iron-on patches for small tears, and a Magic Eraser for hard-shell scuffs—can restore functionality and appearance in minutes.
Zipper Issues
Preventive Tip
Always position double zipper pulls together at the center of the track when closing your bag. This alignment reduces stress on the end stops and teeth, helping your self-repairing YKK® zippers maintain smooth operation longer.
Fixes
- Lubricate with silicone spray: Use a dedicated zipper lubricant or a silicone-based spray along the teeth, then cycle the pull back and forth to distribute it evenly.
- Graphite pencil on stuck teeth: Rub the tip of a soft graphite pencil over the impacted teeth to provide low-residue lubrication that won’t stain fabric.
- Replace bent sliders: If the slider no longer meshes the teeth, carefully pry its sides inward with small pliers or swap it out entirely. Bent sliders often fail because they lose clamping force—restoring that pressure realigns your zipper.
Wheel & Handle Problems
Avoid
- Dragging up/down stairs: Pulling luggage by rolling it over uneven steps puts extreme torque on wheels and axle mounts, leading to cracks or misalignment. Always lift over obstacles whenever possible.
- Grabbing by telescoping handle: Handles aren’t designed to support the full weight of a packed suitcase—always use the reinforced carry handles for picking up your bag short distances.
Quick Fix
- Tighten loose screws: Remove the interior liner to access wheel axle screws; snug them with the correct screwdriver, but avoid over-tightening, which can seize the wheel.
- Clean wheel housing: Debris like hair and thread in the caster assembly can jam wheels—use a toothpick or compressed air to clear the area.
- WD-40 for smooth roll: Apply a drop of WD-40 or equivalent multi-lubricant to the wheel bearings, wiping away any excess to prevent dirt attraction.
Fabric Tears & Scuffs
Tears
- Iron-on repair patches: For small rips in nylon or polyester, trim a Singer-style iron-on patch slightly larger than the tear, center it over the damage, and press according to the patch instructions—no sewing needed.
- Fabric glue: Use a clear, flexible fabric adhesive to bond frayed edges; clamp or weigh down the area until fully set (usually 12–24 hours). This method works on most synthetic and natural fibers.
Scuffs on Hard-Shell
| Method | Details |
|---|---|
| Magic Eraser | Lightly dampen the melamine sponge and gently buff scuffed areas—test inconspicuous spots first |
| Tennis Ball Rub | Wrap a clean tennis ball in a microfiber cloth and rub the scuff in circular motions to burnish the shell |
By incorporating these preventive habits and quick fixes into your travel routine, you’ll reduce the likelihood of being stranded with stuck zippers, wobbly wheels, or unsightly tears—and keep your luggage looking and functioning like new.
DIY Emergency Fixes While Traveling
Seasoned travelers know that a few simple items in your carry-on can fix most luggage mishaps before they become major headaches. Packing a mini roll of duct tape and a handful of safety pins means you can patch splits or secure loose straps in seconds—Southern Living reports that “the duct tape repair remained perfectly affixed the whole time,” even through rigorous airport handling, and Guardian readers list duct tape among their top travel hacks.
Likewise, TSA guidance confirms safety pins are allowed in both carry-on and checked bags, making them ideal for temporary seam repairs. And when it comes to hygiene on the move, sanitizing wipes let you quickly disinfect handles and zipper pulls between flights—Real Simple advises regular wipe-downs to prevent bacterial buildup, while SONO Wipes highlights their compact, individually wrapped design that fits easily in any pocket.
Duct Tape & Safety Pins: Temporary Repairs
- Duct Tape: Carry a 3–5 meter travel-size roll to wrap around torn fabric or cracked hard-shell seams. Instructables demonstrates how wrapping the core of broken wheels with duct tape restores functionality until you can access proper repairs.
- Safety Pins: Stash 10–20 assorted-size safety pins to fasten ripped linings or secure loose straps. Fodor’s Travel forums note that safety pins, unlike non-TSA-approved fasteners, won’t be confiscated and can signal tampering if removed, keeping your bag intact until you reach your destination.
Sanitizing Wipes: Quick Clean of Handles & Zippers
- On-the-Go Disinfection: Keep a pack of 20–30 alcohol-based or disinfecting wipes handy. After baggage claim or before boarding, give all handles, pull straps, and zipper heads a thorough once-over to kill germs—Cruise microbiologist Shaun Veran recommends this step to reduce risk of contamination from airport surfaces.
- Multi-Surface Use: Opt for wipes formulated for both hands and hard surfaces (such as Travel Wipeys or SONO Wipes) to sanitize not just your bag but also tray tables, armrests, and shared touchscreens.
| DIY Fix | Recommended Pack Size | Primary Use |
|---|---|---|
| Duct Tape | 3–5 meters roll | Patch splits, mend hard-shell cracks |
| Safety Pins | 10–20 assorted pins | Secure torn seams, hold broken straps |
| Sanitizing Wipes | 20–30 wipes pack | Disinfect handles and zipper pulls between destinations |
By including these lightweight, versatile items in your travel kit, you’ll be prepared to handle unexpected splits, tears, or hygiene concerns without missing a beat—saving time, money, and stress while on the move.
When to Repair vs. Replace

Before deciding whether to roll up your sleeves or hand your suitcase over to a pro, it’s crucial to distinguish between minor nuisances you can fix yourself for under $20 and serious structural failures that warrant expert attention.
Small issues—like a stubborn zipper, loose hardware, or a ripped seam—are often best resolved with DIY patches, lubricants, or a quick tightening of screws, typically costing less than $20 in parts and saving you $25–$45 compared to professional services. In contrast, cracked shells, busted frames, or irreparable seam tears compromise both safety and function, so professional repair or full replacement is advised—many brands offer repair kits, but true frame or shell damage usually exceeds DIY scope.
Finally, always review your manufacturer’s warranty before paying out of pocket, as leading luggage makers like Briggs & Riley provide lifetime coverage on functional defects, while others (e.g., Away) supply replacement or repair kits for covered issues—note that most warranties exclude cosmetic wear and accidental damage.
Minor Damage
When you’re facing a sticky zipper, a loose screw, or a small seam tear, DIY is both cost-effective and straightforward.
- Patch & Glue: Fabric rips under 2 inches can be mended with iron-on patches (~$5) or clear fabric glue, which sets in 12–24 hours viralrang.com.
- Lubricate Moving Parts: A small can of silicone spray or zipper lubricant (~$8) restores smooth action to zippers and wheels—far cheaper than a $35–$60 shop fix.
- Tighten Hardware: A basic screwdriver set ($5–$10) lets you snug loose wheel axles and handle screws, preventing wobble and rattling on the go.
| Issue | DIY Cost (Parts Only) | Professional Repair Cost | Savings |
|---|---|---|---|
| Zipper slider replacement | $7 | $30 | $23 |
| Spinner wheel replacement | $15 | $60 | $45 |
| Telescoping handle tightening | $8 | $35 | $27 |
| Sources | |||
| Viral Rang (2024) | viralrang.com | ||
| BuyMode (2025) | buymode |
Structural Issues
When damage goes beyond superficial wear, DIY kits fall short—professional repair or outright replacement is the safer, longer-lasting solution.
- Cracked Shells: Polycarbonate or ABS cases that split require epoxy resin and often reinforcement from a repair specialist; amateur fixes can weaken the casing and compromise impact resistance.
- Busted Frame or Chassis: When the internal frame bends or breaks, it affects overall integrity—manufacturers’ repair centers or certified shops are equipped to realign or swap frames correctly.
- Irreparable Seam Tears: Seams that gape beyond patch size indicate fabric fatigue; professional re-stitching or panel replacement ensures durability where simple glue would soon fail.
Warranty Services
Before reaching for your wallet, investigate your luggage’s built-in protection—many brands back their products with generous repair terms.
- Briggs & Riley “Simple as That” Guarantee covers all functional repairs for life, excluding cosmetic scuffs and accidental damage; repairs are free, and even replacement bags remain eligible for service.
- Away’s Warranty supplies repair or replacement kits for functional defects, streamlining fixes without shipping your bag away; cosmetic wear and misuse aren’t covered.
- Consumer Reports Insight: Lifetime warranties typically omit normal wear, tears, and airline-handling damage, so read the fine print to understand exclusions before filing a claim.
- General Manufacturer Warranties often cover workmanship and material defects for a defined period (e.g., 5–10 years) and may require proof of purchase and shipping costs; check brands like Tumi (now 5-year) or generic manufacturers for exact terms.
By matching your response to the severity of the issue—tackling minor fixes yourself, opting for professional service when frames or shells fail, and leveraging warranty coverage wherever possible—you’ll maximize your luggage’s lifespan, minimize downtime, and keep more money in your pocket.
Recommended Products for Luggage Care
Below is a curated selection of essential, budget-friendly products to keep every part of your luggage in top shape—from hard-shell exteriors to soft-sided fabrics, leather panels, moving parts, and scuff-prone surfaces.
- Mild Dish Soap (e.g., Seventh Generation Free & Clear) effectively lifts dirt and grime from hard-shell exteriors without leaving residue or scratches; a 16-oz bottle costs about $5.
- Travel Laundry Detergent Sheets (e.g., Kind Laundry Travel Detergent Sheets) are pre-measured, lightweight, and perfect for spot-cleaning soft-sided fabrics on the go; a pack of six sheets runs around $7.
- Leather Conditioner (blend of seed oils, lipids, and beeswax as recommended by The Real Leather Company) nourishes and restores leather luggage panels; a 4-oz tube typically costs $15.
- Silicone Lubricant Spray (e.g., WD-40 Specialist Silicone Lubricant) keeps zippers and wheel bearings gliding smoothly without attracting dirt; a 6-oz can is about $8.
- Magic Eraser Sponge (melamine foam) safely buffs out scuffs and marks on hard-shell cases; a single household sponge retails for around $4.
Product Comparison Table
| Product | Use Case | Approx. Cost |
|---|---|---|
| Mild Dish Soap | Hard-shell exterior cleaning | $5 |
| Travel Laundry Detergent Sheets | Soft-sided spot cleaning | $7 |
| Leather Conditioner | Leather luggage maintenance | $15 |
| Silicone Lubricant Spray | Zipper & wheel lubrication | $8 |
| Magic Eraser Sponge | Scuff removal on hard cases | $4 |
Maintenance Checklist
Maintaining your luggage with a simple checklist after each trip, combined with monthly and seasonal care, can prevent mold, hardware failures, and cosmetic wear—keeping your bags looking and functioning like new. Travel experts unanimously agree that cleaning your luggage after every trip removes germs and debris before they settle in fodors; quarterly lubrication of zippers and wheels prevents stiffness and squeaks; storing fully cleaned luggage in a cool, dry place—ideally in the soft fabric bag provided—blocks dust and moisture damage; and packing an emergency kit with duct tape ensures you’re ready for on-the-go fixes .
After Every Trip
- Unpack & Shake Out: Empty all compartments and give your bag a firm shake outdoors to dislodge sand, crumbs, and loose debris.
- Vacuum & Wipe Down: Use a brush attachment to vacuum the interior lining; then wipe exterior and interior surfaces with a mild soap solution to remove dirt and germs.
- Deodorize: Sprinkle baking soda inside for 24–48 hours or mist with a linen spray (witch hazel + essential oils) to neutralize odors.
Monthly
- Inspect Zippers & Wheels: Check for bent zipper sliders and wheel debris; clean wheel casters and apply silicone lubricant to bearings.
- Lubricate Zipper Teeth: Rub candle wax or a zipper-specific lubricant along teeth to prevent sticking and extend zipper life.
- Condition Leather: For leather panels or straps, apply a pH-balanced leather cleaner followed by conditioner to keep leather supple and crack-free.
Seasonally
- Deep Clean Exterior & Interior: If your luggage hasn’t been used in six months, repeat the full cleaning routine to counteract dust and germs.
- Store Properly: Stow suitcases in a dry, shaded spot—basements/attics are best avoided—and leave zippers partially open so materials can “breathe”.
- Use Protective Covers: Slip hard-shell cases into soft fabric bags (often provided) or invest in luggage covers to shield against scratches and dust.
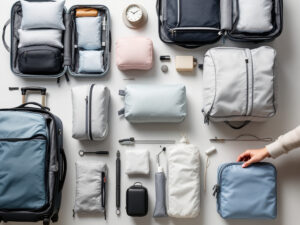
Emergency Kit
Keep these lightweight, versatile items in your carry-on or personal item for instant, effective repairs on the go:
| Item | Purpose | Source & Notes |
|---|---|---|
| Safety Pins | Secure ripped seams, fasten loose straps | TSA allows safety pins in carry-on & checked bags |
| Duct Tape | Patch splits, reinforce cracked seams | Holds through rigorous handling; recommended by travel pros |
| Sanitizing Wipes | Disinfect handles, zipper pulls between trips | Prevent bacterial buildup; hygiene recommended by experts |
Conclusion
Routine luggage care isn’t just about keeping your bags looking sharp—it safeguards your health, preserves your investment, and ensures stress-free travel on every trip. Deep-cleaning and disinfecting both hard and fabric surfaces after each journey prevents bacterial buildup and mold growth, which experts warn can pose health risks if left unchecked. Tailoring your cleaning routine—using mild dish soap on polycarbonate shells, gentle detergent on soft-sided fabrics, and pH-balanced leather conditioner on premium materials—removes grime without damaging delicate finishes.
Preventive care is equally critical. Quarterly lubrication of zippers and wheel bearings keeps them gliding smoothly, warding off sticky tracks and squeaks that often lead to hardware failure. Storing luggage in a cool, dry, shaded environment—ideally in its fabric cover—protects against UV fading, moisture damage, and dust accumulation. Including a compact emergency kit with duct tape, safety pins, and sanitizing wipes means you’re ready to handle splits, seam tears, or hygiene concerns on the go.
When minor scuffs or tears do occur, simple DIY fixes—like a Magic Eraser for scratches or an iron-on patch for fabric rips—can restore functionality in minutes. For structural damage such as cracked shells or broken frames, professional repair or replacement is often the safest bet—especially when covered under robust warranties like those from Briggs & Riley. By combining these material-specific cleaning methods, preventive routines, and smart repair strategies, you’ll keep your luggage performing—and looking—like new for years to come.
FAQs
What’s the best way to disinfect my suitcase?
Use hydrogen peroxide or rubbing alcohol to mist both hard and fabric surfaces, per Real Simple expert Leslie Reichert.
How often should I lubricate zippers and wheels?
Aim for every three months—apply a silicone-based spray to zipper teeth and wheel bearings to maintain smooth operation.
Can I machine-wash soft-sided luggage?
No—spot-clean with warm water and mild detergent. Avoid submerging to protect internal frames and fabrics.
What’s the easiest way to remove scuff marks?
Gently buff hard-shell scuffs with a damp Magic Eraser sponge or a wrapped tennis ball for quick results.
How do I prevent mold during storage?
Ensure your luggage is completely dry, store it partially unzipped in a cool, dry spot, and consider a small desiccant pack inside.


