

Ever feel like your digital life is spiraling out of control? Between countless emails, overflowing cloud storage, and an app for everything, digital clutter can get overwhelming fast. But fear not, because tidying up your digital space can do wonders for your productivity and mental well-being.
Keeping a tidy digital environment isn’t just about aesthetics—it’s about efficiency. Imagine finding important files in seconds, having an inbox that doesn’t give you anxiety, and knowing your digital information is secure. A well-organized digital life can help you stay focused, reduce stress, and ultimately achieve your goals more effectively.
In this article, we’ll dive into practical tips and strategies for decluttering your digital files, streamlining your emails, organizing your apps, and managing your online accounts. Whether it’s purging unnecessary files, setting up a robust folder system, or utilizing cutting-edge organizational tools, we’ve got you covered. Ready to conquer that digital clutter? Let’s get started!
Alright, let’s roll up our sleeves and start purging those unnecessary files!
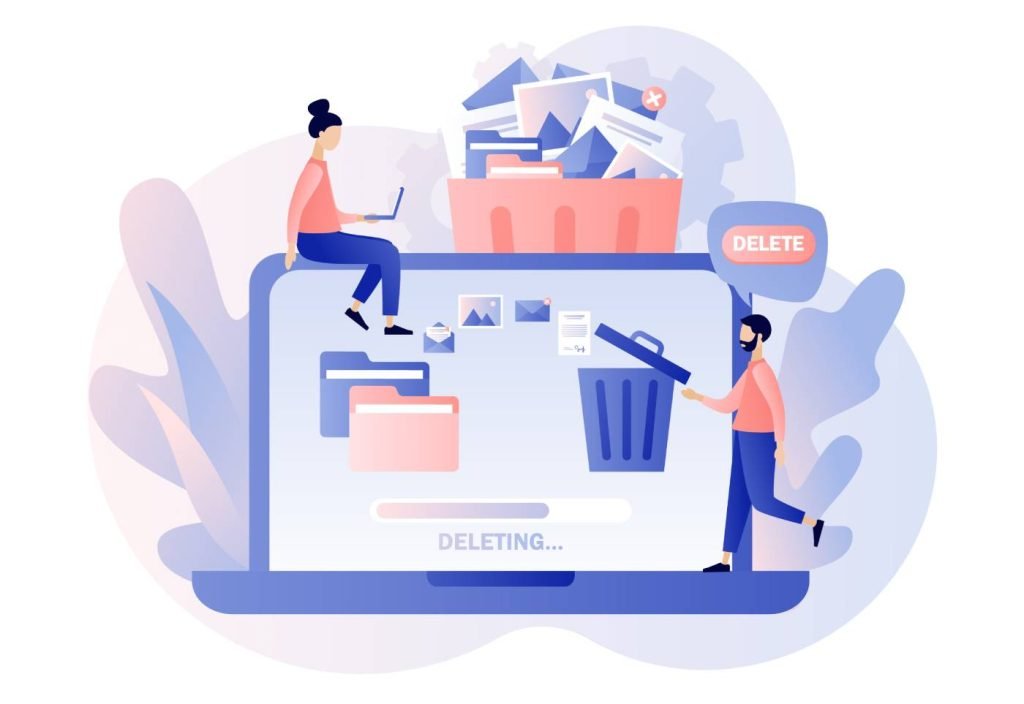
Decluttering Your Digital Space
Purge Unnecessary Files
Identify Unused Files
First things first, let’s find those digital dust collectors hiding in your storage. Here are some simple steps to help you identify and delete old documents, media, and downloads:

- Sort by Date: Start by sorting your files by date. Most file managers allow you to arrange files by the last modified date. This is a quick way to spot documents and media that haven’t been touched in ages.
- Use Search Functions: Utilize the search bar in your file manager to look for specific file types. Try searching for common formats like
.doc,.pdf,.jpg, or.mp4to find old documents and media. - Check Download Folders: Downloads can pile up quickly. Make it a habit to go through your ‘Downloads’ folder. Delete files you no longer need and move important ones to their appropriate folders.
- Temporary Files and Duplicates: Use tools like CCleaner or built-in utilities to clear out temporary files. For duplicates, apps like Duplicate Cleaner can help you find and remove redundant files.
Organize Remaining Files
Once you’ve purged the unnecessary stuff, it’s time to get organized. Here’s how to categorize and label your remaining important files effectively:
- Create Main Folders: Start by creating broad category folders. For example, you might have folders like “Work,” “Personal,” “Finances,” “Photos,” etc. This makes it easier to find files at a glance.
- Use Subfolders: Within each main folder, create subfolders to further categorize your files. For instance, under “Work,” you could have subfolders like “Projects,” “Reports,” and “Meeting Notes.”
- Consistent Naming Conventions: Use a consistent naming convention for your files. For example, you could name documents by date and type, like
2023-10-15_ProjectProposal.pdf. This makes it clear what the file is at a glance and keeps everything orderly. - Add Tags and Labels: If your file management system allows it, use tags and labels to add another layer of organization. Tags can be particularly useful for cross-referencing files that belong in multiple categories.
- Regular Reviews: Set a reminder to review your digital files periodically. Monthly or quarterly check-ins can help you stay on top of clutter and ensure that your system remains functional.
By following these tips, you’ll be well on your way to a streamlined, clutter-free digital space. Happy decluttering!
Streamline Your Email Inbox
Unsubscribe and Delete
Hey there! If your inbox is overflowing with newsletters and spam, it’s time to take action. Here’s how to regain control:

- Unsubscribe from Newsletters: Start by identifying newsletters you no longer read. Most emails have an “Unsubscribe” link at the bottom. Use it! If you have a ton to go through, consider using services like Unroll.Me, which can help you unsubscribe from multiple lists at once.
- Delete Spam: Utilize your email client’s spam filter to identify and delete junk mail. Mark unwanted emails as spam to help your email provider learn what to block in the future. For Gmail users, you can also use the search filter
older_than:1yto find and delete emails older than a year. - Set Up Filters: Automate the process by setting up filters that move promotional emails to a separate folder. This way, they won’t clutter your main inbox but are still accessible if you want to check them later.
Folder and Label System
Once you’ve cleared out the excess, it’s time to organize what’s left:
- Create Main Folders: Start by setting up broad category folders. For instance, you could have folders like “Work,” “Personal,” “Bills,” and “Subscriptions.” This helps you quickly sort new emails as they come in.
- Use Subfolders: Inside each main folder, create subfolders for finer organization. For example, under “Work,” you could have subfolders for “Projects,” “Meetings,” and “Reports.”
- Apply Labels: Many email clients like Gmail offer labels in addition to folders. Labels can be applied to emails in any folder, allowing for more flexible organization. For instance, you might label an email as “Urgent” or “To Review.”
- Automate with Rules: Set up rules to automatically sort incoming emails into the right folders. For example, emails from your boss can go straight to the “Work” folder, or bills can be routed to “Bills.”
- Regular Maintenance: Schedule time every week to go through your emails. Archive what you’ve dealt with and move important emails to their designated folders. This keeps your inbox clean and your mind clear.
By implementing these strategies, you’ll transform your chaotic inbox into a well-organized hub. Happy emailing!
Utilizing Organizational Tools
File Management Software
Recommendations
Hey there! Ready to take your file management game to the next level? Let’s dive into some of the best tools out there:
- Google Drive: This is a go-to for many due to its seamless integration with other Google services. It offers 15GB of free storage and allows for easy file sharing and collaboration. You can access your files from any device with an internet connection.
- Dropbox: Known for its simplicity and ease of use, Dropbox offers 2GB of free storage (with options to earn more through referrals and other activities). It’s great for syncing files across different devices, and its sharing features are straightforward.
- OneDrive: If you’re a Microsoft user, OneDrive is a no-brainer. It integrates perfectly with Windows and Microsoft Office, offering 5GB of free storage. It’s ideal for those who use Office 365, as it provides additional storage and advanced collaboration features.
How to Use
Now, let’s get you set up and rocking these tools efficiently!
Google Drive
- Setting Up:
- Go to drive.google.com and sign in with your Google account. If you don’t have one, you can create it for free.
- Once logged in, you’ll see your My Drive homepage where you can start uploading files.
- Uploading and Organizing:
- Click the “New” button on the left side, then select “File upload” or “Folder upload” to add your files.
- Use the “+ New” button to create folders and organize your files. Drag and drop files into these folders for easy access.
- Sharing and Collaboration:
- Right-click on any file or folder and select “Share.” Enter the email addresses of those you want to share with and set their permissions (e.g., view, comment, edit).
- Collaborate in real-time on Google Docs, Sheets, and Slides by opening the file and sharing the link with your team.
Dropbox
- Setting Up:
- Head over to dropbox.com and create an account or log in if you already have one.
- Download the Dropbox desktop app for easier file syncing across devices.
- Uploading and Organizing:
- Click “Upload files” or “Upload folder” to add your files.
- Create folders by clicking on the “New folder” button and drag your files into these folders for better organization.
- Sharing and Collaboration:
- Right-click on any file or folder and select “Share.” You can send an invite via email or generate a link to share.
- Use Dropbox Paper for collaborative documents and keep all project-related files in one place.
OneDrive
- Setting Up:
- Visit onedrive.com and sign in with your Microsoft account. If you don’t have one, you can create it for free.
- Download the OneDrive app for seamless integration with your desktop.
- Uploading and Organizing:
- Click “Upload” to add files or folders.
- Create new folders by clicking “+ New” and organizing your files accordingly.
- Sharing and Collaboration:
- Right-click on any file or folder and select “Share.” Set permissions and send the link via email or generate a shareable link.
- Use OneDrive’s integration with Microsoft Office to collaborate on Word, Excel, and PowerPoint documents in real-time.
By following these steps, you’ll be able to use Google Drive, Dropbox, and OneDrive to their fullest potential, keeping your digital files organized and easily accessible. Happy organizing!
Email Management Tools
Email Clients and Add-ons
Hey there! Managing emails doesn’t have to be a headache. Let’s explore some top-notch tools to help you stay on top of your inbox game:

- Microsoft Outlook: A powerhouse for email management, Outlook offers robust features for organizing emails. It integrates seamlessly with other Microsoft Office applications and has powerful calendar and task management capabilities. You can set up rules to automatically sort incoming emails into specific folders, making it a breeze to keep things tidy.
- Gmail Filters: If you’re a Gmail user, filters are your best friend. Filters allow you to automatically label, archive, delete, or forward incoming emails based on criteria you set. For instance, you can create a filter to label all emails from your boss as “Important,” ensuring you never miss critical communications.
- Third-Party Apps: Apps like Spark, Thunderbird, and Clean Email can revolutionize how you manage your emails.
- Spark: Known for its smart inbox that categorizes emails for you and allows for team collaboration on emails.
- Thunderbird: A free, open-source email client from Mozilla with powerful customization options and add-ons.
- Clean Email: Helps you declutter your inbox by grouping similar emails together and allowing you to delete, archive, or move them in bulk.
Automation
Now, let’s dive into how you can automate your email sorting and responses to save time and boost productivity:
- Automate Sorting:
- Outlook Rules: In Outlook, go to “File,” then “Manage Rules & Alerts.” Here, you can create rules to automatically move emails from specific senders or with certain keywords to designated folders.
- Gmail Filters: In Gmail, click on the gear icon and select “See all settings.” Navigate to the “Filters and Blocked Addresses” tab and create a new filter. Set your criteria and choose actions like applying labels, marking as read, or moving to a specific folder.
- Automate Responses:
- Outlook Quick Steps: Use Quick Steps in Outlook to automate repetitive tasks. For example, you can create a Quick Step to reply to an email and move it to a folder with a single click.
- Gmail Canned Responses: Enable the “Templates” (formerly Canned Responses) feature in Gmail’s Advanced settings. Create templates for emails you send frequently, and use them to reply with just a few clicks.
- Third-Party Automation Tools: Consider using automation tools like Zapier or IFTTT. These tools can connect your email client to other apps, allowing you to set up complex workflows. For example, you can create a Zap to automatically save email attachments to Google Drive or trigger an SMS notification for important emails.
By implementing these email management tools and automation techniques, you’ll transform your inbox into a well-oiled machine. Happy emailing!
Organizing Apps and Online Accounts
Declutter Your Apps
Audit Your Apps
Hey there! Ready to take control of your app chaos? Let’s start by auditing those apps to see which ones you really need:
- Review Usage: Take a look at your home screen and app drawer. Are there apps you haven’t opened in months? Both iOS and Android devices allow you to check your app usage stats. On an iPhone, go to Settings > Screen Time > See All Activity. For Android, go to Settings > Digital Wellbeing & parental controls > Dashboard.
- Delete Unused Apps: If an app hasn’t been used in the past three months, it’s probably safe to delete. Long-press the app icon and select “Delete App” or “Uninstall.” For apps you might need in the future, consider offloading them (iOS only) instead of deleting them entirely. This keeps the app’s data but frees up storage.
- Evaluate Functionality: Sometimes, we download multiple apps that serve the same purpose. Pick the one that works best for you and delete the rest. For example, if you have three different note-taking apps, choose your favorite and stick with it.
Organize Apps
Once you’ve decluttered, it’s time to organize what’s left for better accessibility and efficiency:
- Group by Category: Create folders on your home screen for different categories like “Work,” “Entertainment,” “Health,” and “Finance.” This makes it easier to find apps when you need them. To create a folder, drag one app onto another and name the folder accordingly.
- Arrange by Function: Within each folder, organize apps based on their function. For example, in the “Work” folder, you might place email clients, document editors, and task managers together. In the “Health” folder, group fitness trackers, meditation apps, and meal planners.
- Prioritize Placement: Place your most frequently used apps on the first page of your home screen or in the dock if your device has one. This saves you time and effort when accessing them.
- Use Widgets: Widgets can provide quick access to app features without opening the app. For example, a weather widget can show the current forecast, or a calendar widget can display your upcoming events. Customize your home screen with widgets to streamline your daily routine.
- Regular Maintenance: Schedule a monthly check-in to review and reorganize your apps. Delete any new apps you no longer use and update your folders as needed. This keeps your digital space clean and efficient.
By following these steps, you’ll have a streamlined and organized app collection that boosts your productivity and makes it easier to find what you need. Happy decluttering!
Manage Online Accounts
Password Management
Hey there! Managing your online accounts effectively starts with strong and secure passwords. Here’s why you should consider using a password manager and which ones are the best:
- Why Use a Password Manager?
- Enhanced Security: Password managers generate and store complex, unique passwords for each of your accounts, minimizing the risk of breaches.
- Convenience: No more struggling to remember multiple passwords. With a password manager, you only need to remember one master password.
- Peace of Mind: Password managers alert you to weak or reused passwords, prompting you to change them and keep your accounts secure.
- Top Recommendations:
- LastPass: Offers a free version with basic features and a premium version with advanced options like dark web monitoring and emergency access.
- 1Password: Great for families and teams, with secure vaults to share login information. It also includes a travel mode to hide sensitive data when traveling.
- Dashlane: Known for its user-friendly interface and features like dark web monitoring and VPN for added security.
- Bitwarden: An open-source option that is both powerful and affordable, offering robust security features even in its free version.
Account Cleanup
Keeping your online presence tidy also involves cleaning up unused accounts and tightening your security settings. Here’s how to do it:
- Deactivate Unused Accounts:
- Identify Inactive Accounts: Make a list of online accounts you no longer use. Common culprits include old social media profiles, outdated email addresses, and accounts with e-commerce sites you no longer shop with.
- Deactivate or Delete: Log in to these accounts and look for options to deactivate or delete them. This is usually found in the account settings or privacy section. If you can’t find the option, a quick search for “how to delete [service] account” can help.
- Remove Linked Accounts and Data: For added security, unlink any connected accounts (like Google or Facebook logins) and delete personal data stored in these accounts before deactivating them.
- Update Security Settings:
- Strengthen Your Passwords: Use your password manager to update weak or reused passwords. Aim for a mix of letters, numbers, and symbols in each password.
- Enable Two-Factor Authentication (2FA): Wherever possible, enable 2FA to add an extra layer of security. This typically involves receiving a code via text or an authentication app whenever you log in.
- Review Privacy Settings: Check the privacy settings on your active accounts to ensure you’re only sharing necessary information. Adjust who can see your posts, personal info, and activity.
- Regularly Monitor Accounts: Periodically review your accounts for any suspicious activity. Password managers often include security dashboards that alert you to potential issues.
By implementing these strategies, you’ll have a more secure and streamlined online presence, making it easier to manage your digital life. Happy decluttering!
Maintaining Digital Hygiene
Regular Digital Cleanups
Scheduled Cleanups
Hey there! Just like your home needs regular cleaning, your digital space benefits from consistent maintenance too. Setting a regular schedule for digital cleanups can keep your devices running smoothly and your data organized. Here’s why it’s essential and how to get started:
- Why Schedule Digital Cleanups?
- Improved Performance: Regularly clearing out unnecessary files and apps can boost your device’s performance.
- Enhanced Security: Frequent updates and reviews of privacy settings protect your data from vulnerabilities.
- Better Organization: Consistent cleanups prevent digital clutter, making it easier to find important files and information.
- How to Schedule Cleanups:
- Set Reminders: Use your calendar app to set monthly and quarterly reminders for digital maintenance. This helps you stay on track and ensures you don’t forget.
- Allocate Time: Dedicate specific times for these cleanups, just like you would for any other important task. Even 30 minutes can make a significant difference.
Checklists
To make your digital cleanups effective, here are sample checklists for monthly and quarterly maintenance tasks:
Monthly Digital Cleanup Checklist:
- Delete Unnecessary Files: Clear out temporary files, downloads, and any documents you no longer need.
- Organize Digital Documents: Move files into appropriate folders and rename them for easy identification.
- Update Software: Ensure your operating system, apps, and antivirus software are up to date.
- Review and Uninstall Unused Apps: Get rid of apps you haven’t used in the past month.
- Clear Browser Cache: Delete cookies and cache files to improve browser performance.
- Backup Important Data: Make sure your essential files are backed up to an external drive or cloud storage.
Quarterly Digital Cleanup Checklist:
- Comprehensive File Review: Go through all your folders and delete old or redundant files.
- Photo and Video Management: Sort through your media files, delete duplicates, and organize the rest into albums.
- Review Privacy Settings: Check the privacy settings on your social media accounts and other online profiles.
- Password Audit: Use your password manager to review and update weak or duplicate passwords.
- Email Cleanup: Unsubscribe from newsletters you no longer read and delete old emails.
- Device Maintenance: Run a full virus scan and clean your device’s physical components, like keyboard and screen.
- Cloud Storage Management: Organize your cloud storage, delete unnecessary files, and ensure important documents are backed up.
By setting a regular schedule and following these checklists, you’ll keep your digital life organized and secure. Happy cleaning!
Backup Strategies
Importance of Backups
Hey there! Ever had that heart-sinking moment when you realize a crucial file is missing or corrupted? Regular backups can save you from that nightmare, ensuring your data is safe and recoverable. Here’s why backups are essential:
- Data Security: Regular backups protect your data from hardware failures, software issues, and cyber threats like malware and ransomware.
- Recovery Assurance: If your device crashes or gets lost, a backup ensures you can recover important files without a hitch.
- Peace of Mind: Knowing your data is securely backed up lets you focus on your work and personal tasks without worrying about potential data loss.
How to Backup
Let’s dive into the different methods for backing up your data and some best practices to keep everything running smoothly:
Cloud Services
Benefits:
- Accessibility: Access your files from anywhere with an internet connection.
- Automatic Updates: Many cloud services automatically sync your files, ensuring your backup is always up to date.
- Redundancy: Cloud providers store your data in multiple locations, reducing the risk of data loss.
Top Services:
- Google Drive: Offers 15GB of free storage and integrates seamlessly with Google Workspace.
- Dropbox: Known for its easy-to-use interface and file-sharing capabilities.
- iCloud: Ideal for Apple users, providing seamless backup for iOS and macOS devices.
- OneDrive: Perfect for Windows users, with deep integration into the Microsoft ecosystem.
Best Practices:
- Regular Syncing: Ensure your files are regularly synced to the cloud, especially after significant changes.
- Two-Factor Authentication: Enable 2FA for added security.
- Check Storage Limits: Monitor your storage usage and upgrade your plan if needed to avoid hitting limits.
External Drives
Benefits:
- Offline Access: Access your backups without needing an internet connection.
- Full Control: You have complete control over your backup process and storage location.
- Cost-Effective: One-time purchase cost without recurring subscription fees.
Types of Drives:
- External Hard Drives: Large storage capacity, ideal for full system backups.
- Solid State Drives (SSDs): Faster and more durable than traditional hard drives, but usually more expensive.
- USB Flash Drives: Portable and convenient for smaller backups and transfers.
Best Practices:
- Regular Backups: Schedule automatic backups to your external drive at least once a week.
- Offsite Storage: Keep an additional copy of your backup in a different physical location to protect against theft or disasters.
- Encryption: Encrypt your backups to secure sensitive information.
Best Practices for All Backup Methods
- Use Multiple Methods: Combine cloud and external drive backups for extra security.
- Test Your Backups: Regularly test your backups to ensure they can be restored successfully.
- Keep a Backup Rotation: Use a rotation system (like the 3-2-1 rule: three copies of your data, two local but on different devices, and one offsite) to keep multiple versions of your data.
Implementing these backup strategies will help you safeguard your digital information, ensuring it’s always there when you need it. Happy backing up!
Conclusion
Hey there! As we wrap up our journey through digital organization, let’s quickly recap the key points we’ve covered:
- Email Management: Using tools like Microsoft Outlook, Gmail filters, and third-party apps can streamline your inbox, while automation helps sort and respond to emails effortlessly.
- Declutter Your Apps: Regularly audit your apps, delete unused ones, and organize the rest by category and function for a tidier and more efficient digital space.
- Manage Online Accounts: Secure your online presence with a password manager, deactivate unused accounts, and regularly update your security settings.
- Regular Digital Cleanups: Set a schedule for monthly and quarterly digital maintenance, using checklists to delete unnecessary files, update software, and review privacy settings.
- Backup Strategies: Protect your data with regular backups using cloud services and external drives, following best practices to ensure your information is secure and recoverable.
Now it’s time to take action! Start implementing these tips today to enhance your digital efficiency and security. Your digital life will be more organized, secure, and stress-free.
We’d love to hear from you! Share your own digital organization tips in the comments below. Let’s build a community of savvy digital organizers who can learn from each other. Happy organizing!


