
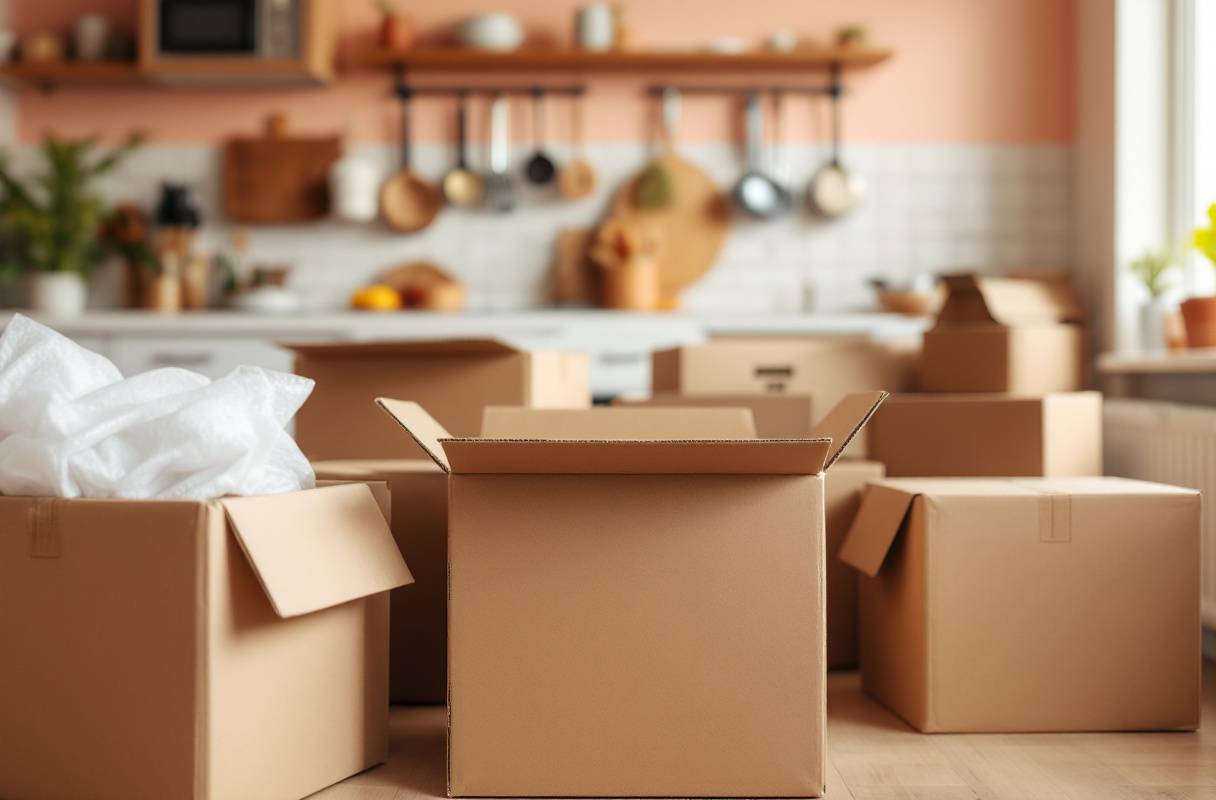
Moving can be a daunting task, but your kitchen doesn’t have to be part of the chaos. Imagine transforming the seemingly overwhelming process of packing up your culinary kingdom into a streamlined, stress-free experience.
Whether you’re safeguarding fragile glassware or organizing your pantry essentials, mastering the art of efficient kitchen packing ensures that your favorite recipes and tools arrive safely at your new home.
Let’s dive into the ultimate guide that turns moving day into a smooth culinary transition.
Preparing Your Kitchen for the Move
Importance of Efficient Packing
When you’re gearing up to move, getting your kitchen packed right can make a big difference—swapping chaos for calm. The kitchen’s a mixed bag of fragile dishes, hefty gadgets, and those countless little utensils that seem to multiply when you’re not looking.
Getting everything wrapped and boxed up properly is key to keeping your gear safe and avoiding hassles when you’re settling into your new place.
Creating a Plan

Before you dive into boxing up grandma’s china collection or that Vitamix you pledged to use every week, it’s a smart move to draw up a game plan. Start by giving your kitchen the once-over to figure out what’s coming along and what needs to be tossed, donated, or passed on to those one-pan dinners you never got around to cooking. Swing by our decluttering tips for some nifty suggestions on lightening your load before the big day.
| Task Steps | Description |
|---|---|
| Step 1 | Look over your kitchen stuff |
| Step 2 | Decide on keep, donate, or toss |
| Step 3 | Snag the packing gear you need |
| Step 4 | Sort items into groups |
| Step 5 | Pack up non-essentials first |
Once you have made your keep-or-toss decisions, it’s time to stock up on packing supplies. Need a hand figuring out what you’ll need? Our packing supplies guide has your back! Keep an eye out for different-sized boxes, sturdy packing tape, and cushioning materials like bubble wrap and packing paper.
As you dive into packing, grouping similar items together is your best bet. Make sure all your boxes are labeled boldly—there’s nothing worse than playing box roulette when you’re trying to find the coffeepot your first morning in the new digs. Our labeling guide can show you how to get your labeling game on point.
By following this blueprint, packing your kitchen won’t just be another task on your to-do list. It’ll be a well-ordered mission leading to less stress and a smoother journey into your next chapter.
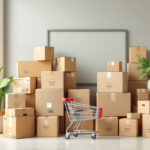
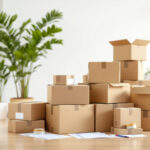
Essential Packing Supplies
Getting ready for a big kitchen move? The secret sauce to smooth sailing is having the right gear on deck. Trust us, having the right packing supplies is like having a good playlist—it’s essential for an epic journey without too many bumps along the way.
Packing Boxes and Containers
You wouldn’t use a tiny mug to hold a gallon of lemonade, right? In the same way, having the right boxes matters. Here’s a cheat sheet for choosing which boxes to grab based on what you’re packing:
| Box/Container Type | Use | Dimensions (inches) |
|---|---|---|
| Small Boxes | Canned Goods, Spices | 12 x 12 x 12 |
| Medium Boxes | Pots, Pans, Cookware | 18 x 18 x 16 |
| Large Boxes | Tupperware, Lightweight Stuff | 24 x 18 x 24 |
| Dish Barrels | Dishes, Wine Glasses | 18 x 18 x 28 |
Small boxes are like jars for heavy little guys like canned corn and those mystery spices you haven’t touched in years—they’re strong but easy to lug around. Medium boxes? Perfect pals for your lumpy pots and pans. Large ones handle the feather-weights like Tupperware, while dish barrels give your fragile tumblers and plates the VIP treatment, thanks to some extra padding and strength.
Packing Materials
Just like how you wouldn’t head out without a coat in a snowstorm, you need your supportive packing gear to keep your kitchen treasures snug and secure.
| Packing Material | Use |
|---|---|
| Bubble Wrap | Shielding breakables like Grandma’s fancy goblets |
| Packing Paper | Nesting them safely, also fills awkward box gaps |
| Foam Sheets | Hugging your mega appliances, keeping scratches at bay |
| Packing Peanuts | Offering a cushy ride inside the boxes |
| Labels/Markers | Making sure you know what’s what when starting fresh |
Bubble wrap is the cozy quilt your fragile stuff needs, while foam sheets are the bodyguards for your hefty appliances. Packing paper is great for both wrapping and taking up those pesky extra inches in boxes, and peanuts stop shuffling around.
And don’t skip the labels—unless you want every box to be a surprise present of random things. Need tips on labeling like a pro? We’ve got you covered with our moving box labeling system.
If you’re the kind who likes to plan right down to the silverware drawer, our room-by-room packing guide is the toolkit you need. Plus, who doesn’t love a good hack? Dive into our moving packing hacks for tricks to make box wrangling a breeze.
With this toolkit, there’s nothing stopping you from conquering your kitchen move without a hitch. Roll up those sleeves and show them who’s boss!
Sorting and Decluttering
Packing your kitchen can feel like a Herculean task, but it starts with a good old sorting out. By ditching what you don’t need, you’ll lighten the load and keep your sanity in check during the big move.
Assessing Your Kitchen Items
Before you toss things into boxes, take a serious look at your kitchen loot. You’ll need to give some thought to what’s worth keeping and what’s just taking up space.
- Group Your Gear: Throw your cookware, utensils, gadgets, and pantry stuff into piles.
- Check It Out: Give everything a once-over. If it’s bashed up, out of date, or just plain broken, take note.
- Use It or Lose It: Ask yourself how often you actually use each thing. If it’s been collecting dust, maybe it’s time to say goodbye.
| Category | Hold Onto It | Pass It On | Dump It |
|---|---|---|---|
| Cookware | ✅ | ✅ | ✅ |
| Utensils | ✅ | ❌ | ✅ |
| Small Appliances | ✅ | ✅ | ❌ |
| Pantry Items | ✅ | ✅ | ❌ |
Need more ideas on sorting through your stuff? Take a peek at our piece on decluttering before moving.
Decluttering and Downsizing
Why clutter up your new crib with old junk? Time to let go of the things you haven’t used in years.
- Banish the Backups: We know how easy it is to hoard doubles. Keep the one you adore and move on.
- Give with a Purpose: If it’s still kicking, but not in your plans, think about donating or selling.
- Fresh Over Fusty: Chuck outdated herbs, musty spices, and expired cans.
- Single-Shot Wonders: If it only does one thing and takes up lots of room, maybe look for alternatives.
| Item Type | Plan |
|---|---|
| Duplicates | Keep one, donate/sell |
| Old Gadgets | Part ways nicely |
| Stale Pantry Goods | Trash ’em |
| Space Hogs | Consider other options |
Your mission? Cut down on chaos to breeze through packing. More magic fixes can be found in our room-by-room packing guide.
By rolling up your sleeves and trimming the fat in your kitchen, you’ll make moving day a whole lot easier. You’ll slide into your new pad with just the essentials. For even more slick tricks on making it fit and fly, be sure to read our take on space-saving packing techniques.
Packing Strategies
Packing your kitchen smartly when moving can feel like a puzzle, but it’s all about making the most of the space in your boxes. Here, we share some tricks to make sure your transition is easy-peasy.
Organizing by Category
When you organize your kitchen stuff by category, it makes unpacking less of a headache. Keep items together by what they do, how big they are, and how easily they break.
Steps for Organizing by Category:
Utensils and Cutlery:
- Keep similar utensils bundled with rubber bands or ties.
- Pop smaller items into labeled bags or tiny boxes.
Cookware:
- Stack your pots and pans like nesting dolls.
- Bubble wrap is your best friend here—keep things safe and snug.
Pantry Items:
- Check expiration dates and say goodbye to old stuff.
- Use sealable bags or containers for dry goods to stop any spills.
Dinnerware:
- Stack plates, bowls, and cups into groups.
- Wrap each in packing paper or foam for extra cushioning.
Small Appliances:
- Take off any removable bits and wrap them separately.
- If you still have the original box, use it—but if not, just make sure they’re wrapped tightly.
Check out our detailed article on packing fragile items for some solid tips on keeping breakables like glassware in one piece.
Maximizing Space Efficiency
Get the best bang for your buck with your packing supplies by using every nook of your box space. This not only saves on boxes but keeps your stuff in prime condition.
Tips for Maximizing Space Efficiency:
Use Smaller Items to Fill Gaps:
- Stuff small, unbreakable things like spices or kitchen towels into empty spots.
- This stops things from moving around too much and possibly getting damaged.
Nested Packing:
- Tuck smaller items into bigger ones when you can. Think a toy shop inside a mall—small within large.
- Even with nesting, wrap each piece to keep it safe.
Vertical Packing:
- Stand items up vertically—like stacking books on a shelf. This uses space more wisely and helps prevent too much shuffling.
- Consider using dividers or cardboard to keep them steady.
Seal Containers:
- Make sure any liquids are tightly sealed and tossed into plastic bags just in case.
- Label them clearly so you know what’s what.
Manage Weight Distribution:
- Distribute weight well—don’t overload one box.
- Heavier stuff goes at the bottom with the light guys up top.
Here’s a quick table to help with packing the usual kitchen suspects:
| Category | How to Pack | Example Items |
|---|---|---|
| Utensils & Cutlery | Bundle and bag | Knives, spoons, forks |
| Cookware | Stack, wrap, and label | Pots, pans, lids |
| Pantry Items | Check dates, pack in bags | Canned goods, dry foods |
| Dinnerware | Wrap individually, use foam sheets | Plates, bowls, cups |
| Small Appliances | Detach parts, use ample padding | Toasters, blenders, mixers |
For more packing intel, check our moving inventory checklist and space-saving packing techniques articles.
Get these strategies right and you’ll be zipping through your kitchen move with ease—no muss, no fuss.
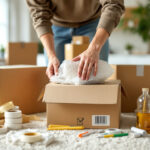
Packing Fragile Items

If there’s one thing you definitely don’t want during a move, it’s finding out your grandma’s fancy teacups have turned into modern art. To keep those kitchen treasures safe, give your fragile items like glassware and delicate gizmos the TLC they deserve.
Securing Glassware and Dishes
Glassware and dishes? Yeah, they might as well be on the endangered species list when moving. Making sure these fragile folks get to your new place in one piece is all about packing them up like they’ve got movie star VIP status.
How to Wrap Up Glassware and Dishes Like a Pro:
- Get Your Hands on Packing Stuff: Hunt down some sturdy boxes, packing paper, and bubble wrap. Dividers are your new best friend. Need to geek out more on packing supplies? Check out essential packing supplies.
- Wrap It Up, Baby: Each glass and dish should be wrapped like a burrito with packing paper or bubble wrap. Add some tape to keep that snug fit.
- Divide and Conquer: Slide those dividers into the boxes to separate each treasure. It’ll be like Jenga—but with less stress.
- Layer Cake Strategy: Lay down a squishy layer of crumpled paper at the bottom, then pile on your wrapped items, adding more squishy stuff between layers.
- Slap a Label On It: Mark those boxes so everyone knows there’s glass inside. Want to be a labeling guru? Check moving box labeling system.
| Item | Packing Material | Wrapping Technique |
|---|---|---|
| Wine Glasses | Bubble Wrap | Forearm and base hugs |
| Plates | Packing Paper | Solo wrap, stack ’em sideways |
| Bowls | Bubble Wrap | Solo wrap, dividers make friends |
Protecting Delicate Appliances
Not just any old things, but those quirky gadgets in your kitchen. The blender yearning for smoothies and the coffee maker perked up by the thought of brewing—they need a little extra love to make it safely too.
How to Baby Your Delicate Appliances:
- Take ‘Em Apart If You Can: Pull apart any removable bits and wrap them like a tiny Christmas present.
- Love the Old Box: If you’ve still got the original box, great! Use it. If not, follow the next steps to build your fortress of safety.
- Wrap Every Little Bit: Bubble wrap or packing paper is ideal. Just swaddle each piece till you can’t see the shape anymore.
- Secure Big Mama: Envelop the main appliance in bubble wrap till it’s nigh unrecognizable.
- Plug Those Gaps: Stuff any empty spots with crumpled paper or foam peanuts so there’s no room to wiggle.
- Give It a Warning Label: Mark the boxes with delicate appliances so the movers know you mean business.
| Appliance | Component | Packing Material | Packing Technique |
|---|---|---|---|
| Blender | Blades, Jar | Bubble Wrap | Separate wrapping, stable box |
| Coffee Maker | Carafe, Filters | Packing Paper | Wrap solo, fill with extra love |
| Toaster | Removable Tray | Bubble Wrap | Tray solo wrap, secure base |
With this plan in action, your fragile kitchen MVPs should make it through the move unscathed. Now, brew a cup o’ joe and pat yourself on the back. For more genius moving tips, head over to packing fragile items and moving packing hacks.
Labeling and Organizing
Packing up your kitchen for a move is no small feat. But, with some good ol’ labeling and organizing, the chaos can turn into a breeze. Slap proper labels on those boxes, and you’ll have an easy-peasy time unpacking and finding stuff during the move.
Importance of Clear Labels
These labels are your secret weapon! They cut out the guesswork and get you settled in no time. Just make sure they’re clear as day, showing both what’s inside and where it should land in your new place.
Key Points for Effective Labeling:
- Go for big, easy-to-read fonts.
- Mention what’s in the box and its final pit stop.
- Bust out some color-coded labels to keep things tidy.
| Label Type | Description | Example |
|---|---|---|
| Box Number | Give each box its own ID. | Box #1 |
| Room | Tell it where it needs to go. | Kitchen |
| Content Description | List of goodies inside. | Plates, Cups |
| Special Handling | Flag fragile or delicate items. | Fragile, Handle with Care |
If you want to ace this, check out our handy moving box labeling system guide.
Organizing Packed Items
Organizing is like peanut butter to the labeling jelly—it just goes together. Putting similar stuff together makes it easy to find what you need when you get to your new digs.
Strategies for Organizing Packed Items:
- Keep similar stuff together.
- Make the must-haves easy to grab.
- Use smaller boxes for the heavy stuff—your back will thank you!
| Box Content Type | Suggested Packing Order |
|---|---|
| Pots and Pans | Bottom of the box, heavier items |
| Utensils and Cutlery | Middle layer, wrapped snug |
| Glassware and Dishes | Top layer, add some cushy padding |
For more on getting different items packed right, check out our room-by-room packing guide. And if you’re dealing with heavy furniture, our packing heavy furniture for moving article might save some sweat and tears.
Nailing the labeling and organizing will make this whole moving gig a lot easier. Your kitchen stuff will get to your new place safe and sound, ready to jump into action.
Transporting Kitchen Items
Moving all your kitchen stuff right can keep it safe and sound during transit. Here’s some straightforward advice to help with loading, unloading, and keeping it all secure along the way.
Loading and Unloading Techniques
Making sure you pack and unpack like a pro is key to protecting your kitchen bits and bobs. Take note of the following:
- Use the right gear: Moving dollies and hand trucks are lifesavers for heftier boxes and gear. Curious about the best options? Check out best moving dollies.
- Heavy stuff first: Always tuck your weighty boxes and machines on the bottom of the moving truck. This way, the load stays steady, and the light stuff won’t get smooshed.
- Spread it out: Even up the weight across the truck so it doesn’t tip over unexpectedly.
- Tie it down: Grab some straps or bungee cords to lock loose items in place and stop them from sliding around.
- Pad the breakables: Wrap fragile items like glassware and china in something soft and make sure they’re snug. Need tips? Peek at our guide on packing fragile items.
| Loading Technique | Description |
|---|---|
| Heavy items | Tuck heavy boxes and machines on bottom of the truck |
| Spread it out | Distribute weight across evenly |
| Tie it down | Secure everything with straps or cords |
| Pad the breakables | Use plenty of padding for glassware |
Safety Tips for Transit
Keeping your kitchen treasures intact en route is top priority. A few safety rules to bear in mind:
- Don’t overload: Make sure boxes aren’t too heavy unless you want broken backs (or boxes).
- Label it clearly: Use a moving box labeling system so you know what’s inside and what’s fragile without guessing games.
- Clear the way: Keep pathways clear wherever you’re moving stuff to dodge trips and slips.
- Lift like a champ: Bend them knees and keep your back happy and straight. Knowing the right way to lift can save you from injuries.
- Inspect before hitting the road: Give everything a once-over before setting off to make sure everything’s secure.
| Safety Tip | Description |
|---|---|
| Don’t overload | Keep boxes light enough to handle safely |
| Label it clearly | Make sure you can find details and fragility at a glance |
| Clear the way | Steer clear of trips or slips when moving things around |
| Lift like a champ | Bend knees and keep back straight to avoid strain |
| Inspect before hitting | Check everything’s tied down right before departure |
With these practical tips in mind, moving your kitchen stuff can be a breeze, getting all your goodies safely to their new spot. Check out how to pack a moving truck for more tricks and tips.
Unpacking and Setting Up
So the chaos of the move is over, and the next adventure begins—unpacking and setting up your new kitchen. Prioritizing can turn this mountain of boxes into a molehill in no time.
Unpacking Priorities
Make settling into your new kitchen a breeze by starting with the must-haves. Here’s a game plan to help you tackle the chaos:
- Daily Basics: Jump right into unpacking the everyday stuff, like plates, mugs, and forks. These things lay the groundwork for getting back to normal right away.
- Cooking Gear: Break out the pots, pans, and necessary utensils. Keep star-player items, like the frying pan and spatula, close at hand where you can grab them without a search party.
- Food Stuff: Get your pantry and fridge in order. Unpack those canned beans and your eggs, lining them up so you don’t have to dig when hunting down ingredients.
- Kitchen Gadgets: Plug in life’s essentials—coffeepot, microwave, toaster. Give them a quick test run to avoid early morning caffeine disasters.
- Cleaning Crew: Lastly, dig out the dish soap, scrubs, and towels. Having these within arm’s reach saves the day when your cooking escapades turn messy.
Efficiently Setting Up Your New Kitchen
Unpacking’s just the first step. Now let’s make this space the well-oiled machine every cook dreams of. Here are some tricks to make your new kitchen work like a charm:
- Category Kingdoms: Keep baking buddies with baking buddies and spices with spices. Grouping stuff by category saves you time and maybe a headache.
Cabinet Tetris: Frequently-used items go on the bottom shelves, and the ‘once-in-a-blue-moon’ stuff goes higher up. Use nifty tools like risers or shelf organizers to make every inch count.
- Drawers & Hooks Magic: Stash utensils and small gadgets in drawers. Hang pots, pans, and oven mitts on hooks to free up that drawer real estate.
- Make Stations: Create zones like a coffee corner with an outlet nearby or a cooking nook with your go-to pots, pans, and utensils.
- Label Maker Fun: As you go, slap on some labels. It might sound overboard, but trust me, it’ll help carry this organized look into the long haul. Curious about labeled organization? Peek at our piece on the moving box labeling system.
- Keep it Safe: Store all the heavy or hazardous stuff like knives and appliances so little ones can’t reach them. Safety first, always.
Getting these unpacking and organization tips up and running turns your kitchen chaos into your favorite place on earth. For more packing and moving wisdom, visit our room-by-room packing guide and dive into our moving packing hacks for more clever tricks.
Conclusion
Packing your kitchen for a move doesn’t have to be a stressful endeavor. By implementing a strategic plan, using the right packing supplies, and adopting effective sorting and packing techniques, you can ensure that every pot, pan, and plate arrives safely at your new home.
Remember to prioritize clear labeling and organization, protect your fragile items, and follow safe transportation practices to make your move seamless.
With these expert tips, you’ll transform your kitchen packing process from a daunting task into a well-orchestrated mission, paving the way for a smooth transition into your new culinary space. Embrace the move with confidence and enjoy setting up your new kitchen, ready for countless delicious moments ahead.
FAQs
What are the essential packing supplies for moving a kitchen?
Essential packing supplies include various sizes of sturdy boxes, packing tape, bubble wrap, packing paper, foam sheets, packing peanuts, labels, and markers. These materials help protect your items and keep them organized during the move.
How can I effectively declutter my kitchen before moving?
Start by categorizing your kitchen items into keep, donate, or toss. Assess the condition and usage frequency of each item, and eliminate duplicates, outdated goods, and items you no longer need. This reduces the volume to be packed and makes the moving process easier.
What strategies can maximize space efficiency when packing a kitchen?
Use smaller items to fill gaps, nest packing by placing smaller containers inside larger ones, pack items vertically, seal containers tightly, and distribute weight evenly across boxes. These strategies help optimize space and protect your belongings.
How should fragile kitchen items be packed to prevent damage?
Wrap each fragile item individually with bubble wrap or packing paper, use dividers in boxes, place a cushioning layer at the bottom, and clearly label the boxes as fragile. Ensuring tight packing with no movement inside the boxes also helps prevent breakage.
What are the best practices for labeling and organizing packed kitchen items?
Use large, easy-to-read fonts for labels, include both the contents and the designated room, and consider color-coding for different categories. Organizing similar items together and keeping a packing inventory can also streamline the unpacking process.


