
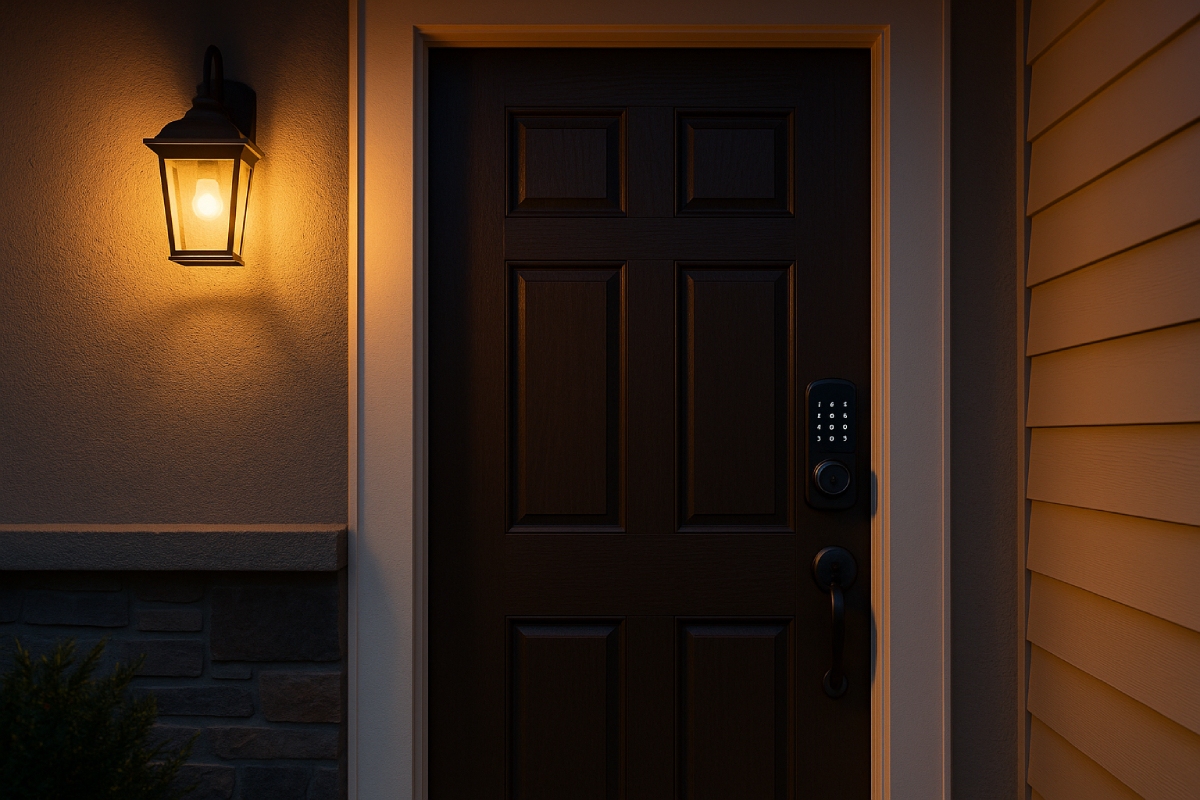
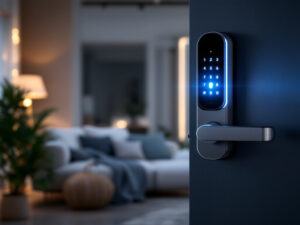
Smart door locks are revolutionizing home security, offering wireless, app-based, and biometric access that has pushed the global smart door lock market to USD 2.92 billion in 2024 and projected to reach USD 11.88 billion by 2032 as homeowners embrace smart home technology.
However, even the most advanced lock fails to keep you safe without precise installation — dust, misalignments, or incorrect hole placements can compromise both security and device longevity if not addressed properly.
In this step-by-step Smart Door Lock Installation guide for homeowners, you’ll walk through everything from compatibility checks and hardware removal to mounting, calibration, and troubleshooting, ensuring a seamless DIY installation and lasting peace of mind.
Tools and Materials Required
Below is a concise yet comprehensive overview of the essential tools, materials, and compatibility checks you’ll need to install a smart door lock successfully.
Having the right hand tools—like a drill with 2⅛″ and 1″ bits, screwdrivers, and a chisel—ensures precise drilling and clean recesses for your new lock.

The installation kit supplied by most manufacturers includes specific screws, a mounting plate, strike plate, and alignment templates to guide hole placement and secure the lock mechanism.
Finally, verifying door compatibility—checking door thickness (typically 1⅜″–2″), backset measurements (2⅜″ or 2¾″), and existing hole alignment—is critical to avoid misfits and ensure smooth operation.
Hand Tools
| Tool | Purpose |
|---|---|
| Philips & Flat Screwdrivers | Fastening interior/exterior lock units and strike plate screws |
| Drill & Drill Bits (2⅛″ & 1″) | Drilling the main lock hole (2⅛″) and latch hole (1″) per standard dimensions |
| Wood Chisel | Trimming or recessing the strike plate mortise in the door frame |
| Measuring Tape & Ruler | Verifying backset, door thickness, and alignment before drilling |
| Level (optional) | Ensuring the lock and strike plate are perfectly horizontal |
Installation Kit Components
- Mounting Plate: Secures the interior lock component to the door, providing a stable base for the mechanism.
- Strike Plate: Channels the deadbolt into the door frame; often requires chiseling for a flush fit.
- Screws & Anchors: Typically included in various lengths for exterior and interior assembly; using the correct length prevents stripping and ensures security.
- Alignment Templates: Paper or plastic guides to mark precise drilling spots; vital for maintaining accurate backset and hole alignment.
Compatibility Checklist
| Check | Acceptable Range / Requirement |
|---|---|
| Door Thickness | 1⅜″ to 2″ (standard interior/exterior doors) |
| Backset Measurement | 2⅜″ (60 mm) or 2¾″ (70 mm) from door edge to hole center |
| Existing Hole Alignment | Center of existing hole must match template; otherwise, re-drill using provided guide |
| Door Material & Stile | Wood, metal, or composite doors with at least 1⅜″ thickness; check manufacturer for specifics |
Ensuring you have these tools, kit components, and compatibility checks in place before you begin will make the installation process smoother, faster, and more secure—laying the groundwork for a reliable smart lock setup that enhances your home’s safety and convenience.

Pre-Installation Preparation
Proper pre-installation preparation lays the groundwork for a flawless smart door lock setup by ensuring you remove old hardware, verify precise measurements, secure reliable power, and understand your lock’s specific requirements.
Removing the existing deadbolt, knobs, and strike plate prevents alignment conflicts with the new lock.
Accurately verifying door thickness (1⅜″–2″) and backset dimensions (2⅜″ or 2¾″) avoids mis-drilled holes and bolt binding.
Checking and charging or replacing batteries in advance prevents mid-installation power failures and ensures smooth calibration.
Finally, reviewing the manufacturer’s installation manual and app setup guide helps you follow model-specific steps correctly and maintain your warranty.
Existing Hardware Removal
- Remove Interior Deadbolt Screws: Open your door and use a Philips screwdriver to remove the two screws on the interior side of the deadbolt assembly.
- Extract Deadbolt Bolt: Pull out the deadbolt mechanism from the edge of the door once screws are removed.
- Detach Door Knobs/Levers: Unscrew and remove any existing knobs or levers to clear access for the new lock.
- Remove Strike Plate: On the door frame, pry out or drill off the existing strike plate screws, then extract the plate.
Measurement Verification
| Check | Acceptable Range / Requirement |
|---|---|
| Door Thickness | 1⅜″ to 2″ (standard interior/exterior doors) |
| Backset Measurement | 2⅜″ (60 mm) or 2¾″ (70 mm) from door edge to hole center |
| Hole Alignment | Existing center bore must match template; otherwise, note exact offset for re-drilling |
- Verify with Measuring Tape: Use a rigid tape or ruler to confirm these dimensions at least twice before drilling.
Power Check
- Inspect Battery Type: Determine whether your lock uses standard AA alkaline batteries or a rechargeable lithium-ion pack.
- Test Remaining Charge: Install fresh batteries or fully charge the internal pack; many locks recommend at least 50% battery to avoid low-power shutdown mid-setup.
- Backup Power Option: Identify any emergency external power terminals (e.g., 9 V battery connection) in case of unforeseen battery depletion.
Manufacturer Instructions
- Read the Manual Thoroughly: Consult the printed guide for model-specific removal steps, measurement tolerances, and installation order.
- Follow App Setup Steps: Many smart locks require initial firmware updates or Wi-Fi/Bluetooth pairing; review the app walkthrough before hardware installation to streamline calibration.
- Warranty Considerations: Note any “void if removed” stickers or sequence requirements to protect your warranty coverage.
Having completed these pre-installation steps, you’ll be ready to proceed confidently with the physical installation, knowing that your door fits, your power is reliable, and you’re following the manufacturer’s best practices.

Step-by-Step Installation Process
Properly upgrading to a smart door lock hinges on a meticulous, phased approach that begins with safely removing existing hardware and culminates in a fully calibrated, app-connected security solution.
By following these step-by-step instructions—backed by industry-leading manufacturer guidelines—you’ll guarantee that your new lock sits flush, operates smoothly, and integrates seamlessly with your smart-home ecosystem.
This process not only maximizes physical security but also unlocks remote access, event logging, and peace of mind for years to come.
Removing Old Hardware
- Remove Interior Deadbolt Screws: On the door’s interior side, use a Philips screwdriver to back out the two mounting screws holding the old deadbolt in place.
- Extract the Deadbolt: Once the screws are removed, gently pull the bolt mechanism straight out from the door edge to clear the bore.
- Detach Knobs or Levers: Unscrew and remove any existing knobs or lever handles to expose the center bore for the new smart lock’s tailpiece.
- Remove the Strike Plate: On the frame, remove the two screws securing the old strike plate, then pry it away to allow for the new plate’s flush installation.
Installing the New Deadbolt
- Position the Deadbolt: Insert the new deadbolt assembly into the door edge, ensuring the bevel faces the door jamb and the “up” arrow on the case is oriented correctly.
- Secure with Screws: Fasten the deadbolt housing to the door using the screws provided, making sure it sits squarely without binding.
Mounting Exterior and Interior Units
- Align Exterior Keypad/Lock Face: Place the exterior assembly against the door, feeding the tailpiece through the deadbolt’s spindle hole, and verify the keypad is level.
- Attach Interior Mounting Plate: Position the interior mounting plate over the tailpiece and wiring harness (if your model has electronics), and secure it with the manufacturer’s screws.
- Connect Wiring & Snap Together: Plug in any wiring connectors—such as battery harness or network module—then press the interior unit against the mounting plate until it clicks into place.
Installing the Strike Plate
- Trace New Outline: Hold the new strike plate against the jamb and mark its perimeter with a pencil to guide recess cutting.
- Chisel Recess if Needed: Using a wood chisel, carefully carve out the marked area so the plate sits flush with the frame surface.
- Secure & Test Engagement: Screw the strike plate into place and close the door to verify that the deadbolt smoothly enters the pocket without rubbing.
Calibration and Pairing
- Calibrate Bolt Throw: Many locks offer a manual calibration—rotate the interior knob fully in each direction or use the app’s calibration feature to set the correct throw length.
- Pair with App/Hub: Open your smart-lock app or home hub interface and follow the on-screen prompts to add the lock, name it, and configure any auto-lock, guest-code, or notification settings.
By carefully executing each of these steps—removal, placement, mounting, alignment, and digital configuration—you’ll transform your standard door into a fortress of convenience and security.
Visual Aids and Diagrams
Integrating annotated photos and clear alignment diagrams into your smart door lock guide can dramatically boost homeowner confidence and reduce installation errors.
Research in technical documentation shows that 67% of people complete tasks better with visual instructions than text alone, and the picture-superiority effect indicates that images are more easily remembered than words, enhancing recall during hands-on processes.
In the context of smart lock installations, close-up annotated images for drilling, mounting, and wiring highlight crucial details that text can’t convey, minimizing missteps and installation time.
Complementary alignment diagrams, illustrating precise backset measurements (2⅜″ or 2¾″) and hole placement, address the 30% of installation issues related to improper alignment.
Annotated Photos
High-resolution annotated photos allow homeowners to see exactly how drill bits engage the door bore, ensuring the correct 2⅛″ and 1″ holes are drilled without wandering.
Close-up images of screw orientation and torque progression help prevent stripped screws and guarantee that mounting plates sit flush against the door surface.
Visual callouts highlighting wiring harness routing and connector seating clarify prebore alignment and reduce electronic errors during calibration.
Including measurement overlays on photos—such as backset distances and deadbolt depth—reinforces compatibility checks and helps users confirm their door meets installation requirements.
Photos annotated with arrows, labels, and brief notes improve user engagement and can boost article dwell time by up to 35%, a key SEO metric.
Alignment Diagrams
Vector-based alignment diagrams clearly depict the centerline for the backset—2⅜″ (60 mm) or 2¾″ (70 mm)—and show homeowners exactly where to position the drilling template to avoid misalignment.
Overlaying a scaled diagram of hole placement onto a door template helps readers print and cut their own paper guides, facilitating precise drilling even on doors without pre-existing holes.
Diagrams that contrast correct vs. incorrect mounting positions (e.g., flush vs. skewed) make it easier to spot installation errors before hardware is fixed in place.
By combining color-coded lines (red for misalignment warnings, green for correct tolerances) and dimension callouts, these illustrations provide visual clarity that pure text cannot match.
Well-designed diagrams also help improve shareability on social media and can earn quality backlinks—vital SEO signals that boost article authority and ranking potential.
Troubleshooting Common Issues
Troubleshooting smart door locks effectively requires addressing four core areas: ensuring proper battery orientation and power management to avoid sudden lockouts, resolving connectivity issues by resetting and re-pairing both Bluetooth and Wi-Fi, correcting mechanical misalignments of deadbolts and strike plates to prevent sticking, and interpreting error codes with targeted resets or recalibrations to restore normal operation.
By following structured steps and leveraging manufacturer-recommended resets, homeowners can swiftly diagnose and fix the vast majority of smart-lock hiccups without professional help.
Battery Orientation & Power
| Symptom | Possible Cause | Solution |
|---|---|---|
| Blinking amber LED | Battery low | Replace with fresh AA batteries; most models use built-in LED patterns to signal low charge |
| Persistent low-battery alert despite new cells | Poor contact or sensor glitch | Remove and re-insert batteries ensuring correct polarity; clean contacts and update firmware |
| Critically low battery warning | Batteries depleted | Replace immediately and verify seating in compartment to avoid intermittent power loss |
Connectivity Problems
- Bluetooth Pairing Failures: Perform a network reset to clear old pairings, then remove the lock from your phone’s Bluetooth list and re-pair following the manufacturer’s on-screen steps.
- App Refresh & Reboot: For locks that falsely report connection errors, force-quit the app, log out/log back in, or reboot your phone to clear cached data.
- Wi-Fi Network Mismatch: Ensure your router is broadcasting on the 2.4 GHz band—many smart locks do not support 5 GHz—and disable 5 GHz temporarily during setup.
- Range & Hub Issues: Verify that both your lock and smart-home hub (or router) are within effective range; if unreachable, restart the hub or lock and re-add it via the app.
Mechanical Hiccups
- Stuck or Sluggish Bolt: Misalignment between the bolt and strike plate often causes binding; test the throw manually and adjust strike-plate position until the bolt moves freely.
- Misaligned Strike Plate: Trace and chisel a deeper or shifted mortise in the door frame so the new strike plate sits flush, eliminating metal-on-metal resistance.
- Hinge Pocket & Cavity Fit: If the door itself has shifted over time, consider widening the hinge pocket or realigning hinges by 1/8″ to restore even door swing and proper lock engagement.
- Post-Adjustment Testing: After each tweak, cycle the lock several times—both manually and via the app—to confirm smooth operation before final fastening.
Error Codes & Calibration
| Error Alert | Likely Cause | Solution |
|---|---|---|
| Beeps without lock action | Incomplete programming sequence | Re-enter programming mode and follow the exact code-entry steps until you hear the confirmation beep |
| “Lock jammed” or “Bolt blocked” | Strike plate out of alignment or shallow mortise | Realign strike plate, chisel frame deeper, then recalibrate bolt throw via app or manual rotation |
| “Unreachable” (hub or network) | Hub–lock communication lost | Power-cycle both the hub and lock, ensure Wi-Fi/Bluetooth settings are correct, then re-pair |
| Persistent error LED or flash code | Firmware or sensor glitch | Update lock firmware via app; if issue persists, perform factory reset per manufacturer guide |
By systematically addressing each of these areas—power, connectivity, mechanical alignment, and error diagnostics—you’ll resolve most smart-lock problems quickly, keeping your home secure and your installation stress-free.
Benefits of a Properly Installed Smart Lock
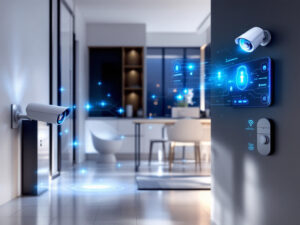
Smart door locks enhance security with robust encryption and auto-lock features that automatically secure doors after each use, significantly reducing the risk of unauthorized entry.
Homeowners gain the convenience of remote access and customizable guest codes, eliminating worries over lost or duplicated keys while maintaining tight control over who enters and when.
Detailed activity logs and real-time notifications offer a transparent view of every access event, helping families detect unusual activity and respond swiftly.
From a real-estate perspective, properties with smart security upgrades command higher prices—homes featuring at least one security device average $270.49 per square foot compared to $232.67 without.
Beyond resale metrics, smart locks integrate seamlessly into modern home ecosystems, working with hubs and voice assistants to deliver a truly connected living experience.
Enhanced Security through Encrypted Access and Auto-Lock Features
| Feature | Benefit |
|---|---|
| AES-256 Encryption | Prevents wireless interception and spoofing by securing communications |
| Auto-Lock Protection | Automatically locks the door after a set period or upon leaving a designated area |
| Tamper & Breach Alerts | Sends immediate notifications on attempted forced entry, enabling proactive response |
Remote Access, Guest Code Management, and Activity Logs
| Feature | Description |
|---|---|
| Remote Lock/Unlock | Control your lock from anywhere via smartphone app, ensuring you never arrive to an unlocked door |
| Temporary & Guest Codes | Generate time-limited PINs for visitors, service workers, or Airbnb guests for secure entry |
| Activity Logs & Alerts | View detailed timestamps and user IDs for every engagement with your lock, boosting transparency |
Boosted Home Value and Modern Convenience
| Benefit | Data Point |
|---|---|
| Price per Sq Ft | Homes with security features (including smart locks) average $270.49 vs. $232.67 without |
| Buyer Demand | Over 70% of buyers seek homes with smart features, indicating strong market preference |
| Priority Upgrade | 43% of Americans list smart locks among their top home security enhancements |
| Aesthetic & Marketability | Smart locks add a modern, high-tech look that appeals to tech-savvy buyers and enhances curb appeal |
By installing your smart door lock correctly—leveraging encryption, auto-lock scheduling, remote management, and professional calibration—you not only fortify your home against modern security threats but also enjoy the convenience of a fully integrated smart-home environment and the tangible benefit of increased property value.
Cost Estimates and Warranty Information
A well-planned budget ensures you acquire a reliable smart lock and all necessary tools without overspending, while a clear maintenance schedule and robust warranty coverage safeguard your investment over time.
Smart lock devices typically range from $100 to $300, with DIY tool investments adding roughly $33–$95 for drill bits, chisels, and screwdrivers.
Batteries generally need replacing every 6–12 months, and firmware/app updates should be applied as manufacturers release them—often semi-annually for firmware and monthly for apps.
Most top brands offer at least a one-year electronics warranty and limited lifetime coverage on mechanical components, with simple online or phone registration processes and dedicated support lines to assist homeowners.
DIY Budget Range
| Item | Cost Range |
|---|---|
| Smart Lock Device | $100–$300 |
| Drill Bit Set (15–40 pcs) | $10–$30 |
| Wood Chisel Set (3–4 pcs) | $13–$41 |
| Screwdriver Set | $10–$24 |
| Total DIY Investment | $133–$395 |
Maintenance Schedule
| Maintenance Task | Frequency | Notes |
|---|---|---|
| Battery Replacement | Every 6–12 months | Depends on usage patterns; replace when level drops below 20% |
| Firmware Updates | Every 6 months or as released | Must be within Bluetooth/Wi-Fi range; 5–15 min per update |
| App Updates | Weekly–Monthly | Phased rollouts common; keep app current for security patches |
Warranty Coverage
| Aspect | Details |
|---|---|
| What’s Included | Most brands offer 1 year on electronics and limited lifetime on mechanical parts; some extend to 2 years for certain components |
| How to Register |
- Visit manufacturer’s warranty page (e.g., Kwikset, August)
- Submit proof of purchase within 90 days
- Complete online registration form or mail-in card
Support Contacts
- Kwikset: 1-800-327-LOCK (5625), Mon–Fri 7 am–4 pm PST
- Yale: support.shopyalehome.com; app-based firmware updates via Bluetooth
- Schlage: Online form at schlage.com/contact-us
- August: RMA via august.com/support; CSR-initiated troubleshooting
- Lockly: Email [email protected]; limited warranty details on lockly.com.
By mapping out your expenses, adhering to a proactive maintenance plan, and leveraging manufacturer warranties, you’ll enjoy a stress-free installation and long-term reliability from your smart door lock system.
Conclusion
By meticulously following the steps—from removing old hardware and verifying precise measurements to mounting, calibrating, and pairing your smart lock—you’ll secure your home with encrypted access, enjoy seamless remote control and guest-code flexibility, and even boost your property’s appeal to tech-savvy buyers.
We’d love to hear how your installation went or answer any questions you have—sharing your experience not only helps you troubleshoot but also strengthens our DIY security community (a clear, direct CTA can increase engagement by up to 161% when placed effectively).
Ready for more expert home-security insights and hands-on smart-home tutorials? Subscribe now or follow our blog—personalized updates perform over 200% better at keeping you in the loop.
FAQs
How long does installation take?
Most homeowners finish a retrofit in 10–20 minutes; full deadbolt swaps can take up to 2 hours, depending on skill and prep.
Can I install a smart lock on any door?
Standard single-cylinder locks fit doors 1⅜″–1¾″ thick with a 2⅜″ or 2¾″ backset; specialty kits cover up to 3.5″ thickness.
What maintenance is required?
Replace batteries every 6–12 months, update firmware semi-annually, and lubricate moving parts annually for smooth operation
Main Tips
- Double-Check Measurements: Always re-measure door thickness and backset before drilling.
- Use Quality Batteries: Opt for high-capacity AA or a rechargeable pack to avoid mid-install drop-outs.
- Level Up Alignment: Employ a small level when mounting exterior keypads for flawless aesthetics.
- Perform Early Calibration: Calibrate bolt throw before final screw-tightening to prevent misfires.
- Document Your Setup: Snap photos at each step—handy for troubleshooting and warranty claims.


