
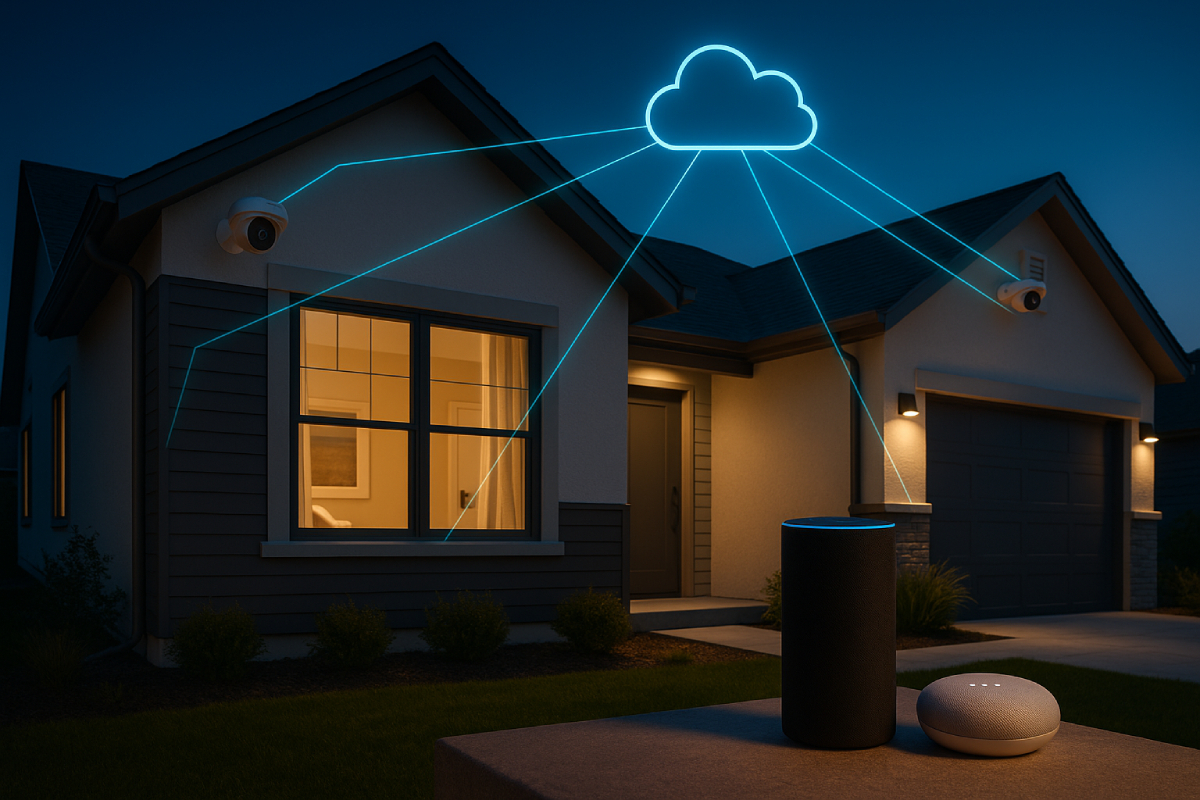
As home security evolves, voice-controlled systems represent the next frontier in intuitive protection, allowing homeowners to arm and disarm alarms, lock doors, and view live camera feeds with simple voice commands for unparalleled convenience and peace of mind.
By integrating your security devices with Amazon Alexa and Google Home, you can build customized routines—like “Goodnight” to secure all entry points—and receive instant voice alerts on suspicious activity, streamlining both everyday use and emergency responses.
In this guide, you’ll learn how to choose compatible smart security hardware, follow clear step-by-step setup workflows, master essential voice commands, and apply privacy best practices to turn your home into a seamlessly managed, voice-enabled fortress.
Understanding Integration Types
Smart home integrations split into two overarching approaches—cloud-to-cloud and local—and hinge on the communication protocols powering them.
Cloud-to-cloud integrations route commands through vendor-managed servers, enabling easy remote access and automated routines but introducing potential latency, privacy concerns, and reliance on internet connectivity.

Local integrations keep control on-site via a home hub or gateway, offering low latency, enhanced privacy, and offline reliability at the cost of more complex setup and limited remote access.
Underlying both models are protocols like Wi-Fi, Zigbee, Z-Wave, and Thread, each with unique topologies, range, and power profiles—and the emerging Matter standard aims to bridge ecosystems by operating over IP on Wi-Fi and Thread.
Choosing the right integration type and protocol mix is critical for building a responsive, secure, and user-friendly voice-controlled security system.

Cloud-to-Cloud vs. Local Integrations
Definitions and Trade-Offs
Cloud-to-cloud integrations connect devices through vendor cloud platforms over the internet, centralizing automation logic off-site.
Local integrations process commands within a home hub or gateway, keeping data on-premises for faster response and increased privacy.
| Integration Type | Definition | Pros | Cons |
|---|---|---|---|
| Cloud-to-Cloud | Devices communicate via vendor cloud APIs over the internet | • Remote control from anywhere• Simple setup | • Latency and downtime risk• Privacy and data-breach concerns |
| Local | Devices connect directly to a local hub or gateway via LAN or mesh protocols | • Low latency• Enhanced privacy• Offline operation | • Complex initial setup• Limited remote access without VPN or cloud bridge |
Key Protocols & Standards
Wi-Fi, Zigbee, Z-Wave, Thread, and Matter form the backbone of smart security integrations. Selecting the right protocol affects range, power use, network resilience, and cross-ecosystem compatibility.
| Protocol | Frequency | Network Type | Range | Power Consumption | Notes |
|---|---|---|---|---|---|
| Wi-Fi | 2.4 / 5 GHz | Star | Up to ~100 m | High | Ubiquitous; ideal for high-bandwidth devices like cameras |
| Zigbee | 2.4 GHz | Mesh | 10–100 m per hop | Low | Low-power sensor networks; requires coordinator |
| Z-Wave | 908 MHz (US) | Mesh | Up to ~150 m | Low | Reliable sub-GHz mesh; now evolving with Long Range (ZWLR) |
| Thread | 2.4 GHz | Mesh (IPv6) | 10–30 m per hop | Low | IP-based; resilient mesh; foundation for Matter |
| Matter | IP over Wi-Fi/Thread | Hybrid | Wi-Fi/Thread ranges | Varies | Unified standard across ecosystems; improving interoperability |
Compatibility Matrix
In today’s voice-first smart homes, compatibility varies significantly across leading security systems. SimpliSafe supports both Amazon Alexa and Google Home via official cloud-based Skills and integrations, enabling arming, status checks, and limited voice controls.
Ring Alarm offers full Alexa integration but does not integrate with Google Home, relying on its cloud APIs for voice control.
ADT’s Smart Home platform and Pulse/Command apps work seamlessly with both Alexa and Google Assistant through cloud-to-cloud connections, giving users broad voice-control options.

Vivint systems integrate with Alexa and Google Home by linking through the Vivint Skill or SmartHub in the respective apps.
Finally, Wyze’s camera and security suite provide robust support for both assistants, also via cloud-based Skills and APIs.
| Security System | Alexa Support | Google Home Support | Integration Type |
|---|---|---|---|
| SimpliSafe | Yes — Enable SimpliSafe® Skill in Alexa app | Yes — Link via Google Home/Assistant app; arm/status only | Cloud-to-Cloud |
| Ring Alarm | Yes — Add Ring Skill; supports doorbell, cameras, modes | No — Not supported by Google Home | Cloud-to-Cloud |
| ADT Smart Home | Yes — ADT Smart Home Skill works with Echo, Echo Show, etc. | Yes — “Works with Google” via ADT Pulse/Command | Cloud-to-Cloud |
| Vivint | Yes — Enable Vivint Skill in Alexa app | Yes — Connect in Google Home app to SmartHub | Cloud-to-Cloud / Local¹ |
| Wyze | Yes — Wyze Skill supports cameras, sensors | Yes — Native integration via Wyze Google Action | Cloud-to-Cloud |
¹ Vivint may also leverage on-premises SmartHub routing for faster local control alongside cloud services.
How to Read Compatibility Labels
- Yes: The system offers an official “Skill” (Alexa) or “Works with” Action (Google Home), enabling voice commands for arming, disarming, camera feeds, and sensor status through cloud APIs.
- No: There is no native integration; third-party workarounds (e.g., IFTTT) may exist but aren’t officially supported.
- Partial: The assistant can perform limited functions (e.g., SimpliSafe allows arming and status queries but not disarming via Google Home).
- Integration Type:
- Cloud-to-Cloud: Commands travel via the vendor’s servers, offering easy setup and remote access but requiring internet connectivity and involving potential latency and privacy considerations.
- Local: Control occurs on-site via a hub or gateway, providing faster response times and offline capabilities at the expense of more complex setup and restricted remote control without additional configuration.
This matrix and label guide help you quickly determine which security systems align with your voice-control preferences and technical requirements.
Selecting the Right System
Choosing the ideal smart security solution starts with weighing DIY versus professional installation—balancing upfront complexity against convenience—and understanding ongoing subscription costs.
From there, compare core components (cameras, locks, sensors, alarms, and hubs) not only on price but on functionality, power requirements, and ecosystem compatibility.
This approach ensures your home protection setup is both affordable and tailored to your voice-controlled, privacy-focused lifestyle.
Assessing Your Needs
DIY vs. Professionally Installed Systems
- DIY Installation appeals if you’re comfortable with basic networking and want to minimize upfront fees—but expect to spend personal time on setup, troubleshooting, and firmware updates.
- Professional Installation offers a plug-and-play experience with certified technicians handling wiring, configuration, and often a satisfaction guarantee—at the expense of higher installation fees and potentially longer lead times.
Budget Considerations and Subscription Models
| Provider | Upfront Cost | Monitoring Fee | Notes |
|---|---|---|---|
| SimpliSafe | Equipment purchase only | $0.33–$2.66/day (Standard to Pro Plus) | Self-monitoring plan available at $0.24/day |
| ADT | $599–$899 installation fee | $45.99–$60.97/month | DIY option starts at $24.99/mo with 1-month min |
| Vivint | Equipment financed or upfront | ~$40/month | 24/7 professional monitoring included |
| Ring Alarm | Starter kit from ~$199 | $0 or $20/month for professional monitoring | No monthly fee for app alerts; monitoring optional |
| General | £250–£1,500 | £5–£40/month | DIY kits from £250 vs. pro installs up to £1,500; sensors £20–£50 |
- Tip: Factor in both upfront equipment/installation and recurring subscription to calculate true lifetime cost.
Feature Comparison
Below is a high-level comparison of key components to help you prioritize based on function, price, and integration needs.
| Feature | Function | Price Range | Key Considerations |
|---|---|---|---|
| Sensors | Detect motion, doors/windows opening | £20–£50 per sensor | Battery vs. wired, tamper alerts, mesh protocol support (Zigbee/Z-Wave) |
| Cameras | Live video, recording, and notifications | £50–£400 per camera | Resolution (1080p vs. 4K), night vision, local vs. cloud storage |
| Alarms/Sirens | Audible alerts for intrusion or fire | £40–£80 each | Decibel level, backup battery, outdoor vs. indoor usage |
| Smart Locks | Keyless entry, remote lock/unlock | $10–$600 per lock | Integration (Wi-Fi vs. bridge required), auto-lock, guest codes, battery life |
| Automation Hubs | Central control point for multiple protocols | ~$150–$200 (e.g., Tapo H500) | Protocol support (Wi-Fi, Zigbee, Thread, Matter), local processing vs. cloud |
- Integration Note: Ensure each component you choose supports the ecosystem you want—Alexa, Google Home, or both—and consider Matter-certified devices for future-proof interoperability .
By aligning your installation preference, budget, and feature priorities, you’ll be equipped to select a smart security system that delivers seamless voice-controlled protection and long-term peace of mind.
Step-by-Step Setup Guides
In just a few minutes, homeowners can leverage Amazon Alexa and Google Home to voice-control their security devices with minimal friction.
For Alexa, enabling the vendor-specific security Skill (e.g., SimpliSafe, Ring, ADT) in the Alexa app, linking your account, and running device discovery typically sets up sensors and cameras for voice queries in under five minutes.
Creating custom routines like “Alexa, secure the house” centralizes arm/disarm commands alongside lighting or thermostat adjustments for a true one-command experience.
On Google Home, granting the necessary permissions, adding devices via “Works with Google,” and assigning them to rooms usually takes about three to seven minutes.
Once configured, simple voice commands such as “Hey Google, show me the front door” bring up live video or status updates on compatible displays, making everyday security checks effortless.
Integrating with Amazon Alexa
- Enabling the Security Skill
- Open the Alexa app and tap More > Skills & Games. Search for your system’s Skill (e.g., “SimpliSafe,” “Ring,” or “ADT Smart Home”) and tap Enable.
- For Ring, go to the Alexa app’s menu, select Skills & Games, search “Ring,” enable the Skill, and sign in to your Ring account.
- For ADT, open the ADT app’s menu, tap Add a Device, choose Alexa Skill, enable it in the Alexa app, and complete sign-in.
- Linking Your Account & Discovering Devices
- After enabling, Alexa prompts you to link your security account; enter credentials and grant permissions.
- Say “Alexa, discover devices” or tap Devices > + > Discover Devices to populate all cameras, sensors, locks, and alarms in the Alexa app.
- Creating Routines
- In the Alexa app, navigate to More > Routines > +. Name your routine (e.g., “Secure the house”) and set the voice trigger.
- Add Action > Smart Home > Control scene or choose Custom and enter a voice command like “ask SimpliSafe to arm home mode”.
- Optionally, combine with other actions (turn off lights, adjust thermostat) for a multi-device “Goodnight” routine.
Integrating with Google Home
- Granting Permissions
- Open the Google Home app, tap your profile, then Manage people & permissions. Add yourself (or household members) as Admin or Member to control devices and view history.
- Adding Devices & Assigning Rooms
- In Google Home, tap + > Set up device > Works with Google, then search your security system’s brand (e.g., Nest, SimpliSafe, Ring) and link the account.
- Once linked, devices auto-populate. Tap a device, select Settings > Room, and assign it to your desired room for contextual voice control.
- Setting Up Voice Commands
- Use commands like “Hey Google, show me the front door camera” on a Nest Hub or Chromecast-enabled TV; ensure the target display is online and named exactly as in the Home app.
- For third-party cameras, speak the precise device name (e.g., “Backyard Camera”) to avoid “device not found” errors.
With these clear, expert-backed steps, you’ll transform your home into a seamlessly managed, voice-enabled security fortress.
Cross-Platform Scenarios
Bridging Amazon Alexa and Google Home through IFTTT or Hubitat empowers homeowners to unify voice control across platforms, automating security tasks like arming alarms and viewing camera feeds from either assistant.
With IFTTT, users can create Applets that trigger Alexa routines via the mkZense service and feed Google Assistant commands into Alexa or vice versa.
Hubitat offers a local hub that natively exposes devices to both assistants, reducing latency and privacy concerns by keeping automations on-premises.
These cross-platform strategies ensure consistent, multi-assistant voice control even when one cloud service experiences downtime, while future-proofing setups through community-maintained integrations and virtual devices.
Using IFTTT to Bridge Alexa and Google Home
IFTTT acts as a cloud-to-cloud intermediary, letting you link the Alexa Actions by mkZense service with Google Assistant to route commands seamlessly.
To set up, connect both the Alexa and Google Assistant channels in IFTTT, authorize your Amazon and Google accounts, then build Applets using “If This” triggers (voice commands) and “Then That” actions (invoke routines).
Popular security-focused Applets include “Arm the Security System” which uses the Google Assistant trigger to send an arm command to your alarm via IFTTT.
Note that IFTTT’s native Alexa integration occasionally changes—third-party workarounds like the Voice Monkey service may be required when the direct Skill isn’t officially supported.
Using Hubitat to Bridge Alexa and Google Home
Hubitat Elevation serves as a local automation hub, automatically exposing compatible Zigbee, Z-Wave, and Thread devices to both Alexa and Google Home once you enable the respective integrations.
Beyond security devices, Hubitat’s built-in Text-to-Speech engine can issue voice alerts through Sonos or IKEA Symfonisk speakers for events like door/window sensors tripping.
Many users find Alexa integration more mature—Hubitat’s Alexa Routines can be triggered by motion or contact sensor events—while Google Home support remains more limited in routine triggers.
For advanced use cases, the community-maintained Google Home integration allows granular control over how each device appears and behaves in Assistant.
Example Workflows: Multi-Assistant Voice Control
| Workflow Name | Trigger | Action in Alexa | Action in Google Home | Description |
|---|---|---|---|---|
| Secure Home Sync | IFTTT: “Hey Google, arm security” | mkZense Applet sends “arm home” command to SimpliSafe via Alexa | Google Assistant confirms “System armed” on your Nest Hub | Single voice command on Google triggers your Alexa-managed alarm to arm, with dual-assistant feedback. |
| Snapshot Relay | IFTTT: “Alexa, show camera snapshot” | Alexa Skill captures Ring snapshot and stores to cloud | IFTTT Applet pushes URL to Google Assistant notification | Use Alexa to grab a camera image, then have Google Assistant notify you with the snapshot link. |
| Hubitat Virtual Lock | Hubitat: Virtual switch toggled by any assistant | Echo-enabled locks lock/unlock via local hub | Google Home triggers same virtual switch for locks | A single virtual device in Hubitat lets both assistants lock or unlock doors interchangeably. |
| Local Alert Broadcast | Hubitat sensor event (door open) | Hubitat TTS announces on Sonos/Echo devices | Google Home broadcasts alert via Chromecast speakers | Instant, local voice alerts across ecosystems when security sensors detect activity. |
These cross-platform scenarios illustrate how IFTTT and Hubitat can bridge Alexa and Google Home, delivering cohesive security control and multi-assistant voice workflows for a truly integrated smart home experience.
Voice Command Best Practices
Effective voice commands and clear device naming are essential for a seamless, reliable smart security experience with Alexa and Google Home.
By following best practices—such as using concise, unambiguous commands for arming/disarming, camera feeds, and lock checks, and adopting intuitive naming conventions—you minimize recognition errors and maximize responsiveness across platforms.
Below, find sample voice commands and naming guidelines to help you ensure that every request is executed smoothly and securely.
Sample Commands for Arming/Disarming, Camera Feeds, and Lock Status
| Assistant | Action | Sample Command |
|---|---|---|
| Alexa | Arm system | “Alexa, arm Ring in Away mode.” |
| Alexa | Disarm system | “Alexa, disarm SimpliSafe.” |
| Google Home | Arm system | “Hey Google, arm my ADT system to Stay.” |
| Google Home | Disarm system | “Hey Google, set Smarthub to Disarmed.” |
| Alexa | Show camera feed | “Alexa, show me the front door camera.” |
| Google Home | Show camera feed | “Hey Google, show me the backyard camera.” |
| Alexa | Check lock status | “Alexa, is the front door locked?” |
| Google Home | Check lock status | “Hey Google, is the main door locked?” |
Tip: Always speak the exact device name as it appears in your app to avoid “device not found” errors.
Naming Conventions for Clarity
- Keep names simple and unique. Short, descriptive names prevent misinterpretation (e.g., “Hallway Sensor” vs. “Sensor1”).
- Include location and function. Use patterns like “Room – Device” (e.g., “Living Room Camera”) to group devices logically.
- Spell out numbers. Instead of “Light 2,” say “Light Two” so voice assistants parse them correctly.
- Avoid special characters. Stick to letters and spaces; punctuation can confuse NLP engines.
- Use consistent prefixes. For multi-device rooms, start each name with the room (e.g., “Kitchen Lock,” “Kitchen Sensor 1”) to streamline bulk commands.
Implementing these voice-command and naming strategies will make your Alexa and Google Home integrations more reliable, ensuring your home security system responds instantly and accurately.
Troubleshooting
This guide pulls insights from official developer resources, user reports, and community forums to ensure you have reliable, expert-backed solutions at your fingertips.
Common Issues
1. Discovery Failures
When devices don’t appear in Alexa or Google Home during setup, it’s often due to network misconfigurations, outdated firmware, or cached credentials (developer.amazon.com). Typical symptoms include:
- No devices listed under “Discover Devices.”
- Error messages like “No new devices found.”
Primary Causes & Fixes
- Network Isolation: Ensure your security hub and voice assistant are on the same Wi-Fi band (2.4 GHz recommended).
- App Cache: Clear the Alexa or Google Home app cache, sign out and back in, then retry discovery (amazonforum.com).
- Firmware Updates: Update both your hub/camera firmware and the Alexa/Google Home apps before rediscovery.
Latency
Delays between voice command and device response can undermine user confidence. In side-by-side tests, Alexa typically responds in 1–2 seconds, whereas Google Home may take 6–7 seconds on average.
| Assistant | Average Response Time |
|---|---|
| Alexa | 1–2 seconds |
| Google Home | 6–7 seconds |
Speed-Up Strategies
- Local Control: Use hubs like Matter-enabled bridges to process commands locally, cutting latency to under 1 second.
- Optimize Skills: For Alexa, allocate at least 512 MB to your Skill’s Lambda function to boost execution speed (developer.amazon.com).
- Network Health: Prioritize QoS for your security devices on your router to reduce packet loss and jitter.
3. Authentication Errors
Errors such as “Auth check failure on device(s)” or generic login failures often stem from misaligned account permissions or expired tokens.
| Error Message | Likely Cause | Quick Fix |
|---|---|---|
| “Auth check failure on device(s)” | Not a Home member or shared-device issue | Add/re-add user as Admin/Member in Google Home; retry linking |
| “Couldn’t authenticate” | Corrupt OAuth tokens or expired passwords | Unlink & relink account; reboot router and device |
| “Account linking failed” | API key misconfiguration in Home Assistant | Regenerate API key; clear credentials in HA and relink |
Quick Fixes & Support Resources
| Issue | First-Step Fix | Advanced Resource |
|---|---|---|
| Discovery Failures | Restart router & devices; clear app cache | [Alexa Troubleshooting Guide] (developer.amazon.com) |
| Latency | Switch to local Matter hub | [View Operational Metrics] (developer.amazon.com) |
| Authentication Errors | Unlink & relink accounts; reboot network | Google Home Help: Auth Error |
Security & Privacy Considerations
Here’s a concise yet comprehensive look at security and privacy for voice-controlled smart security systems, covering how and where data is stored and protected, the trade-offs between local and cloud architectures, and top best practices for credentials and network design.
Data Storage & Encryption
Data from cameras, sensors, and logs can reside on-site (local storage) or off-site (cloud storage), and each choice demands strong encryption both at rest and in transit. Local storage gives you direct control over your files but requires you to implement AES-256 or equivalent disk-level encryption yourself.
Cloud providers typically handle server-side encryption automatically—often using AES-256—and secure connections via TLS 1.2+ to safeguard data in transit.
End-to-end encryption (E2EE) adds an extra layer by ensuring only you hold the decryption keys, preventing even the cloud vendor from reading your footage.
| Storage Type | At-Rest Encryption | In-Transit Encryption | Control Level |
|---|---|---|---|
| Local | Depends on user setup (AES-256 recommended) | User-configured (e.g., VPN/TLS) | Full control; user manages keys |
| Cloud | Provider-managed (AES-256) | TLS 1.2+ | Limited; keys often managed by provider |
| Hybrid | Combination of both | Combination of both | Balanced control and scalability |
Local vs. Cloud Trade-Offs
Choosing cloud or local integrations affects performance, privacy, and reliability. Cloud-based setups offer seamless remote access, automatic updates, and scalable storage but introduce latency (often 1–2 s for commands) and greater exposure to online threats if credentials are compromised.
Local systems ensure sub-second responsiveness and operate offline during internet outages but demand more technical know-how, manual firmware updates, and on-premises backup management.
| Aspect | Cloud | Local |
|---|---|---|
| Latency | 1–2 s typical | < 1 s with Matter-enabled hubs |
| Reliability | Depends on internet; auto-retry on reconnect | Operates offline; unaffected by WAN outages |
| Privacy Risk | Higher if cloud credentials leaked | Lower; data stays on-site unless manually shared |
| Maintenance | Provider handles updates | User/installer responsible for patches and backups |
Best Practices for Credentials & Networks
Securing voice-controlled security systems isn’t just about device hardening—it’s also about strong credentials and network design.
- Strong, Unique Passwords
- Use a reputable password manager to generate and store complex passwords (15+ characters, mixed types) and avoid reuse.
- Change default device credentials immediately upon setup—over 80 % of IoT breaches exploit unchanged defaults.
- Multi-Factor Authentication (MFA)
- Enable MFA on all vendor accounts; choose phishing-resistant methods like hardware tokens or app-based authenticators over SMS.
- Regularly verify and update your MFA methods; remove unused or lost devices promptly.
- Network Segmentation
- Place security cameras and sensors on a dedicated VLAN or guest SSID, isolating them from your primary LAN to contain potential breaches.
- Enforce firewall rules that restrict outbound traffic to only necessary endpoints (e.g., your cloud provider’s IP ranges).
| Practice | Description |
|---|---|
| Strong Passwords | 15+ character, unique per account; managed with a vault |
| MFA | App-based or hardware token; avoid SMS where possible |
| VLAN/Site Segmentation | Guest SSID or VLAN for IoT; block inter-VLAN traffic by default |
| Firewall Egress Filtering | Permit only necessary ports and IPs for device cloud communication |
Adopting these encryption strategies, understanding the cloud versus local trade-offs, and enforcing rigorous credential and network controls will ensure your voice-enabled security ecosystem remains both user-friendly and resilient against evolving threats.
Advanced Topics
In this section, we explore how Matter’s evolving certification roadmap will unify disparate smart-home ecosystems under a single IP-based standard, and how security systems can also leverage Apple’s Siri/HomeKit and customizable platforms like Home Assistant to create seamless, voice-controlled experiences across devices and brands.
Matter Certification & Future Roadmap
Matter—developed by the Connectivity Standards Alliance and backed by Apple, Google, Amazon, and Samsung—provides a unifying, IP-based protocol that enables secure, reliable interoperability among smart-home devices from different manufacturers.
Since its launch (as Project CHIP) in 2022, Matter has released multiple versions—1.1, 1.2, 1.3 (May 2024), 1.4 (Nov 2024), and the latest 1.4.1 (May 7, 2025)—each adding new device types (energy management, water controls) and onboarding features like NFC, while improving Thread and Wi-Fi integration.
Looking ahead, the Matter roadmap targets support for ambient motion and presence sensing, advanced environmental controls, and expanded device classes (cameras, major appliances) to cover virtually every smart-home use case.
Enhanced Multi-Admin in 1.4 fosters better multi-ecosystem experiences, while upcoming “Matter-certifiable Home Routers” and “Access Points” aim to simplify network setup and boost reliability.
With industry leaders committing to refine reliability, performance, and ecosystem-wide data sharing in 2025, Matter is poised to fulfill its promise of a truly seamless smart-home foundation.
Integration with Other Platforms
While Matter brings brand-agnostic interoperability, many users also rely on Apple’s HomeKit and Siri for smooth security control.
HomeKit encrypts data end-to-end and enables voice commands via Siri on iPhone, HomePod, or Apple Watch, with scenes and automations managed in the Home app.
Leading security brands like Abode and Reolink offer native HomeKit support—letting you arm alarms, view camera feeds, and receive notifications contract-free—though choice is limited to MFi-certified devices.
For ultimate flexibility, custom smart-home platforms such as Home Assistant enable you to integrate non-Matter and non-HomeKit devices using community drivers and expose them to Siri/HomeKit via the HomeKit Bridge integration.
This approach brings local control and advanced automations—like triggering security alarms based on complex logic—while preserving HomeKit’s privacy protections. Developers and power users can also explore Homebridge or Node-RED for bespoke workflows, ensuring your voice-controlled security ecosystem adapts to any device or requirement.
Table: Other Platform Integrations
| Platform | Integration Method | Key Benefit | Limitation |
|---|---|---|---|
| Apple HomeKit & Siri | Native HomeKit framework | End-to-end encryption; seamless Siri voice control | Only MFi-certified devices supported |
| Abode | Official HomeKit integration | Contract-free DIY with Home app control | No professional monitoring option |
| Home Assistant | HomeKit Bridge integration | Expose any HA entity to HomeKit; local automations | Requires technical setup and maintenance |
By understanding Matter’s certification trajectory and leveraging both Apple and custom platform integrations, you can architect a future-proof smart security system that combines broad compatibility, robust privacy, and advanced automation tailored to your home.
Conclusion
By now, you’ve mapped out the ideal integration path—choosing between cloud-to-cloud or local setups, consulting a clear compatibility matrix, aligning your DIY or professional installation and budget, and stepping through seamless Alexa and Google Home configurations—while applying best practices for voice commands, naming, encryption, and network segmentation to maximize both convenience and security.
Testing these configurations in your own home—verifying arming/disarming, live camera feeds, and lock checks—then measuring response times against benchmarks (Alexa: ~1–2 s; Google: ~6–7 s) will highlight any latency issues and guide you toward local or Matter-enabled hubs if needed.
From there, build and refine automation routines—like “Goodnight” to arm alarms and dim lights—to streamline daily habits, and monitor logs for unusual activity while staying current with Matter’s rollout and community developments for continued interoperability and security improvements.
FAQs
What’s the difference between cloud-to-cloud and local integrations?
Cloud-to-cloud routes commands via vendor servers for easy remote access but adds latency and privacy risks; local uses an on-site hub for sub-second response and offline reliability.
Which security systems work with both Alexa and Google Home?
SimpliSafe, ADT, Vivint, and Wyze natively support both assistants; Ring Alarm works only with Alexa without third-party bridges.
How do I create a voice routine to arm my system?
In Alexa/Google Home apps, enable the system Skill/Action, link your account, discover devices, then build a custom routine (e.g., “Alexa, secure the house”) that issues arm/disarm commands.
Why is my device not discovered during setup?
Ensure all devices and your voice assistant are on the same 2.4 GHz network, update firmware, clear app cache, and retry discovery.
How can I minimize voice-command latency?
Use a Matter-certified local hub to process commands on-premises, and prioritize QoS for security devices on your router .
Main Tips
- Use consistent, location-based device names (e.g., “Living Room Camera”).
- Enable MFA and change all default passwords immediately.
- Prioritize Matter-certified devices for future compatibility.
- Segment your IoT network with VLANs or a guest SSID.
- Test and time each voice command; adjust for under-second responses.


