

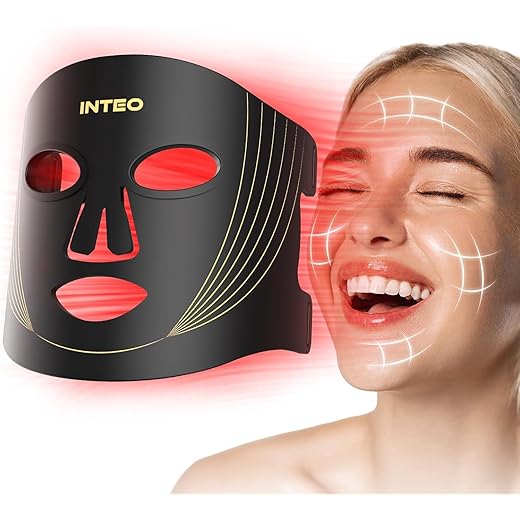
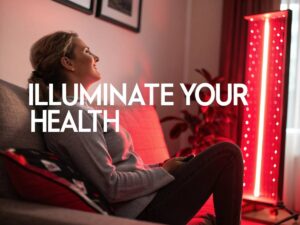
Unlock Radiance with Red Light Therapy
Discover the transformative power of RED LIGHT THERAPY MASKS and how they can rejuvenate your skin effortlessly. These innovative masks harness light energy to enhance your skin’s appearance, leaving you with a youthful, radiant glow. Get ready to unlock your skin’s potential!
What You Need to Get Started

Unlock radiant skin with your LED mask!
Choosing the Right Mask for You
Not All Masks Are Created Equal – Here’s How to Pick!Evaluate the wavelength of the red light therapy mask. Look for masks offering wavelengths between 600nm to 650nm for surface-level skin rejuvenation and 800nm to 850nm for deeper tissue penetration. This ensures you’re targeting a range of skin concerns effectively.
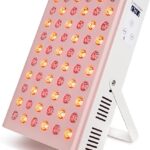
Consider the size of the mask. Opt for a full-face design to treat your entire complexion simultaneously, or choose a mask with adjustable areas to focus on specific spots, like your cheeks or around your eyes, depending on your unique needs.
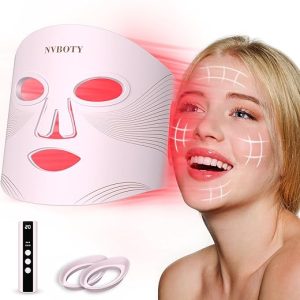
Assess additional functionalities. Some masks come equipped with features like heat therapy or varying light modes (pulsed vs. continuous). These can enhance treatment effects. For instance, a mask that allows you to switch between red and near-infrared light can cater to multiple skin issues.

Read reviews and get recommendations. Take note of user experiences to get a sense of how well different masks work. Don’t hesitate to reach out to friends or online communities for insights. By making informed choices, you’re paving the way to achieving remarkable results with your red light therapy journey.
Preparing Your Skin for Treatment
Prep Like a Pro – Your Skin Will Thank You!Cleanse your skin thoroughly. Before using your red light therapy mask, remove makeup, dirt, and oil. Use a gentle facial cleanser that suits your skin type. For example, if you have oily skin, a foaming cleanser works well, while creamy options are great for dry skin.
Exfoliate effectively. Next, exfoliate to slough off dead skin cells. This step is crucial as it enhances light penetration, allowing the therapy to work more effectively. You can use a physical scrub or a chemical exfoliant containing ingredients like glycolic or salicylic acid. Just be sure to follow the product instructions for use to avoid irritation.
Pat your skin dry gently. After cleansing and exfoliating, use a soft towel to pat your face dry. Don’t rub; be gentle to avoid irritation.
Avoid heavy products. On treatment days, skip thick creams or oils. Keeping your skin bare allows the red light to penetrate effectively without barriers.
Now you’re all set for an effective red light therapy session! Enjoy the luminous benefits that are about to unfold.

Setting Up Your Red Light Therapy Session
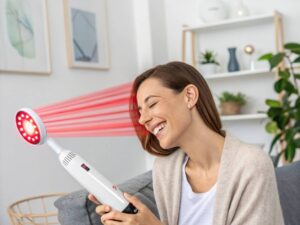
Get the Most Out of Your Treatment – It’s All About the Setup!Position your mask correctly. Find a comfortable spot where you can sit or lie down. Ideally, the mask should be placed about 6 to 12 inches away from your face. This distance allows the light to penetrate effectively without causing any discomfort.
Adjust the fit of the mask. Ensure the mask sits snugly against your skin. For example, if it feels loose, use the adjustable straps to secure it comfortably. A well-fitted mask ensures that the light hits all target areas evenly.
Create a calming environment. Dim the lights and eliminate distractions. Playing soothing music or an engaging podcast can enhance your relaxation. Imagine settling into a cozy chair, mask on, while calming tunes play in the background.

Set your timer. Many users find that a session of 10 to 20 minutes is ideal. Use this time to unwind—maybe meditate or simply breathe deeply as the red light works its magic.
Remember to relax your facial muscles. To maximize efficacy, keep your face neutral and avoid squinting; let the light do its job! You’re in for a rejuvenating experience.

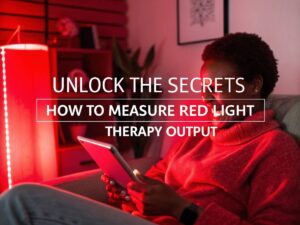
Timing Is Everything: Finding Your Ideal Session Length
More Isn’t Always Better – Discover the Perfect Duration!Determine the optimal duration. Generally, aim for 10 to 20 minutes per session. This timeframe allows your skin to absorb the light effectively without overstimulation. If you’re just starting, begin with shorter sessions around 10 minutes and gradually increase as your skin adjusts.
Tailor to your skin type and goals. If you have specific concerns, like acne or signs of aging, adjust the duration to suit your needs. For instance, if targeting fine lines, you might want to extend your session to 15-20 minutes to promote deeper collagen production. Conversely, if you’re simply maintaining your skin’s glow, a quick 10-minute session may be sufficient.
Track your progress. Take notes after each session about how your skin feels and looks. Maybe you notice less redness or a dewy finish! This feedback will help you refine your treatment length over time.
Consistency is key. Aim for at least 3 to 5 sessions per week for optimal results. Just imagine incorporating this glowing routine into your weekly self-care—your skin will thank you!

Caring for Your Skin Post-Treatment
Glow Time! The Secret to Maintaining Your Radiance After Use.Hydrate your skin immediately. After your red light therapy session, apply a hydrating serum or moisturizer to lock in moisture. Choose products rich in hyaluronic acid or glycerin for maximum hydration. Imagine your skin soaking up all that goodness, feeling plump and rejuvenated!
Use sunscreen daily. Protect your skin from sun damage. Apply a broad-spectrum SPF of at least 30 every morning, even if you’re indoors. Think of this step as a shield defending your freshly treated skin from harmful UV rays.
Avoid heavy makeup right after treatment. Give your skin a break by letting it breathe for a few hours post-session. If you must wear makeup, opt for breathable products and keep it light. Remember, your skin just had a spa-like experience; allow it to shine!
Give your skin some time to recover. If you notice any redness or sensitivity, refrain from exfoliating or using strong actives for a day or two. Let your skin heal and enjoy the subtle glow emerging over the next few days.
Stay consistent with your skincare routine. Continue using soothing products regularly to maintain the glowing effects and nurture your skin for long-lasting beauty. Your diligent aftercare will amplify the benefits you gained from red light therapy!

Embrace Your Radiance Journey
Now that you’re equipped with the essentials of using your red light therapy mask, it’s time to embrace your skincare journey. Try it out, monitor your progress, and share your radiant results with friends! You deserve glowing skin—let your journey begin today!


I think the phototherapy device of ZJKC is more cost-effective.
Love that, Kathy! Setting the mood can really enhance the experience. Keep enjoying your journey!
That sounds so relaxing! I just put on some calming music. Need to step up my game with the candles, haha.
I have to say, I’m loving the whole ‘embrace your radiance journey’ vibe! It’s like a little self-care ritual for me now. I even light candles when I use my mask. Anyone else have a fun routine?
Same! I also like to do a little facial massage before the session. Feels really nice and I think it helps with absorption!
Great to hear, Sarah! Consistency is key, and don’t forget to hydrate! ????
I’ve been using mine for about a month now! The key is consistency, just like the guide says. I try to do it every other day, and my skin feels so much smoother! ????♂️
Just started using my red light therapy mask and wow, I’m already seeing a difference in my skin! ✨ I followed the guide on prepping my skin and honestly, it makes a big difference. Anyone else have tips for maximizing results?
For real! I was so confused at first but now I feel like a pro! ????
Glad to hear it, Daniel! It should be easy and enjoyable, so that’s a win!
Can we talk about how the setup was so easy? I was worried I’d mess it up, but this guide made it super simple. Like, I actually feel like I know what I’m doing now! ????
Awesome choice, John! The combination can be really effective. Keep us posted on your results!
That sounds cool! I just got a plain red light one, but maybe I should look into the combo too. Do you find it worth the extra $$?
The section on choosing the right mask was super helpful! I had no idea there were so many options out there. I ended up getting one with both red and near-infrared light. Hope it works as well as the guide suggests!
Totally! I was skeptical too but now I’m hooked. Just stick with it, and you’ll see results!
Welcome to the club, Brian! It can be a game changer for many. Keep us updated on your journey!
Honestly, I thought this was a gimmick at first but seeing my wife’s results made me try it out. I’m not as consistent as I should be, but the guide made it easy to understand. Anyone else a skeptic turned believer?
Post-treatment care is definitely key to keeping that glow! Try using a gentle serum before your moisturizer.
I’ve been using vitamin C serum too! It seems to help brighten my skin after treatment.
I like to use a hyaluronic acid serum after my sessions. It really helps with hydration!
So, I totally overlooked the post-treatment care! The guide really opened my eyes to how important that is. I usually just slap on some moisturizer and call it a day. ???? Anyone have a good routine they follow?
I started at 15 mins and now I’m at 25 mins per session. It’s all about finding what feels right for you!
So happy to hear that, Nina! Keep up the great work, and let us know about your progress!
I usually do 20 mins, but I’ve built up to it. Just listen to your skin! If it feels too much, scale back a bit.
Great question, Michele! It really depends on your skin type, but generally starting with 10-15 minutes is a good idea.
Right?! I’m loving the glow too! It’s like I have my own personal sun. ☀️
I feel like I’m not getting the timing right. How long should I really be using this thing? I want to see results but I don’t want to overdo it either! ???? Any advice?
Anyone else notice how much more glowing their skin looks after just a few sessions? I’m amazed! The guide really helped me feel confident about using it. Can’t wait to see how it looks in a month!