
Transforming your closet doesn’t have to be a daunting task. Imagine turning those unused corner spaces into stylish, functional shelves that not only maximize storage but also elevate your room’s aesthetic.
With DIY corner closet shelves, you can achieve a personalized look without breaking the bank. Whether you’re a seasoned DIY enthusiast or just starting out, this guide offers wallet-friendly materials and clever features to inspire your next project.
Dive in to discover how simple changes can bring a fresh, organized vibe to your space, making every morning routine a breeze!
Building DIY Corner Shelves
Creating your own DIY corner closet shelves can bring a dash of excitement to your space while giving you that sweet satisfaction of a job well done. We’re gonna check out some wallet-friendly options and super handy features you’ll wanna keep in mind.
Cost-Effective Materials
If you’re watching those pennies, picking the right stuff is key—so you don’t just save dough, but also turn out shelves that’ll last and look fab. One of those miracle materials is MDF (Medium Density Fiberboard). It’s got a nice, smooth surface that’s a breeze to slice up and coat with paint. Plus, it won’t break the bank, making it a top choice for folks who love a good DIY session (Lovely Etc).
| Material | Cost | Durability | Ease of Use |
|---|---|---|---|
| MDF | Cheap | Okay | Super Easy |
| Plywood | Cheap | Tough | A bit tricky |
| Metal | Not so cheap | Tough | Kinda hard |
| Wire Shelving | Fair | Okay | Super Easy |
Key Features to Think About
When you’re putting together those corner shelves, think about stuff that’ll make ’em not just useful but also easy on the eyes:
- Materials: Wood gives you that homey feel, metal’s got the modern edge, and wire shelving lets you see your stuff right away.
- Usage: Tote around heavy loads or just a bunch of light bits? That choice will steer you on what to use and how to put it all together.
- Customizability: Shape those shelves to any storage dream you have. You could hang hooks for clothes, use sturdy brackets, and stack shelves wherever seems right.
And don’t forget lighting—gotta see what you’re picking outta that closet! Choices range from a fancy fixture to nifty portable lamps or snazzy LEDs (WooHome). We have a whole deal on lighting too if you want to light things up like a pro, check it here.
Dream up your DIY corner closet shelves by throwing in fun ideas, like recycling a ladder, jazzing up with curved curtains, or flipping an old bookshelf into something new. If you’re itching for a full-on DIY dive, peek at our nifty guide on building DIY wood shelves for step-by-step magic.
By picking smart and keeping these goodies in your mind, you’ll whip up DIY corner shelves that’re not just handy but also a looker—ideal for newbies, thrifty stylists, and anyone who loves a bit of creative crafting.
Lighting in Corner Closets
Lighting can make or break the practicality and vibe of a corner closet. We’re diving in on why it’s essential and checking out some nifty options for lighting up your DIY corner closet shelves without having to squint and guess if you grabbed the right shirt.
Importance of Adequate Lighting
Having your DIY corner closet shelves lit up like a Christmas tree can do wonders. First off, it makes life easier. No more rummaging through shadowy corners only to yank out the wrong pair of pants. With ample lighting, sorting and organizing your clothes and accessories becomes a breeze. Angela Marie Made even says good lighting ups the game in both function and looks. That’s a double win!
You know what’s more? Good lighting makes your closet look snazzy. You’re getting dressed in the morning, racing against the clock, and voila! You find exactly what you need. Time saved and no more morning meltdowns over missing socks.
Lighting Options for Visibility
You’ve got plenty of choices when it comes to lighting up those DIY shelves. Whether your wallet’s feeling heavy or light, or if you’re all about that snazzy décor, there’s something for everyone.
Built-in Light Fixtures
Want to go all out? Built-in light fixtures are your best pals. Think overhead LED lights, recessed lights, or track lights. They’ve got the whole place covered, and you can even play around with them to showcase different spots in the closet. Plus, they won’t burn a hole in your pocket when it comes to energy bills, thanks to LED tech.
Portable Lamps
Not ready to drill holes or hang stuff permanently? No worries. Portable lamps to the rescue! Easy-peasy battery-powered or rechargeable lamps can stick on or stand around wherever you need them. Perfect for renters or if you just can’t commit to built-ins.
Motion Sensor Lights
For zero effort on your part, try motion sensor lights. They pop on as soon as you crack open that closet door. Trust us, they’re lifesavers for those tight, dark nooks. Plop them under shelves or along the walls and you’re sorted.
Strip Lighting
If you’re eyeing a sleek, modern look, LED strip lights are where it’s at. Stick them onto the edges of shelves and watch the magic happen with a warm glow. Plus, they can be dimmed to set the mood just right.
Here’s a quick lowdown on your options:
| Lighting Option | Cost | Installation Difficulty | Flexibility | Pros | Cons |
|---|---|---|---|---|---|
| Built-in Light Fixtures | $ – $$ | Moderate | Fixed | Covers everything, can be tweaked | Permanent, might need wiring |
| Portable Lamps | $ – $ | Easy | Flexible | Simple to set up, rental-friendly | Not the best for big spaces |
| Motion Sensor Lights | $ | Easy | Fixed | Turns on without a touch, energy-efficient | Needs battery swaps |
| Strip Lighting | $ – $$ | Easy | Flexible | Chic look, can adjust brightness | Sticky bits may wear out |
For more cool stuff on DIY corner closet shelves and other fun projects, go ahead and check out articles like diy wood closet shelves, easy diy closet shelves, and build your own closet shelves.
Getting your corner closet lit up right isn’t just about seeing what’s in there; it’s about making the whole thing enjoyable and easy to use. Happy organizing!
Materials for DIY Corner Closets
Picking the right stuff is key when you’re whipping up some sturdy, functional corner closet shelves. Let’s chat about the main options out there and throw in some funky ideas to kickstart your creation.
Wood, Metal, and Wire Options
When it comes to building your own corner closet shelves, your material choice packs a punch. Here’s a peek at the contenders:
| Material | What Is It | Good Stuff | Meh Stuff |
|---|---|---|---|
| Wood | The classic gangsta of materials | Solid, flexible, makes things look snazzy | Can bite your wallet, needs paint or varnish now and then |
| Metal | For that slick, cool vibe | Long-lasting, holds hefty stuff | Can be a beast to lift, might need special gear to work with |
| Wire | Your go-to for a breezy vibe | Light as a feather, a cinch to pop in place | Not great for heavy items, styles are kinda limited |
Each material pulls its weight in its own way. Wood’s got the sturdiness game down pat and is super flexible—you can hack, sand, and stain it to your heart’s content. Metal’s the warrior of the trio, especially steel pipes that lend that edgy industrial look. Then there’s wire, it won’t win any weight-lifting contest, but it’s light and easy to install.
If wood’s your choice or you need some sage advice on designs, check out our full woodworking guide and our chat on diy wood closet shelves.
Unique DIY Corner Closet Ideas
Stretching your creativity muscles for a unique corner closet isn’t as tricky as you might think. Here’s some nifty inspiration:
- Iron Shelf Brackets and Pipes: Pair iron pipes with brackets for that rust-blended industrial flare.
- Shelf with Hooks for Clothes: Pop some hooks under your shelf for that extra hang-out space.
- Freestanding Doors: Got old doors you don’t need? Make them shelf stars.
- Ladders: A ladder can be an unexpected hero in the shelving world, giving off some serious vintage vibes.
- Wooden Pallets: Save some pennies and repurpose pallets—your wallet will thank you.
- Curved Curtains: Curtain off that corner for a neat and tidy, out-of-sight charm.
- Bookshelf Rehaul: Got an old bookshelf lying around? Give it a makeover for closet duty.
These ideas offer a sweet mix of style and function while making the most of your storage space. For a more step-by-step approach on turning these ideas into reality, scope out our guides on easy diy closet shelves and build your own closet shelves.
By getting a feel for these materials and giving the creative options a whirl, you can knock together some snazzy and handy DIY corner closet shelves tailored just for your pad.
Designing DIY Closet Shelves
Making extra room in a tight corner closet is a real life-saver, ain’t it? Check out some nifty tricks to get the most out of your shelves and make ’em just right for what you need to stash away.
Maximizing Shelf Space
If you’re sprucing up your diy corner closet shelves, let’s chat about squeezing every last drip of usefulness out of ’em:
- Vertical Space Utilization:
Stack those shelves high! Load up on vertical storage with a long hanger bar and a top shelf for all that overhead space. It’s a neat way to keep your stuff in check and within easy pickin’ range. - Adjustable Shelving:
Who needs a one-size-fits-all? Play with adjustable shelves so you can tuck away all sizes of doodads. This is a game-changer for easy diy closet shelves when your storage needs change like the weather. - Corner Shelves:
Nail those corners by creating custom shelves just for them. Fill ’em up with toys, shoes, or clothes and never complain about a dark corner again.
Here’s a handy table with the usual sizes for those DIY corner closet shelves:
| Component | Typical Dimension (inches) |
|---|---|
| Shelving Width | 12-16 |
| Shelving Height | 72-84 |
| Hanging Bar Height | 48-60 |
| Corner Shelf Depth | 18-24 |
Custom Shelving for Storage Needs
Sometimes you just gotta do it yourself to get exactly what you need, especially when more than one person is tossing their stuff in the closet.
- Personalized Height:
Make shelves at heights that work for everyone, tall and small. Whether you’re stashing toys for the little ones or shoes for grown-ups, make sure those kiddos can reach their fav toys without a fuss. - Mixed Materials:
Get creative with your materials—wood, metal, wire—you choose! Use iron shelf brackets, ladder rungs, or even pipe clothing racks to give your closet personality and function. - Storage Bins and Baskets:
Throw in some cube organizers and baskets to keep everything in its place. The cherry on top of building those DIY closet shelves is adding these nifty bins to hoard shoes, toys, clothes, you name it. Peek at our site for more gems on how to build your own closet shelves.
With some clever planning, your DIY corner closet shelves will not only fit everything you need but also look snazzy while doing it. If you’re itchin’ for more closet smarts, swing by for our tips on diy walk-in closet shelves.
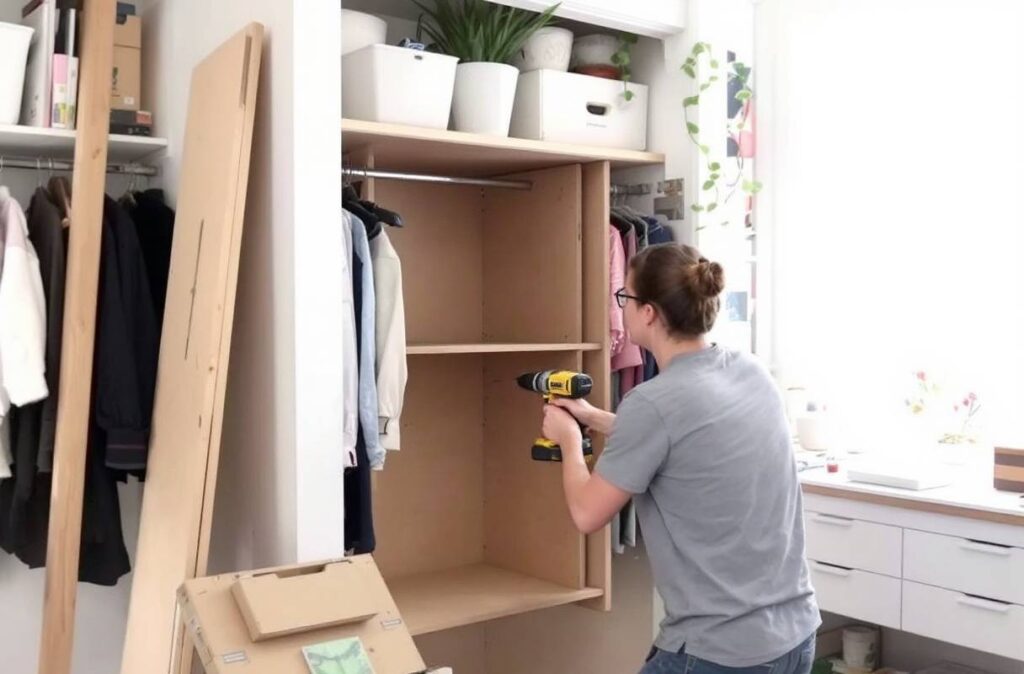
Construction of DIY Shelves
Building your own DIY corner closet shelves is a clever way to stash your stuff while making your place look snazzy. Follow this step-by-step walkthrough to knock together some rock-solid cubbies that don’t just work hard—they look good doing it too. Ideal for new homeowners, thrifty decorators, renters needing temporary solutions, and DIY rookies.
Building Sturdy Cubbies
To ensure your DIY corner closet doesn’t end up like a game of Jenga, secure your cubbies for lasting support. Cubbies provide upright stability, so you can skip adding extra bracing to the back wall.
- Stuff You Need:
- Wood boards like MDF or plywood
- 1″x2″ boards (poplar is a winner) for facing
- Wood screws or those skinny finishing nails
- Measuring tape (do not eyeball this)
- Circular saw (be careful, Captain!)
- Drill
- Wood glue (sticky stuff)
- Spackling compound (the gap fixer)
- Caulk (the seam smoother)
- Sizing and Chopping:
Whip out the measuring tape to figure out your closet’s space.
Saw the MDF or plywood to create your shelves and side panels.
| Material | Length (inches) | Width (inches) |
|---|---|---|
| MDF Shelf | 24 | 12 |
| Side Panel | 24 | 12 |
- Putting Together Cubbies:
- Screw or nail those side panels to your shelves.
- Slap on some wood glue for an extra bond.
- Let it dry—patience is a virtue.
Sprucing Up Shelf Appearance
You want your DIY corner closet shelves to look like a million bucks, don’t ya? From beefing up the appearance to smoothing out the kinks, here’s how you glam them up:
- Attach Poplar Facing:
- Grab those 1″x2″ poplar boards and dress up your shelves’ edges.
- Make sure they stick out a teensy bit to give your shelves a thicker, fancier vibe.
- Tack ’em down with finishing nails and dab with wood glue.
- Fix Those Nail Holes:
- Spackle up nail holes until they’re flush with the wood.
- Sand everything down after the compound sets. Smooth like butter, baby.
- Seal the Corners:
- Caulk around where shelves meet walls and where the facing joins the shelves.
- Keep it even for that neat-as-a-pin finish.
Get your hands sturdy building those cubbies and prettying ’em up, and your DIY corner closet shelves will not just store— they’ll shine! Looking for more how-to or inspiration? Check out diy wood closet shelves, easy diy closet shelves, and diy walk-in closet shelves.
Finishing Touches
Building a DIY corner closet shelf? Sweet! But don’t put away that toolbox just yet—the magic’s in the finishing. Nail holes, caulk jobs, and the right accessories give your shelves that “Hey, I know what I’m doing” vibe and make things more useful. Let’s break it down.
Filling Nail Holes and Caulking
Finished putting together DIY wood closet shelves? Don’t let those gaps and holes stick out like a sore thumb. Filling and caulking are your best pals here; transforms haphazard into seamless. Plus, your shelves will endure the daily grind much better.
Steps to Fill Nail Holes and Caulk
- Hide Those Nail Holes:
- Grab some spackling or wood filler and cover up all nail holes like a pro.
- Let it dry—patience is key.
- Sand it smooth until you can’t feel a thing—no bumps allowed.
- Master the Caulk:
- Glide caulk along the seams and edges.
- Smooth it out with your finger (or fancy caulking tool if you got one).
- Let it dry before slathering on paint or stain.
Organizational Accessories
Jazzing up your DIY walk-in closet shelves with the right accessories can make a world of difference. Think clothes, shoes, toys—all in their rightful homes. Here’s the scoop on top picks.
Top Organizational Accessories
- Fabric Storage Cubes:
- Soft, foldable, and just right for clothes, shoes, whatever.
- Slot these into cubbies to maximize your closet’s potential.
- Plastic Baskets:
- Perfect for the small fry—think toys and tiny trinkets.
- Transparent ones let you see what’s inside without the guessing game.
- Hanging Organizers:
- Keep scarves, hats, and bits and bobs off the floor.
- Hook onto closet rods or shelf bars with ease.
- Drawer Dividers:
- Make drawers not just a sock abyss.
- Great for separating socks, belts, undies.
| Accessory Type | Ideal For | Price Range ($) |
|---|---|---|
| Fabric Storage Cubes | Clothes, shoes, accessories | 10 – 30 |
| Plastic Baskets | Toys, puzzles, smaller items | 5 – 20 |
| Hanging Organizers | Scarves, hats, accessories | 15 – 40 |
| Drawer Dividers | Socks, belts, undergarments | 10 – 25 |
Want your closet to suit you like a glove? Think deeper shelves for those bulky sweaters or adjustable ones for when your collection grows.
By sprucing up your DIY corner closet with these finishing tips and snappy accessories, you’ll craft a spot that’s practical and pretty on the eyes. For more inspiration, check out our guides on easy diy closet shelves and build your own closet shelves.
Personal DIY Closet Shelf Journey
Transition to Making Closets a Priority
Updating the closets at first seemed like that final run to the grocery store after a barbecue. Many DIY enthusiasts start by revamping spaces like the living room or kitchen, assuming closets can wait. But here’s the scoop: fixing up your closet can make your daily routine way smoother and is a neat project for newbie homeowners and handy folks.
Step-by-Step Building Fun
Diving into making corner closet shelves is like a fun puzzle that loves you back. Here’s a detailed how-to, cheers to THRIFT DIVING:
Stuff You’ll Need:
- Planks of wood
- Sandpaper (get ready for some elbow grease!)
- Wood stain and a protective finish
- Shelf brackets
- Screws and nails
- Measuring tape
- Circular saw for kicking up sawdust
1. Figuring Out the Size
Start by measuring your closet’s nooks and crannies. Getting this part right means your shelves won’t end up like that shirt you bought two sizes too small.
2. Cutting the Wood
Grab your circular saw and make the magic happen. Cut those planks to fit snugly in their new home. It’s all about the precision—less Miss Congeniality, more pageant pro. For circular saw tips, swing by our article on easy DIY closet shelves.
3. Making Things Smooth
Nobody likes splinters, right? Sand those wood pieces down to buttery perfection. Smooth shelves won’t tug at your favorite sweater or make your socks scream in terror.
4. Go Picasso with Stain and Finish
Slap on some wood stain and let it dance in the light. After it dries, add a top coat to protect your labor of love from life’s rough patches. Need more staining wisdom? Our guide on DIY wood closet shelves has got you.
5. Time to Install
Showtime! Mount those shelf brackets on the walls at the perfect height. Then, using screws and nails, fasten the sanded and beautified wood onto the brackets. Make sure everything’s sturdy so your attic junk won’t come crashing down.
6. Get Your Marie Kondo On
Once your shelves are up, throw in baskets and other jazzy organizers to keep chaos at bay. More ideas are itching for your click in our DIY walk-in closet shelves corner.
Cheat Sheet on Tools:
| Material/Tool | Doing What? |
|---|---|
| Wood Planks | The actual shelves |
| Sandpaper | Making it silky smooth |
| Stain & Top Coat | Saving face from life’s scratches |
| Shelf Brackets | Keeping it all together |
| Screws & Nails | Locking shelves in place |
| Measuring Tape | Making numbers your friend |
| Circular Saw | Ripping through wood like a boss |
This laid-back but foolproof method lets anyone whip up closet shelves that scream personality. For more pizzazz, check out the build your own closet shelves section.
Building DIY Wood Shelves
Whipping up your own set of diy corner closet shelves can be a satisfying project. To guide your way, here’s a blueprint of the slicing, smoothing, coloring, and finishing steps you’ll need to tackle.
Cutting and Sanding Process
Before you start sawing away, grab that tape measure and chalk out your closet’s dimensions. The accuracy here will make sure those shelves tuck in just right.
- Pick Your Lumber: Choices abound — pine, plywood, or MDF are your allies. Pine’s got that rustic charm if that’s your jam.
- Measure and Mark: Get your tape measure and pencil lines on the wood like a pro.
- Cut the Boards: A circular saw is the tool here for those nice clean lines. For deep-dish shelves, you might be stacking boards or slicing a bigger sheet of plywood, with prices hovering around 52 bucks a piece.
| Tool | What It Does |
|---|---|
| Circular Saw | Cuts through wood |
| Tape Measure | Gets your dimensions right |
| Pencil | Marks where to cut |
- Smooth the Edges: Sanding time! Polish those edges and the surface using a coarse grit moving to finer sandpaper for that silky finish.
Staining and Top Coating
With your boards cut and smoothed, it’s onto staining and sealing to pretty them up and make them tough as nails.
- Grab Your Stain: Provincial by Minwax gives a top-notch rustic vibe.
- Stain Time: Using a clean cloth or brush, apply stain evenly. Let it soak in for about 5-15 minutes, then wipe off extras with a clean rag. Let it dry all the way.
| Step | Product | How Long it Takes to Dry |
|---|---|---|
| Staining | Provincial by Minwax | 6-8 hours |
| Top Coating | Polyurethane | 24 hours |
Tips from Angela Marie Made
- Seal it with Polyurethane: After staining, a coat of polyurethane seals the deal and makes the shelf easy to clean. Apply in a fresh-air zone. Once dried, sand lightly with fine-grit sandpaper and add a second coat to really lock it down.
Keep in mind, always follow the manufacturer’s advice for both stain and polyurethane. By these steps, your diy wood closet shelves won’t only stand the test of time, but they’ll also class up that storage space. For extra tips or to jazz up your shelves further, check our easy diy closet shelves guide.
Pouring some sweat and creativity into cutting, sanding, staining, and sealing ensures you’ll whip up sturdy diy corner closet shelves that boost your home’s tidy look and feel.
Tips for Successful Closet Shelves
Building your own corner closet shelves ain’t rocket science, but having the right tried-and-true tools and tricks up your sleeve can turn a headache into a walk in the park. So, here’s the lowdown for getting your DIY on without losing your mind.
Circular Saw Recommendations
First things first: If you’re gonna be slicing and dicing wood, a circular saw is your best buddy. Believe me, it’s worth getting picky with this tool:
- Blade Size: A 7 1/4 inch blade will do the trick for most DIY episodes. It’s like the Swiss army knife of blade sizes — it cuts through just about everything.
- Power Hanging Tough: Make sure your saw’s got at least 15 amps under the hood. Thick plywood won’t stand a chance.
- Weight: You don’t wanna bench press your saw. Go for something light yet built to last. Striking that balance between “feather” and “rock” is key.
- Adjustable Depth and Bevel Settings: These are your tools for those super precise, show-off cuts.
Some trusty models? Look no further than DEWALT’s or Makita’s 7-1/4-Inch Circular Saws — they won’t let you down. For more on saw magic and cutting know-how, hop over to our guide on diy wood closet shelves.
Customization for Deep Shelves
Going deep with your shelves can mean more room but also more hurdles. Here’s how to make ’em go the distance:
- Board Width: Stack ’em up or go all in with a massive plywood sheet (4′ x 8’). A sheet’s around 52 bucks, courtesy of our pals at THRIFT DIVING.
- Support: Those hefty boards need love — and by love, I mean support brackets. The Kreg Jig is your secret weapon to boost stability.
- Finish: Top it all off with a classy finish. Minwax’s Provincial stain plus a coat of polyurethane keeps it looking sharp and wipes clean without a fuss (Angela Marie Made can show you how).
| On Your Radar | What Works |
|---|---|
| Board Width | Stack boards or roll with large sheets of plywood |
| Support | Strong brackets call for a Kreg Jig |
| Finish | Class things up with stain and polyurethane |
Tweaking your shelves to match your style and storage needs is half the fun over at build your own closet shelves.
Now with these tips in your arsenal and the right toys — ahem, tools — your DIY corner closet shelves are not just gonna work; they’re gonna rock. Whether you’re a newbie or a woodworking wiz, start with a plan and gear that delivers. Wanna broaden your shelf horizons? Check out our stash of ideas on diy walk-in closet shelves.
Conclusion
Redefining your closet with DIY corner shelves is a rewarding project that blends creativity with practicality. By selecting cost-effective materials like MDF or plywood, you ensure durability without straining your budget.
Incorporating thoughtful features such as adjustable shelving and strategic lighting not only enhances functionality but also transforms the overall look of your space. Whether you opt for the warm charm of wood, the sleekness of metal, or the versatility of wire, each material offers unique benefits tailored to your specific needs.
Embracing unique DIY ideas, from repurposing ladders to adding decorative hooks, infuses personality into your storage solutions. Additionally, maximizing vertical space and customizing shelf dimensions ensures every inch is utilized efficiently.
The construction process, when approached methodically with the right tools and techniques, results in sturdy, aesthetically pleasing shelves that stand the test of time.
Finishing touches like spackling and caulking seamlessly integrate your shelves into the room, while organizational accessories keep everything tidy and accessible.
Ultimately, these DIY corner closet shelves not only declutter your space but also add a bespoke touch that reflects your personal style.
Whether you’re a DIY novice or a seasoned builder, this project offers a satisfying blend of functionality and design, making your closet a standout feature in your home. Happy building and organizing!
FAQs
How do I choose the right material for my DIY corner closet shelves?
Choosing the right material depends on your budget, desired durability, and aesthetic. MDF is affordable and easy to paint, plywood offers toughness, metal provides a modern look, and wire shelving is lightweight and simple to install.
What tools do I need to build DIY corner closet shelves?
Essential tools include a measuring tape, circular saw, drill, wood glue, sandpaper, and finishing nails or screws. Optional tools like a Kreg Jig can enhance stability for larger shelves.
How can I ensure my corner shelves are sturdy and safe?
Use strong brackets, secure shelves properly to the walls, and choose durable materials. Additionally, follow construction guidelines carefully and consider adding extra support for heavier items.
What are some creative ideas to personalize my DIY corner closet shelves?
Incorporate elements like iron pipe brackets, hooks for hanging clothes, repurposed ladders, wooden pallets, or LED lighting to add unique character and functionality to your shelves.
Can I install DIY corner shelves if I’m renting my home?
Yes! Opt for portable lighting solutions like battery-powered lamps or adhesive strip lighting that don’t require permanent installation. Use tension rods or non-damaging brackets to keep your shelves renter-friendly.


