
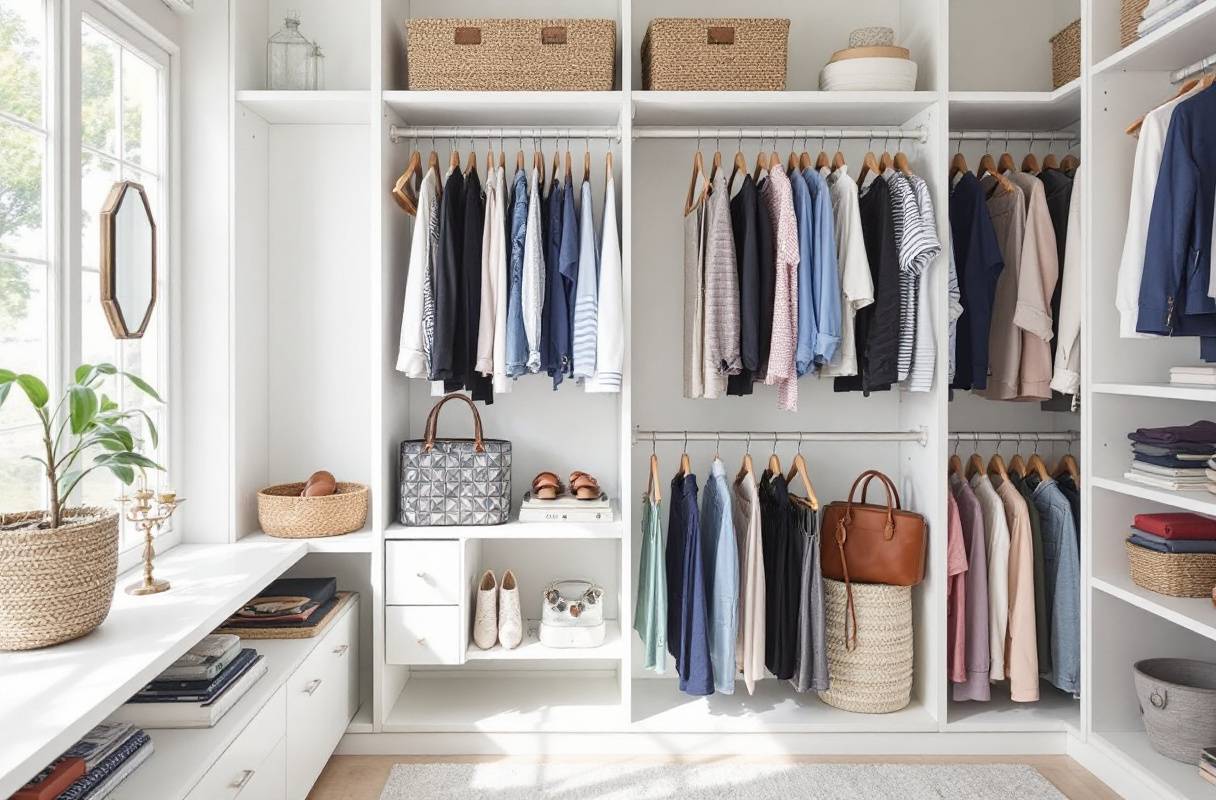
Imagine transforming your cluttered closet into a stylish sanctuary without breaking the bank or calling in a professional.
Crafting your own closet shelves is not only a rewarding DIY project but also a chance to infuse your personal flair into every nook and cranny.
Whether you’re dealing with a petite wardrobe or dreaming of a spacious walk-in haven, this guide will walk you through the essentials of measuring, planning, and building shelves that blend functionality with elegance.
Get ready to roll up your sleeves and turn your closet chaos into organized charm with our step-by-step strategies and creative tips!
Plan Your Closet Space

Before you get your hands dirty with hammers and nails, let’s take a second to map out your closet dreamland. This is your go-to for measuring up and planning where you’ll stash those hangers, shelves, and drawers.
Closet Size: All About That Space
First things first: grab that tape measure and tackle the space. Getting those numbers right is your ticket to a closet that’s less chaos and more zen.
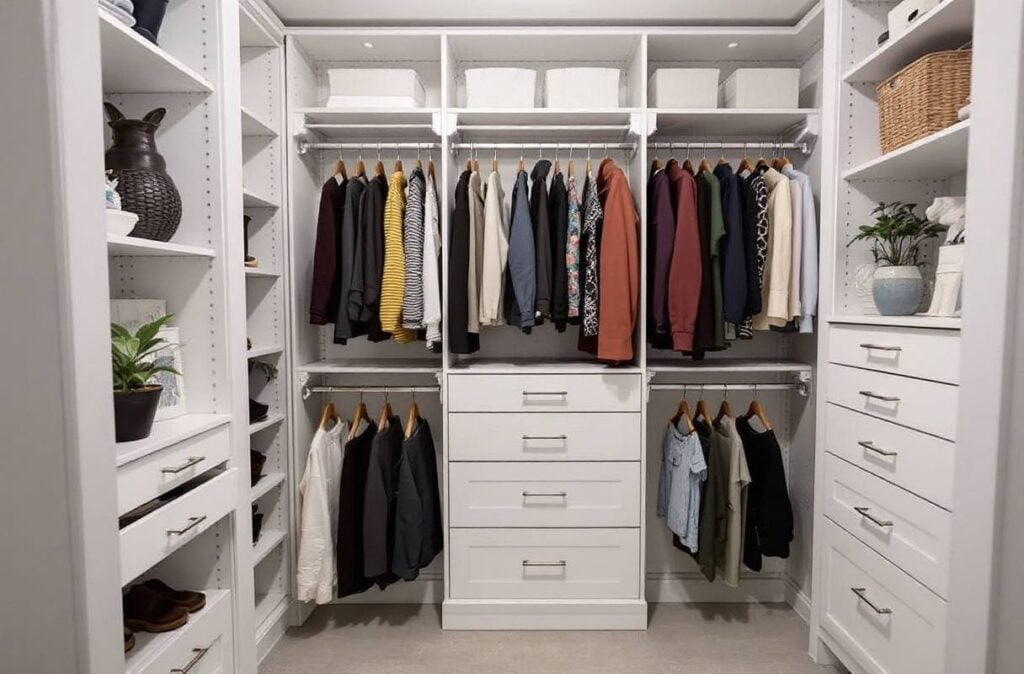
For those who love to spread out, a walk-in closet fit for two should clock in at least 7 by 10 feet, giving you 100 square feet to play with (Bienal Closets). Not working with a ballroom? No sweat—you can still create magic with as little as 25 square feet. When you’re sorting out how deep your storage needs to be, here’s the lowdown:
- Clothing Hangs: Make sure those closet cabinets go at least 24 inches deep so your clothes hang free and clear.
- Shelf Life: Shelves do best in the 12 to 14-inch range for folded goodies, but bigger stuff might need you to extend out to 16 or even 20 inches.
- Drawer Details: Go for drawers 14-16 inches deep for most of your wardrobe. If you’ve gotta tuck away thicker stuff, push for 20 inches.
Getting these numbers right sets the stage for a closet that’s both functional and eye-candy. For hands-on guides, check out our takes on diy wood closet shelves and diy walk-in closet shelves.
Layout: Nailing Shelves, Bars, and Drawers
Once you’ve got the dimensions down, it’s time to play Tetris with shelves, bars, and drawers. Knowing each piece’s size means you can maximize your closet’s mojo. For all sorts of shelf sizes, Dakota Closet Systems brings options like 11.5, 24, and even 36 inches (The Shady Gal Writes).
Shelves
Get your shelves sorted so you’re not left hanging:
| Item Type | Ideal Depth |
|---|---|
| Folded Clothes | 12-14 inches |
| Big Items/Bins | 16-20 inches |
Bars
For hangers-on, plan your bars so they serve all outfit lengths. Double hang sections for tops and skirts rock the vertical space, while single bars look after gowns and coats.
| Hanging Section | Height Needed |
|---|---|
| Double Hanging (shirts, skirts) | 40 inches height each |
| Single Hanging (dresses, coats) | 72 inches height |
Drawers
Drawers hide away those smaller bits and bobs. Make sure they’re deep enough for whatever’s inside.
| Item Type | Ideal Depth |
|---|---|
| Clothes | 14-16 inches |
| Bulkier Stuff/Linens | 20 inches |
With a strategic layout, your DIY closet won’t just store your possessions; it’ll flaunt them. For more inspo on making your closet pop, peek into diy corner closet shelves and easy diy closet shelves. Plan smart, and your custom closet becomes not just a space saver but a style statement.
DIY Custom Closet Considerations
Thinking about creating some new closet shelves all by yourself? Before you grab those tools, let’s talk about how you can jazz up your space with a mix of practicality and style. Custom closets can be real game-changers and help you keep up with your ever-changing stash of stuff.
Adding Flexibility with Adjustable Features
Doing your own custom closet means you can tweak things long after that first nail goes in. Imagine adding more shelves or throwing in some snazzy extras like drawers and hampers.
Adjustable shelves? Total lifesavers for folks who like to switch things up. Here’s what you might do:
- Toss in Drawers: Perfect for hiding away those knick-knacks you don’t want lying around.
- Pop a Hamper In: Helps in keeping your dirty laundry organized and out of sight.
- Stack More Shelves: From shoes to bags to yesterday’s laundry—there’s space for all.
| Feature | Benefits |
|---|---|
| Adjustable Shelves | Makes shifting your storage as easy as pie |
| Drawers | Hide all the mess |
| Hampers | Keep laundry organized |
| Extra Shelves | More spots for all the odds and ends |
Leaning into adjustable features makes your closet future-proof. If you’re feeling this, take a gander at our easy diy closet shelves for a deeper dive into customization.
Understanding Closet Hanging Systems
What’s the deal with all these closet hanging systems? You’ve got options like nobody’s business. From systems that hover like Pelé himself to the ones lounging on the ground, knowing your “hang track” from your regular old coat hanger is crucial.
Here’s the lowdown on the main types:
- Wire Shelving Systems: Easy on the wallet? Check. Easy to fit in any space? Double-check. The smooth finish? That’s just the cherry on top, letting your hangers glide smoothly along (Lowe’s).
- Wood Shelving Systems: Classy, solid, and hits all the right aesthetic notes. Rods, drawers, the whole shebang, in wood. Sure, it might take a bit more elbow grease, but nothing a seasoned DIYer can’t tackle.
| System Type | Benefits |
|---|---|
| Wire Shelving | Wallet-friendly, simple install, versatile |
| Wood Shelving | Tough, stylish, but oh-so practical |
Choose what vibes best with your style, space, and budget. If saving bucks is your jam, our diy wood closet shelves section has got you covered.
Grasping these closet systems helps you pick the best route for your DIY adventure. Whether it’s the sturdy wood or adaptable wires, make sure it suits your taste and does the job right. Need a spark of creativity? Our feature on diy walk-in closet shelves might just tickle your fancy with ideas galore.
Preparing for DIY Closet Building
Getting ready is like packing for a trip—do it right, and the rest just falls into place. Let’s get into the nitty-gritty of building your closet, focusing on prepping those parts and making sure every measurement’s on the money.
Building Sections Ahead of Time
Life hack: build parts of your closet before you try assembling it inside an actual closet. If space is tighter than a pair of skinny jeans, this strategy is your best friend. Knock together small to medium sections first, making most of that free space.
Doing this outside the closet (like in your garage or living room) means less head-banging and fumbling around in tight spaces. Plus, if you mess up, you’ll still have room to fix it without feeling like you’re playing Twister. It simplifies handling those trickier parts when piecing it all together later. Seriously—much more chill.
Attention to Measurements and Details
This is the “measure twice, cut once” part your grandpappy always grumbled about. Start by measuring your closet like you’re figuring out if that new sofa will fit in the living room. Don’t forget those sneaky little things like doors, windows, and electric panels that can mess with your plan.
Key Measurements:
| Measurement | Required Precision |
|---|---|
| Width | Within 1/8 inch |
| Height | Within 1/8 inch |
| Depth of Shelves | 12″ to 16″ based on what’s gonna sit there (Handyman Startup) |
Map out a detailed cut list so you can nab the right materials, making sure every piece slides in smoothly, like the last puzzle piece. If you’ve already got some shelves, use them as your guide to keep things consistent.
By getting up close and friendly with measurements and paying attention to details, you’ll set a solid stage for your DIY closet project. Want someone to hold your hand through the whole shebang? Peek at our guides on diy walk-in closet shelves and easy diy closet shelves.
Building Your Own Closet Shelves
Rolling up your sleeves for an adventurous weekend DIY project? If you’re stepping into homeownership, watching your wallet, or just love getting crafty, creating your own closet shelves might just be your next best endeavor. Let’s dig into the essentials: shelf depth, material picks, and the charming art of cutting and sanding.
Shelf Depth and Material Options
Deciding how deep your closet shelves should be is like picking shoes — you need the right fit.
- Folded Clothes: Stick to a shelf depth of 12 to 14 inches for those neat stacks.
- Bigger Stuff: Got bins or oversized accessories? A good depth is anywhere between 16 to 20 inches.
For those rock-solid shelves, consider 3/4″ MDF (Medium-Density Fiberboard). It’s tough, won’t break the bank, and perfect for closet projects.
| Shelf Function | Recommended Depth |
|---|---|
| Folded Clothes | 12 – 14 inches |
| Larger Items/Bins | 16 – 20 inches |
Cutting and Sanding Shelves
Now’s the time to channel your inner craftsman and get cutting and sanding like a pro.
- Cut that MDF: Grab your circular or table saw and slice those MDF sheets to your specified sizes. Steady hands make straight lines.
- Sand like a Smooth Operator: Post-cutting, it’s all about smoothing out those edges. Use 180 or 220 grit sandpaper to soften pointy corners and keep them looking sharp (not literally).
With clever planning and placing lots of rack space and shelves in the right spots, your closet will be more organized than your grandma’s pantry. Say goodbye to overpriced systems that make you scratch your head.
Sanding Smart: Always sand along the wood grain for that smooth, professional finish. This little trick primes your shelves for the next DIY steps.
Swing by and check our dandy DIY closet shelves guide for more detailed insights.
With your newfound know-how of building custom closet shelves, you’re ready to wild out and enjoy a space that’s as organized as a library — one you whipped up all by yourself, with a dash of creativity and flair!
Painting Closet Shelves
Jumping into painting your custom shelves can add the final sprinkle of magic to your DIY journey of building your own closet shelves! A slick paint job gives your storage space a fresh look and helps it stand the test of time.
Priming and Painting Process
Preparation:
- Clean the Surface: Get rid of any dust and litter hanging around on your shelves.
- Sand the Shelves: Start sanding with medium-grit sandpaper (120-grit, to be precise) to get a smooth surface.
- Apply Oil-Based Primer: If you’re using MDF shelves, slap on some oil-based primer to stop moisture from making your shelves all rough and yucky, droopin’ those fibers.
- Allow to Dry: Give the primer about 24 hours to do its thing and dry thoroughly.
Painting:
- Sand Between Coats: After each coat, lightly sand with fine-grit sandpaper (220-grit) to get that silky finish.
- First Coat of Paint: Lay down your choice paint. A high-quality brush or roller keeps it classy.
- Second Coat: Once the first is dry, do a quick sand, then hit it with another coat.
- Final Inspection: Check it’s all smooth and covers everything nicely.
| Step | Task | Tips |
|---|---|---|
| 1 | Clean Surface | Use a tack cloth to grab any dust |
| 2 | Sand Shelves | Medium-grit sandpaper does the trick |
| 3 | Apply Primer | Oil-based primer works wonders |
| 4 | Sand Between Coats | Fine-grit sandpaper helps it shine |
| 5 | First Coat | Quality brush or roller is key |
| 6 | Second Coat | Make sure it covers evenly |
Finishing for Longevity
Here’s where you lock in that masterpiece for the long haul with some extra TLC.
Protective Finishes:
- Polyurethane Coating: A clear polyurethane coat acts like armor against life’s scratches and spills.
- Edge Banding: MDF shelves get a slick finish from iron-on edge banding.
Filling Gaps:
- Caulking: Seal those gaps or seams for the professional vibe. It’s optional but definitely worth a shot.
- Filling Nail Holes: Use wood filler or putty to patch up any nail holes.
Final Touches:
- Sanding and Cleaning: Give the paint job a gentle rub down with fine-grit sandpaper, then banish dust with a clean sweep.
- Decorative Elements: Add some trim or bling to really make those closet shelves yours.
For the newbies taking a crack at DIY, this painting and finishing dance can be a real joy, bringing your closet project to life! Want more wallet-friendly and creative inspiration? Check out our guide on easy DIY closet shelves.
Installing Closet Shelves
Putting up your own closet shelves can be a rewarding weekend project. Nothing beats the pride and satisfaction of seeing your handiwork bring order to your closet chaos. In this section, we’ll walk you through the basics of setting up sturdy shelves while giving them that polished, store-bought feel.
Attaching Shelf Supports
Getting those shelf supports right is the make-or-break part of building your own closet shelves. Do it right, and your shelves will stand tall, holding all your stuff without a hiccup. Here’s how to get it done:
- Locate Studs: Grab a stud finder and start hunting for those studs in the closet walls. Mark their spots—they’re your go-to anchors for the shelf supports.
- Cut Supports: Measure like a pro and cut your shelf supports from 1×2 lumber or MDF strips. These bad boys need to match the shelf width to a tee.
- Secure with Nails or Screws: Use a brad nailer or screws to fasten the supports to the wall. Nail or screw right into those studs for rock-solid support—it’s your best bet.
- Use a Level: Before locking them down, check the supports with a level. This guarantees your shelves don’t play seesaw.
Securing Supports and Enhancing Appearance
Once your supports are fastened, it’s time to set the shelves and spruce ’em up for the grand finale.
- Place Shelves: With the supports in place, drop the pre-cut shelves on top. Make sure they’re hugging the wall tight and level as can be.
- Additional Fastening: For extra assurance, throw a couple of screws from the top of the shelves into the supports. This keeps everything steady and secure.
- Caulking: Fill those pesky gaps between the shelves and the wall with a bit of caulk. It’s a small step with a big payoff—hello, seamless finish! Just make sure everything’s clean and dry first.
- Painting: If your shelves and supports haven’t yet met a paintbrush, show them some love now. A fresh coat of paint can make your shelves look sharp and designer-level classy. Check out our guide on priming and painting for more tips.
| Task | Tools Needed | Materials Needed |
|---|---|---|
| Locating Studs | Stud Finder | Pencil |
| Cutting Supports | Saw | 1×2 Lumber or MDF Strips |
| Securing Supports | Brad Nailer/Screws and Drill | Level |
| Placing Shelves | None | Pre-cut Shelves |
| Additional Fastening | Screws and Drill | None |
| Caulking | Caulk Gun | Caulk |
| Painting | Paintbrush/Roller | Paint and Primer |
Follow these steps and you’ll have strong, sleek shelves that turn your closet into prime real estate. For more ways to get creative, peek at our articles on diy corner closet shelves and diy walk-in closet shelves.
Cost-Effective DIY Closet Solutions
Thinking about shaking things up in the closet department without spending your life’s savings? Building your own closet shelves can be a savvy way to get the storage setup of your dreams without emptying your piggy bank. Let’s see how a bit of elbow grease stacks up against the fancy pre-made kits, and what budget-friendly stuff and tools you might need to get started.
Comparing Pre-Made vs. DIY Costs
Pre-made closet storage can cost an arm and a leg—sometimes between $650 and $950 for just a few shelves and rods. But you could save quite a bit if you go the do-it-yourself route. Case in point: by whipping up your own eight-foot-wide closet system, you might only spend about $278, which is a pretty sweet deal if you ask me. Check out more DIY inspiration at DIYPete.
| Option | Cost Range |
|---|---|
| Pre-Made Closet System | $650 – $950 |
| DIY Closet Shelves | $278 |
Budget-Friendly Materials and Tools
When you dive into making your own closet shelves, wood is your best buddy. It’s sturdy and looks good too. Kits that use wood usually come with handy bits like rods, drawers, and even the occasional shoe rack or two. These kits are pretty straightforward to DIY, though wiring them ain’t as simple as some wire systems you can find over at Lowe’s.
Here’s a shopping list for you on the cheap side:
- 1″x12″ MDF boards for constructing the bulk of it
- 1″x2″ and 1″x1″ boards for those nice edges
- 1.25″ round dowel for the closet rods (hang those shirts in style!)
- Pocket screws and wood trim to add panache
Want to jazz up your closet with organizers for belts or ties, or throw in some curtains to keep things hidden? Wood kit combos let you mix and match. Need a closet that can hide your mess? Cut the shelves to fit or add doors.
Now for your toolbox essentials:
- Circular saw or table saw for slicing the boards
- Power drill and screws to lock things in place
- Sandpaper or an electric sander to smooth out those rough edges
- Painter’s tape to sketch out your dream layout
Kick things off by emptying your current closet mess—out go the old shelves and rods. Once the area is clean and maybe freshly painted, you can draw up your game plan with painter’s tape, and cut those MDF boards just right. Pocket screws will be your secret weapon for sturdy construction, and a bit of wood trim will finish things off with style (Lovely Etc).
For more ideas and step-by-step guides to crafting your ultimate DIY closet shelves, peek at our other articles: diy wood closet shelves, diy walk-in closet shelves, diy corner closet shelves, and easy diy closet shelves.
Personalizing Your Closet Organization
Building your own closet shelves can really jazz up your room, letting you design the space to fit your stuff and your style. It’s all about making your storage work for you while keeping it easy on the eyes.
Customizing Shelf Layout
When you’re thinking about how to set up your shelves, it’s smart to think about what you’ll be stashing away and how much room you’ll need:
| Item Type | Recommended Shelf Depth |
|---|---|
| Folded Clothes | 12 – 14 inches |
| Bigger Stuff/Bins | 16 – 20 inches |
Got these hints from Bienal Closets.
Knowing the right sizes helps you sketch out a layout that fits your lifestyle. Toss in some drawers, hampers, or little cubbies and see how much more useful your closet gets. With DIY custom closets, you can even tweak it later for more flair or functionality.
Check these out for different closet vibes:
- DIY Wood Closet Shelves
- DIY Walk-In Closet Shelves
- DIY Corner Closet Shelves
Adding Personal Touches
Beyond the practical stuff, your closet should shout “YOU!”. Some ways to do this:
- Finish with a Stain: This ties the shelves into the room’s overall look.
- Add Trim Boards: These give it a finished feel.
- Rods and Mounting Hardware: Necessary for hanging your duds and it can add a little character.
Get creative with shelf styles and finishes to meet both your storage and vibe needs. With these ideas, your closet isn’t just practical, it’s a cozy combo of style and utility.
Want more tips on building chic and useful closets, swing by easy DIY closet shelves. Every tweak, from planning the layout to the final touches, turns your closet into a space that’s totally yours, packed with style and usefulness.
Conclusion
Embarking on a DIY closet shelving project is more than just a home improvement task—it’s a journey toward creating a personalized space that reflects your style and meets your organizational needs.
From meticulously planning your closet layout to selecting the perfect materials and adding those final artistic touches, every step brings you closer to a harmonious and functional wardrobe.
By understanding the nuances of shelf dimensions, opting for adjustable features, and mastering the art of installation, you not only save money but also gain the satisfaction of crafting something uniquely yours.
Remember, the key to a successful DIY project lies in preparation, precision, and creativity. So, gather your tools, embrace the process, and watch as your once chaotic closet transforms into a sleek, orderly haven.
With your new skills and our comprehensive guide, your closet will soon be the envy of all who see it—organized, stylish, and entirely customized to your taste. Happy crafting!
FAQs
How do I measure my closet space accurately?
Start by measuring the width, height, and depth of your closet. Use a tape measure to note the dimensions of the entire space, including any irregularities like sloped ceilings or obstructions. Sketch a layout to scale to visualize where shelves, rods, and drawers will fit best.
What materials are best for DIY closet shelves?
Medium-Density Fiberboard (MDF) is a popular choice due to its durability and affordability. Alternatively, plywood or solid wood can be used for a more premium finish. Ensure the material you choose can support the weight of your items.
Can I install closet shelves myself without professional help?
Yes! With the right tools and a step-by-step guide, installing closet shelves is a manageable DIY project. Ensure you have accurate measurements, the appropriate materials, and follow safety guidelines for a successful installation.
How can I make my DIY closet shelves adjustable?
Use adjustable shelving brackets or track systems that allow you to move the shelves up or down as needed. This flexibility lets you customize the storage space based on your changing needs.
What are some cost-effective tips for building DIY closet shelves?
Opt for affordable materials like MDF, repurpose existing wood, and use basic tools to keep costs down. Planning and measuring accurately can prevent mistakes and save money on materials.


