

Transforming your walk-in closet into an organized oasis doesn’t require magic—just some smart DIY strategies. Imagine walking into a space where every item has its place, and finding what you need is effortless.
Whether you’re a seasoned DIY enthusiast or just starting out, maximizing your closet space with custom shelves can elevate both functionality and style.
In this guide, we’ll explore creative storage solutions, effective use of vertical space, and step-by-step instructions to build sturdy, personalized closet shelves.
Get ready to declutter and design a walk-in closet that not only meets your storage needs but also reflects your personal aesthetic.
Maximizing Closet Space
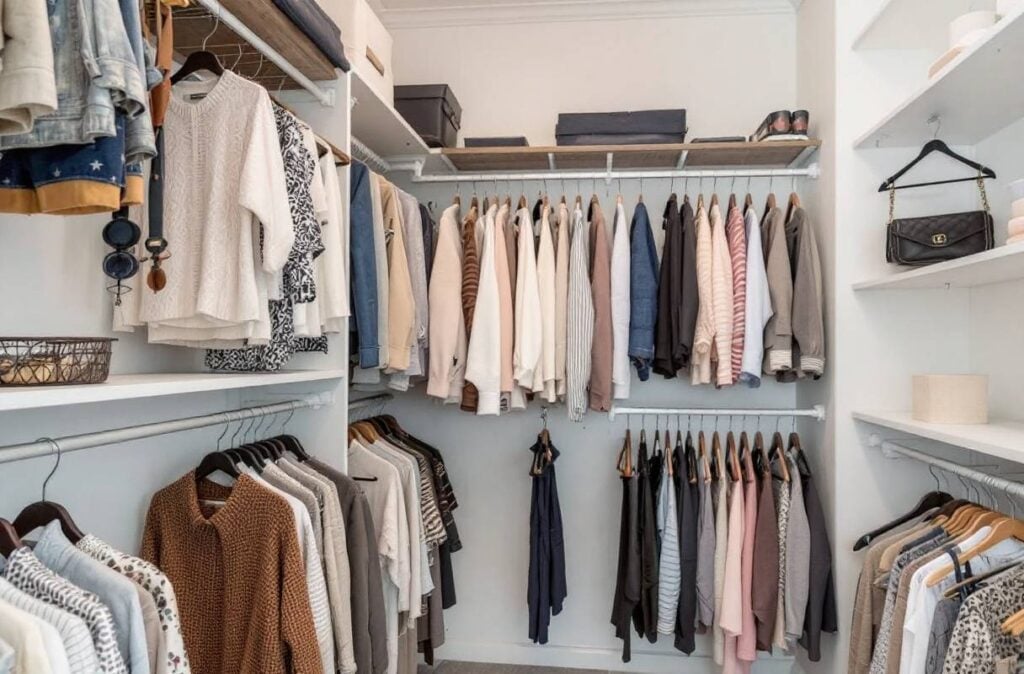
When it comes to making the most out of your closet, especially if you’re lucky enough to have a walk-in, the trick is in being a little clever. It’s not magic, but it might feel like it when you finally get everything to fit. Let’s check out some neat ways to save space and use that vertical stretch.

Storage Solutions Overview
Walk-in closets: the Cadillac of clothing storage. A whopping 79% of homeowners dig them for their ability to be personalized just the way you like it (Boss Design Center). Here are some crafty ideas to make sure you’re using every nook and cranny:
- Pull-Out Hanger Rods: Pop these under your shelves to stash small or light stuff. They’re perfect when you don’t want to reach way back into that abyss of fabric (Dengarden).
- Wall Hooks: Got bags, belts, or hats? Get them on hooks to keep everything tidy and at your fingertips.
- Alcoves and Dressers: Got an awkward corner or a tiny dresser? Tuck away your jewelry and sunglasses there. Add some accessory holders to keep the chaos at bay.
- Storage Boxes: Reserve those top shelves for the stuff you don’t need every day—like winter boots in July or three extra cowboy hats. Out of sight but not out of mind (PODS).
These tricks help you keep your sanctuary of style neat and not-so-chaotic. If wooden shelves catch your fancy, peep our DIY wood closet shelves article.
Utilizing Vertical Space
Many closets are sitting on a skyscraper of untapped potential. Exploring this makes your closet a whole new story of neatness and ease:
- Top Shelves: Here’s the spot to shove those less-used things: last year’s holiday sweater or your rollerblades from 1998.
- Accessibility: Keep the action between 15-48 inches from the floor, or go James Bond with pull-down rails for stuff higher up.
- Under-Shelf Storage: Slide in some extra shelves or hang hooks for the small fry—think belts, scarves, or that novelty tie collection your aunt insists on enhancing every Christmas.
Using your closet’s height to your advantage could just solve that Tetris game we call storage. For more handy ideas, scope out our easy DIY closet shelves.
| Methods | Item Examples | Benefits |
|---|---|---|
| Pull-Out Hanger Rods | Small clothes, scarves | More room, easy reach |
| Wall Hooks | Bags, belts, hats | Clears floor, quick grab |
| Alcoves & Dressers | Jewelry, sunglasses | No more lost earrings |
| Storage Boxes on Shelves | Out-of-season shoes, hats | Top-shelf organization |
With a bit of planning and some savvy storage tricks, your closet can totally transform from a jungle into a well-organized paradise. Want to take a crack at building some units? Catch our guide on build your own closet shelves.
Building Sturdy DIY Shelves
Building your own DIY walk-in closet shelves is a rewarding project that’s perfect for new homeowners, thrifty decorators, and DIY rookies. Here’s how to ditch the old shelves and whip up some solid L-shaped ones.
Removing Existing Shelving
First things first—clear out the old shelves and make room for your new creations. You’ll need to chuck any wire racks and poles to make space for your sturdy new shelves..
Steps to Remove Existing Shelving:
- Clear Out the Closet: Remove all your stuff from the closet. It’s like a clean slate—a pretty dusty one, perhaps.
- Rip Out the Wire Shelving: Unscrew and yank out any wire shelving units. Be brave, and don’t look back.
- Pull Out the Closet Pole: Unscrew and pull down that pole. It’s had its time.
- Fix the Walls: Fill in any holes or damage with spackle, and sand it smooth once dry. Presto!
- Give It a Fresh Coat: A fresh coat of paint spruces things up. SW Swiss Coffee is a popular choice, for that no-nonsense white look (The Navage Patch).
Constructing L-Shaped Shelves
Once you’ve got an empty canvas, it’s time to rock those L-shaped bad boys. Build from floor-to-ceiling and nail them to the wall studs for max support.
Materials You’ll Need:
- 3/4 inch plywood or MDF
- Pocket screws
- Scrap wood for the support frames
- Nails and screws
- Caulk
- Paint
Tools You’ll Need:
- Drill
- Saw
- Stud finder
- Level
- Spackle and putty knife
- Sandpaper
Steps to Build L-Shaped Shelves:
- Find Those Studs: Use that stud finder to locate studs in the walls. Mark them like they owe you money.
- Make the Support Frames: Use scrap wood to build support frames, fastening ’em with pocket screws for extra muscle.
- Fasten frames to wall studs directly.
- Keep them level or you’ll have crooked shelves and that’s just sad.
- Heads Up: Skip the vertical posts—multiple wall surfaces got your back.
- Cut Out Your Shelves: Measure twice, cut once. You’ll need the 3/4 inch plywood or MDF shaped to fit just right.
- Secure the Shelves: Attach those shelves to the support frames using pocket screws. You’ll be able to stack anything from shoes to suitcases.
- Install Upper Shelves: Whip up some upper shelves to max out storage space—you know you need it, with or without Marie Kondo. Check out vertical space storage solutions for more genius ideas.
- The Finishing Touch: Add trim, caulk, and slap some paint on there for that showroom finish. Smooth it out, and you’re golden.
Estimated Cost Table:
| Item | Quantity | Cost |
|---|---|---|
| 3/4 inch Plywood | 4 sheets | $60 |
| Pocket Screws | 1 box | $15 |
| Scrap Wood | Varies | $0 (Recycling is free!) |
| Spackle | 1 tub | $5 |
| Paint | 1 gallon | $30 |
| Odds and Ends (Nails, Sandpaper) | – | $10 |
Loads more details, tool lists, and downloadable plans are up for grabs over at DIY Pete. If you need more inspiration, check out our posts on easy DIY closet shelves and building your own closet shelves. You’re one project away from closet nirvana.
DIY Shelving Project Steps
Building your own walk-in closet shelves isn’t just about gaining more space; it’s about making that space truly yours. Let’s get down to the nitty-gritty of fixing, painting, and constructing those trusty support frames.
Repairing and Painting
Before you dive into crafting shelves, clearing the way is key. Say goodbye to those clunky wire shelves and mismatched closet rods. Let’s make a clean start.
- Out with the Old: Take down any wire or old shelves. Grab a screwdriver or drill and unscrew those pesky anchors.
- Smooth Over the Past: Patch up wall scars with some good ol’ spackle. Slather it on, smooth it with a putty knife, and let it sleep overnight.
- Smooth Operator: Sand down those patches until everything’s a smooth as butter.
- Fresh Coat of Paint: Apply primer first, then lay on a couple coats of paint. A shade like SW Swiss Coffee keeps things clean and bright.
| Step | Products Needed | Estimated Cost |
|---|---|---|
| Spackle Magic | Spackle, Putty Knife | $8 |
| Sanding | Sandpaper | $5 |
| Painting | Primer, Paint, Rollers | $35 |
Check out our how-to on easy diy closet shelves for more details.
Building Support Frames
Strong support frames are your best buddies in this DIY adventure. They’ll make sure your shelves stay put, no matter how much stuff you pile on.
- Wood’s the Word: Pick some hardy 2x4s or similar for your support frames. These are the bones of your new shelf setup.
- Cut to Measure: Size up your space, then saw those planks to fit just right.
- Lock it Down: Fasten your frames directly to the wall studs with long screws. This step keeps everything sturdy and fightin’ gravity.
| Frame Component | Material | Estimated Cost |
|---|---|---|
| Horizontal Supports | 2×4 Lumber | $20 |
| Vertical Supports | 2×4 Lumber | $15 |
| Screws & Fasteners | Screws, Anchors | $10 |
- Shape it Up: Once your frames are ready, whip up L-shaped shelves using 3/4 inch plywood or MDF. Mix in some scrap wood to save a buck.
- Nail it Together: Attach those shelves to your frames with screws, making sure everything’s nice and level.
- Trim it Out: Add some trim for the final touch, then a dash of caulk and paint to blend everything in.
For more construction pointers, swing by diy wood closet shelves.
By sticking to these steps, you’ll have robust and snazzy DIY shelves for your closet. Keep your space tidy and enjoy the perk of a unique, orderly storage setup. For more creative sparks, check out our other guides on build your own closet shelves and diy corner closet shelves.
Customizing Closet Shelving
Turning your closet shelves into your own personal storage heaven can change even the most chaotic space into something that would make Marie Kondo proud. Here, we’re gonna break down some handy ways to throw in some top shelves and give your shelving masterpiece a neat little glow-up with some snazzy trim.
Adding Upper Shelves
Upper shelves are the magic trick you need to make the most of your closet’s tall space. Here’s a no-fuss way to install them and stuff your socks up high:
- Round Up Your Gear: You’ll be needing some scrap MDF or similar wood, utility panel bottoms, pocket screws, a circular saw, a Kreg cutting whatchamacallit, a table saw, some sturdy clamps, and an air nailer. Basically, it’s the toolbox dream team.
- Measure Twice, Cut Once: Got your closet measured? Great! Now put that circular saw to work and slice those panels to fit just right.
- Frame It Up: Use those pocket screws and build the frames for your shelves, making sure they’re strong like bull by assembling them outwards.
- First Shelf Magic: Get that first shelf hugging the ceiling snug, and attach it to the wall studs. Don’t forget, it better be as level as your morning coffee counter.
- Rinse and Repeat: Keep slapping up those shelves where you see fit, same as above – screw ’em down tight to avoid any regrettable rack droopiness.
| What To Grab | Why It’s Handy |
|---|---|
| Circular Saw | To cut panels |
| Kreg Cutting Guide | For straight edges |
| Table Saw | To tackle bigger cuts |
| Kreg Pocket Hole Jig | Making pocket holes |
| Clamps | Keeping things together |
| Air Nailer | For fastening those boards |
Got the woodworking itch? Visit our diy wood closet shelves page for the full lowdown.
Trim and Finishing Touches
Now for the cherry on top—let’s butter those shelves up and make ’em pop with some style:
- Pretty Up with Trim: Cover up any unsightly board edges with trim. Cut ‘em to fit with your table saw and nail ‘em down for a slick finish.
- Edge Banding Fun: Grab some edge banding for that plywood and stick it on with an iron. Trim off any excess for a smooth, finished look.
- Gap Duty: Caulk those pesky gaps between shelves and walls, then smooth it over, so nobody knows your secret.
- Paint-athon: Slap on some primer, then paint those shelves in your fave color. It guarantees they’ll stay pretty and strong.
- Accessorize Like a Star: Add rods, hooks, or whatever extra bits you want for functionality boosts. Secure them with the right hardware.
| Duty Call | What’s Needed |
|---|---|
| Attaching Trim Boards | Trim boards, table saw, air nailer |
| Banding Plywood Edges | Banding, iron, utility knife |
| Filling Gaps and Seams | Caulking, caulking gun, putty knife |
| Priming and Painting | Primer and paint, brushes |
| Installing Accessories | Rods, hooks, mounting bits |
These finishing touches are like the cake icing—deliciously pretty and extend your project’s shelf life (pun intended). For more inside scoop on shelves you can tweak, pop by our easy diy closet shelves.
With a little elbow grease and a pinch of creativity, your closet shelves can be easy on the eyes and tough on clutter. Be sure to check out our guides on diy corner closet shelves and build your own closet shelves for more nifty ideas.
Designing Your Walk-in Closet
Layout Considerations
When you’re dreaming up your walk-in closet, think about how you can make your space work best for you. No matter the size, your closet should have room for a few shelves, a hanging rod, and enough space to move around comfortably. Here are some popular layouts and how they might fit in:
| Layout Type | Dimensions (W x L) | Features |
|---|---|---|
| Single-Sided | 4-5 feet deep | Great for tight spots, storage along one wall |
| Double-Sided | 6 feet wide, 4-6 feet long | Storage on both facing walls |
| L-Shaped | 6.5 feet wide, 4-6 feet long | Makes good use of corner spaces |
| U-Shaped | 7 feet wide, 10 feet long | Three storage walls for maximum organization |
| With Island | 3-4 feet wide, 1.5-3 feet deep for island, 3 feet walking space all sides | Features central storage, needs more room |
For areas that aren’t exactly palatial, shoot for the stars—shelving that stretches up to the ceiling can be a lifesaver for stuff you don’t use often.
Organizational Elements
To keep things neat and stress-free, add some smart organizational tricks to your walk-in closet:
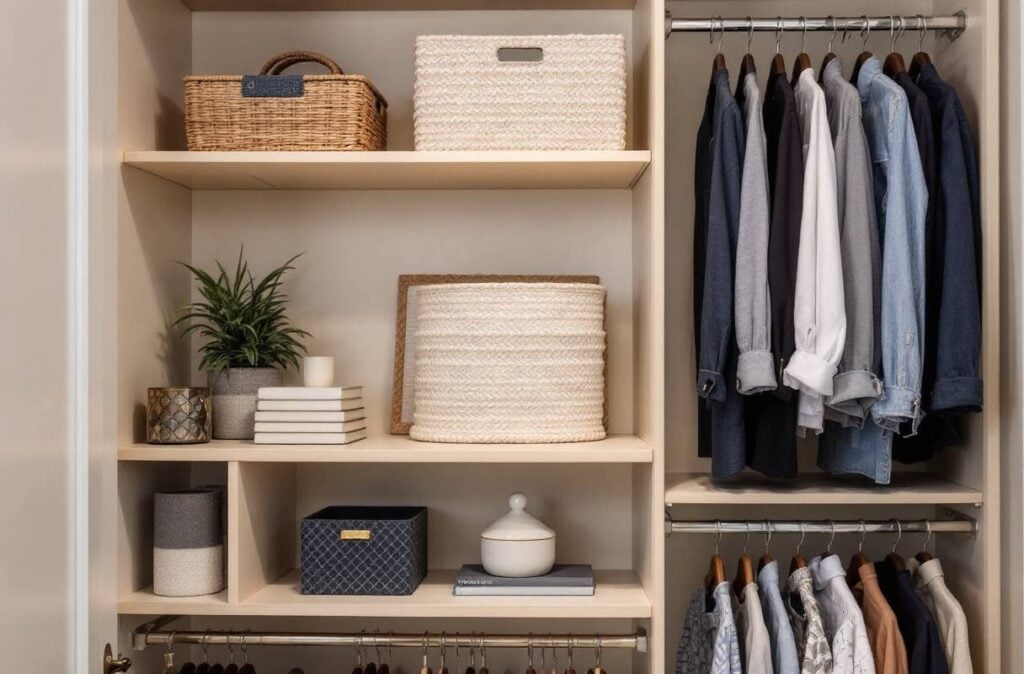
- Open Shelves: Perfect for showing off your folded clothes, shoes, and accessories. Check out some diy wood closet shelves for a personal touch.
- Hanging Rods: Mix and match heights to handle clothes of all lengths—lower for shirts and skirts, higher for dresses and coats. Going for both single and double rods gives you extra options.
- Drawers: Ideal for small stuff like socks, underwear, and other accessories. Usually, they come 22-36 inches wide, 14-24 inches deep, and 4-10 inches high—you’ve got choices.
- Custom Lighting: Amp up the style and make things easier to see with LED lights. Try some under-shelves or overhead fixtures for that classy finish.
- Ironing Board or Steamer: Built-in features optional but handy for keeping clothes neat.
- Mirrors: Full-length ones are a must for that final outfit check—don’t leave home looking like a hot mess!
Think about what you like and what you can afford when you’re sketching out your closet. Will you go for open shoe shelves or opt for pull-out drawers? Fancy lighting or keep it simple? Take a look through your wardrobe and figure out where you need things the most—you want everything you love right at your fingertips.
For even more creative vibes, take a peek at some diy corner closet shelves and build your own closet shelves ideas to really make your space yours.
DIY Closet Shelving Budget Project
Building the Shelving Units
Taking on a DIY walk-in closet shelves project offers a fun and wallet-friendly way for new homeowners, budget decorators, and DIY rookies to put a personal spin on their storage solutions. Crafting a custom shelving unit yourself costs way less than those pricey pre-made ones you’ll find at the store.
Here’s a no-nonsense guide to making your own shelves:
- Cutting Plywood to Size:
- Grab a circular saw with a Kreg guide for nice, clean cuts.
- Adjust the shelf width to fit just right in your closet.
- Assembling the Units:
- Use a Kreg pocket jig to make hidden spots for screws.
- Put the pieces together tight with Kreg screws.
- Adding Adjustable Shelving Pin Holes:
- Drill evenly spaced holes for movable shelves.
- Attaching Trim Boards:
- Use clamps and a nail gun to fix trim boards for a smooth touch.
- Covering Plywood Edges:
- Stick edge banding on to hide rough plywood edges.
- Installing Rods:
- Secure rods with the right hardware.
- Finishing Touches:
- Stain or paint to match your style, then fix them to the wall.
You can whip up this whole thing over a weekend, making it an easy closet upgrade project.
Cost Breakdown and Future Plans
Crafting a tailored shelving setup for an eight-foot closet runs about $278, minus the sweat you put into it. Here’s how it adds up:
| Item | Cost (USD) |
|---|---|
| Plywood | $50 |
| Kreg Screws | $25 |
| Trim Boards | $30 |
| Edge Banding | $10 |
| Mounting Hardware | $20 |
| Stain/Paint | $20 |
| Adjustable Shelf Pins | $10 |
| Rods | $18 |
| Miscellaneous | $15 |
| Total | $278 |
Making your shelves isn’t just easy on the budget—it’s a chance to tailor exactly what you need. Plus, the pride from finishing something yourself is a sweet bonus.
Down the road, you might want to beef up the system with more shelves or toss in other organizing bells and whistles. Think about mixing in different hangers or using space more wisely with ideas like corner shelves.
Don’t forget, tons of detailed project steps, tool needs, and plans you can download are hanging out online ready to help you out with this DIY adventure.
Closet Organization Strategies
Alright, let’s dive into taming that chaotic closet of yours. Making your closet space sing in harmony requires some clever tricks to stash away your stuff in a neat fashion. Here’s how you can get a walk-in closet that’ll make your neighbors jealous.
Hanger Variety Delight
First off, let’s jazz up those hangers. Swapping out those generic hangers for tiny baby-sized ones can work wonders—more hangers mean more clothes fit in the same space! Perfect for your bundle of jeans, tanks, and swimsuits. Plus, your closet is gonna win a space-saving trophy.
Check out this cheat sheet on maximizing your hanger game:
| Hanger Type | Use Case |
|---|---|
| Standard Hangers | Shirts, blouses |
| Baby Clothes Hangers | Pants, tank tops, bathing suits |
| Specialty Hangers | Ties, scarves, belts |
For a hands-on guide to making your closet shelves flat-pack IKEA-style, swing by our article on build your own closet shelves.
Sneaky Space Wizards
Hard-to-reach places in your closet are just begging for some loving. That corner you walk past without much thought could cradle your jewelry, sunglasses, or other pretty knick-knacks. Add a few nifty holders, and ta-da! Miracles!.
Toss in a hanging shelf organizer on your closet rod. Watch as shoes, purses, and sweaters line up in neat little cubby holes — it’s like Hogwarts for your wardrobe.
Key ideas for ace closet wizardry:
- Alcoves and Dressers: Stash jewelry, sunglasses, and tiny treasures.
- Hanging Shelf Organizers: Perfect for shoes, purses, and sweaters.
Want to dodge the panic of cleaning up? Keep it simple and cheap with organization hacks that won’t drive you nuts, especially if you’re juggling more than just sock drawers.
For more DIY magic tricks, pop over to our posts on diy wood closet shelves and easy diy closet shelves.
Walk-in Closet Design Tips
Customization and Aesthetics
Changing up your walk-in closet can make it feel like a tailor-made treasure chest for your clothes. Whether you’re trying this for the first time or you fancy yourself a DIY champ, start with the basics: get the layout right and use your space smartly. Pop some shelves up high and you’ve got yourself some nifty storage. Perfect for stashing away boxy stuff, off-season shoes, or even that stack of hats that’s been begging for a home.
Make your closet look as good as it functions. Match those hangers, bins, and boxes with your closet’s vibe, creating a neat and trendy look. Jazz it up with some snazzy hooks, clever labels, and maybe splash out on lighting to crank up the charm.
For a chic and slip-free solution, slap on some non-slip shelf liners. They’ll keep your things in place and add a personal touch at the same time. Want to go the extra mile? Grab a paintbrush or some trim and go to town on those shelves, giving them a facelift and a bit of pizzazz.
Hang some shelf organizers off your closet rod, and you’ve got mini cubbies ready for your stuff – shoes, bags, sweaters, you name it. Style and storage in one go! Check out our diy wood closet shelves and diy corner closet shelves for more inspiration.
Affordable Organization Solutions
Who said looking polished has to cost a mint? With a pinch of planning and a sprinkle of budget smarts, a chic walk-in closet is within reach. Start with the “One In, One Out” game: for every new thing you tuck in, pull one oldie out. It’s a neat way to dodge clutter and keep things snazzy.
Flip some bucks-friendly magic with hanging shelf organizers. Perfect for shoes, purses, and those folded clothes that need a spot. Don’t forget – back-of-door hooks or organizers can rescue unused space, keeping all those little bits and bobs within easy reach.
If you’re building shelves from scratch, get a budget game plan. Price out materials – wood, screws, paint – and hunt for deals. Ever thought about repurposing an old dresser or using affordable, sturdy bits? Our easy diy closet shelves guide is packed with how-to’s.
Here’s a peek at what your budget might look like for a DIY closet shelving adventure:
| Item | Estimated Cost ($) |
|---|---|
| Wood (for shelves) | 50 |
| Screws and brackets | 20 |
| Paint | 15 |
| Hanging shelf organizers | 30 |
| Decorative bins and baskets | 25 |
Total Estimated Cost: $140
Keep your eyes peeled for sales and discounts at the hardware store. For tons more on pinching those pennies while pimping your closet, peek at our guide on how to build your own closet shelves.
Follow these tips, and you’ll soon have a closet that’s as stylishly sorted as it is budget-friendly. Happy organizing!
Conclusion
Creating a well-organized walk-in closet is entirely achievable with a bit of planning, creativity, and some DIY elbow grease. By implementing the storage solutions and shelving strategies outlined in this guide, you can transform your closet from a cluttered space into a personalized sanctuary.
Whether you choose to install pull-out hanger rods, utilize vertical space with upper shelves, or build custom L-shaped shelves, each method offers unique benefits tailored to your specific needs.
Additionally, customizing your shelving with trim and organizational elements not only enhances the functionality but also adds a touch of style that reflects your personal taste.
Budget-friendly options ensure that you don’t have to compromise on quality or aesthetics, making it possible to achieve a high-end look without the hefty price tag. Remember, the key to a successful closet makeover lies in thoughtful design and efficient use of space.
Embrace the DIY spirit, follow the step-by-step instructions, and enjoy the satisfaction of a beautifully organized walk-in closet that serves as both a practical storage solution and a stylish extension of your home.
Resources
FAQs
What are the best materials for DIY closet shelves?
For DIY closet shelves, sturdy materials like 3/4 inch plywood or MDF are ideal. They provide strong support and can be easily customized with paint or trim to match your closet’s aesthetic.
How can I maximize vertical space in a walk-in closet?
Utilize upper shelves for less frequently used items, install pull-down rods for easy access to high spaces, and add under-shelf storage solutions like hooks or small shelves for accessories.
Are there budget-friendly options for organizing a walk-in closet?
Yes! Opt for affordable materials like plywood, use repurposed items for storage, and incorporate simple DIY solutions like hanging hooks and shelf organizers to keep costs low while maintaining style and functionality.
How long does it take to build DIY walk-in closet shelves?
Depending on your experience and the complexity of the design, building DIY walk-in closet shelves can typically be completed over a weekend. Proper planning and having all necessary tools and materials on hand can streamline the process.
Can I customize my DIY closet shelves to fit my specific needs?
Absolutely! DIY shelves offer the flexibility to design and adjust the layout according to your unique storage requirements, whether you need more space for shoes, accessories, or clothing.


