

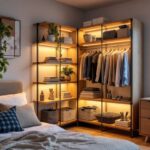
Imagine walking into your closet and being greeted by sleek, sturdy shelves that not only showcase your wardrobe but also elevate the entire space.
Whether you’re a seasoned DIY enthusiast or just starting out, creating your own wood closet shelves can be a game-changer for your home organization.
Dive into our comprehensive guide where affordability meets creativity, and transform your closet into a masterpiece with ease!
Affordable Wood Options for DIY
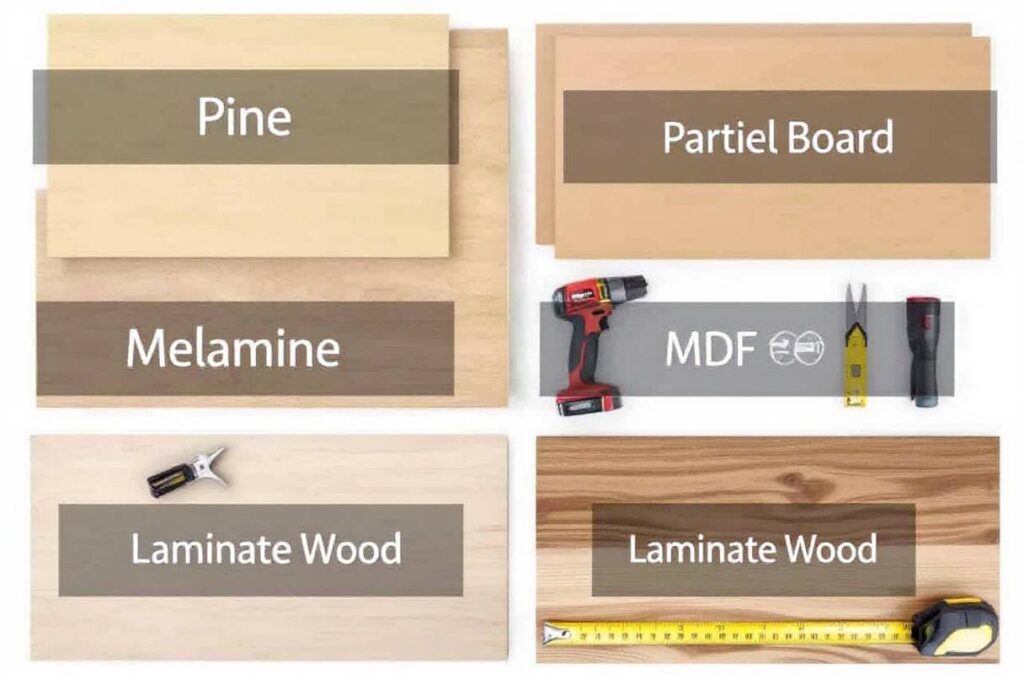
Picking the right wood for your DIY closet shelf can make the difference between a squeaky disaster and a satisfying triumph. For those just rolling up their sleeves and diving into the world of sawdust and nails, here’s a lineup of affordable choices. Perfect for fresh homeowners, those keeping an eye on the purse strings, and folks just getting started.
Pine Wood: Light but Strong
Think pine if you want something both cheap and reliable. Lightweight but solid, it’s like the Hercules of woods—mighty yet easy to handle. Pine is a breeze to paint or stain, so no need to worry about pursuing the look you love. Who knew you could get both strength and style? (Source: ShelfGenie).
| Feature | Description |
|---|---|
| Weight | Light |
| Durability | Strong |
| Finish | User-friendly for paint and stain |
Particle Board: Budget’s Best Friend
Need a wallet-friendly option for your DIY adventure? Meet particle board. It’s a good buddy for your budget and simple to cut into shape. While it looks pricier when stained, don’t overload it with heavy stuff or it’ll start bending under the pressure.
| Feature | Description |
|---|---|
| Weight | Not too heavy, not too light |
| Durability | Watch out for bending under heavy loads |
| Finish | Pretends to be the pricier stuff when stained |
Melamine: The Tough Cookie
Melamine is where durability meets sleek design. It’s tougher than many woods, resisting heat and staying stain-free. Forget about warping with this one—ideal for glossy shelves handling light to medium loads. No muss, no fuss.
| Feature | Description |
|---|---|
| Weight | Like a feather on a breeze |
| Durability | Built to last, loves the heat |
| Finish | Shiny and stain-resistant |
MDF: For the Light Lifting
MDF, or Medium-density fiberboard, is the go-to for packaging light stuff. Sure, might not hold up like the heavyweight champions, but for clothes and other featherweight items, it’s a safe bet. Just keep those spans short to avoid unwanted curving.
| Feature | Description |
|---|---|
| Weight | Feathery |
| Durability | Tends to bend with the long haul |
| Finish | Smooth operator, usually requires painting |
Laminate Wood: Tough Against the Elements
Laminate is your ally against fire and moisture, all while keeping costs low and looks high. Perfect for holding light to medium-weight stuff in that closet without breaking a sweat. It’s the undercover hero of shelving materials (Source: ShelfGenie).
| Feature | Description |
|---|---|
| Weight | Middleweight champ |
| Durability | Fire and rain resistant |
| Finish | Looks posh but priced sensibly |
Making the right pick for your DIY closet shelves isn’t just about counting pennies. Consider what you plan to store and the conditions of the space. For more inspirations and plans, peek into our guides on diy walk-in closet shelves and diy corner closet shelves.
Choosing the Right Wood Material
Picking the right wood for your DIY closet shelves is like choosing the right shoes for an outfit – it can make all the difference. You want shelves that not only look great but also stand the test of time. Let’s get to know our wood friends a bit better so you can make the best choice.
Characteristics of Spruce Wood
Spruce wood is like the trusty sidekick of the wood world. It’s soft, affordable, and pretty darn easy to work with, making it perfect for a wide range of closet projects. Even though it’s a softwood, it’s sturdy enough for light to medium storage. If you’re a newbie at home improvement or just watching your wallet, spruce might become your new best friend.
| Wood Type | Characteristics | Best For |
|---|---|---|
| Spruce | Soft, affordable, easy to work with | Light to medium storage |
If you want to see spruce wood in action, check out our piece on diy walk-in closet shelves.
Plywood Grades for Different Applications
Enter plywood, the chameleon of the wood family. It’s got a reputation for resisting sagging and warping, making it a solid pick for all sorts of DIY activities, closet shelves included. Plywood’s available in different grades, so there’s something for everyone.
- Furniture-grade plywood (marked A or B) is great for a smooth and durable finish on interior shelving.
- Utility-grade plywood (marked B or C) is your go-to for tougher jobs like garage shelving where beauty ain’t the main concern.
| Plywood Grade | Characteristics | Best For |
|---|---|---|
| A or B | Smooth, strong | Interior shelves |
| B or C | Basic, sturdy | Garage shelves |
Versatility of Cherry Wood
Now, if you’re feeling fancy, cherry wood is the way to go. With its rich, warm color and durability, it’s like the designer handbag of closet shelving materials. This hardwood’s on the heavier side, making it perfect for adding a touch of elegance to high-end closet setups. Sure, it might cost a bit more, but cherry wood is sure to impress.
| Wood Type | Characteristics | Best For |
|---|---|---|
| Cherry | Heavy, luxurious, durable | High-end closet shelves |
If you’re aiming to elevate the look, our diy corner closet shelves guide has more chic ideas using cherry wood.
With these wood picks, there’s something for everyone’s taste and budget. Whether you’re new to the DIY scene or a seasoned vet, nailing down your wood choice is a key move in building your own closet shelves.
Building Custom Closet Shelves
Whipping up some custom closet shelves can turn into a fun and fulfilling DIY adventure. Here’s a friendly guide for newbies, penny-pinchers, renters who don’t want to leave holes, neat freaks, and DIY rookies aiming to put together tough and good-looking wood shelves for their closet.
Removing Existing Hardware
First things first, everything old’s gotta go! Yank out those ancient shelf units, brackets, or rods cluttering your closet. Arm yourself with a trusty screwdriver, unscrew the bits and toss out any old supports anchoring your walls. This clean break gives you a fresh, blank slate for your new masterpiece Decor by the Seashore.
Measuring and Placing Shelves
Now, let’s get measuring! Grab your tape measure and jot down the width, depth, and height of your closet. How many shelves do you want? Got it? Calculate around 12 inches between each. Mark where the leveling magic will happen on your wall.
For some serious shelf muscle, slap on thick supports (we’re talking 1 5/8″ x 1 1/2″) right on those studs. These babies will keep your 3/4 inch plywood or MDF shelves solid. For the bottoms, utility panels (1/8 or 3/16 inch plywood) do the trick. If your walls can handle the job, ditch the vertical posts and let the frames fly solo The Navage Patch.
| Shelf Dimensions | Material | Thickness (inches) |
|---|---|---|
| Shelves | Plywood/MDF | 3/4 |
| Shelf Bottoms | Utility Panel | 1/8 or 3/16 |
Drilling Supports and Attaching Shelves
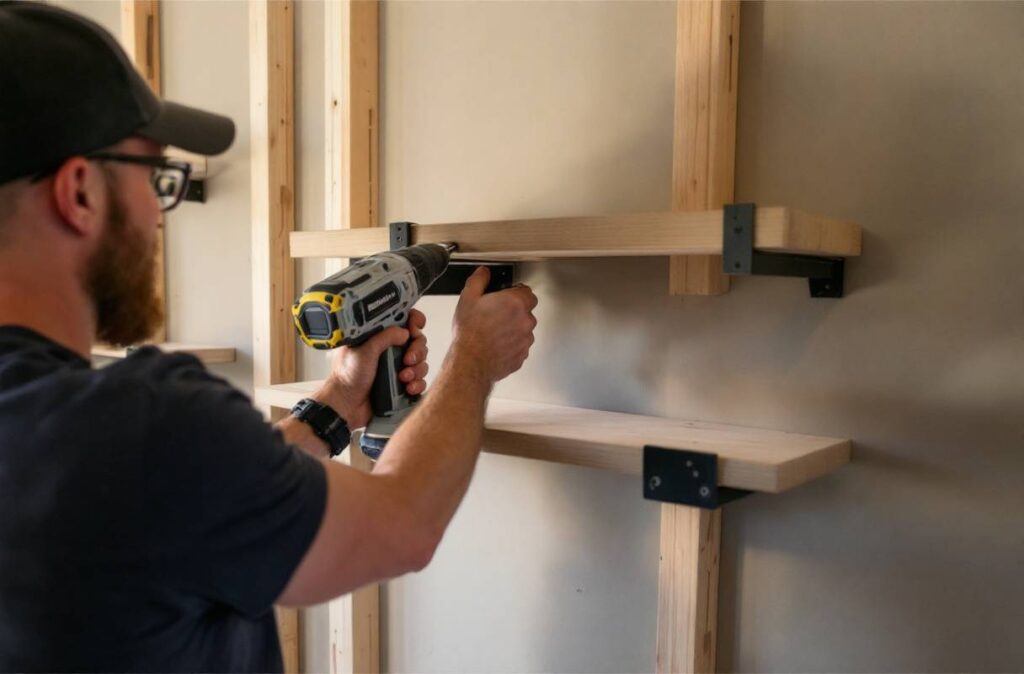
With those plans in hand, start by popping in the back cleat, then tack on the side cleats. Anchor them bad boys right into the studs for maximum shelf support. Trim your shelves to fit your mighty measuring effort. Plop each shelf right onto those cleats, ensuring they play nice and level. With this setup, say goodbye to vertical posts, because your walls have got your back The DIY Playbook.
- Pop in back cleat
- Tack on side cleats
- Trim shelves to fit
- Plop shelves on cleats
Painting for a Finished Look
To wrap it all up, fill any holes or little gaps with some trusty wood filler. Sand those edges, maybe caulk ’em too, then let the painting party begin! Match the shelves to your closet’s style and paint away. This final flourish doesn’t just look spiffy; it keeps the wood grinning for years The Navage Patch.
- Fill holes/gaps with filler
- Sand and caulk edges
- Paint shelves and faces
Nail these steps, and you’ll get shelves that aren’t just practical, but also a feast for the eyes. For more ideas and tidbits, poke around with articles like diy walk-in closet shelves, diy corner closet shelves, and easy diy closet shelves.
DIY Closet Shelves Project
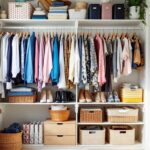
Building your own closet shelves from wood can be incredibly satisfying and practical. Whether you’re in your first home, pinching pennies while decorating, a renter wanting a simple fix, a neat-freak home organizer, or a DIY newbie, these shelves are your ticket to an organized world. Let’s jump into how to whip up some handy, good-looking closet shelves, shall we?
Utilizing Wall Supports
Start with the wall supports, which are like the backbone of your shiny new DIY shelves. You’ll wanna clear out any old brackets or whatnot hanging on your walls (Decor by the Seashore).
- Grab those wall supports (think 1 5/8″ wide and 1 1/2″ high) and fasten ’em into the studs at your chosen shelf heights. Hitting the studs keeps your shelves from crashing down.
- Make sure everything’s on the level! Lopsided shelves? No, thanks.
| Support Bit | Size (inches) |
|---|---|
| Wall Support Width | 1 5/8″ |
| Wall Support Height | 1 1/2″ |
Building Sturdy Wall Frames
Next, dive into the wall frames—this is where the heavy lifting’s gonna happen.
- Jot down the exact size of your shelves-to-be.
- Get your pieces cut from scrap 2x wood to match your planned shelves.
- Fasten those frames together using pocket screws and some construction adhesive for that rock-solid vibe.
Tools and Stuff You Need
- Scrap 2x lumber
- Pocket screws
- Construction adhesive
Adding Finish Trim Pieces
Trim pieces really up the ante, taking those shelves from “I made this” to “I could sell that.”
- Chop the trim to fit and stick it onto the shelf fronts with brads and some glue.
- Make sure everything lines up nice and flush with the shelf surface for a pro look.
Final Touches for Polished Appearance
Now, for that magazine-worthy finish, a few more steps.
- Fill any gaps or nail holes with wood filler.
- Smooth everything with a sander.
- Use caulk to hide seams and give everything a tidy look.
Once your surfaces are all spiffed up, paint the shelves for that finished feel. Boom. Your DIY closet shelves are good to go.
For more ways to organize those closets like a champ, check out our other bits on DIY walk-in closet shelves and DIY corner closet shelves.
Stick to these steps and you’ll be strutting past personalized shelves that meet your stashing needs, giving your closet a whole new personality.
Conclusion
Crafting your own wood closet shelves is more than just a DIY project—it’s an investment in your home’s functionality and style. By selecting the right materials, following detailed building steps, and adding personal touches, you can create shelves that perfectly match your needs and aesthetic preferences.
Whether you’re organizing a small space or revamping a walk-in closet, these affordable wood options and expert tips will help you achieve a polished, durable, and beautiful result.
Embrace your creativity, roll up your sleeves, and transform your closet into an organized haven that reflects your unique taste.
FAQs
What is the best wood type for beginner DIY closet shelves?
For beginners, Pine Wood and Particle Board are excellent choices due to their affordability and ease of handling.
How do I ensure my DIY shelves are sturdy?
Use thick supports anchored into wall studs and choose durable materials like Melamine or Plywood for added strength.
Can I paint MDF shelves, and how?
Yes, MDF shelves can be easily painted. Start by sanding the surface, applying a primer, and then painting with your chosen color.
What tools are essential for building DIY closet shelves?
Essential tools include a tape measure, screwdriver, drill, saw, level, wood filler, sandpaper, and paintbrushes.
How do I prevent shelves from bending under heavy loads?
Choose sturdy materials like Plywood or Melamine and ensure shelves are properly supported with strong brackets or cleats.


