
Have you ever dabbled in the delightful world of paper mache? If not, you’re in for a treat! Paper mache is a fantastic art form that truly knows no age limit—it’s perfect for kids and adults alike.
Imagine the fun of tearing up old newspapers, dipping them in gooey paste, and transforming them into whimsical creations. The best part? You don’t need fancy supplies or prior experience to dive right in!
Paper mache is incredibly versatile. Whether you’re a beginner just looking for a fun weekend project or an experienced crafter aiming to create intricate masterpieces, there’s something here for everyone. From vibrant masks and adorable animal sculptures to elegant vases and unique wall art, the possibilities are endless.
But what really makes paper mache special is the joy and sense of accomplishment it brings. There’s something wonderfully satisfying about seeing your project take shape, layer by layer.
It’s a creative process that can be both relaxing and exhilarating. So, why not grab some paper, mix up some paste, and let your imagination run wild? Let’s explore the fun and easy world of paper mache together!
Getting Started with Paper Mache
Hey there! Ready to dive into the world of paper mache? Let’s get started with the basics. First up, you’ll need to gather a few simple supplies. Here’s what you’ll need:
Materials Needed:
- Old newspapers or any scrap paper
- All-purpose flour
- Water
- White glue (optional)
- A mixing bowl
- A spoon or whisk
- Balloons, cardboard, or any mold for shaping
- Paints and brushes for decorating
- Vaseline or plastic wrap (for easy mold removal)
Simple Techniques:
How to Make Paper Mache Paste:
There are two popular methods to create your paper mache paste, and both are super easy:
- Flour and Water Method:
- Mix 1 part flour with 2 parts water in a bowl.
- Stir the mixture well until it reaches a smooth, batter-like consistency.
- Add a pinch of salt to prevent mold growth if you’re working on a longer project.
- Glue and Water Method:
- Combine equal parts white glue and water in a bowl.
- Mix thoroughly until you achieve a uniform consistency.
- This method results in a stronger and more durable finish.
Basic Steps:
- Tearing Paper:
- Tear your newspaper or scrap paper into strips. Aim for around 1-inch wide strips, but feel free to adjust based on your project.
- Avoid cutting the paper with scissors; torn edges blend better when layered.
- Dipping:
- Dip each strip of paper into your paste, ensuring it’s fully coated but not overly saturated.
- Use your fingers to remove excess paste from the strip.
- Layering:
- Lay the strips across your mold or base, overlapping slightly to cover all areas.
- Smooth out any wrinkles or bubbles as you go.
- Continue adding layers until your project feels sturdy. Typically, 3-4 layers are sufficient.
Drying and Finishing Techniques:
- Drying:
- Allow your paper mache project to air dry completely between layers. This can take anywhere from a few hours to overnight, depending on the thickness.
- Speed up the process by placing your project in a warm, dry place or using a fan.
- Finishing:
- Once fully dried, gently remove your project from the mold. If you used a balloon, pop it and peel away the remnants.
- Sand any rough edges with fine-grit sandpaper for a smooth finish.
- Paint and decorate your creation as desired. Seal with a clear varnish for added durability and a glossy finish.
And there you have it! You’re now equipped with the essentials to get started on your paper mache journey. Happy crafting!
Project Ideas for Kids:
Colorful Masks
Hey there! Let’s dive into an exciting paper mache project that’s perfect for kids: colorful masks. These masks are not only fun to make but also a fantastic way to let your creativity shine. Ready to get started? Here’s a step-by-step guide to creating your very own vibrant paper mache mask.
Step-by-Step Guide to Creating Fun and Vibrant Masks:
Materials Needed:
- Balloons
- Newspaper or scrap paper
- Flour or white glue (for the paste)
- Water
- Mixing bowl
- Paints (tempera or acrylic)
- Paintbrushes
- Embellishments (glitter, feathers, stickers, sequins)
- Elastic string or ribbon (for wearing the mask)
- Scissors
- Vaseline or plastic wrap (optional, for easy mold removal)
Instructions:
- Inflate the Balloon:
- Blow up a balloon to the size you want your mask to be. This will serve as the mold for your mask.
- Prepare the Paper Mache Paste:
- For the flour and water method, mix 1 part flour with 2 parts water until smooth.
- For the glue and water method, combine equal parts white glue and water.
- Tear the Paper:
- Tear newspaper or scrap paper into strips about 1 inch wide. Remember, torn edges blend better than cut ones.
- Apply the Paper Mache:
- Dip each paper strip into the paste, removing excess paste with your fingers.
- Lay the strips across the balloon, overlapping slightly to cover the entire surface.
- Apply 3-4 layers, letting each layer dry completely before adding the next. This can take several hours or overnight.
- Shape the Mask:
- Once the layers are dry, decide on the shape of your mask. You can cut out areas for the eyes, nose, and mouth using scissors.
- For a more detailed mask, like an animal face, you can add extra features using additional paper mache (e.g., ears, snout).
- Decorate the Mask:
- Paint the mask with a base coat and let it dry.
- Use bright colors to make your mask pop. Feel free to be as creative as you like with patterns and designs.
- Once the paint is dry, add embellishments. Glue on feathers, glitter, stickers, sequins, or anything else that will make your mask unique and exciting.
- Finish the Mask:
- Poke small holes on either side of the mask and thread elastic string or ribbon through them. This will allow you to wear the mask comfortably.
- Ensure the string or ribbon is securely tied and fits well around your head.
Tips for Decorating:
- Paint Selection: Use non-toxic, kid-friendly paints like tempera or acrylic.
- Layering Colors: Apply a base coat first, then add details once the base is dry.
- Embellishments: Use a variety of embellishments like glitter, feathers, and stickers to make the mask stand out.
- Safety First: Supervise younger children when using scissors and glue.
And there you have it! A fun, colorful mask that’s perfect for dress-up, Halloween, or just a rainy day craft. Happy crafting!
Animal Sculptures
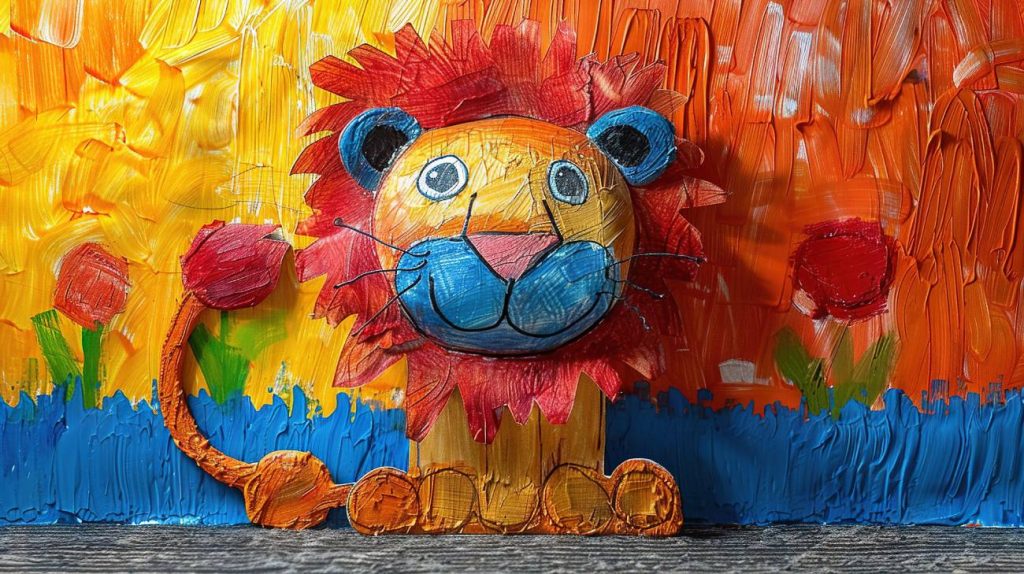
Hey there! Ready to bring some adorable animal friends to life with paper mache? This project is perfect for kids and a great way to unleash creativity. Let’s dive into a step-by-step guide to making easy and fun paper mache animal sculptures.
Step-by-Step Guide to Creating Animal Sculptures:
Materials Needed:
- Old newspapers or scrap paper
- Balloons (for basic shapes)
- Cardboard tubes (to create legs or other body parts)
- Flour or white glue (for the paste)
- Water
- Mixing bowl
- Paints (tempera or acrylic)
- Paintbrushes
- Markers
- Embellishments (googly eyes, felt, pipe cleaners)
- Scissors
- Tape
Instructions:
- Choose Your Animal:
- Decide on the animal you want to create. Simple shapes like a cat, dog, or elephant are great for beginners.
- Create the Base Shape:
- Inflate a balloon to form the main body of your animal.
- Use cardboard tubes or rolled-up paper for legs, tails, or other protruding parts. Tape these securely to the balloon.
- Prepare the Paper Mache Paste:
- For the flour and water method, mix 1 part flour with 2 parts water until smooth.
- For the glue and water method, combine equal parts white glue and water.
- Tear the Paper:
- Tear newspaper or scrap paper into strips about 1 inch wide. Torn edges blend better in the layers.
- Apply the Paper Mache:
- Dip each paper strip into the paste, removing excess paste with your fingers.
- Lay the strips across the balloon and any attached parts, overlapping slightly to cover the entire surface.
- Apply 3-4 layers, letting each layer dry completely before adding the next. This can take several hours or overnight.
- Shape and Refine Your Animal:
- Once dry, use additional paper mache to add details like ears, snouts, or wings. Shape these from rolled or crumpled paper.
- Ensure all parts are securely attached with a few layers of paper mache.
- Dry and Finalize the Structure:
- Allow the entire sculpture to dry thoroughly. This ensures a solid base for painting and decorating.
- Decorate the Sculpture:
- Paint your animal with a base coat and let it dry.
- Use different colors and patterns to add personality. Spots, stripes, or patches make the animal unique.
- Add features like googly eyes, felt ears, or pipe cleaner whiskers. Use markers for fine details like noses or mouths.
Ideas for Customizing and Painting:
- Colors and Patterns: Encourage kids to be imaginative with their color choices. A pink elephant or a blue tiger? Why not!
- Additional Materials: Use googly eyes for a playful look, felt for soft ears, or pipe cleaners for whimsical whiskers.
- Details: Markers can add fine details like facial features, fur texture, or even tiny claws.
- Embellishments: Glitter, sequins, or tiny pom-poms can make the sculptures extra special.
And there you go! You’ve now crafted your very own paper mache animal sculpture. It’s a fun project that brings a sense of accomplishment and endless joy. Happy sculpting!
Holiday Decorations: Simple and Festive Projects
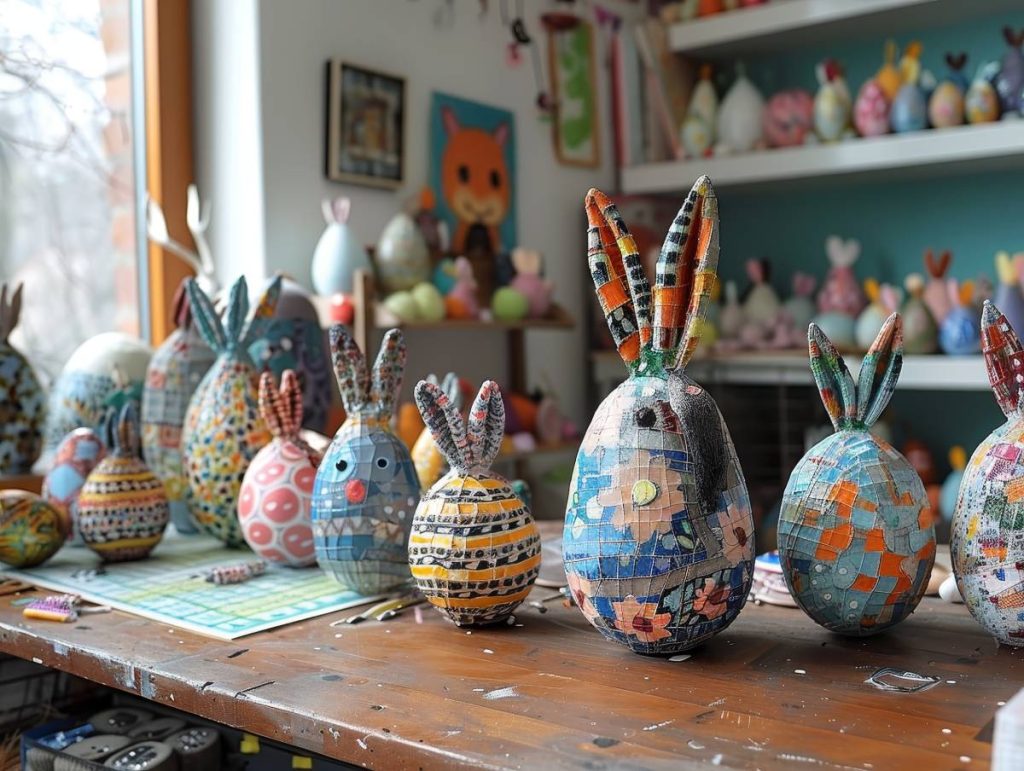
Hey there! There’s nothing quite like adding a personal touch to your holiday decorations. Paper mache offers endless possibilities to create unique and festive items. Let’s dive into some simple projects, like Easter eggs, Halloween pumpkins, and Christmas ornaments, and explore fun ways to personalize them.
Project Ideas:
Easter Eggs:
Materials Needed:
- Balloons (small, water balloon size)
- Newspaper or scrap paper
- Flour or white glue (for the paste)
- Water
- Mixing bowl
- Paints (tempera or acrylic)
- Paintbrushes
- Glitter, stickers, ribbon
- Scissors
Instructions:
- Inflate the Balloons:
- Inflate small balloons to egg size. These will serve as your mold.
- Prepare the Paper Mache Paste:
- Mix 1 part flour with 2 parts water until smooth or combine equal parts glue and water.
- Tear the Paper:
- Tear newspaper into strips about 1 inch wide.
- Apply the Paper Mache:
- Dip paper strips into the paste, remove excess paste, and lay them on the balloon.
- Cover the entire balloon with 3-4 layers, letting each layer dry completely.
- Decorate the Eggs:
- Once dry, pop the balloon and remove it.
- Paint the eggs in pastel colors or patterns.
- Add glitter, stickers, or ribbon for extra flair.
Halloween Pumpkins:
Materials Needed:
- Balloons
- Newspaper or scrap paper
- Flour or white glue (for the paste)
- Water
- Mixing bowl
- Paints (tempera or acrylic)
- Paintbrushes
- Black marker, glitter, stickers
- Scissors
Instructions:
- Inflate the Balloons:
- Blow up balloons to your desired pumpkin size.
- Prepare the Paper Mache Paste:
- Mix 1 part flour with 2 parts water or combine equal parts glue and water.
- Tear the Paper:
- Tear newspaper into strips about 1 inch wide.
- Apply the Paper Mache:
- Dip paper strips into the paste, remove excess paste, and lay them on the balloon.
- Cover the entire balloon with 3-4 layers, letting each layer dry completely.
- Shape the Pumpkin:
- Once dry, pop the balloon and remove it.
- If desired, add a stem using rolled-up paper mache and attach it with more paper strips.
- Decorate the Pumpkin:
- Paint the pumpkin orange and let it dry.
- Use a black marker or paint to draw a spooky face.
- Add glitter or stickers to make it extra festive.
Christmas Ornaments:
Materials Needed:
- Balloons (small, water balloon size)
- Newspaper or scrap paper
- Flour or white glue (for the paste)
- Water
- Mixing bowl
- Paints (tempera or acrylic)
- Paintbrushes
- Glitter, sequins, ribbon, small bells
- Scissors
- String or hooks
Instructions:
- Inflate the Balloons:
- Inflate small balloons to ornament size.
- Prepare the Paper Mache Paste:
- Mix 1 part flour with 2 parts water until smooth or combine equal parts glue and water.
- Tear the Paper:
- Tear newspaper into strips about 1 inch wide.
- Apply the Paper Mache:
- Dip paper strips into the paste, remove excess paste, and lay them on the balloon.
- Cover the entire balloon with 3-4 layers, letting each layer dry completely.
- Decorate the Ornaments:
- Once dry, pop the balloon and remove it.
- Paint the ornaments in festive colors like red, green, gold, or silver.
- Add glitter, sequins, or small bells for extra sparkle.
- Attach a string or hook for hanging on the tree.
Personalization Tips:
- Colors and Patterns: Use a variety of colors to match the holiday theme. Pastels for Easter, orange and black for Halloween, and red, green, gold, or silver for Christmas.
- Embellishments: Add glitter, stickers, sequins, or small bells to make the decorations shine.
- Unique Designs: Encourage kids to draw their own patterns or designs before painting.
- Special Touches: Use ribbon or felt to add bows, hats, or other holiday-appropriate accessories.
And there you have it! These simple and fun paper mache holiday decorations are sure to add a personal and festive touch to your celebrations. Happy crafting!
Project Ideas for Adults:
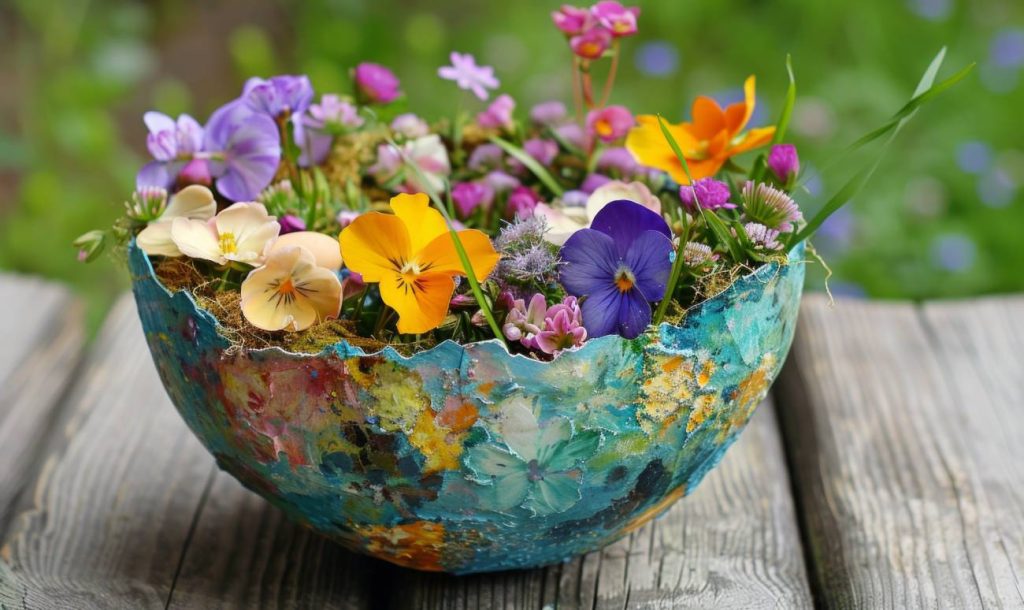
Decorative Bowls and Vases
Hey there! If you’re looking to elevate your home decor with some personalized touch, paper mache bowls and vases are a perfect choice. These elegant and functional pieces can be customized to match any style. Ready to get started? Here’s a step-by-step guide to creating your own decorative bowls and vases, complete with techniques for adding texture and color.
Step-by-Step Guide to Creating Elegant and Functional Bowls and Vases:
Materials Needed:
- Balloons (for vases) or bowls (for molds)
- Newspaper or scrap paper
- Tissue paper (for a smoother finish)
- Flour or white glue (for the paste)
- Water
- Mixing bowl
- Paints (acrylic or spray paint)
- Paintbrushes
- Sandpaper (fine grit)
- Acrylic sealer or varnish
- Decorative elements (e.g., metallic leaf, lace, fabric)
Instructions:
- Create the Mold:
- For vases, inflate a balloon to the desired shape and size.
- For bowls, choose a bowl from your kitchen and cover it with plastic wrap for easy removal later.
- Prepare the Paper Mache Paste:
- Mix 1 part flour with 2 parts water until smooth, or combine equal parts white glue and water.
- Tear the Paper:
- Tear newspaper into strips about 1 inch wide. For a smoother finish, you can use tissue paper for the final layers.
- Apply the Paper Mache:
- Dip each paper strip into the paste, removing excess paste with your fingers.
- Lay the strips across the mold (balloon or bowl), overlapping slightly to cover the entire surface.
- Apply 3-4 layers of newspaper, letting each layer dry completely before adding the next. This can take several hours or overnight.
- For a smoother finish, use tissue paper for the final layer.
- Shape and Refine:
- Once the layers are dry, pop the balloon or gently remove the paper mache from the bowl mold.
- If desired, use sandpaper to smooth any rough edges or imperfections.
- Add Texture and Color:
- Texture: Experiment with different types of paper for texture. Tissue paper creates a smooth finish, while textured paper adds a unique look.
- Layering: Layer different colors or types of paper for a marbled effect. You can also crumple paper before applying it for a textured surface.
- Painting: Once dry, paint your bowl or vase with acrylic paint. Use a base coat of a solid color and then add designs or patterns on top. Metallic paints or spray paints can give a sophisticated finish.
- Decorate and Personalize:
- Add decorative elements like metallic leaf, lace, or fabric to enhance the look. Use glue to attach these embellishments securely.
- For a modern touch, consider geometric patterns or a simple color block design.
- Seal and Finish:
- To ensure durability, apply a coat of acrylic sealer or varnish after the paint has dried. This will also give your piece a glossy finish.
Tips for Sealing and Finishing:
- Durability: Ensure each layer is thoroughly dry before adding the next to prevent warping.
- Aesthetic Appeal: Sand any rough edges for a polished look. A final coat of varnish not only protects but also brings out the colors and textures.
- Versatility: Experiment with different shapes and sizes. Smaller bowls are perfect for keys or jewelry, while larger vases can hold faux flowers or decorative branches.
And there you have it! By following these steps, you can create beautiful and unique paper mache bowls and vases that add a personal and elegant touch to your home. Happy crafting!
Wall Art and Sculptures
Hey there! Ready to transform your walls with some unique and eye-catching paper mache art? Whether you’re looking to create striking wall hangings or intricate 3D sculptures, this project will add a creative touch to your home decor. Let’s get started with a step-by-step guide to creating your own paper mache wall art and sculptures, complete with tips for adding intricate details and professional finishing techniques.
Step-by-Step Guide to Creating Wall Art and Sculptures:
Materials Needed:
- Newspaper or scrap paper
- Cardboard or thick paper (for structure)
- Flour or white glue (for the paste)
- Water
- Mixing bowl
- Paints (acrylic or spray paint)
- Paintbrushes
- Stencils or molds (for intricate designs)
- Sandpaper (fine grit)
- Acrylic sealer or varnish
- Additional decorative elements (e.g., beads, fabric, metallic leaf)
Instructions:
- Design Your Piece:
- Plan your design on paper first. Decide whether you want to create a flat wall hanging or a 3D sculpture. Sketch out your ideas to visualize the final piece.
- Create the Base Structure:
- Wall Hangings: Cut cardboard to the desired shape and size as the base. You can also use thick paper for smaller, lighter pieces.
- 3D Sculptures: Build the basic structure using crumpled paper, cardboard, or even wire for more complex shapes. Tape the parts together securely.
- Prepare the Paper Mache Paste:
- Mix 1 part flour with 2 parts water until smooth, or combine equal parts white glue and water.
- Tear the Paper:
- Tear newspaper into strips about 1 inch wide. You can use colored tissue paper or other decorative paper for the final layer.
- Apply the Paper Mache:
- Dip each paper strip into the paste, removing excess paste with your fingers.
- Lay the strips across the structure, overlapping slightly to cover the entire surface. Apply 3-4 layers, letting each layer dry completely before adding the next.
- Add Intricate Details:
- Using Stencils or Molds: To create intricate patterns, use stencils or molds. Apply a thin layer of paper mache over the stencil to imprint the design onto your piece.
- Creating Texture: Experiment with different materials to add texture. For example, use lace or fabric to imprint patterns, or crumple paper for a textured surface.
- Layering: Layer different colors or types of paper for a marbled or mosaic effect.
- Shape and Refine:
- Once dry, use sandpaper to smooth any rough edges or imperfections. This step is crucial for achieving a polished look.
- Paint and Decorate:
- Base Coat: Apply a base coat of acrylic paint in your chosen color. Let it dry completely.
- Detailed Painting: Add designs or patterns on top of the base coat. Use fine brushes for detailed work. Metallic paints or spray paints can add an elegant touch.
- Additional Elements: Attach decorative elements like beads, fabric, or metallic leaf to enhance the piece. Use glue to secure these embellishments.
- Seal and Finish:
- Durability: Apply a coat of acrylic sealer or varnish after the paint has dried. This will protect your art and give it a glossy finish.
- Visual Appeal: A final coat of varnish not only seals the piece but also enhances the colors and textures.
Tips for Enhancing Your Artwork:
- Intricate Designs: Use stencils or molds to create detailed patterns effortlessly. This technique works well for wall hangings with intricate motifs or 3D sculptures with complex surfaces.
- Texturing Techniques: Experiment with different materials like lace, fabric, or textured paper to add unique textures to your pieces.
- Color and Pattern: Layer different colors of paper for a dynamic, multi-dimensional look. Use a combination of bold and subtle colors to create depth.
- Sealing and Finishing: Ensure your piece is thoroughly dry before sealing. Use multiple coats of varnish for added durability and a professional finish.
And there you have it! With these steps, you can create stunning paper mache wall art and sculptures that bring a personal and artistic touch to your home. Happy crafting!
Home Decor Items
Hey there! If you’re looking to add a personal touch to your home decor, paper mache is a fantastic medium to create unique and stylish pieces. From lampshades to picture frames and plant pots, these projects are both fun to make and offer endless possibilities for customization. Let’s dive into some creative ideas and see how you can incorporate these paper mache items into your interior design.
Step-by-Step Guide to Creating Home Decor Items:
Materials Needed:
- Balloons (for lampshades)
- Cardboard or existing frames (for picture frames)
- Plastic pots or containers (for plant pots)
- Newspaper or scrap paper
- Flour or white glue (for the paste)
- Water
- Mixing bowl
- Paints (acrylic or spray paint)
- Paintbrushes
- Sandpaper (fine grit)
- Acrylic sealer or varnish
- Decorative elements (e.g., fabric, lace, beads)
Lampshades:
Instructions:
- Create the Mold:
- Inflate a balloon to the desired size of the lampshade.
- Prepare the Paper Mache Paste:
- Mix 1 part flour with 2 parts water until smooth, or combine equal parts white glue and water.
- Tear the Paper:
- Tear newspaper into strips about 1 inch wide.
- Apply the Paper Mache:
- Dip each paper strip into the paste, removing excess paste with your fingers.
- Lay the strips across the balloon, overlapping slightly to cover the entire surface.
- Apply 3-4 layers, letting each layer dry completely before adding the next.
- Shape and Refine:
- Once the layers are dry, pop the balloon and remove it.
- Use sandpaper to smooth any rough edges.
- Decorate and Seal:
- Paint the lampshade with acrylic paint. Use a base coat and add designs or patterns on top.
- Add decorative elements like lace or beads.
- Apply a coat of acrylic sealer or varnish for durability.
Picture Frames:
Instructions:
- Create the Base:
- Use an existing frame or cut cardboard to the desired size and shape.
- Prepare the Paper Mache Paste:
- Mix 1 part flour with 2 parts water until smooth, or combine equal parts white glue and water.
- Tear the Paper:
- Tear newspaper into strips about 1 inch wide.
- Apply the Paper Mache:
- Dip each paper strip into the paste, removing excess paste.
- Layer the strips over the frame, covering it completely.
- Apply 2-3 layers, letting each layer dry completely.
- Add Texture and Details:
- For a textured look, use crumpled paper or textured materials like lace.
- Use sandpaper to smooth any rough edges.
- Paint and Embellish:
- Paint the frame with your chosen colors.
- Add decorative elements like beads, fabric, or metallic leaf.
- Seal with acrylic sealer for a glossy finish.
Plant Pots:
Instructions:
- Create the Mold:
- Use a plastic pot or container as the mold.
- Prepare the Paper Mache Paste:
- Mix 1 part flour with 2 parts water until smooth, or combine equal parts white glue and water.
- Tear the Paper:
- Tear newspaper into strips about 1 inch wide.
- Apply the Paper Mache:
- Dip each paper strip into the paste, removing excess paste.
- Layer the strips over the pot, covering it completely.
- Apply 3-4 layers, letting each layer dry completely.
- Shape and Refine:
- Once the layers are dry, remove the paper mache from the mold.
- Use sandpaper to smooth any rough edges.
- Decorate and Seal:
- Paint the pot with acrylic paint and add designs or patterns.
- Add decorative elements like fabric or beads.
- Seal with acrylic sealer for durability.
Incorporating Paper Mache into Interior Design:
- Color Coordination: Match the colors of your paper mache items with the existing color scheme of your room. Use complementary or contrasting colors to make the pieces stand out.
- Style Matching: Choose designs and patterns that fit the overall style of your home. For a modern look, opt for geometric patterns and metallic finishes. For a rustic feel, use earthy tones and textured finishes.
- Placement Tips:
- Lampshades: Place paper mache lampshades on bedside tables or in living rooms to create a cozy ambiance.
- Picture Frames: Display paper mache picture frames on mantels, shelves, or walls to showcase your favorite photos with a personalized touch.
- Plant Pots: Use paper mache plant pots to add a touch of greenery to your space. Place them on windowsills, shelves, or as centerpieces on tables.
By incorporating these paper mache home decor items into your interior design, you can create a unique and personalized space that reflects your style and creativity. Happy crafting!
Tips for Success
Common Mistakes to Avoid in Paper Mache Projects
Hey there! Paper mache is an enjoyable and versatile craft, but like any project, it can sometimes come with a few hiccups. Don’t worry, though—we’ve got you covered. Whether you’re new to paper mache or looking to perfect your technique, here are some common mistakes to avoid and tips to ensure your creations turn out beautifully.
Tips for Proper Drying:
- Right Paste Consistency:
- Tip: Ensure your paste is neither too thick nor too watery. A smooth, yogurt-like consistency is ideal. If it’s too thick, it won’t spread easily, and if it’s too watery, it won’t hold the paper strips properly.
- How to Fix: If the paste is too thick, add a small amount of water and mix until smooth. If it’s too thin, add a bit more flour or glue to thicken it up.
- Drying Environment:
- Tip: Dry your paper mache projects in a well-ventilated area with good airflow. Avoid direct sunlight as it can cause the paper to dry too quickly and crack.
- How to Fix: If you notice cracking, move your project to a cooler, shaded area. Using a fan to improve airflow can also help with even drying.
- Layering and Drying Time:
- Tip: Allow each layer to dry completely before adding the next. This prevents sagging and ensures a strong structure.
- How to Fix: If layers aren’t drying properly, give them more time. Use thinner layers of paste and paper to speed up the drying process.
Fixing Common Issues:
- Cracking:
- Solution: Cracks can occur if the layers dry too quickly or unevenly.
- Reinforce Weak Areas: Apply additional layers of paper mache over the cracks, ensuring each layer dries thoroughly before adding the next.
- Adjust Drying Times: Move the project to a more controlled environment with consistent temperatures and humidity levels.
- Solution: Cracks can occur if the layers dry too quickly or unevenly.
- Sagging:
- Solution: Sagging happens when the structure isn’t strong enough to support itself.
- Use a Strong Base: Start with a sturdy base, like a balloon or cardboard, and ensure it’s well-supported.
- Additional Layers: Apply more layers of paper mache to reinforce weak areas. Allow each layer to dry completely before adding more.
- Support Structures: Use temporary supports like sticks or boxes to hold the project in shape while it dries.
- Solution: Sagging happens when the structure isn’t strong enough to support itself.
- Uneven Surface:
- Solution: An uneven surface can be smoothed out with careful attention.
- Sanding: Once the paper mache is completely dry, use fine-grit sandpaper to smooth out any rough or bumpy areas.
- Final Layer: Apply a final, thin layer of tissue paper with a smooth paste to create a polished finish.
- Solution: An uneven surface can be smoothed out with careful attention.
- Peeling:
- Solution: Peeling can occur if the paste isn’t sticking properly.
- Proper Adhesion: Ensure the paper strips are fully saturated with paste and pressed firmly onto the surface.
- Glue Mixture: If using a flour-water paste, try switching to a stronger glue-water mixture for better adhesion.
- Solution: Peeling can occur if the paste isn’t sticking properly.
General Tips for Success:
- Patience is Key: Give your project plenty of time to dry. Rushing the process often leads to cracks or sagging.
- Smooth Application: Apply the paper strips smoothly, avoiding wrinkles and air bubbles. This will help create a uniform finish.
- Check Consistency: Regularly check the consistency of your paste and adjust as needed to ensure it’s working effectively.
By keeping these common mistakes in mind and following these tips, you’ll be well on your way to creating beautiful and sturdy paper mache projects. Happy crafting!
Creative Finishing Touches for Your Paper Mache Projects
Hey there! Now that you’ve crafted your paper mache masterpiece, it’s time to add some creative finishing touches to make it truly shine. Whether you’re aiming for a sleek, glossy finish or a textured, rustic look, here are some ideas to help you paint, seal, and embellish your projects.
Painting Techniques:
- Matte Finish:
- Materials Needed: Acrylic paint, paintbrushes, matte acrylic sealer.
- Instructions:
- Base Coat: Start with a base coat of acrylic paint in your chosen color. Apply evenly and let it dry completely.
- Second Coat: Apply a second coat for a more vibrant color. Let it dry.
- Seal: Finish with a layer of matte acrylic sealer to protect the paint and give a smooth, non-glossy finish.
- Glossy Finish:
- Materials Needed: Acrylic paint, paintbrushes, glossy acrylic sealer or varnish.
- Instructions:
- Base Coat: Apply a base coat of acrylic paint. Let it dry completely.
- Second Coat: Add a second coat for better coverage. Let it dry.
- Seal: Use a glossy acrylic sealer or varnish to give your project a shiny, polished look. Apply evenly and let it dry.
- Textured Finish:
- Materials Needed: Acrylic paint, paintbrushes, sponges, texture paste.
- Instructions:
- Base Coat: Apply a base coat of acrylic paint. Let it dry.
- Add Texture: Use texture paste to create raised designs. Apply with a palette knife or brush and let it dry.
- Paint Over Texture: Once dry, paint over the textured areas with a contrasting color to highlight the texture.
- Seal: Finish with a matte or glossy sealer, depending on your preference.
Adding Embellishments:
- Glitter:
- Materials Needed: Glitter, white glue or Mod Podge, paintbrush.
- Instructions:
- Apply Glue: Brush a thin layer of white glue or Mod Podge onto the area you want to embellish.
- Add Glitter: Sprinkle glitter over the glued area. Shake off excess glitter and let it dry.
- Seal: Apply a thin layer of Mod Podge over the glitter to seal it and prevent shedding.
- Beads:
- Materials Needed: Beads, white glue, tweezers.
- Instructions:
- Arrange Beads: Plan your design and arrange the beads on your project.
- Glue Beads: Apply a small dot of glue to each bead and press it onto the surface. Use tweezers for precise placement.
- Secure: Allow the glue to dry completely. For added durability, apply a thin layer of clear sealer over the beads.
- Fabric:
- Materials Needed: Fabric scraps, white glue or fabric glue, scissors.
- Instructions:
- Cut Fabric: Cut fabric into desired shapes or strips.
- Apply Glue: Brush a thin layer of glue onto the area where you want to attach the fabric.
- Attach Fabric: Press the fabric onto the glued area, smoothing out any wrinkles. Let it dry.
- Seal: For added durability, apply a thin layer of clear sealer over the fabric.
Tips for Securely Attaching Embellishments:
- Strong Adhesive: Use a strong adhesive like white glue, Mod Podge, or fabric glue to ensure your embellishments stay in place.
- Drying Time: Give each layer of glue and sealer ample time to dry to prevent any shifting or peeling.
- Layering: For a more secure attachment, apply an additional layer of glue or sealer over the embellishments once they are in place.
By taking these steps, you can enhance the visual appeal and durability of your paper mache projects, creating unique and personalized pieces that stand out. Happy crafting!
Safety Tips for Paper Mache Projects
Hey there! Crafting with paper mache is loads of fun, but safety should always come first, especially when kids are involved. Here are some essential safety tips to ensure a safe and enjoyable crafting environment for everyone.
Creating a Safe Crafting Environment for Kids:
- Supervision is Key:
- Always supervise children during crafting activities to ensure they are using materials and tools safely.
- Set clear rules and explain the importance of following them to prevent accidents.
- Protective Gear:
- Equip kids with protective aprons or old clothes to protect their skin and clothing from paste and paint.
- Use non-toxic, child-friendly paints and glues to avoid harmful chemical exposure.
- Safe Workspace Setup:
- Choose a well-ventilated area for crafting to avoid inhaling fumes from paints or glues.
- Cover the workspace with newspaper or a plastic tablecloth to protect surfaces and make cleanup easier.
- Keep sharp tools, such as scissors and craft knives, out of reach of young children.
Proper Handling and Disposal of Materials:
- Non-Toxic Paste Options:
- Use non-toxic, homemade paste options like flour and water or non-toxic glue for a safer crafting experience.
- Store paste in a sealed container when not in use to prevent spills and contamination.
- Cleaning Up Spills:
- Keep a damp cloth or sponge handy to clean up spills immediately, preventing slips and sticky messes.
- Encourage kids to wash their hands thoroughly after crafting to remove any glue, paint, or paste residue.
- Disposing of Waste Responsibly:
- Collect and dispose of paper scraps, dried paste, and other waste materials in a designated trash bag or bin.
- Recycle where possible—clean paper scraps can often be recycled, reducing environmental impact.
- Avoid pouring leftover paste or paint down the drain; instead, let it dry out and dispose of it in the trash.
Additional Tips for Safety and Environmental Care:
- Ventilation: Ensure good airflow in the crafting area, especially when using paints and sealers, to minimize inhalation of fumes.
- Safe Storage: Keep all crafting materials and tools stored safely when not in use to prevent accidents.
- Eco-Friendly Practices: Opt for eco-friendly and biodegradable materials when possible to minimize environmental impact.
By following these safety tips, you can create a safe and enjoyable crafting environment for kids and adults alike, while also taking care of our planet. Happy crafting!
Conclusion
Wrapping Up: Dive into the World of Paper Mache!
Hey there! We’ve journeyed through the whimsical world of paper mache, exploring fun and accessible projects perfect for crafters of all ages. From creating unique home decor items to adding creative finishing touches and ensuring a safe crafting environment, paper mache offers endless possibilities for expressing your creativity.
Ready to get started? Whether you’re a seasoned crafter or just beginning, paper mache is a versatile and forgiving medium that invites you to experiment and have fun. Gather your materials, set up a cozy crafting space, and dive into one of the projects we’ve shared. Don’t forget to let your personality shine through in your creations!
We’d love to see what you come up with! Share your paper mache masterpieces on social media or with friends and family. And hey, why not drop a comment below? Tell us about your experiences, ask questions, and share your own creative ideas. Let’s build a vibrant, supportive community of paper mache enthusiasts together.
Happy crafting, and we can’t wait to see your imaginative creations!
Join the Paper Mache Fun!
Hey there, crafty friends! We can’t wait to see the amazing paper mache creations you come up with. Share your masterpieces on social media using the hashtag #PaperMacheFun so we can all admire and get inspired by each other’s work.
Don’t miss out on more creative ideas and tutorials! Subscribe to our blog to stay updated with the latest projects, tips, and crafting inspiration. Let’s keep this fun crafting journey going together—happy creating!


