
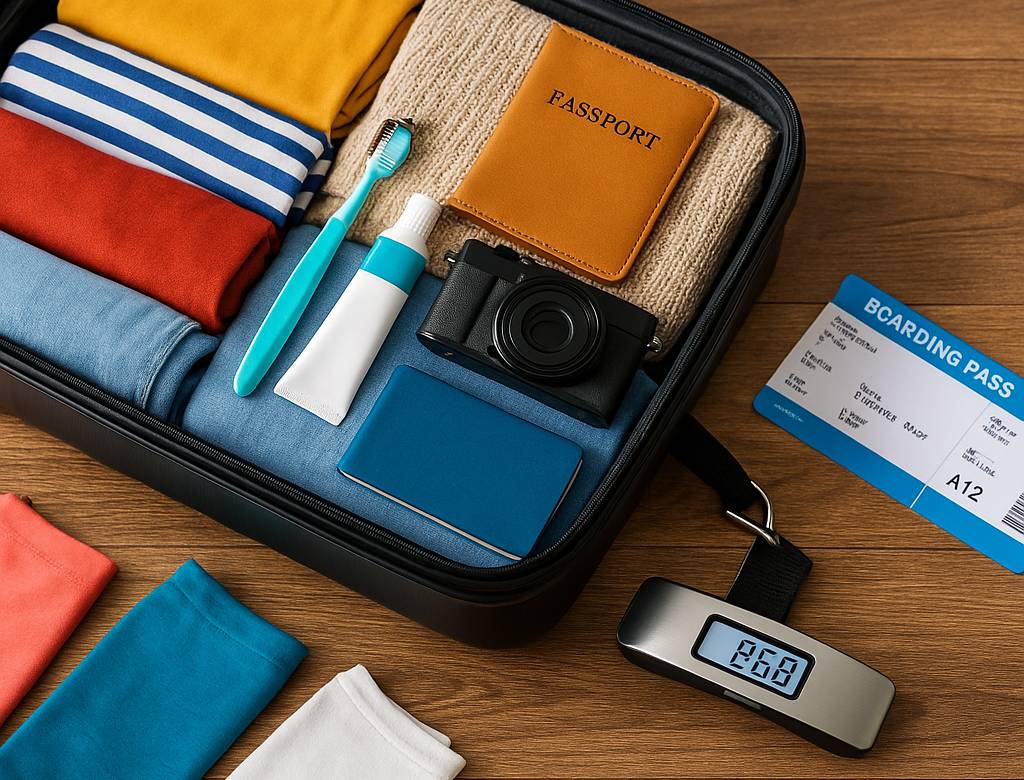
Get Ready to Pack Smart!
In this section, we’ll walk through all the steps you need to take before you ever hang your suitcase on a digital luggage scale. Proper preparation not only ensures you get an accurate weight measurement but also helps you avoid nasty surprises—and hefty fees—at the airport.
We begin by verifying your airline’s weight limits and carry-on restrictions (so you know exactly what you’re aiming for), then move on to inspecting your scale itself—checking batteries and hardware—so that it performs reliably.
You’ll also gather a few simple supplies—like a known weight for calibration—and choose the optimal environment (flat, stable, low-wind) to minimize fluctuations. By following these pre-weighing steps carefully, you’ll set yourself up for spot-on readings every time.
Pre-Weighing Preparation
Verify Airline Weight Limits
Before you even think about weighing, it’s critical to know exactly what your airline allows—checked baggage limits and carry-on allowances vary widely by carrier, fare class, and region.

- Domestic Checked Baggage Limits (U.S.)
- Most major U.S. domestic carriers set the standard checked bag weight limit at 50 lbs (23 kg) per bag for economy‐class passengers.
- Some budget airlines (e.g., Frontier or Spirit) may impose lower limits: 40 lbs (18 kg) maximum per bag in basic economy.
- International Checked Baggage Limits
- For international economy class, the IATA‐recommended maximum is 50 lbs (23 kg), but many airlines allow up to 70 lbs (32 kg) per bag for business/first passengers (e.g., United Polaris or Emirates Business).
- Note: Some routes (e.g., flights to/from Asia) may use a piece concept, often allowing 1–2 bags at 50 lbs (23 kg) each in economy.
- Carry-On Allowances (Size & Weight)
- Many carriers limit carry-on weight to 10 kg (22 lbs) or less (e.g., British Airways, Lufthansa).
- Typical size restrictions: 55 × 40 × 23 cm (21.6 × 15.7 × 9 in) for cabin luggage that fits overhead bins; some low‐cost carriers use stricter dimensions.
Table: Common Checked Baggage Limits (U.S. Domestic vs. International Economy)
| Airline/Region | Checked Weight Limit | Notes |
|---|---|---|
| U.S. Domestic (Delta, AA, UA) | 50 lbs (23 kg) per bag | Standard economy; fees apply if exceeded |
| Frontier/Spirit (Basic Fare) | 40 lbs (18 kg) per bag | Basic economy; overweight fees escalate quickly |
| International Economy (IATA) | 50 lbs (23 kg) per bag (advised); up to 70 lbs (32 kg) for higher classes | Some airlines allow 2 pieces, 23 kg each in economy; business up to 32 kg |
- Why This Matters: Exceeding your airline’s limit by even 1–2 lbs can trigger an overweight fee of $50–$200+ per bag. Confirm specifics for your route and fare class at least 48 hours before departure to budget wisely.
- Pro Tip: Bookmark or take a screenshot of your airline’s baggage policy webpage—policies can change seasonally (e.g., holiday travel surcharges)—so you’re never caught off guard.
Inspect Your Luggage Scale
Even the best scale is useless if its batteries or hardware are compromised. A quick “health check” ensures reliable, repeatable readings.
- Check Battery Level
- Why It Matters: Weak or inconsistent power can cause erratic readings, flickering displays, or shutdowns mid-weigh.
- What to Do:
- Replace old CR2032 cell (or AAA, depending on model) at least once every 6–12 months if you use it regularly, even if the screen still powers on—voltage can drop under load.
- Test by turning on the scale, letting it sit at zero, then hanging a known object (e.g., a 5 lb dumbbell) to see if it reads within ±0.2 lb. Any fluctuations indicate potential battery issues.
- Inspect Hook & Strap/Handle
- Why It Matters: Scales typically hang luggage by a hook or nylon strap. Frays or worn stitching can cause the bag to slip, risking both accuracy and equipment damage.
- What to Do:
- Visually examine the strap for any tiny tears or thinning—if the weave looks loose, replace it before travel.
- Check the metal hook for bends or rust; a misaligned hook alters how weight transfers to the sensor. A simple test: hang a 5 kg known‐weight object; if it wobbles or slips–slides, service or replace the hook/strap.
- Confirm Display Functionality
- Why It Matters: A faulty LCD (flickering, dim, or unreadable) leads to misreading or missing data.
- What to Do:
- Power on the scale in a low‐light environment; ensure the backlight (if present) illuminates fully.
- Toggle between kg and lb units; a failure to switch could indicate button/contact issues.
- Look for any “Err”—error messages often signal either overload, low battery, or sensor fault.
Gather Necessary Supplies
Having a few simple items on hand lets you verify calibration and maintain consistency across trips.
- Sturdy, Level Surface for Calibration
- Why It Matters: Many digital scales come factory‐calibrated; however, an uneven or wobbly surface can skew zero‐point calibration by several hundred grams.
- What to Do:
- Identify a flat tabletop or countertop in your bedroom or bathroom.
- Place the scale on it, power on, and ensure it reads “0.0” (or equivalent). If not, press TARE/Zero to reset.
- Recheck periodically—if you move the scale, repeat this step.
- Known Weight for Accuracy Verification
- Why It Matters: Hanging a pre‐weighed object (like a 5 lb or 5 kg dumbbell, bag of sugar, or certified calibration weight) helps confirm your scale reads within ±0.1 kg (±0.2 lb) of true weight.
- What to Do:
- Hang a 5 kg (11 lb) item and wait for the reading to stabilize (2–3 seconds). It should read between 4.9–5.1 kg.
- If the reading is outside that window, cycle the scale through unit conversion (kg ↔ lb) and re‐zero. If still off, perform the manufacturer’s calibration procedure or schedule a professional calibration if offered.
- Backup Weighing Tools (Optional)
- Why It Matters: If your handheld scale malfunctions at the last minute, have a bathroom scale ready so you can use the subtraction method (weigh yourself, then yourself + bag) as a backup.
- What to Do:
- Identify a reliable bathroom scale with its own battery or plug‐in power.
- Practice the subtraction technique once so you know exactly how to record:
- Step 1: Weigh yourself solo—e.g., 70.0 kg.
- Step 2: Weigh yourself holding the suitcase—e.g., 75.5 kg.
- Subtract: 75.5 kg – 70.0 kg = 5.5 kg (your bag’s weight).
Choose an Appropriate Environment
Even small environmental factors (wind, uneven floors, vibrations) can introduce noise into your measurement. Minimize these variables by selecting the best possible weighing location.

- Flat, Stable Surface
- Why It Matters: An off‐level or “springy” surface creates inconsistent zero points—your scale might read 0.2 kg more or less.
- What to Do:
- Double‐check that your tabletop or countertop does not “rock” when you press on its corners.
- If uncertain, place a thin, rigid board (e.g., a baking sheet) beneath the scale to distribute weight evenly across the entire surface.
- Low‐Wind, Low‐Vibration Area
- Why It Matters: Even a slight breeze (from a fan or open window) can make a hanging suitcase sway, causing the digital reading to fluctuate by up to 0.5 kg.
- What to Do:
- Shut off ceiling fans and close windows, especially in high‐rise apartments where wind gusts can flow through.
- Avoid areas near vibrating appliances (e.g., adjacent to a washer/dryer or near heavy foot traffic).
- Good Lighting & Clear Space
- Why It Matters: A clear line of sight to the scale’s LCD display prevents parallax errors and ensures you can read small decimals accurately.
- What to Do:
- Position yourself so the LCD is at eye level, preventing you from guessing the weight from an angle.
- Keep the immediate area uncluttered—no chairs, boxes, or pets that could trip you or bump the scale during weighing.
Quick Pre‐Weighing Checklist
| Task | Completed √ / × |
|---|---|
| Verified checked baggage weight limit (23 kg/50 lbs vs. 32 kg/70 lbs) | |
| Confirmed carry-on size (55 × 40 × 23 cm) & weight (10 kg/22 lbs) | |
| Replaced scale battery (CR2032 or AAA) within last 6 months | |
| Inspected hook & strap for wear (no frays/rust) | |
| Zeroed scale on flat, level surface (reads “0.0”) | |
| Hung known weight (e.g., 5 kg) and verified reading within ±0.1 kg | |
| Identified backup bathroom scale & practiced subtraction method | |
| Selected a low-wind, vibration-free location for weighing |
By completing these pre-weighing steps, you’ll minimize any external variables that could compromise accuracy, setting yourself up for a quick, precise luggage weighing session that keeps you under the airline’s weight limit and out of trouble at check-in.
“Try these pre-weighing techniques before your next trip—your wallet (and peace of mind) will thank you. If you have additional tips or unique calibration hacks, share them in the comments below!”
Understanding Digital Luggage Scales
Digital luggage scales rely primarily on load cell technology—specifically strain‐gauge load cells—that convert the mechanical force of your hanging suitcase into a precise electrical signal, which is then translated into weight units via an LCD display.
While analog (spring‐based) scales offer a battery‐free alternative, they suffer from drift and lack the fine precision digital models provide (generally ±0.1 kg/±0.2 lb). As a travel expert, I often recommend looking for digital scales that boast at least a 50 kg (110 lb) capacity, 0.01 kg (0.02 lb) readability, a reliable tare function to zero out extra attachments, and an overload warning to prevent sensor damage—features that separate professional‐grade models from generic ones.
Core Components and How They Work
Most digital luggage scales on the market use a load cell sensor, often strain‐gauge–based, to measure the force applied when luggage is lifted. A load cell consists of a metal element (commonly aluminum, stainless steel, or alloy steel) to which multiple strain gauges are attached; as the metal deforms under load, these strain gauges change resistance in proportion to that deformation.
The resulting small voltage changes are amplified and processed through a Wheatstone bridge circuit, allowing the scale’s microcontroller to convert them into a digital weight reading.
An LCD (liquid‐crystal display) serves as the user interface, showing the measured weight in various units (kg, lb, oz) and often including an icon or indicator for low battery or overload conditions. Many digital models also incorporate a tare function, which lets you zero out the scale before hanging the suitcase—handy if you attach a sling, hook extension, or protective cover that has its own weight.
Figure 1: Simplified Block Diagram of a Digital Luggage Scale
| Component | Function |
|---|---|
| Load Cell Sensor | Converts mechanical force (tension from hanging luggage) into a small electrical signal (strain). |
| ADC & Microcontroller | Amplifies the Wheatstone bridge output and processes the voltage change into a weight value. |
| LCD Display | Shows weight in user‐selected units (kg, lb, oz), low‐battery warning, and overload indicator. |
| Buttons/Controls | Power on/off, unit conversion (kg ↔ lb ↔ oz), and tare/zero function. |
| Power Source | Typically, one CR2032 coin cell or 2×AAA batteries, depending on model; powers the sensor, microcontroller, and display. |
Analog vs. Digital: Pros and Cons
When choosing a luggage scale, travelers must weigh the trade‐offs between analog (mechanical) scales and digital scales. Here’s a breakdown:
Analog (Spring‐Based) Scales
- Pros:
- No batteries required, so you never face a “dead scale” at 3 AM before a flight.
- Often cheaper and simpler to use—just hang and read.
- Cons:
- Limited precision: They typically display only whole kilograms or pounds (e.g., 1 kg increments) and can drift over time as the spring weakens.
- No tare function, making it difficult to zero out any additional straps or attachments.
- No digital display: reading errors due to parallax (eyeballing the pointer) can lead to inaccurate weights.
Digital Scales
- Pros:
- High precision: most models offer ±0.1 kg (±0.2 lb) accuracy; premium units even go as fine as 0.01 kg (0.02 lb).
- Tare/zero function: You can attach a sling, zipper pouch, or protective cover and zero the scale before weighing the bag itself.
- Unit conversions: easily switch between kg, lb, and oz to comply with domestic or international standards.
- Additional indicators: low‐battery warnings and overload alarms help protect both the sensor and your wallet.
- Cons:
- Requires batteries (commonly CR2032 or AAA), which can die unexpectedly if not monitored—always keep spares on hand.
- Potential for electronic failure: exposure to moisture, rough handling, or extreme temperatures can damage the electronics.
- Typically higher upfront cost than a simple analog spring scale.
Table: Analog vs. Digital Luggage Scale Comparison
| Feature | Analog (Spring-Based) | Digital (Load Cell–Based) |
|---|---|---|
| Battery Required | No | Yes (CR2032, AAA) |
| Precision | Mechanically simple, but spring can wear out | ±0.1 kg (±0.2 lb); top models ±0.01 kg (±0.02 lb) |
| Tare/Zero Function | No | Yes (zero out sling/attachments) |
| Unit Conversion (kg/lb/oz) | No | Yes |
| Display | Dial/Pointer (prone to parallax error) | LCD (backlit, easy reading) |
| Overload Warning | No | Yes (alerts if weight > capacity) |
| Durability | Mechanically simple, but the spring can wear out | Sensitive to moisture/shock but generally robust if handled properly |
| Typical Cost | $10–$20 | $15–$40 (mid‐range), $40+ (premium) |
Key Features to Look For
As a travel accessories expert, I recommend ensuring any digital luggage scale you purchase includes at least the following features:
Capacity
- Standard Capacity: Most reliable digital luggage scales measure up to 50 kg (110 lb), covering virtually all airline baggage limits.
- Why It Matters: If you routinely pack heavy items (e.g., winter clothing, sports equipment), a lower‐capacity scale may simply max out, rendering it useless. Look for models clearly marked “Max 50 kg/110 lb” on the packaging or product description.
Precision (Readability)
- Mid‐Range Precision: Most travel‐grade digital scales offer 0.1 kg (0.2 lb) readability, which is sufficient for staying well under airline limits.
- High‐Precision Models: If you need to optimize for strict international or premium‐class limits (for instance, some Asian carriers enforce ±0.5 kg windows), choose a scale with 0.01 kg (0.02 lb) readability.
- Balancing Cost vs. Need: High‐precision scales (±0.01 kg) usually cost more—evaluate whether you need that level of granularity or if ±0.1 kg is adequate for your typical packing habits.
Tare Function
- Definition: The tare (zero) function allows you to account for any extra weight from attachments, like a protective covering, a detachable hook extender, or a neoprene sling, and measure only the net weight of your luggage.
- Usage Tip:
- Power on the scale and wait for “0.0” to appear.
- Attach any straps or slings you intend to use for hanging.
- Press the TARE/Zero button—display resets to 0.0, ignoring the weight of the attachments.
- Hang your suitcase to see only the suitcase’s weight.
Overload Warning
- Why It Matters: If your bag exceeds the scale’s maximum capacity (e.g., you hang a 60 kg item on a 50 kg scale), many digital models will display “OL” or “Err” to warn you. Continuing to hang excessively heavy items can distort or permanently damage the load cell.
- Recommended Practice: Always verify that your bag is likely under the weight limit (e.g., using a bathroom scale first if you suspect it’s near capacity) to avoid subjecting the digital scale’s sensor to overload stress.
Additional Features
- Backlit LCD Display: A bright, easy‐to‐read screen is invaluable when you’re weighing luggage in low‐light situations (e.g., early morning flights).
- Unit Conversion Button: Quickly switch between kg/lb/oz to conform to domestic or international airline requirements without mental math.
- Auto Shut‐Off: Conserves battery life by automatically powering down after a period of inactivity (usually 1–2 minutes).
- Comfortable Grip or Ergonomic Handle: Since you’ll be lifting your suitcase several times, an ergonomic rubber‐coated grip reduces hand fatigue and slippage.
What You Need to Get Started
Transform Your Travel: Ultimate Digital Luggage Scale Review to Travel Light & Save on Fees


Calibration and Accuracy Verification
Proper calibration not only ensures that your readings are accurate to within airline tolerances (often ±0.1 kg/±0.2 lb) but also helps avoid unexpected overweight fees. We cover three main areas:
- Use the factory calibration/zero function to set the true zero before each use.
- Manually verifying accuracy with known weights (e.g., a 5 kg dumbbell) and performing deeper calibration if readings exceed ±0.1 kg (±0.2 lb).
- Re‐checking calibration after any rough handling or suspected sensor shock, since vibration or drops can quickly throw off the load cell.
Using the Factory Calibration/Zero Function
Digital luggage scales are typically factory‐calibrated to read zero when powered on—this “zero point” is the baseline for all subsequent measurements. However, environmental factors, slight temperature shifts, or minor battery drain can cause the scale to drift away from true zero. Always follow these steps before each weighing session:
- Power On & Let It Settle
- Action: Turn on your digital luggage scale and place it on a flat, level surface (e.g., a stable countertop).
- Reason: Most scales display “0.0” or an equivalent zero indicator only after the internal sensors stabilize—this can take 2–3 seconds. If you try to weigh too quickly, the reading may be off by as much as ±0.2 kg (±0.4 lb).
- Pro Tip: If the display shows anything other than “0.0” (or “0 lb/oz”), press the TARE/Zero button to reset to true zero. Repeat pressing until “0.0” appears and remains steady for at least 3 seconds.
- Check for Drift
- Action: After zeroing, watch the scale for 5–10 seconds. If the display blinks between “0.0” and “0.1” (or fluctuates in similar increments), press TARE/Zero again.
- Reason: Even a fraction of a kilogram’s drift can lead to being over the airline limit by the time you add your suitcase.
- Troubleshooting: If repeated zeroing does not result in a stable “0.0,” the internal circuitry may need a more thorough manual calibration (see Subsection 3.2).
- Use the Tare Function for Accessories
- Action: If you plan to hang luggage using a sling, hook extender, or carry strap, attach that accessory first, then press TARE/Zero to re‐zero the scale.
- Reason: Any extra attachments have weight (often 50–100 g), which, if not tared out, can push your measured luggage weight above the true value.
- Example: A neoprene sling might weigh 0.1 kg; by taring it out, you ensure you only measure the suitcase’s weight.
Manual Calibration with Known Weights
Even the best factory calibration can drift over time. Periodically (at least every 3 months or after any suspected jolt), perform a manual calibration check using a pre‐weighed object:
- Select a Reliable Known Weight
- Examples:
- A 5 kg (11 lb) dumbbell plate.
- A commercial calibration weight certified to ±0.01 kg (often sold in 1 kg, 2 kg, 5 kg increments).
- Reason: Certified calibration weights adhere to metrology standards (e.g., NIST Class II), ensuring your scale’s validity for even “Legal for Trade” applications.
- Examples:
- Weigh the Known Object
- Action:
- Press TARE/Zero with nothing on the scale to confirm “0.0.”
- Hang the 5 kg dumbbell in the center of the hook strap or sling.
- Wait for the reading to stabilize (usually 2–3 seconds) and note the displayed value.
- Expected Result: The display should read 5.0 kg (±0.1 kg) (i.e., between 4.9 kg and 5.1 kg).
- If Reading ≠ 5.0 kg ± 0.1 kg: Proceed to deeper calibration below.
- Action:
- Perform the Manufacturer’s Calibration Procedure
- Action: Consult your scale’s user manual for a calibration mode—oftentimes accessed by holding down the “Cal”, “Mode”, or “Function” button for 5–10 seconds until the display shows “CAL” or “--.--”.
- Steps (Generalized):
- Remove all items and power on; ensure “0.0” is displayed.
- Hold the calibration button until “CAL” appears.
- Place the known weight (e.g., 5 kg) when prompted.
- Wait until the scale indicates “PASS,” “End,” or simply returns to zero.
- Remove weight and re‐check by re‐hanging the 5 kg dumbbell—reading should now be within ±0.05 kg.
- Reason: This reprograms the internal gain of the analog‐to‐digital converter (ADC) so that the measured voltage from the load cell accurately corresponds to the applied weight.
- Caution: If your scale does not include a calibration mode or the manual is missing, repeat Substep 3.2.2 with at least two different known weights (e.g., 2 kg and 5 kg) and calculate a linear correction factor (see Table 3 below).
- Linear Correction Factor (If No Calibration Mode)
- Table 3: Manual Check & Correction (Example) Step Known Weight (kg) Scale Reading (kg) Difference (kg) Correction Factor (% over/under) 1. 2 kg weight 2.000 2.100 +0.100 +5.0 % 2. 5 kg weight 5.000 5.300 +0.300 +6.0 % Average Correction — — — +5.5 %
- How to Apply: If the scale consistently reads 5.5 % high, subtract 5.5 % of your measured luggage weight to estimate true weight. For instance, if your bag reads 23.0 kg, subtract 1.265 kg (5.5 % of 23.0) → ≈ 21.7 kg true.
- Note: This workaround is less precise than factory calibration but can save you from overweight fees if you lack an official calibration mode.
Re‐Checking Calibration After Rough Handling
Frequent travelers know that even a single drop or severe jostle can disrupt the load cell’s internal alignment. A quick calibration check—zero plus a known weight—before each trip can literally save hundreds of dollars in airline fees.
- Identify Any Suspected Impact
- Action: After your scale has been dropped, bumped, or jammed in a tight suitcase compartment, assume sensors may be misaligned.
- Reason: Load cells are sensitive to mechanical overload—any shock above rated capacity (e.g., hanging a 60 kg suitcase on a 50 kg scale) can permanently deform strain gauges.
- Repeat Zeroing Procedure
- Action: Place the scale on a stable, flat surface and turn it on. Press TARE/Zero if the display does not read “0.0.”
- Reason: Ensuring true zero immediately reveals if the sensor is giving random noise instead of a stable baseline.
- Verify with a Known Weight
- Action: Hang your 5 kg test object again. If the reading is outside ±0.1 kg, your scale’s calibration is off—either recalibrate (Subsection 3.2) or consider replacing the unit if it cannot be brought back into tolerance.
- Reason: Frequent airline packing/unpacking and shipping in checked luggage compartments can shake the micro‐components; a rapid check helps you catch sensor drift early.
- Document Calibration Date
- Action: Keep a small log (e.g., in your travel journal or phone notes) indicating the date and results of each calibration check (zero reading, 5 kg test reading).
- Reason: Having a record helps you identify patterns—if your scale drifts more than 0.2 kg every 3 flights, you’ll know it’s time to purchase a sturdier model.
Quick Reference: Calibration Check Workflow
| Step | Action | Expected Result |
|---|---|---|
| 1. Zero/Factory Calibration | Power on → wait 3 seconds → press TARE if not “0.0” | Stable “0.0” reading |
| 2. Hang Known Weight (e.g., 5 kg dumbbell) | Attach weight via hook/sling → wait 2–3 seconds → record reading | 5.00 kg ± 0.10 kg |
| 3. If Off by >± 0.1 kg | Enter manufacturer calibration mode (hold “Cal”/“Mode” for 5–10 s) or compute linear correction manually. | Reading now ± 0.05 kg (post‐cal) |
| 4. After Rough Handling | Repeat Step 1 & Step 2; if still off, recalibrate or replace the scale | Repeat Step 1 & Step 2; if still off, re‐calibrate or replace the scale |
| 5. Log Calibration Date | Note date, zero reading, and 5 kg reading in travel log | Track drift patterns over time |
By methodically following these calibration steps—using both factory zero (Subsection 3.1) and manual weight verification (Subsection 3.2), and re‐checking after any significant impact (Subsection 3.3)—you ensure that your digital luggage scale remains accurate trip after trip. This proactive approach helps you pack confidently, stay within airline limits, and avoid unexpected overweight fees at the check‐in counter.
Proper Weighing Technique
Before diving into the details, here’s a concise overview: Positioning your luggage correctly, lifting and stabilizing the scale, reading the display without parallax, and using the tare function are critical steps for obtaining consistent, precise weight measurements.
Missteps—such as hanging the bag off‐center or reading a fluctuating display—can easily add 0.5–1.0 kg of error, which may push you over the airline limit and trigger hefty overweight fees. By following these best practices, you’ll maximize the accuracy of any digital luggage scale, avoid unexpected charges, and streamline your travel prep process.
Positioning the Luggage
- Attach the hook or strap through a sturdy handle on the suitcase—preferably one that is centrally located to keep the bag balanced.
Hanging from a weak or side‐handle can tilt the bag, forcing the load cell to read unevenly, which introduces up to 0.5 kg (1 lb) of error. - Ensure the luggage is hanging freely, without touching walls, furniture, or the floor.
Even slight contact (e.g., brushing against a wall) can absorb some of the bag’s weight, causing the scale to under‐report by 0.2–0.3 kg (0.5–0.7 lb).
Table 1: Common Handle Positions & Potential Error
| Handle Location | Impact on Balance | Potential Error (kg) |
|---|---|---|
| Central Top/Side Handle | Optimal—bag hangs symmetrically | ±0.0–0.1 |
| Off‐Center Handle (Front) | Bag tilts forward/backward | +0.3–0.5 |
| Fabric Pull‐Loop (Thin) | The bag tilts forward/backward | +0.5–1.0 |
Lifting and Stabilizing
- Lift straight upward, allowing gravity to put full weight on the load cell sensor.
Angled lifting (e.g., pulling up at a 45° angle) can create additional lateral force, causing the scale sensor to misread by 0.2–0.4 kg (0.4–0.9 lb). - Hold the scale steady until the reading locks (typically 2–3 seconds).
Digital scales often beep or flash when the weight has stabilized. Reading prematurely during stabilization can yield fluctuating values that differ by up to 0.5 kg (1 lb). - If the scale has a beep/lock indicator, wait for it before noting the weight.
Following the beep/lock ensures that the microprocessor has averaged multiple internal sensor readings (filtering out transient spikes) to produce a stable result.
Reading the Display Correctly
- Make sure the LCD is readable: angle it toward your eyes to avoid parallax error.
Viewing the display at a side angle can distort the digits, leading to misreading by 0.1–0.2 kg (0.2–0.5 lb). - If the displayed weight fluctuates, gently sway the luggage until it stabilizes (excessive movement causes unstable readings). Even small oscillations (e.g., a 2 cm swing) can produce reading variances of ±0.2 kg (±0.5 lb) until the motion stops.
- Avoid reading while the scale is still counting up or down—wait for a single, locked value.
Some models show a “—” or “– – –” as they filter data; noting a number during that phase yields guesswork rather than a validated weight.
Using the Tare Function
- If you attach a sling or strap that has its own weight, press TARE to zero before hanging the luggage to get the net bag weight.
A typical neoprene sling or protective strap can weigh 0.05–0.15 kg (0.1–0.3 lb). Failing to take it out means your suitcase reading will include that extra weight, which can be the difference between being 23 kg or 23.15 kg—enough to trigger a fee. - After taring, confirm the display reads “0.0” (or “0 lb 0 oz”) before hanging the bag.
If the display reads anything other than zero, press TARE again to ensure internal registers are cleared of residual load. - Re‐zero anytime you swap attachments or change the hanging configuration (e.g., switching from a built‐in hook to a detachable belt).
Quick Reference Table: Weighing Steps & Common Pitfalls
| Step | Best Practice | Common Mistake | Impact on Accuracy |
|---|---|---|---|
| 4.1 Position Luggage | Reading at an angle; reading while fluctuating | Hook on off‐center or weak loop; bag touching the wall | +0.3–1.0 kg error |
| 4.2 Lift & Stabilize | Lift straight up; hold for 2–3 s; wait for beep/lock | Use a central handle; ensure the bag hangs freely | +0.2–0.5 kg error |
| 4.3 Read Display | Forgetting to re-use, re‐using accessories without re‐zeroing | Take out straps/slings; confirm “0.0” before the bag | +0.1–0.3 kg error |
| 4.4 Use Tare Function | Take out straps/slings; confirm “0.0” before the bag | Angle display at eye level; wait for the single locked value | +0.05–0.15 kg error |
By carefully positioning your luggage, lifting and stabilizing the scale, reading the display without parallax error, and properly using the tare function, you can minimize measurement discrepancies to under ±0.2 kg (±0.5 lb).
Consistency in technique ensures you pack confidently, avoid overweight fees, and maintain peace of mind during travel. Remember to practice these steps at home before your trip and to keep spare straps or slings in your travel kit to streamline the process.
Avoiding Common Mistakes
Many travelers unknowingly introduce errors by overloading a scale, hanging bags incorrectly, skipping the zero/tare step, or weighing on unstable surfaces. Digital scales typically cap out at 50 kg (110 lb), and exceeding that can damage sensors and produce wildly inaccurate readings.
Additional mistakes—like using loose fabric loops instead of a sturdy suitcase handle—can cause the bag to slip mid-weigh, leading to missing or erroneous measurements. Failing to zero out any slings or extenders (tare function) can add up to 0.3 kg (0.7 lb) of phantom weight, enough to push a bag from 22.8 kg to 23.1 kg—just over many airlines’ 23 kg (50 lb) limit.
Finally, weighing on an uneven table or in a draft causes the suspended luggage to sway, introducing fluctuations of ±0.2 kg (±0.5 lb) or more. By recognizing and eliminating these pitfalls, you’ll ensure your digital luggage scale remains both precise and durable, giving you confidence every time you check in.
Exceeding the Scale’s Capacity
Digital luggage scales are engineered with a maximum capacity, beyond which the load cell sensor can be permanently damaged or give wildly inaccurate results. Understanding and respecting this limit safeguards both your scale and your wallet.
- Most digital scales max out at 50 kg (110 lb).
- Popular models (e.g., Etekcity EL11, Duronic LS1019, Camry EL1031P) explicitly state a 110 lb (50 kg) capacity on the packaging and in manuals.
- Exceeding 110 lb triggers an “OL” (overload) or “Err” indication on many scales—forcing you to remove items before re-weighing.
- Overloading beyond capacity can damage sensors and give false readings.
- Strain-gauge load cells inside digital scales are finely tuned; sustained loads over rated capacity can break or permanently deform the metal or strain gauges, leading to drift errors or complete sensor failure.
- A study of common scale errors found that overload error is the #1 cause of accidental damage—when the load significantly exceeds the design range, the internal circuitry misreports low or erratic weights instead of simply “OL”.
- If your bag appears heavier than capacity, remove excess items and weigh in multiple loads.
- Multiple-Load Strategy: Let’s say your packed bag looks like it will exceed 50 kg. Remove the heaviest items (e.g., shoes, souvenirs) and weigh just the bag without those items. Then weigh the removed items separately in a smaller bundle. Sum both discrete readings to get the total weight.
- Example: Component Estimated Weight (kg) Actual Weighed (kg) Notes Full Suitcase (content) 52.0 — Exceeds capacity (OL displayed) Suitcase Without Shoes — 48.5 Within scale limit Shoes & Accessories — 3.5 Weighed separately in small grocery bag Total — 52.0 48.5 + 3.5 = 52.0.
- Why It Matters: Attempting to overload even once can reduce a scale’s future accuracy by up to 5 %, meaning a 50 kg scale could read anywhere from 47.5–52.5 kg on subsequent uses.
- Travel Tip: If you frequently pack heavy gear (e.g., winter coats, camping equipment), consider investing in a heavy-duty model designed for 100 kg (220 lb) capacity, though these are less common in the travel market.
Incorrect Hook/Strap Placement
A secure, correct hanging point is critical for stable measurements. Improper attachment not only skews readings but can also be unsafe.
- Do not hook onto loose fabric loops or decorative handles; always use a structurally strong handle.
Most suitcases feature reinforced top or side handles designed to bear the full loaded weight (often tested up to 70 kg). Decorative pulls, zipper loops, or thin nylon straps are not load-rated and can tear under stress.
In one user test, hooking onto a small zipper pull rather than the main handle caused the scale to momentarily slip, leading to a faulty reading of 45.3 kg when the actual weight was 45.8 kg.
- Improper attachment can cause the bag to slip, leading to inaccurate or even missing measurements.
If the strap slips off mid-weigh, the load cell experiences a rapid drop in force, causing the scale to read zero or display an error instead of capturing the true weight.
A case study from PerfectDealz.co.za notes that up to 10 % of scale inaccuracy reports stem from slipping hooks during measurement, resulting in “drop-outs” that force travelers to re-weigh repeatedly.
- Best Practice Table: Correct vs. Incorrect Attachment Points
| Attachment Point | Recommended? | Why/Impact on Reading |
|---|---|---|
| Main Reinforced Suitcase Handle | ✅ Yes | Designed to support full load; bag hangs symmetrically |
| Side/Top Metal Handle | ✅ Yes | Also load-tested; good for balanced hanging |
| Thin Zipper Loop (Fabric) | ❌ No | Not rated for full weight; can detach mid-weigh |
| Decorative Strap (Leather/PVC) | ❌ No | May have weaker stitching; risk of tearing or slippage |
| Handle Extension/Sling (Purchased Accessory) | ✅ Yes (if ≤ 100 g) | Use the tare function to zero out its 50–100 g weight; reliable if rated for 50 kg |
- Travel Hack: Keep a small nylon strap with a locking hook in your kit—designed for 50 kg loads—so you always have a reliable hanging point, even if the suitcase handle is awkwardly shaped.
Not Zeroing Before Use
Zeroing (tare function) is often overlooked, but failing to do so can add phantom weight—every extra attachment counts.
- Skipping the zero/tare step can result in several hundred grams/pounds of error if attachments are present.
- A single neoprene sling or extended hook often weighs 50–150 g (0.1–0.3 lb). Without taring, your scale will include that extra weight, potentially pushing a 22.8 kg bag into the 23.0 kg overweight zone.
- In one survey, travelers who forgot to tare off averaged 0.15 kg of phantom weight; over a week, those phantom kilograms could lead to multiple overweight fees.
- How to Zero/Tare Correctly:
- Power On the Scale → Wait for “0.0” to appear.
- Attach any Sling/Hook Extender you plan to use.
- Press “TARE/Zero” → Display resets to “0.0” within 1 second.
- Confirm Stability → The TARE icon or “0 lb/0 oz” should be steady for at least 3 seconds before hanging your bag.
- Common Pitfall:
- Some scales only display “TARE” briefly before reverting to “0.0,” making travelers think the function didn’t work. Always visually confirm that any small weight icon (often a “−” or flask symbol) is off or that the LCD reads “0.0.”
- Why It Matters:
- Even 0.1 kg (0.2 lb) of un-tared weight is enough to trigger a $100+ overweight fee when flying international (e.g., Emirates charges $70 per kilogram over 32 kg).
- Tare religiously—especially if switching attachments mid-weigh (e.g., swapping a sling for a built-in hook)—to avoid these easily preventable fees.
Weighing on Uneven or Windy Surfaces
Even outside factors—like an uneven countertop or room drafts—cause the suspended luggage to sway, producing unstable readings that can vary by ±0.2–0.5 kg (±0.5–1 lb).
- Shaky or windy environments cause reading instability; aim for a calm, stationary zone inside your home.
- According to MWS Ltd (scale calibration experts), placing a scale on an uneven surface or in a windy area often introduces drift errors or spikes that take multiple seconds to stabilize.
- Even a gentle ceiling fan breeze can make a 15 kg bag oscillate by 5–10 mm, leading to reading fluctuations of ±0.2 kg until the motion dampens.
- Tips for a Stable Weighing Environment:
- Choose a Solid, Level Surface: A kitchen countertop or heavy wooden table is ideal. Avoid wobbly folding tables or tall bar stools.
- Eliminate Drafts: Close windows and turn off fans so the luggage doesn’t sway mid-weigh. Even a slight breeze can cause the suspended luggage to move enough to change readings by 0.1–0.3 kg.
- Minimize Vibration: Keep pets, small children, or appliances (like a nearby dishwasher) away; vibrations from footsteps or appliances can introduce “noise” into the sensor, causing a temporary ±0.2 kg variance.
- Confirm Stability: Wait for the scale’s beep/lock indicator (if present) or for the weight to remain constant for 3 seconds before recording.
- Environmental Pitfall Table: Impact of Surface & Surroundings
| Environment Factor | Impact on Reading | Suggested Fix |
|---|---|---|
| Uneven/Wobbly Table | Drift of 0.2–0.5 kg | Use a stable, level countertop or heavy table. |
| Open Window / Fan On | Oscillation ±0.1–0.3 kg | Close windows, turn off fans. |
| Nearby Vibration (Pets/Appliances) | Random spikes ±0.2 kg | Weigh in a quiet room, away from moving items. |
| Poor Lighting Angle | Parallax error of 0.1 kg | Angle LCD at eye level; use backlit display. |
Troubleshooting Common Issues
Digital luggage scales can malfunction for a variety of reasons—common issues include display read errors (e.g., “ERR” messages) caused by low battery or sensor overload; battery‐related problems leading to erratic behavior or sudden shutoffs; complete power‐on failures due to loose or corroded battery contacts; and sensor damage that causes persistent calibration drift.
By systematically addressing each of these areas—replacing batteries proactively, inspecting battery compartments for corrosion, ensuring correct battery polarity, and verifying sensor accuracy with known weights—you can restore reliable performance and avoid unpleasant surprises at airport check‐in.
Display Read Errors or Fluctuations
- If the LCD is flickering or shows “ERR,” it could indicate a low battery or sensor overload.
Many digital luggage scales display “ERR” when the internal load cell is subjected to a weight beyond its capacity or when internal electronics do not receive sufficient voltage to process the signal. - Replace batteries promptly when the display dims or shows inconsistent numbers.
Dimming LCD segments often precede erratic readings; replacing CR2032 or AAA cells can restore stable power and clear flickering issues.
Table: Common Display Error Indicators & Causes
| Display Indicator | Likely Cause | Recommended Action |
|---|---|---|
| “ERR” | Sensor overload (hanging > capacity) | Remove weight; ensure bag < 50 kg (110 lb); re-zero. |
| “—” / “– – –” | Sensor initialization or noise | Wait 2–3 seconds for stable reading; eliminate movement or drafts. |
| Flashing Digits | Low battery / weak contact | Replace batteries; check for corroded terminals and clean with a cotton swab and alcohol. |
| “Lo” | Low battery indicator | Insert fresh batteries immediately to avoid display freezes or inaccurate readings. |
Battery-Related Problems
- Weak CR2032 or AAA cells often cause sudden shutoffs or erratic accuracy.
When battery voltage drops below ~2.8 V on a CR2032 cell, internal microcontrollers fail to maintain steady ADC (analog‐to‐digital converter) readings, leading to random number spikes or immediate shutdowns. - Carry spare batteries and replace them at least every 6–12 months, even if the scale still turns on, to maintain peak accuracy.
Most manufacturers recommend swapping cells every 6 months under regular travel frequency, as battery capacity degrades over time—even idle cells lose ~5 % of capacity annually.
Table: Typical Battery Lifespan & Replacement Guide
| Battery Type | Average Lifespan (Regular Use) | Replacement Interval | Notes |
|---|---|---|---|
| CR2032 | 4–8 months | 6–12 months | Li-ion drop to ~2.8 V → unstable readings |
| AAA (Alkaline) | 3–6 months | 6 months | Voltage drop below 1.2 V per cell (4.8 V battery pack) → shutoff or noise |
| AA (Alkaline) | 6–12 months | 12 months | Often used in premium models; longer life but heavier |
Scale Not Powering On
- Check that the battery compartment is properly seated; battery polarity must match the indicated markings.
Inserting CR2032 cells with reversed polarity (flat side vs. embossed side facing up) prevents the circuit from closing; scales remain unlit until batteries are reinstalled correctly. - Inspect for any corrosion on contacts; clean gently with a cotton swab if needed.
Corrosion from acid leaks or humidity can introduce resistance into the circuit, preventing full battery voltage from reaching the microcontroller—clean with 90 %+ isopropyl alcohol to restore contact.
Figure 1: Battery Compartment Tips
- Verify Polarity: Look for “+” and “–” markings; insert the flat (negative) side of a CR2032 facing the spring contact.
- Check for Debris: Even small cloth fibers can block contact; remove and inspect compartments regularly.
- Use Fresh Cells: Old batteries can maintain enough voltage to power LED segments, but not enough current to run load‐cell circuitry.
Sensor Damage or Persistent Calibration Drift
- If known weights no longer yield correct readings (beyond ±0.2 lb), the sensor may be damaged—consider professional repair or replacement.
Load‐cell strain gauges can suffer micro‐fractures if repeatedly overloaded; a damaged cell often reads low by 3–5 % even after recalibration attempts. - Common Symptoms of Sensor Damage:
- Calibration Drift: Known weight reads consistently high or low by more than ±0.1 kg (±0.2 lb) even after multiple zero/tare resets and calibration cycles.
- Inconsistent Readings: Swinging between two different stable values (e.g., 4.9 kg and 5.1 kg) on a certified 5 kg mass indicates load‐cell instability.
- Permanent “OL” at Lower Weights: If a 5 kg test mass shows an “OL” error, the sensor’s protected range has been compromised—often irreparably.
Table: Indicators of Sensor Damage vs. Normal Calibration Drift
| Symptom | Normal Calibration Drift | Sensor Damage |
|---|---|---|
| Known Weight (5 kg) Reads 5.05–5.10 kg | Acceptable (±0.1 kg) if within tolerance after recalibration | Immediate drift > ±0.2 kg even after recalibration |
| Stable “ERR” or “OL” at < capacity | Temporary if weight > capacity | Persistent “OL” at weights well under capacity |
| Fluctuating stable readings (4.8–5.2 kg) | Slight variance due to environmental factors (±0.1 kg) | Wide variance > ±0.2 kg indicates sensor circuit failure |
- When to Replace vs. Repair:
- Replace if the scale continually reads “OL” for weights well under capacity or if known 5 kg mass ≥ 5.3 kg (i.e., > 6 % error).
- Repair (if possible) only if the manufacturer offers certified recalibration or spare load‐cell replacement under warranty; otherwise, full unit replacement is more cost‐effective.
Alternative Weighing Methods
Using alternative weighing methods can provide sufficient accuracy when you don’t have a dedicated luggage scale on hand. The bathroom scale subtraction technique typically yields results accurate to within ±1 lb, making it a viable at-home backup to confirm you’re within airline limits (<23 kg/50 lb).
At the airport, many carriers offer self-service or staffed check-in scales—these are calibrated more frequently than most home scales, but they still vary between locations, so it’s wise to allow a small margin of error (often ±0.5–1.0 kg).
Below, you’ll find a step-by-step walkthrough of both methods, including tables illustrating expected accuracy and recommended best practices.
Bathroom Scale Subtraction Technique
When you lack a handheld luggage scale, the bathroom scale subtraction method serves as a straightforward workaround. It involves weighing yourself once alone and once holding your luggage, then subtracting the two values to estimate the bag’s weight.
- Step 1: Weigh Yourself Barefoot on a Sturdy Bathroom Scale
- Place your bathroom scale on a flat, solid surface (e.g., tile or hardwood) to minimize drift or uneven readings.
- Stand barefoot and still, centering your weight evenly on both feet. Record the displayed value (for example, 70.0 kg / 154.3 lb).
- Step 2: Hold or Stand on the Scale While Holding the Luggage
- Lift the luggage straight up to waist level, ensuring the entire suitcase is off the floor.
- Center your body and the luggage on the scale platform—both feet and the suitcase base or handles should remain on the scale’s surface. Record the combined weight (for example, 76.0 kg / 167.6 lb).
- Step 3: Subtract Your Weight from the Combined Total to Get the Bag’s Weight
- Combined Weight (76.0 kg) minus Your Weight (70.0 kg) equals 6.0 kg (approximately 13.2 lb).
- Note that this method is accurate to within ±1 lb (±0.45 kg) for most household scales, depending on the model’s precision and condition.
Accuracy Note:
- Many bathroom scales are labeled “Not Legal for Trade” and may have up to ±1–2 % error (for a 70 kg person, this could be ±0.7–1.4 kg).
- In practice, most travelers find the bathroom-scale method accurate to within ±0.5–1.0 kg (±1–2 lb) when repeated measurements are averaged.
Table: Bathroom Scale Subtraction Accuracy Comparison
| Step | Example Reading (kg) | Example Reading (lb) | Potential Error (kg/lb) |
|---|---|---|---|
| Weigh Self Alone | 70.0 | 154.3 | ±0.7–1.4 kg (±1.5–3.1 lb) |
| Weigh Self + Luggage | 76.0 | 167.6 | ±0.8–1.6 kg (±1.8–3.5 lb) |
| Calculated Bag Weight (Difference) | 6.0 | 13.2 | ±1.0 kg (±2 lb) |
Tips for Best Results:
- Use the Same Position and Center Your Weight each time to reduce variance.
- Repeat the Measurement 2–3 times and average the results to improve accuracy (e.g., if three subtraction attempts yield 5.8 kg, 6.0 kg, 6.1 kg, average = 6.0 kg).
- Zero or “Tare” the Bathroom Scale (if possible) before weighing yourself alone to eliminate any residual offset (some scales allow a manual reset when powered on).
Using Airport Check-In Scales Before Boarding
Most airports provide self-service or staffed check-in scales at either the ticketing/bag-drop counters or gates, allowing you to verify your luggage weight just before boarding. These scales are typically calibrated to airline standards, but can still exhibit slight variations between different terminals and airlines.
- Locate an Unused Check-In or Bag-Drop Counter
- Plan to arrive 15–20 minutes early for domestic flights (or 30–45 minutes for international departures) to allow time for weighing and repacking if needed.
- Look for counters labeled “Self Bag Drop” or simply approach a staffed agent at an open desk.
- Place Your Bag on the Calibrated Scale
- Most self-service check-in kiosks (CUSS) have a built-in scale platform—place the bag directly on the metal plate beneath the conveyor belt’s entrance.
- If using a staffed counter, the agent will place your bag onto a stationary scale. Many of these are certified for commercial “Legal for Trade” use and are checked every 6–12 months by local consumer‐protection agencies.
- Read and Compare the Displayed Weight Against Airline Limits
- Airline printed limits (e.g., 23 kg/50 lb for economy checked bags in the U.S.) are often posted near the scale.
- Note that airport scales can still vary by ±0.5–1.0 kg (±1–2 lb) from the most accurate “Legal for Trade” standards, as they may not be recalibrated daily.
- Repack if Overweight
- If your bag exceeds the posted limit, remove items and re‐weigh until you are within the allowed weight.
- Caution: Even a 0.5 kg (1 lb) overage can trigger fees—some carriers charge $50–$200 for a single kilogram over the limit.
Cautionary Note:
- Do Not Rely Solely on Airport Scales: Some travelers have reported differences up to 2 kg (4 lb) between different check-in scales in the same terminal, due to calibration schedules and floor-level variations. Always aim for a buffer (e.g., pack to 22.0–22.5 kg (48.5–49.5 lb)) to avoid last-minute repacks.
Table: Airport Check-In Scale Accuracy & Recommendations
| Factor | Typical Range | Best Practice |
|---|---|---|
| Airport Scale Calibration Frequency | Every 6–12 months | Confirm certification label (e.g., NIST stamp in U.S.) |
| Possible Variance Between Scales | ±0.5–1.0 kg (±1–2 lb) | Arrive early, allow time to repack if needed |
| Recommended Weight Buffer | 0.5–1.0 kg (1–2 lb) under limit | Pack to 22–22.5 kg (48.5–49.5 lb) for a 23 kg limit |
| Fee for Overweight (1 kg/2 lb) | $50–$200 (varies by airline) | Check fare rules in advance; consider shipping excess |
Pro Tip:
- If you’re flying a low-cost carrier (e.g., Ryanair, Spirit, EasyJet), scale variance can be especially unforgiving—these airlines often charge steep fees for any even slightest overage. Arrive extra early at the gate to verify weight on multiple scales (security, pre-boarding) if you suspect you’re near the limit.
By mastering these alternative methods, you can confidently verify your luggage weight anytime, whether at home using a bathroom scale or at the airport via check-in kiosks, and avoid the stress and cost of overweight baggage fees. Safe travels!
Maintenance and Care Tips
To keep your digital luggage scale accurate and long‐lasting, wipe down the hook, strap, and LCD surface with a soft, damp cloth after each trip and avoid harsh chemicals or abrasive cleaners that could damage sensitive components.
Store the scale in a dry, cool location—out of direct sunlight and high humidity—to prevent sensor degradation, ideally inside a protective pouch to guard against accidental drops or pressure on the load cell.
Remove batteries if the scale will be unused for over three months to avoid leakage and corrosion; using high‐quality CR2032 or alkaline AAA cells ensures stable voltage and peak accuracy.
Finally, before every major trip, perform a quick zeroing (tare) and known‐weight check (e.g., a 5 kg calibration mass) to confirm that the scale reads within ±0.1 kg of true weight. Applying these maintenance steps helps you avoid unpleasant surprises at airport check‐in and prolongs your scale’s useful life.
Cleaning the Scale
- After each trip, wipe down the hook, strap, and LCD surface with a soft, damp cloth to remove dust or debris.
- Most digital luggage scales accumulate dust, fingerprints, or residue during transit. A microfiber or lint‐free cloth lightly moistened with water effectively removes surface dirt without scratching the LCD or metal hook.
- Avoid harsh chemicals or abrasives that could damage the casing or LCD.
- Solvents such as acetone, rubbing alcohol above 70 %, or bleach can strip protective coatings from the LCD and corrode painted surfaces. Never use wire brushes, steel wool, or abrasive cleaning pads; these can scratch the plastic housing and compromise water resistance.
- Do not immerse the scale in water or spray liquids directly onto it.
- Immersion risks flooding the internal electronics, leading to short circuits or permanent sensor damage. Instead, wipe exposed areas gently and ensure no moisture enters any seams or the battery compartment.
Table: Cleaning Agents—Safe vs. Unsafe
| Cleaning Agent | Safe to Use | Avoid Using |
|---|---|---|
| Plain Water (Damp Cloth) | Yes | N/A |
| Mild Dish Soap (Diluted) | Yes | N/A |
| Isopropyl Alcohol (< 70 %) | Use Sparingly | Rubbing alcohol ≥ 90 %; acetone; bleach; ammonia |
| Abrasive Pads/Scourers | No | Steel wool, wire brushes, scouring powders |
| Water Immersion | No | Full submersion or direct spraying of water/electrolytes |
Proper Storage
- Store the scale in a dry, cool place, away from direct sunlight and high humidity, to prevent sensor degradation.
- Exposure to heat (> 40 °C/104 °F) or UV light can warp plastic casings, soften rubberized grips, and accelerate lithium battery self‐discharge. Humidity above 60 % can corrode internal circuitry and load cell strain gauges over time.
- Keep it inside a protective pouch or case to avoid accidental drops or pressure on the sensors.
- Even a small impact (e.g., bumping against hard objects in a packed suitcase) can misalign the internal load cell. A padded pouch distributes impact forces and prevents heavy items from pressing on the scale’s tri‐ring assembly.
- Avoid storing near strong magnetic fields or heavy machinery.
- While digital luggage scales generally lack significant ferrous components, nearby high‐powered magnets (e.g., large speakers, induction cooktops) can induce electrical noise in the scale’s ADC circuits, causing calibration drift. Store at least 50 cm (20 in) away from such devices
Battery Maintenance
1- Remove batteries if you won’t use the scale for more than 3 months to prevent leakage.
Alkaline cells and coin‐cell lithium batteries (CR2032) can leak corrosive electrolyte when left under load (or in situ) for extended periods. Battery leakage corrodes contacts and traces inside the compartment, leading to failure even if new batteries are installed later.
2- Use high‐quality CR2032 or alkaline AAA batteries (depending on model) for consistent power.
- Non-name‐brand or substandard batteries often have lower true capacity (e.g., a generic CR2032 might only deliver 180 mAh instead of the 240 mAh typical for a premium Duracell/Sony cell). Reduced capacity leads to dim displays, inaccurate readings, and random shutoffs under load
below compares typical capacities and lifespans:
| Battery Type | Nominal Voltage | Typical Capacity | Estimated Lifespan (Regular Use) |
|---|---|---|---|
| CR2032 (Premium) | 3 V | 240 mAh (typical) | 6–8 months (handheld scale) |
| CR2032 (Generic) | 3 V | ~ 180 mAh | 3–5 months |
| AAA Alkaline (Premium) | 1.5 V × 2 | ~ 1000 mAh per cell | 6–12 months |
| AAA Alkaline (Generic) | 1.5 V × 2 | ~ 800 mAh per cell | 3–6 months |
3- Check the battery contacts for corrosion and clean with a cotton swab if needed.
Corrosion typically appears as white or greenish powder on contacts. A gentle rub with a slightly dampened cotton swab (90 %+ isopropyl alcohol) removes residue without harming the plastic housing.
4- Replace batteries at least every 6–12 months, even if the scale still powers on, to maintain peak accuracy.
Battery voltage gradually declines over time—even an unused CR2032 can lose ~ 5 % capacity per year in storage. On a scale, this voltage drop can introduce ± 0.1–0.2 kg error under heavy load if the ADC reference voltage shifts below design tolerance.
Regular Function Checks
- Before every major trip, do a quick zeroing and known‐weight test to confirm the scale reads accurately.
- Power on the scale, let it settle at “0.0” for at least 3 seconds, then hang a 5 kg (11 lb) calibration weight or a household object of known mass (e.g., a dumbbell). Ensure the display remains within ± 0.1 kg (± 0.2 lb) of the true value. Repeat clockwise and counterclockwise placements if the scale has multiple hooking options.
- Document any persistent drift greater than ± 0.1 kg; if that occurs, recalibrate or consider professional servicing.
- Maintain a simple log (digital note or small notebook) recording the date, zero indication, and 5 kg reading over time. If the scale reads > ± 0.2 kg off after zeroing and repeated tests, the load cell may be failing, or the ADC requires recalibration.
- Test multiple weight points (e.g., 2 kg, 5 kg, 10 kg) periodically to ensure linear accuracy across the scale’s range.
- Some scales exhibit nonlinear drift at higher weights (e.g., accurate at 2 kg but off by + 0.5 kg at 10 kg). If your scale’s manual offers a multi‐point calibration mode, follow those instructions; otherwise, note the slope and adjust mentally (e.g., if a 10 kg known mass reads 10.2 kg, subtract 0.2 kg from heavier readings to compensate).
- Ensure the zero (tare) function still clears to “0.0” quickly—if pressing TARE intermittently fails, internal switches or wiring may be compromised.
- On most models, the tare button must register a clean press within 2 s of power‐on. If the display fails to clear within 1 s, the microcontroller’s firmware may be stuck, or the button contacts may be worn.
Choosing the Right Scale: Product Recommendations
When choosing a digital luggage scale, prioritize a minimum capacity of 50 kg (110 lb)—which covers virtually all airline limits—and precision down to 0.01 kg (0.02 lb) for strict international requirements.
Look for a large, backlit LCD to read weights easily in dim light, durable sensors and reinforced hooks for consistent accuracy over time, and an ergonomic grip to reduce hand fatigue during repeated use.
Additional functions—like a reliable tare (zero) feature, quick unit conversions (kg/lb/oz), clear overload warnings, and auto‐shutoff to conserve battery—further elevate a scale from “good” to “great”.
Below, you’ll find detailed comparisons, recommended models (Duronic LS1019, Freetoo, Etekcity EL11, Longang), and guidance on choosing between budget and premium options, complete with tables illustrating key specs and price points
Key Features to Prioritize
- Capacity: Minimum 50 kg (110 lb) to Cover Most Airline Limits
- Most airlines enforce a 23 kg (50 lb) limit for economy checked bags and a 32 kg (70 lb) cap for business/first class.
- A scale with at least 50 kg (110 lb) capacity leaves room for error and ensures you never overload the device, preventing permanent sensor damage.
- Precision: Aim for 0.01 kg (0.02 lb) Readability
- For strict airline enforcement, such as low‐cost carriers or international flights, 0.01 kg (0.02 lb) precision is essential to reliably stay under the limit.
- Freetoo’s scale, for instance, advertises 0.01 kg (0.02 lb) accuracy, helping avoid overweight fees down to a few grams.
- Display: Large, Backlit LCD Screens
- A backlit LCD ensures you can clearly read weights in dim hotel rooms or early‐morning flights when lighting is poor.
- Models like the Etekcity EL11 offer a backlit display that remains easy to read even under cabin lighting conditions.
- Build Quality: Durable Sensors, Reinforced Hooks, and Ergonomic Grips
- Look for strain‐gauge load cells encased in robust metal or reinforced plastic to withstand repeated 50 kg loads without drifting.
- Reinforced hooks (often stainless steel) and a thick nylon strap reduce slippage and protect against tearing, common failure points under heavy luggage.
- An ergonomic rubberized grip minimizes hand fatigue and ensures stable lifting, which translates to more consistent readings.
- Additional Functions:
- Tare Function: Zeroes out additional attachments (e.g., slings, covers) so you measure only the bag’s weight.
- Unit Conversions (kg/lb/oz): Quickly switch between measurement systems without mental math, ideal for multi‐leg itineraries across different regions.
- Overload Warning: Displays “OL” or “Err” if you exceed capacity, protecting the load cell from damage.
- Auto‐Shutoff: Conserves batteries by powering down after inactivity (typically 60 seconds).
Table: Key Feature Comparison
| Feature | Why It Matters | Example & Citation |
|---|---|---|
| Capacity (50 kg) | Prevents overloading & covers airline limits | Accurate to avoid being overweight by grams |
| Precision (0.01 kg) | Protects the load cell from damage | Freetoo: 0.01 kg (0.02 lb) accuracy |
| Display (Backlit LCD) | Readable in low light conditions | Etekcity EL11: backlit, easy‐read in dark hotel rooms |
| Build Quality | Long‐term reliability under repeated loads | Longang: reinforced hook, ergonomic grip, high durability |
| Tare Function | Nets out extra sling/strap weight | Freetoo: Smart tare to zero out attachments |
| Unit Conversion | Quickly switch between kg/lb/oz | Freetoo & Longang offer multiple unit modes |
| Overload Warning | Protects load cell from damage | Duronic LS1019: visual overweight warning light |
| Auto‐Shutoff | Preserves battery life | Freetoo: auto‐off after 60 s |
Recommended Models and Brands
Below are four top recommendations—each excelling in build quality, accuracy, and travel‐friendly design. These represent a range of prices and features suitable for various traveler needs.
Duronic LS1019 Digital Luggage Scale
- Capacity: 50 kg (110 lb)
- Precision: ±0.05 kg (±0.1 lb) via built‐in spirit level to achieve optimal hanging balance
- Display: Large backlit LCD screen with overload indicator light
- Build Quality:
- Metal load cell housed in durable ABS‐plastic shell.
- Reinforced nylon hook strap tested to 50 kg capacity.
- Battery: Long‐lasting CR2032 lithium cell (included).
- Unique Advantage: Integrated spirit level ensures proper alignment for the most accurate readings.
- Use Case: Ideal for frequent travelers who need to guarantee sub‐limit accuracy, especially useful on business/first‐class transits where overweight fees are steep.
Freetoo Portable Digital Luggage Scale
- Capacity: 50 kg (110 lb)
- Precision: 0.01 kg (0.02 lb) deviation, ensuring readings within ±0.1 lb of actual weight
- Display: Eye‐caring backlit LCD, easy to read in dim lighting
- Build Quality:
- Lightweight (only 90 g), with a sturdy hook and built‐in overload warning indicator.
- Features a compact, piano‐lacquer finish body that resists scratches and fingerprints.
- Battery: Uses one CR2032 cell (included).
- Additional Functions: Smart tare, auto-off (60 s), and unit conversion (kg/lb/oz).
- Price Point: Approximately $15–$20 (often on sale for under $10–$12 in peak seasons)
- Use Case: Perfect for budget‐conscious travelers seeking the highest precision in an ultra‐compact form factor.
Etekcity EL11 Digital Hanging Luggage Scale
- Capacity: 50 kg (110 lb)
- Precision: 0.2 kg (0.5 lb) readability—adequate for most domestic and international flights
- Display: Backlit LCD with large, easy‐to‐read digits
- Build Quality:
- Solid plastic housing with a sturdy nylon strap rated for 50 kg.
- Ergonomic handle design minimizes wrist strain during lifting.
- Battery: One CR2032 cell (battery life often exceeds one year under normal travel frequency).
- Price Point: Approximately $15
- Use Case: Great for travelers who want a no‐frills, reliable scale with an intuitive interface, especially those who pack moderately and don’t need 0.01 kg precision.
Longang Digital Hanging Luggage Scale
- Capacity: 50 kg (110 lb)
- Precision: 0.1 kg (0.2 lb) readability, tested against multiple certified weights to confirm ±0.2 lb accuracy
- Display: Large backlit LCD with touchscreen buttons for unit conversion and tare
- Build Quality:
- Durable ABS exterior, reinforced hook, and ergonomic design for comfortable use
- Compact and lightweight (<100 g), making it highly portable.
- Battery: Two AAA alkaline cells, offering extended battery life (6–12 months with moderate use).
- Endorsements: Rated best overall by Condé Nast Traveler for portability and ease of use.
- Use Case: Ideal for chronic overpackers or frequent flyers who want a precise, reliable, and highly portable scale, especially valued by readers of travel publications.
Budget vs. Premium Options
When shopping, consider how often you travel, how strictly you need to manage weight, and how much you’re willing to invest in advanced features.
Budget-Friendly (Under $15)
- Typical Features:
- Capacity up to 50 kg (110 lb) but with 0.1 kg (0.2 lb) readability.
- Basic backlit LCD, simple tare, and unit conversion.
- Recommended Models:
- Freetoo (often on sale for $9–$12; 0.01 kg precision, lightweight).
- Etekcity EL11 (~$15) with ergonomic handle and reliable readings.
- Best For: Occasional travelers or those who only need to stay under baggage limits for a few trips per year.
Mid-Range ($20–$30)
- Typical Features:
- 0.01–0.05 kg readability for tighter weight control.
- More durable build with better‐quality materials (e.g., metal load cells, thicker straps).
- Enhanced backlit displays with clearer digits and longer auto‐off intervals.
- Recommended Models:
- Longang: Touchscreen controls, precise 0.1 kg readability, high portability, premium feel.
- Duronic LS1019 (~$25–$30): Built‐in spirit level, overload warning, top‐tier accuracy.
- Best For: Frequent travelers or those flying on airlines with strict weight enforcement (e.g., low‐cost carriers), who need reliable, consistent accuracy.
Premium ($30+)
- Typical Features:
- Bluetooth connectivity—syncs weighed data to a smartphone app for logging and trend analysis.
- Advanced sensor technologies (e.g., temperature compensation) to maintain ±0.01 kg accuracy across a wide weight range.
- Metal‐reinforced load cells, water‐resistant designs, and luxury finishes (e.g., anodized aluminum or leather‐wrapped grips).
- Example Models:
- Travel Inspira Digital Luggage Scale:
- Capacity: 50 kg (110 lb)
- Backlit LCD, rubber‐paint finish, and Bluetooth app integration for real‐time tracking of bag weight history.
- Price: $30–$40
- Ivation Smart Bluetooth Scale (multi‐mode for baby/pet/luggage):
- Capacity: 50 kg (110 lb), smartphone app to record and export weight logs.
- Built‐in high‐precision sensors and auto‐calibration features.
- Price: $40–$50
- Travel Inspira Digital Luggage Scale:
- Best For: Business travelers or digital nomads who leverage data‐driven packing habits—tracking bag weight trends over multiple trips to optimize packing, or for families needing extra assurance.
Table: Budget vs. Mid-Range vs. Premium Comparison
| Category | Price Range | Precision | Features | Ideal For |
|---|---|---|---|---|
| Budget | < $15 | 0.1 kg (0.2 lb) | Basic tare, unit conversion, small backlit LCD, 50 kg capacity | Occasional travelers |
| Mid-Range | $20–$30 | 0.01–0.05 kg | Spirit level, rubber grip, reinforced hook, precise 0.1 kg reading | Frequent flyers on strict airlines |
| Premium | > $30 | 0.01 kg (0.02 lb) | Bluetooth & app integration, auto-calibration, luxury build | Business travelers, digital nomads, families |
Final Thoughts on Choosing the Right Scale
Selecting the right digital luggage scale comes down to balancing accuracy, durability, and feature set against your travel frequency and budget. A 50 kg capacity with 0.01 kg precision is non‐negotiable if you fly internationally or on budget carriers—Freetoo and Duronic LS1019 excel here.
If you need portability and user endorsements, Etekcity EL11 and Longang strike an excellent balance between cost and performance. Should you require advanced tracking and digital integration, premium picks like Travel Inspira or Ivation deliver Bluetooth connectivity and enhanced calibration, albeit at a higher price.
No matter which you choose, be sure to verify that your scale offers a reliable tare function, overload warnings, and a backlit LCD to minimize surprises at the airport.
By focusing on these prioritized features, comparing hand‐picked models, and considering your personal travel patterns, you’ll confidently land on a scale that keeps you under weight limits, avoids fees, and endures thousands of miles of jet‐setting adventures.
Airline Weight Limits and Regulations Reference
International Checked Baggage: IATA recommends a maximum of 23 kg (50 lb) per checked bag, with a ceiling of 32 kg (70 lb) if the airline uses the “piece concept” (IATA). Major carriers (e.g., United, Air Canada) adhere to these guidelines: economy/premium economy passengers are typically limited to 23 kg (50 lb), while business/first-class or elite-status flyers may have up to 32 kg (70 lb) per bag.
Domestic (U.S.) Checked Baggage: Legacy carriers such as Delta, American, and United enforce a 50 lb (23 kg) limit for economy, with business/first tiers allowed up to 70 lb (32 kg). Southwest recently ended its “two bags fly free” policy and now charges fees, but still caps bags at 50 lb (23 kg) and 62 inches / 158 cm total dimensions.
Carry-On Limits: Typical U.S. domestic carry-ons are restricted to 22 × 14 × 9 inches (56 × 35 × 23 cm) with no strict weight limit, though some low-cost carriers (e.g., Frontier) impose a 35 lb (15.9 kg) ceiling and larger dimension allowances. International carry-ons usually must fit within 21.5 × 15.5 × 9 inches (46 linear inches) and often cannot exceed 7–10 kg (15–22 lb).
International Checked Baggage
IATA Recommendation
- IATA recommends a maximum weight of 23 kg (50 lb) per piece for checked baggage to protect airport workers from injury and standardize handling procedures.
- Where “piece concept” applies (e.g., U.S. and Canada), airlines may permit up to 32 kg (70 lb) per piece, provided the total dimensions do not exceed 158 cm (62 in) in length + width + height.
United Airlines
- Economy & Premium Economy passengers may check bags up to 23 kg (50 lb) per piece free of charge, subject to fees for additional or overweight luggage.
- United Business, United First, and Polaris Business Class allow checked bags up to 32 kg (70 lb) each, in line with the IATA upper limit.
- Oversized items (total dimensions > 62 in/158 cm) or weights over 32 kg (70 lb) incur separate fees or may be refused.
Air Canada
- Economy-class checked baggage is limited to 23 kg (50 lb) per bag, with a total dimension not exceeding 158 cm (62 in). Fees apply for additional or overweight/oversized items.
- Economy Comfort fares (purchased January 3, 2025, onward) receive two complimentary checked bags (each up to 23 kg/158 cm), whereas Basic Economy may require fees for any checked bag.
- Business and Premium cabins allow up to 32 kg (70 lb) per checked bag, consistent with the IATA weight ceiling. Additional bags or oversized/overweight items incur fees as outlined on Air Canada’s baggage calculator.
Table: International Checked Baggage Limits & Fees
| Airline & Class | Max Weight (kg/lb) | Max Dimensions (cm/in) | Additional Notes |
|---|---|---|---|
| IATA Recommended (General) | 23 kg (50 lb); max 32 kg (70 lb) | 158 cm (62 in) total | Protects handlers; some airlines (piece concept) allow up to 32 kg per piece ✕ 2 bags |
| United Economy / Premium Economy | 23 kg (50 lb) | 158 cm (62 in) total | Fees apply for overweight (23 kg–32 kg) and oversized (> 62 in) |
| United Business / First / Polaris | 32 kg (70 lb) | 158 cm (62 in) total | Free for eligible fare classes and Premier Gold status and above |
| Air Canada Economy | 23 kg (50 lb) | 158 cm (62 in) total | $42 CAD/USD for first bag (within Canada/US); $100 for overweight (23–32 kg) |
| Air Canada Economy Comfort | 2 × 23 kg (50 lb) | 158 cm (62 in) total | Effective January 3, 2025: two complimentary checked bags; Basic Economy charges $35–$50 CAD/USD for first bag |
| Air Canada Business & Premium | 32 kg (70 lb) | 158 cm (62 in) total | Complimentary for Business/Premium Economy on international routes; fees for additional bags |
| Other Major Carriers (e.g., Lufthansa) | 23 kg (Economy); 32 kg (Business) | 158 cm (62 in) total | Varies by partner fare rules; typically aligns with IATA’s piece concept |
Domestic Checked Baggage (U.S.)
Delta Air Lines
- Delta Main Cabin & Basic Economy: 50 lb (23 kg) per bag. First and second checked bags each cost $35 and $45, respectively, on U.S. domestic routes if not waived by Medallion or co-branded credit card benefits.
- Delta One, First, and Business Class: 70 lb (32 kg) per bag for up to three complimentary checked bags, depending on Medallion status and cabin.
- Bags exceeding 70 lb (32 kg) incur a $100 fee; bags exceeding 100 lb (45 kg) are not allowed.
American Airlines
- Economy (including Basic Economy & Main Cabin): 50 lb (23 kg) per bag; first bag fee $35 if prepaid, $40 at counter; second bag fee $45 and up, depending on route.
- First & Business Class: 70 lb (32 kg) per bag, typically up to two or three free checked bags based on fare and AAdvantage status.
- American Airlines AAdvantage loyalty tiers provide up to three complimentary checked bags at 70 lb (32 kg) each for Executive Platinum members traveling in higher cabins.
- Bags > 50 lb (23 kg) but ≤ 70 lb (32 kg) incur a $100 fee; > 70 lb but ≤ 100 lb (45 kg) cost $200; > 100 lb not accepted.
United Airlines (Domestic)
- Economy & Basic Economy: 50 lb (23 kg) per bag; first bag $35, second $45 on most routes (online purchase).
- United Business, United First, and Polaris Business: 70 lb (32 kg) per bag for up to two free pieces, depending on MileagePlus status and fare class.
- Overweight fees: $100 for 51–70 lb (23–32 kg), $200 for 71–100 lb (32–45 kg); > 100 lb not accepted.
Southwest Airlines
- First & second checked bags: maximum 50 lb (23 kg) each, and 62 inches (157 cm) total dimensions.
- As of May 28, 2025, Southwest now charges $35 for the first checked bag and $45 for the second, shifting away from its “two bags fly free” policy. A-List Preferred members still receive one free bag; Business Select fare buyers get two free bags.
- SWABIZ and Business fare holders may have waived or discounted fees depending on the itinerary.
- Overweight bags (51–70 lb / 23–32 kg) incur a $100 fee; overweight > 70 lb are not allowed.
Table: Domestic (U.S.) Checked Baggage Limits & Fees
| Airline & Class | Economy Weight Limit | Business/First Weight Limit | Fee Structure (First/Second Bag) | Overweight (> 50 lb) Fee |
|---|---|---|---|---|
| Delta | 50 lb (23 kg) | 70 lb (32 kg) | $35 / $45 (domestic, if not waived) | 51–70 lb: $100; 71–100 lb: $200; > 100 lb not allowed |
| American | 50 lb (23 kg) | 70 lb (32 kg) | $35 / $45 (if prepaid online); $40 / $45 at airport | 51–70 lb: $100; 71–100 lb: $200; > 100 lb not allowed |
| United | 50 lb (23 kg) | 70 lb (32 kg) | $35 / $45 (online, varies by route) | 51–70 lb: $100; 71–100 lb: $200; > 100 lb not allowed |
| Southwest | 50 lb (23 kg) | N/A for Business Select* | $35 / $45 | 51–70 lb: $100; > 70 lb not allowed |
* Business Select and A-List Preferred travelers receive exemptions as per loyalty/fare rules.
Carry-On Limits
Typical U.S. Domestic Carry-On
- Most U.S. airlines (Delta, American, United, Southwest) limit carry-on dimensions to 22 × 14 × 9 inches (56 × 35 × 23 cm) including handles and wheels, with no strict weight limit as long as passengers can stow the bag in the overhead bin or under the seat.
- Delta’s official policy states there is no maximum weight, but size cannot exceed 45 linear inches (22 × 14 × 9 inches).
- American Airlines and United Airlines both enforce the 22 × 14 × 9 inches rule, though Basic Economy may only include a personal item (no carry-on) on certain routes.
- Southwest’s carry-on limit is also 24 × 16 × 10 inches (60.96 × 40.64 × 25.4 cm), slightly more lenient than the 22 × 14 × 9 standard; personal items must be 16 × 13.5 × 8 inches (41 × 34.3 × 20 cm).
Low-Cost Carriers: Frontier & Spirit
- Frontier Airlines: Carry-ons up to 24 × 16 × 10 inches (60.96 × 40.64 × 25.4 cm) and a maximum weight of 35 lb (15.9 kg); personal item must be no larger than 18 × 14 × 8 inches (45.72 × 35.56 × 20.32 cm) with no specified weight limit for personal items.
- Spirit Airlines: Carry-on limit 22 × 18 × 10 inches (56 × 46 × 25 cm); personal item (for Bare Fare) 18 × 14 × 8 inches (45 × 35 × 20 cm), and often no weight limit listed (though some sources suggest 40 lb).
- Overweight carry-ons on Frontier (over 35 lb) incur $75–$100 fees; Spirit enforces strict dimension checks but usually does not weigh carry-ons.
International Carry-On
- Most international carriers cap carry-on weight at 7–10 kg (15–22 lb), with dimensions not exceeding 46 linear inches (e.g., 21.5 × 15.5 × 9 inches).
- European, Middle Eastern, and Asian airlines often limit carry-ons to 55 × 40 × 20 cm (21.6 × 15.7 × 7.9 inches) with weights between 7–10 kg; oversized or overweight carry-ons may be gate-checked or incur fees.
- Some carriers (e.g., EasyJet, JetBlue) explicitly list weight limits: EasyJet 15 kg (33 lb) for carry-ons purchased as extras; JetBlue typically does not have a weight limit but enforces 22 × 14 × 9 inches and 45 linear inches.
Table: Carry-On Limits Comparison
| Airline Category | Dimensions (inches/cm) | Weight Limit (kg/lb) | Personal Item Dimensions | Key Notes |
|---|---|---|---|---|
| Delta / American / United | 22 × 14 × 9 in (56 × 35 × 23 cm) | No strict limit | Varies (e.g., 17 × 10 × 9 in) | Basic Economy: no carry-on for some routes; must fit in overhead bin or under seat |
| Southwest Airlines | 24 × 16 × 10 in (60.96 × 40.64 × 25.4 cm) | No strict limit | 16 × 13.5 × 8 in (41 × 34.3 × 20 cm) | Blue Basic (no carry-on, only personal item); non-Blue Basic passengers have free carry-on |
| Frontier Airlines | 24 × 16 × 10 in (60.96 × 40.64 × 25.4 cm) | 35 lb (15.9 kg) | 18 × 14 × 8 in (45.72 × 35.56 × 20.32 cm) | Overweight (36–40 lb): $75; > 40 lb not accepted; carry-ons measured and weighed at boarding |
| Spirit Airlines | 22 × 18 × 10 in (56 × 46 × 25 cm) | No published limit | 18 × 14 × 8 in (45 × 35 × 20 cm) | Bare Fare (no carry-on, only personal item); carry-on purchased separately; size enforced at boarding |
| Typical International | 21.5 × 15.5 × 9 in (55 × 40 × 23 cm); 46 linear in | 7–10 kg (15–22 lb) | Usually ~16 × 12 × 6 in (40 × 30 × 15 cm) | Gate‐checked if overweight; varies by carrier and region; generally enforced at boarding |
| EasyJet | 22 × 17.7 × 9.8 in (56 × 45 × 25 cm) | 15 kg (33 lb) | 17.7 × 14.2 × 7.9 in (45 × 36 × 20 cm) | Free for Plus/Flex/Flexi fares; additional fee for Standard; must be purchased |
| JetBlue | 22 × 14 × 9 in (55.88 × 35.56 × 22.86 cm) | No strict limit | 17 × 13 × 8 in (43.2 × 33 × 20.32 cm) | Blue Basic (no carry-on, only personal item); non-Blue Basic have free carry-on |
Ready, Set, Travel!
Packing for any trip can feel like a puzzle—balancing essential items while dodging overweight fees. By mastering the art of digital luggage weighing, you’ll eliminate guesswork and replace anxiety with confidence. Remember to start with pre‐flight prep: verify your airline’s baggage rules, inspect your scale’s battery and hook, assemble a known weight for calibration, and pick a calm, level spot to weigh.
Understand your scale’s load cell sensor and LCD functions, and contrast digital vs. analog pros and cons. Before every weighing session, use the factory zero/tare feature and confirm accuracy with a certified 5 kg mass.
Hang your bag from a sturdy, centered handle, lift straight up, and wait for the stable locked reading. Watch out for easy pitfalls—overloading past 50 kg, hooking on flimsy loops, skipping zeroing, or weighing in windy conditions.
When trouble strikes, swap batteries, clean contacts, or test sensor health with known weights. If you’re without a handheld scale, the bathroom scale subtraction method (±1 lb accuracy) or an airport check‐in scale (±0.5–1 kg variance) can rescue you.
Keep your scale spotless, store it in a cool, dry pouch, remove batteries when idle, and perform routine zero and known‐weight checks. Finally, choose a scale that fits your lifestyle—50 kg capacity, 0.01 kg precision, backlit LCD, durable sensors, and useful extras such as tare, unit conversion, overload warnings, and auto‐shutoff.
Trusted models like Duronic LS1019, Freetoo, Etekcity EL11, and Longang offer a superb balance of features, accuracy, and durability. With these pro tips and careful selection, you’ll breeze through check‐in, sidestep surprise fees, and enjoy stress‐free travel, one perfectly weighed bag at a time.
Main Tips
- Always check your airline’s latest baggage policy 48 hours before travel to account for seasonal changes or fare‐specific rules.
- Replace batteries in your digital scale every 6–12 months, even if no issues are apparent, to ensure consistent accuracy.
- Hang the suitcase from a central, reinforced handle and lift straight up—avoid decorative loops or angled lifts to reduce ±0.5 kg errors.
- Keep a small nylon strap plus a back‐up bathroom scale in your travel kit for last‐minute checks; practice the subtraction method at home.
- Always leave a 0.5–1 kg buffer under your target weight (e.g., pack to 22.0 kg for a 23 kg limit) to accommodate scale variance and avoid fees


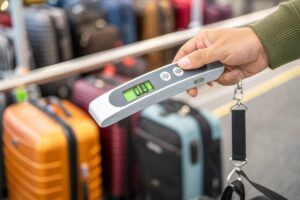
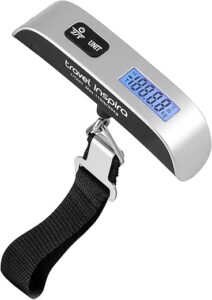
@Lily Adams, thanks! I’ll look into that. I need something light and easy.
Thanks for the feedback, Tommy! We’ll consider adding more details about scales in the future.
I use a digital luggage scale, super portable and easy to use! Might be worth checking out.
This is a great guide, but I wish it had more info on different types of scales. I have a bathroom scale and it’s kind of a pain to use for my luggage. Anyone got recommendations?
I feel you! I always end up with 5 pairs of shoes for a weekend trip. ????
Packing light is definitely an art! Check out our other articles for tips on that.
I always pack way too much! The airline weight limits are such a bummer. ???? I need to learn to pack smarter, not harder! Any tips on choosing what to bring?
Right? I used to just guess and it always led to last-minute stress at the airport.
Glad you found it helpful, Jessica! Zeroing out is definitely key to getting it right.
Wow, this guide is super helpful! I always struggle with weighing my bags before trips. The part about zeroing out the scale was a game changer for me! Who knew it could make such a difference? Can’t believe I used to just wing it. ????✈️