
Unlock the Secrets to Hassle-Free Travel with Digital Luggage Scales
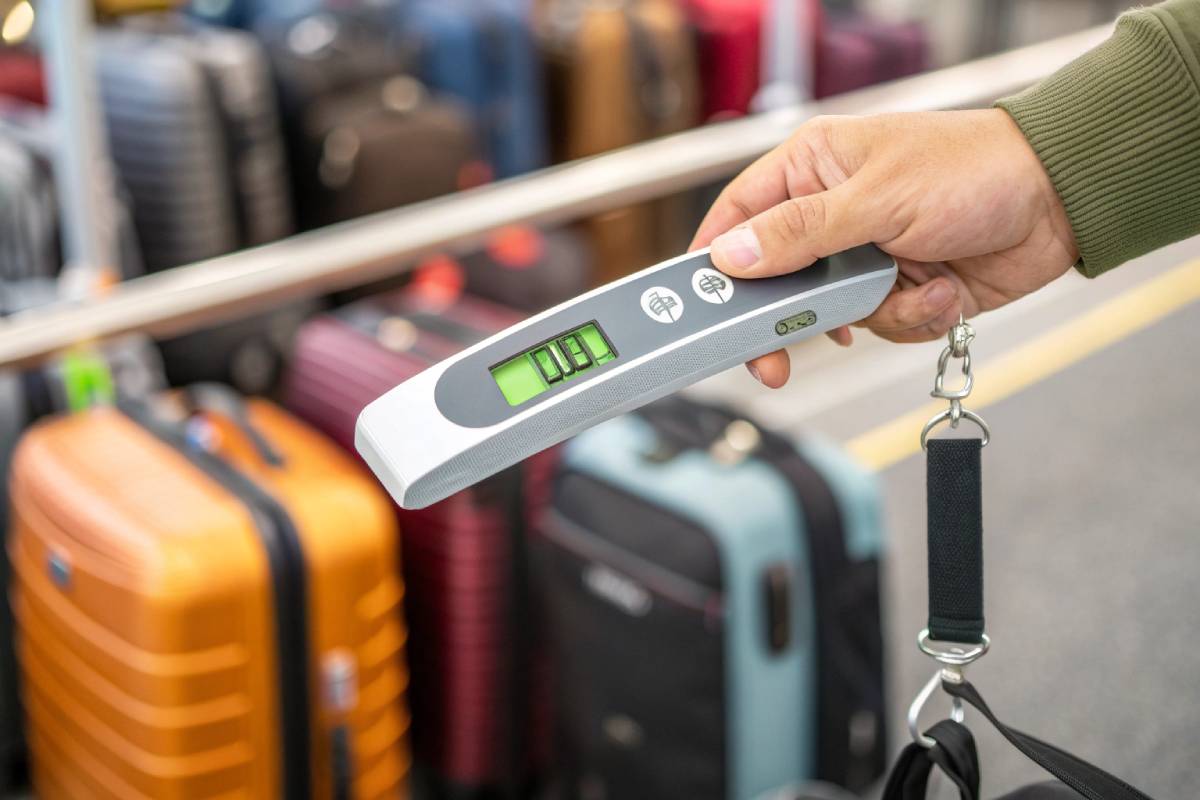
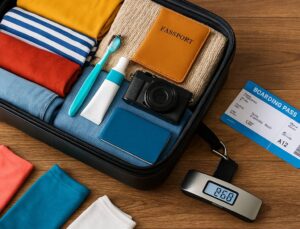
Overweight luggage can saddle you with unexpected fees and travel-day stress, all of which can be avoided by using a digital luggage scale before you head to the airport. Modern digital scales slip into your pocket, are user-friendly, and deliver far more precise readings than a typical bathroom scale.
Even seasoned travelers frequently misjudge how much they’ve packed and end up paying hefty penalties, whereas mastering a few simple steps with a digital scale ensures you stay within airline limits.
By zeroing your scale, lifting your bag smoothly, and double-checking the weight against your carrier’s regulations, you gain confidence that your luggage complies with airline rules—and you breeze through check-in without surprises.
Traveling can be stressful, especially when it comes to managing luggage weight. This guide will empower you to MASTER the use of digital luggage scales, ensuring you never face overweight baggage fees again. Follow these steps for a smooth travel experience!

What You’ll Need to Get Started


Master Your Packing: Weigh Your Suitcase with a Digital Luggage Scale
Pre-Weighing Preparation
Before you even click on “Pack,” setting up a foolproof weighing routine can spare you hefty airline fees and last-minute scrambling. Start by emptying all exterior pockets and sealing every compartment to eliminate hidden weight and prevent spills when lifting your bag.
Next, verify that your digital scale’s batteries are fresh—and pack spares—because low power often translates to erratic readings and “Lo” warnings. If you plan to stow the scale for weeks, remove its batteries to prevent leakage that could foul internal circuitry.
Finally, arm yourself with airline-specific baggage policies: IATA advises a 23 kg maximum for checked luggage (50 lbs), but carriers vary—some allow 32 kg (70 lbs) per piece in premium cabins—so check your airline to know exactly where you stand. With these prep steps in place, you’re primed to weigh accurately and travel stress-free.

Empty & Arrange Your Luggage
- Remove unnecessary items from external pockets. Any loose items—like keys, chargers, or snacks—dangling from side or front pockets can add extra ounces (or grams) that throw off your final weight. Zip or unzip every external compartment and double-check that nothing is poking out before weighing.
- Close all zippers and flaps completely to prevent spillage. An open zipper or flap not only risks liquids or small objects falling out, skewing your reading, but also creates a messy situation at check-in. Ensure each section and pocket is fully sealed before you lift.
Check Scale & Batteries
- Test battery level before each use. Digital scales typically display “Lo” or a blinking battery icon when power is low; using them in this state often yields erratic or inconsistent results. Switch on your scale, wait for “0.0” or “0.00” to appear, and replace batteries immediately if you notice any warning signs.
- Carry spare batteries (preferably CR2032 or equivalent). Scales power themselves on with small button cells that drain quickly when the device is accidentally activated inside a packed bag. Keep at least two fresh cells on hand so you never face an unexpected “Lo” alert at home or in a hotel room.
- Remove batteries during extended storage. If you’re shelving your luggage scale for more than a few weeks—say, between travel seasons—take out the batteries to guard against corrosion and leakage that can destroy delicate internal components.
Know Your Airline’s Weight Allowances
- Understand IATA’s baseline recommendation. The International Air Transport Association (IATA) suggests that checked bags not exceed 23 kg (50.7 lbs) to protect ground staff from strain, with an absolute maximum of 32 kg (70.6 lbs) per piece, and total linear dimensions (length + width + height) capped at 158 cm (62.2 in).
- Review specific policies for major carriers. While 23 kg/32 kg guidelines are common, each airline’s allowances differ by class and route. Below is a snapshot of typical checked-baggage limits (per bag) for some leading global carriers: Airline Economy Class Business/First Class Source American Airlines 23 kg (50 lbs) 32 kg (70 lbs) British Airways 23 kg (51 lbs) 2 × 32 kg (70 lbs) each China Airlines 23 kg (50 lbs) 2 × 32 kg (70 lbs) eachEmirates 23 kg (50 lbs) 2 × 32 kg (70 lbs) each
- Account for fare-type nuances and seasonal variations.
- Carriers often change allowances for holiday seasons (e.g., permitting heavier or extra bags around Christmas or summer breaks), especially for loyalty members. Always confirm the latest baggage policy on your airline’s official site or e-ticket before packing.
- Some “Basic Economy” tickets exclude any free checked bags, while “Economy Standard” and above generally include at least one 23 kg checked bag. Booking class details directly informs your expectations, so never assume your allowance without checking your fare rules.
By clearing external pockets, verifying every zipper is shut, maintaining fresh batteries (and removing them when storing), and aligning your packing with airline-specific limits, grounded in IATA’s guidance, you ensure that your first attempt at weighing will be spot-on. This eliminates surprises at the airport, keeps you within airline regulations, and preserves the calm in your travel experience.
Calibrating & Placing the Scale
Before lifting your luggage to get a weight reading, it’s essential to calibrate the scale correctly and attach it to the right handle—small missteps here can lead to inaccurate readings, forcing you to repack at the airport and pay hefty fees.
First, power on the scale and ensure it reads “0.0” (or “CAL” on some models) before hanging any weight; if it doesn’t, press the “Tare” or zero button to reset the display. Accurate zeroing minimizes systematic errors, especially when switching between kilograms and pounds, so always confirm the display is stable at zero before each use.
Next, secure the scale’s strap or hook to a robust, centralized handle—ideally the top carry handle—rather than side handles that can tilt the bag and skew the measurement.
Avoid frayed or weak handles that might snap under load; if the designated handle looks worn, switch to another reinforced loop or repair it before proceeding.
Finally, lift the scale vertically and keep it horizontal to prevent swinging, which can cause the weight reading to fluctuate until it locks in place.
Zeroing the Scale
- Power on and verify “0.0” or “CAL.” Press the power button to turn on the digital luggage scale and wait for the screen to display “0.0” (some models show “CAL” instead). If the display doesn’t read zero, press the “Z/T” (Zero/Tare) button once to reset it to zero before attaching any luggage.
- Press “Tare” if needed to reset. On many scales, a brief tap of the “Tare” or “Zero” button while the display is reading zero ensures that any residual weight or strap tension is cleared out. This step is crucial if you’ve just removed a previous load and want a fresh baseline for your next measurement.
- Switch between kg and lb accurately. If you need to change units, press the “Unit” button before zeroing. Accurate zeroing is vital because switching units without resetting can introduce rounding errors—always re-zero after toggling between kilograms and pounds.
Attaching to Luggage Handles
- Fasten to a sturdy, centralized handle. Wrap the scale’s strap or hook around the top carry handle of your suitcase—this location supports the bag’s weight centrally and prevents tilting. Avoid hooking to side or retractable handles, as uneven weight distribution can cause the scale to read inaccurately.
- Ensure the connection is secure and horizontal. Clip the hook into the scale’s triangle ring or secure the strap’s buckle. Keep the scale perfectly horizontal (parallel to the floor) to prevent the luggage from swinging; a stable, balanced lift leads to a faster, steadier.
- Avoid frayed or weakened handles. Inspect the handle’s stitching and material—if it looks worn or fraying, use an alternate reinforced strap or carry loop. A brittle handle could snap under the bag’s full weight, not only invalidating your measurement but also risking.
- Hold the scale still until the reading locks. After lifting, keep the scale vertical and avoid tilting or rotating the bag. Once the display shows a stable number (often flashing three times before locking), that is your accurate weight. Release the strap slowly to let the bag settle before removing it from the hook.
By following these calibration and attachment steps—powering on and zeroing correctly, then fastening the scale to a strong, centered handle and keeping it horizontal—you ensure every reading is spot-on, helping you avoid airline overweight fees and travel-day headaches.
Weighing Technique for Accurate Measurements
Before you lift your bag, remember that small technique tweaks—like lifting your luggage smoothly, confirming the scale reads exactly zero, and taking multiple measurements—can dramatically improve accuracy and spare you from surprise fees.
A steady, vertical lift prevents the weight from fluctuating, while switching units (kg ↔ lb) only after zeroing helps avoid rounding errors. Repeating the weighing process twice (or more) and averaging the results ensures consistency; if you don’t have a digital scale, the bathroom‐scale method (weigh yourself empty, then holding the bag and subtracting) offers a reliable backup.
Together, these steps transform a seemingly simple task into a foolproof routine that keeps you within airline limits and travel stress at bay.
Lift Smoothly & Steady
- Lift the luggage slowly until it’s fully off the ground. Jerky or angled lifting causes the weight reading to fluctuate as the scale tries to stabilize under varying forces. A gentle, consistent upward pull minimizes oscillation, enabling the scale’s sensors to settle quickly.
- Hold the scale at eye level and wait 3–5 seconds for stabilization. Once the luggage is suspended, keep the scale perfectly vertical (parallel to your line of sight) and avoid swinging. Most digital luggage scales display weight in increments as small as 0.01 kg (0.02 lbs), but readings only lock in after a few seconds of stability. Holding still for 3–5 seconds, until you see the number stop blinking, ensures you capture the true weight instead of a momentary spike or dip.
Account for Unit Conversion
- Switch units only when the display reads zero. Many digital scales include a “Unit” or “Mode” button to toggle between kilograms (kg), pounds (lb), and sometimes ounces (oz) or grams (g). Toggling without first zeroing can introduce small rounding errors; always press “Unit” before you press “Tare” or confirm the display reads “0.0” to ensure an accurate baseline in your chosen unit.
- Match airline requirements exactly. Different airlines publish their limits in kg or lbs—e.g., most U.S. carriers (like American Airlines) list 50 lbs (23 kg) for Economy, while many European and Asian airlines do the same. Confirming and zeroing in on the same units used by your airline’s baggage policy reduces conversion confusion at check-in.
Multiple Readings for Consistency
- Weigh each bag at least twice and average the values if readings differ by more than 0.5 kg. Environmental factors—like slight hand movement or breeze—can skew a single measurement. If your first reading is 22.8 kg, but the second is 23.3 kg, average them (23.05 kg) or re‐weigh a third time to pinpoint consistency. Many experts recommend allowing a 0.5 kg (1 lb) buffer under the airline limit for safety, so repeated measures help confirm you’re within that margin.
- Use known weights to test your scale’s consistency. Place a small, standardized weight, like a 5 kg exercise weight or a 1-gallon water jug (approximately 3.78 kg), on the scale periodically. If that weight reads 5.0 kg (±0.1 kg) each time, you can trust that your luggage measurements are reliable.
Bathroom‐Scale Fallback Method
- Weigh yourself empty first. Step onto a flat, hard-surfaced digital bathroom scale—not one placed on carpet—and record your body weight to the nearest 0.1 kg (0.2 lbs).
- Weigh yourself holding the luggage. Pick up the bag as you normally would for a luggage scale: hold the handle at chest or eye level to avoid tilting. Record this combined weight.
- Calculate the bag’s weight by subtraction. Subtract your empty‐body weight from the combined weight. For example, if you weigh 68.5 kg solo and 90.0 kg holding the suitcase, the bag is 21.5 kg.
- Allow a 1 kg margin of error. Bathroom scales typically have a ±0.5 kg (±1 lb) tolerance. By leaving a 1 kg (2 lb) buffer below the airline’s max, you account for any inaccuracy and avoid potential overage fines.
By lifting your bag in a controlled, smooth motion, zeroing and toggling units correctly, and taking multiple measurements—or using the bathroom-scale method as a backup—you guarantee accurate, repeatable luggage weights. This disciplined approach not only helps you avoid luggage fees but also instills confidence that you’re fully prepared for check-in, regardless of airline policies or unexpected scale quirks.

Handling Different Luggage Types
Before diving into specific bag types, it’s important to understand that different luggage constructions behave distinctly when weighed.
Hard-shell cases generally have a fixed shape that doesn’t compress under load, while soft-shell bags can yield and distort if not hooked correctly. Backpacks and duffels introduce additional variables—straps, compression systems, and unconventional shapes—that require tailored weighing tactics.
Recognizing these nuances helps you avoid weight misreads, eliminate unnecessary repacking at the airport, and travel confidently within airline limits.
Hard-Shell vs. Soft-Shell Suitcases
- Empty Weight Differences
- Hard-shell suitcases are often constructed from rigid materials such as polycarbonate or ABS, which can result in a slightly higher empty weight compared to soft-shell alternatives.
- For example, a typical 24″ polycarbonate carry-on may weigh around 2.7 kg (5.9 lbs) empty, while a comparable 24″ soft-shell spinner can weigh as little as 2.2 kg (4.8 lbs).
- Impact of Empty Weight on Packing
- Because airlines deduct the bag’s tare weight from your total allowance, choosing a heavier hard-shell model means you have less “paid-for” weight for your items.
- If you’re close to the baggage limit—say 23 kg (50.7 lbs)—a 0.5 kg (1.1 lbs) difference in empty weight can force you to trim packing by nearly a liter of volume or move essentials to your carry-on.
- Compression and Hook Placement
- Soft-Shell Compression Risks: When you hook a soft-shell bag by its top handle, the fabric can compress or fold, creating an uneven load that sometimes reads lower or higher than the true weight.
- Best Hook Point Demonstration: To avoid skewed readings, locate the suitcase’s reinforced “hung handle”—often a reinforced strap sewn into the bag’s internal frame—and loop the scale’s hook through that. This supports the bag’s center of gravity and reduces material give.
- Protection vs. Flexibility
- Hard-Shell Advantages: Polycarbonate and aluminum hard shells protect fragile items like electronics and toiletries from impact damage and inclement weather.
- Soft-Shell Advantages: The malleable fabric of soft-sided suitcases allows you to squeeze in extra layers or souvenirs, as they can expand slightly under pressure.
- Security Considerations: Hard-shell designs often include integrated TSA-approved locks, which deter theft better than soft-shell zippers that can be slashed.
- Seasonal and Destinational Factors
- For rainy or snowy destinations, a hard shell with a waterproof seal keeps contents dry, whereas a soft shell may wick moisture through seams.
- If you’re backpacking or moving through tight European cobblestone streets, a lightweight soft-shell spinner may be more maneuverable than a bulkier hard-shell case.
Backpacks & Duffel Bags
- Strap Alignment for Even Weight Distribution
- Most digital hanging scales feature a single hook or strap; when weighing a backpack, loop the scale’s hook through both shoulder straps (joined) or a single reinforced “haul loop” at the top. This centers the bag’s weight under the scale and reduces lateral tilt.
- Duffel bags often have two carrying handles: join these handles together in a single knot or secure with a small carabiner clip supplied with some scales. This keeps the bag balanced, preventing one side from dipping during lift.
- Compression Straps and “Air Pockets”
- Top Compression Straps on Backpacks: Before weighing, tighten all compression straps to eliminate slack and reduce internal “air pockets” where loose clothing can shift. This prevents under-reading—a common issue when bulk items compress unevenly.
- Duffel Bag Tightening: For unstructured duffels, cinch the main zipper fully and fasten any side straps. If the duffel has a roll-top closure, roll tightly and buckle firmly to ensure a taut shape that distributes weight evenly under the scale’s hook.
- Weight Distribution Techniques
- Place heavier items closest to the bag’s back panel (for backpacks) or at the bottom center (for duffels) so the load sits directly under the scale’s hook. A centered load reduces pendulum motion and allows the scale to lock in a stable reading within 3–5 seconds.
- Avoid placing heavy gear in external side pockets—this shifts the center of gravity outward, causing the scale to register erratically if the bag tilts.
- Special Features to Leverage
- Backpack Hip Belt Hooks: Some backpacks come with a “haul handle” above the hip belt—use this reinforced grab handle for weighing rather than shoulder straps, as it is designed to carry maximum load.
- Built-In Compression on Duffels: Many high-end duffels (e.g., from Patagonia or North Face) include side compression buckles—fasten these after packing to ensure the bag holds a fixed, compact shape under the scale.
Table: Luggage Type Comparison for Weighing Accuracy
| Luggage Type | Empty Weight Range | Compression Behavior Under Hook | Hook Point Recommendation |
|---|---|---|---|
| Hard-Shell Suitcase | 2.5–4.0 kg (5.5–8.8 lbs) | No compression; maintains rigid shape | Top carry handle; reinforced hang loop |
| Soft-Shell Suitcase | 2.0–3.5 kg (4.4–7.7 lbs) | Compresses if not centered; may skew | Reinforced internal “hung handle” |
| Backpack (30–50 L) | 0.9–1.5 kg (2.0–3.3 lbs) | Haul loop above the hip belt | Haul loop above hip belt |
| Duffel Bag (40–70 L) | 0.8–1.8 kg (1.8–4.0 lbs) | Collapses if loosely packed | Dual handles knotted; overhead strap loop |
Sources:
- Empty weights and compression behavior derived from luggage brand specifications (TravelPro, Samsonite) and expert reviews.
Key Takeaways for Accurate Weighing
- Always know the empty weight of your chosen luggage—subtracting this from your packed total reveals how much capacity you truly have.
- For soft-shell cases, find the reinforced “hung handle” to accommodate the scale’s hook and prevent fabric folding.
- When weighing backpacks or duffels, align straps or handles to ensure the bag hangs straight; tighten all compression straps to eliminate “air pockets.”
- Consult airline weight limits after factoring in your bag’s empty weight—this prevents last-minute repacking and overweight fees.
By understanding each luggage type’s characteristics—rigidity, compression behavior, and hook-point tolerance—you’ll master a weighing routine that delivers spot-on results. This ensures you travel stress-free, stay within airline weight allowances, and optimize your packing strategy for every trip.
Weight Distribution Techniques
Before settling on how to pack, remember that smart weight distribution can save you from hefty overweight fees, often ranging between $50 and $200 per bag, while also ensuring your luggage hangs straight under the scale for the most accurate reading.
By centering heavy items low and near the wheels, you reduce pendulum swing and stabilize the bag during weighing, which not only prevents last-minute repacking but also safeguards fragile items up top.
If your bag tips over your airline’s limit (for example, 23 kg or 50 lbs on most carriers), shifting items between bags—starting with essentials in your carry-on—can avoid a sudden $100+\ fee at check-in.
Distribute Heavy Items Evenly
- Center heavier objects over the bag’s fixed wheels and base. Placing items like shoes, books, or toiletries directly above the wheels and close to the bottom of the suitcase helps maintain balance when lifting. This placement counteracts torque and prevents the luggage from tilting sideways or forward, which can cause erratic scale readings.
- Place the weight closer to the bag’s center to reduce pendulum swing. When the heaviest items sit near the bag’s geometric center, the entire load hangs straight, allowing the scale’s sensors to lock a stable weight faster, typically within 3–5 seconds, rather than chasing a swinging mass.
- Avoid stuffing heavy objects into exterior pockets. Placing dense items on one side or in a side compartment shifts the center of gravity outward. As a result, the suitcase can lean or sway under the scale’s hook, leading to fluctuating or unreliable readings. Keep external pockets for lightweight, flat items like documents or underwear to preserve balance.
- Use packing cubes or compression bags to group heavy goods. Consolidating dense items—such as electronics or toiletries—in a single packing cube allows you to visually ensure they’re positioned low and central, rather than scattered. This strategy not only improves packing efficiency but also preserves a consistent weight distribution for more reliable measurements.
Table: Weight Placement vs. Stability
| Placement Location | Effect on Stability | Recommended Strategy |
|---|---|---|
| The bag may lean to one side, causing pendulum oscillation and delayed weight lock-in | Base near the wheels | Highest stability, minimal tilt; quick weight lock-in |
| Center interior | Balanced hang; bag remains vertical; accurate reading within 3–5 seconds | Can be stable if sufficiently supported underneath, but risk of top-heavy tilt if bulked at the top |
| Top of bag | Place shoes, toiletry kits, and books at the base center | Reserve for bulky but light items (e.g., hats, scarves) |
| Side compartment or external pocket | Top of the bag | Use only for flat, lightweight items (e.g., socks, small accessories) |
Note: These guidelines assume a typical hardshell or softshell suitcase with internal frames. Always verify with your specific model, as some designs (e.g., duffels with no rigid base) may require additional support when positioning heavy items.
Repack If Over the Limit
- Weigh and identify the excess. If your digital scale reads just over the limit—say 23.5 kg when flying a 23 kg allowance—you’ll incur fees anywhere from $75 to $200, depending on carrier and route. To avoid this, systematically remove nonessential items until the scale reads at or below the limit.
- Move items between bags using a two-scale strategy. First, weigh each bag individually. If Bag A is 24 kg and Bag B is 20 kg, transfer 1 kg of items—pack light extras like T-shirts or cosmetics— from Bag A to Bag B, then re-weigh both. This method ensures neither bag exceeds 23 kg, and you can fine-tune in 0.1 kg increments if your scale has that resolution.
- Pack essentials in carry-on first, then fill the checked luggage. Begin by placing critical items—travel documents, medications, electronics—in your carry-on. Weigh your carry-on to ensure it meets cabin limits (typically 7–10 kg/15–22 lbs for many airlines). Next, build your checked bag around remaining necessities, and weigh it. Any leftover items can be shifted between checked and carry-on accordingly to leverage both allowances.
- Consider buying an extra baggage allowance or upgrading your fare. If you consistently exceed limits, especially during peak travel seasons with strict enforcement, pre-purchasing an additional checked bag or upgrading to a fare class that includes a higher weight limit can cost less than paying overweight fees. For instance, adding a 23 kg bag on American Airlines online typically costs $30–$40, whereas paying an overweight fee at the airport can jump to $100–$200.
- Use lightweight luggage and gear to maximize capacity. Opt for ultralight suitcase models (weighing 2 kg or less), which can save up to 1 kg over standard hardshell options. That “free” kilogram allows you to pack souvenirs or extra layers without repacking.
By centering heavy items at the base, keeping weight close to the bag’s core, and shifting nonessentials into carry-on, you’ll streamline the final weighing process, avoiding costly overweight fees, maintaining travel flexibility, and ensuring fragile items remain protected.
Whether you’re a frequent flyer or first-time traveler, these distribution and repack strategies transform a stressful airline check-in into a confident, fee-free breeze.
Airline Weight Limits & Regulations
Before diving into specifics, it’s crucial to understand that airline baggage policies hinge on both global standards and individual carrier rules, which can change based on travel class, routes, and even seasonal promotions.
The International Air Transport Association (IATA) sets baseline guidelines, such as a recommended 23 kg maximum per checked bag and a strict cap of 32 kg per piece with total dimensions not exceeding 158 cm—that most full-service airlines follow to protect ground staff and ensure safety during handling.
However, individual carriers often layer their own nuances on top of these recommendations, leading to variations in free allowances and fees. Below, you’ll find a breakdown of IATA’s core recommendations, major carrier policies, and tips for navigating seasonal or special-route exceptions to avoid surprise overweight charges.
IATA Recommendations
- Maximum Checked-Baggage Weight: IATA advises carriers to cap each checked bag at 23 kg (50 lbs) for standard Economy tickets, primarily to reduce injury risk to baggage handlers and maintain a consistent global baseline.
- Absolute Weight Limit: Regardless of fare class, no carrier should accept a single checked item heavier than 32 kg (70 lbs); bags exceeding this weight typically require special handling or must be shipped as freight.
- Linear Dimensions: IATA recommends that each checked bag’s combined length + width + height not exceed 158 cm (62 in), including handles, wheels, and side pockets, to fit standard baggage-handling systems without modification.
- Piece vs. Weight Concept: While many carriers follow the piece concept—allowing a specified number of bags, often at 23 kg each—others (notably some on Asian and Middle Eastern routes) use a weight-concept model, where passengers have a total kilogram limit rather than a fixed number of items (Wikipedia).
Major Carrier Policies
Below is a table summarizing the typical checked-baggage weight allowances for several leading airlines. Note that allowances can vary by route and may depend on specific fare types.
| Airline | Economy Class | Business/First Class |
|---|---|---|
| American Airlines | 1 × 23 kg (50 lb) | 2 × 32 kg (70 lb) free; excess at 23 kg rate |
| United Airlines | 1 × 23 kg (50 lb) | 2 × 32 kg (70 lb) free in premium cabins |
| British Airways | 1 × 23 kg (51 lb) | 2 × 32 kg (70 lb) per bag for Business; 3 × 32 kg for First |
| Emirates | 1–2 × 23 kg (50 lb) depending on fare | 2 × 32 kg (70 lb) in Business/First |
| Delta Air Lines | 1 × 23 kg (50 lb) (Main Cabin); basic economy may charge for first bag | 2 × 32 kg (70 lb) in Delta One/Premium Select |
| British Airways | (repeat for thoroughness) | (repeat) |
- American Airlines (AA): AA’s standard Economy ticket includes one free checked bag up to 23 kg (50 lbs), while First/Business allows up to two bags at 32 kg (70 lbs) each at no extra cost. Excess • bags (23–32 kg) incur a fee of around $100 if flying transatlantic, but specific pricing can vary based on route and booking date.
- United Airlines (UA): United permits one 23 kg (50 lb) bag in Economy. Premium cabins (Business, First) allow two bags at 32 kg (70 lb) each; MileagePlus elites often receive additional waivers and can combine allowances under the weight concept on select international routes.
- British Airways (BA): In Economy (excluding Basic fares), BA includes one 23 kg (51 lb) bag. Premium Economy passengers get two 23 kg bags; Business/First receive two or three bags respectively at 32 kg (70 lb) each. Silver/Gold Executive Club members can add an extra 32 kg bag depending on status.
- Emirates (EK): Economy Saver/Flex passengers check two 23 kg (50 lb) bags (Special fares allow one). Business and First Class allow two bags at 32 kg (70 lb) each. On routes to/from the Americas, a per-piece model applies; on most other routes, a weight model dictates total kilograms rather than piece count.
- Delta Air Lines (DL): Main Cabin (standard Economy) includes one 23 kg (50 lb) bag; Basic Economy often charges for the first bag. Delta One and Premium Select allow two 32 kg (70 lb) bags each. Some transatlantic and transpacific routes include extra checked-bag waivers for premium fares.
Seasonal Variations & Special Routes
- Transatlantic/Transpacific Routes: On American Airlines transatlantic itineraries, up to ten checked bags are permitted per passenger, significantly more than domestic limits, reflecting the importance of baggage for long-haul travelers. Note that this is specific to AA-operated flights on certain routes and not a universal benefit across all carriers.
- International Premium Cabins: United Airlines occasionally extends two-bag, 32 kg allowances to some international routes even for full-fare Economy passengers during peak seasons; always verify your e-ticket or UA’s online baggage chart for last-minute promotions.
- Holiday & Peak Travel Promotions: Many carriers run seasonal promotions—especially during summer or December holidays—that temporarily waive excess bag fees or raise the per-piece weight limit by 2 kg (e.g., 25 kg instead of 23 kg in Economy). For instance, BA has historically offered 25 kg soft-bag exceptions on select long-haul flights between December and January for Executive Club members.
- Special Routes (Weight Concept vs. Piece Concept): Emirates applies a weight-concept model on flights from Asia, Australia, or New Zealand connecting through Dubai to the Americas, allowing a total combined weight (e.g., 30 kg Economy Flex) rather than a per-bag piece count. Conversely, flights originating in the U.S. or Europe revert to a per-piece model of 23 kg/32 kg limits.
- Frequent Flyer Status & OneWorld/Star Alliance Tiers: Passengers with elite status in loyalty programs (e.g., oneworld Sapphire/Emerald or Star Gold) often enjoy additional baggage waivers or higher weight limits, especially on partner carriers and code-share flights. For example, BA Gold members can add a 32 kg bag even on a 23 kg Economy fare during promotional windows.
Tip: Always check your e-ticket and the airline’s official baggage page for your specific booking class and route. Policies can vary not only by carrier but also by fare type, fare purchase date, and unique seasonal promotions. When in doubt, consult your carrier’s “Manage My Booking” portal or call customer service at least 72 hours before departure to confirm exact allowances and avoid last-minute fees.
Key Takeaway: While IATA’s 23 kg (50 lb) and 32 kg (70 lb) guidelines form the foundation of most baggage policies, individual carriers layer on specific rules, often including extra bags on transatlantic routes or weight-concept allowances on certain regions. By familiarizing yourself with both global recommendations and your chosen airline’s detailed policy—especially around peak travel seasons and special routes—you can confidently pack within limits, leverage any seasonal waivers, and sidestep surprise overweight charges.
Battery & Maintenance Tips
Proper battery selection and regular upkeep are vital to ensure your digital luggage scale remains accurate trip after trip, saving you from surprise overweight fees and travel frustrations.
Use High-Quality Batteries
Using high-quality batteries—ideally non-rechargeable alkaline cells—ensures stable voltage output and a longer shelf life compared to most rechargeable options.
Alkaline batteries deliver a nominal 1.5 V consistently, whereas rechargeable NiMH cells typically provide around 1.2 V, which can cause marginal under‐readings if the scale isn’t calibrated for the lower voltage.
Rechargeable cells also self-discharge faster—up to 20 % per day for standard NiMH cells—leading to unreliable performance if your scale sits unused for some time. By contrast, alkaline batteries maintain close to full capacity for several years in storage, making them preferable for infrequent use scenarios such as digital luggage scales.
Replace your scale’s battery at least once a year—or sooner if the display starts flickering or the unit powers up slowly—as these symptoms typically indicate the cells are nearing end‐of‐life.
Cleaning & Storage
Dust and debris on the hook or display can interfere with the scale’s sensors and buttons, leading to erratic readings or unresponsive controls. To keep your scale in peak condition, wipe the hook, display, and buttons gently with a soft, dry microfiber cloth after every trip; avoid using abrasive cleaners or harsh solvents that can damage the plastic housing and electronics.
When not in use, store your scale in a padded pouch or a sealed plastic bag to protect it from moisture, dust, and accidental impacts. Humidity can corrode internal circuitry and degrade sensor accuracy over time. If you travel frequently, consider keeping the scale in a dedicated compartment of your suitcase away from liquids or sharp objects to minimize the risk of damage.
Periodic Calibration Checks
Even with proper care, digital scales can drift slightly due to environmental changes or normal wear on internal load cells. To verify accuracy, perform a calibration check every three to six months using a known weight, such as a 5 kg dumbbell or a certified calibration weight, placing it gently at the center of the scale’s hook or strap interface.
If the reading deviates by more than ±0.05 kg (±0.1 lb), follow the manufacturer’s calibration procedure, often requiring you to hold the “Unit” button until “CAL” appears, then apply the known weight until the display locks.
Recording your calibration checks in a travel log helps identify trends; if you consistently see gradual drift, professional re-calibration or scale replacement may be necessary.
Table 1: Battery Type Comparison for Digital Luggage Scales
| Battery Type | Nominal Voltage | Shelf Life (Unopened) | Self‐Discharge Rate | Recommended Use |
|---|---|---|---|---|
| Alkaline (AA/AAA/CR2032) | 1.5 V | 5–7 years | ~2–3 % per year | Ideal for infrequent use (digital scales, remotes); stable voltage for extended accuracy |
| NiMH Rechargeable (AA/AAA) | 1.2 V | 3–5 years | ~20 % per day initially | Better for high‐drain, frequent‐use devices (cameras, gaming); not optimal for scales |
| Lithium (Primary) | 1.5 V | 10 years | <1 % per year | High‐performance, extreme‐temperature use (some premium scales, emergency gear) |
| Rechargeable Alkaline | ~1.5 V | 2–3 years | ~5 % per year | Occasional use; better than NiMH for long‐term storage, but limited cycle life |
*Sources for Table 1:
- Alkaline vs. rechargeable stats from REI and Best Buy
- NiMH discharge and performance details from Solarponics and Batteries Plus
By choosing high-quality alkaline batteries, cleaning and storing your scale properly, and performing regular calibration checks with a certified weight, you’ll maintain your digital luggage scale’s accuracy and reliability, ensuring peace of mind and no unexpected fees at the airport.
Alternative Weighing Methods (Backup Options)
Below is a summary of alternative methods you can use to weigh your luggage in case your digital scale fails or is unavailable. The bathroom scale method requires two simple steps—first weigh yourself, then weigh yourself holding the bag—and allows for a roughly 1 kg margin of error since home scales are not designed for hanging objects.
Additionally, many post offices and shipping centers offer calibrated digital scales to the public—often free of charge—though it’s wise to call ahead to confirm availability, hours, and any fees, especially in smaller or remote locations.
Bathroom Scale Method
Using a bathroom scale is a fast, no-cost way to estimate your bag’s weight when you don’t have a handheld luggage scale handy. Follow these steps:
- Step 1: Weigh Yourself Alone.
- Place your bathroom scale on a hard, level surface and step onto it barefoot or with light socks to get your body weight. Record this measurement to the nearest 0.1 kg (0.2 lb) or as precisely as your scale allows.
- Ensure the scale is calibrated and reads zero before you step on; some digital bathroom scales auto-zero when no weight is detected.
- Step 2: Weigh Yourself Holding the Luggage.
- Pick up your packed luggage as you would hang it on a luggage scale—grasp the handle or strap firmly. Position both feet centrally on the scale so your weight and the bag’s weight are fully registered. Jot down this combined weight (you might need assistance or a mirror to read the display).
- Avoid leaning back or tilting; keep your spine straight and the luggage close to your body to prevent an uneven distribution on the scale platform.
- Step 3: Calculate the Luggage Weight by Subtraction.
- Subtract your solo body weight (Step 1) from the combined weight (Step 2). The difference is the approximate weight of your luggage. For example, if you weigh 68.3 kg alone and 90.0 kg while holding the suitcase, your bag is about 21.7 kg.
- Round up to the next 0.5 kg (1 lb) to provide a safety buffer; if your calculated weight is 21.7 kg, consider it as 22 kg to account for bathroom scale tolerance.
- Margin of Error Recommendation.
- Bathroom scales typically have a tolerance of ±0.5 kg (±1 lb) for weights under 100 kg (220 lb), depending on brand and calibration quality.
- To avoid overweight fees—often $75–$200 per bag—it’s prudent to leave at least a 1 kg (2 lb) buffer below your airline’s limit (e.g., if your limit is 23 kg, aim for 22 kg or less).
Table: Typical Bathroom Scale Accuracy vs. Luggage Impact
| Weight Range (Combined) | Scale Tolerance | Recommended Buffer | Why It Matters |
|---|---|---|---|
| 80–100 kg (176–220 lb) | ±0.5 kg (±1 lb) | ≥1 kg (2 lb) | A moderate buffer reduces the risk of exceeding the weight allowance lightly |
| 60–80 kg (132–176 lb) | ±0.3 kg (±0.6 lb) | ≥0.8 kg (1.7 lb) | Lower weight results in smaller absolute error, and still allows a small buffer |
| 40–60 kg (88–132 lb) | ±0.2 kg (±0.4 lb) | ≥0.5 kg (1 lb) | Lower weight results in smaller absolute error, still allows a small buffer |
Sources:
- Bathroom scale calibration and tolerance data
- Travel blog weighing methods
Post Office or Shipping Store
If you’re out and about and need a reliable, public scale, post offices and shipping stores (like UPS, FedEx, or DHL service points) often provide calibrated scales that you can use—sometimes free of charge, but policies vary by location and region.
- Locate a Nearby Post Office or Shipping Center.
- In many countries, national postal services (e.g., USPS in the U.S., Royal Mail in the U.K., Canada Post) have scales at their counters. You can usually step up to an agent and ask, “Can I weigh my luggage?” Most counters accommodate this without a fee, although some branches may impose a nominal charge (e.g., $1–$5) for non-customer use.
- Private shipping stores (UPS Store, FedEx Office) also maintain precise digital scales calibrated for shipping. These can often be used for free if you’re sending a parcel at the same time; otherwise, a small weighing fee may apply.
- Call Ahead to Confirm Availability & Fees.
- Hours and services can vary, especially in remote or small-town post offices. A quick phone call can save you a wasted trip; ask specifically if they allow customers to weigh personal luggage and whether any fee applies. Some locations restrict scale use to shipping activities only.
- Weighing Procedure at the Counter.
- Approach the counter with your closed and ready-to-lift bag. The postal clerk will place the bag on their large, flat postal scale. Most commercial postal scales measure up to 70 kg (154 lb) with an accuracy of ±0.05 kg (±0.1 lb), ensuring precise readings.
- Ask the clerk for a printed receipt showing the weight; this can serve as proof at the airline check-in desk if needed. In some cases, you can also use self-service kiosks at larger postal branches, which display weight on a digital screen (though printed tickets may require a fee).
- Considerations for Remote or Rural Areas.
- Not all postal outlets maintain a scale for public use—some limited-service locations remove or lock down large scales for security or space reasons. Confirm before you venture out. In very remote areas, you might need to visit a larger town’s main post office or a private shipping center in a nearby city.
- If no postal scale is available, pharmacies, veterinary clinics, or pet stores sometimes have animal scales that can accommodate small to medium luggage; always ask permission first, as these businesses may restrict customer use for liability reasons.
Table: Comparison of Public Weighing Facilities
| Facility Type | Scale Accuracy | Typical Cost | Availability | Best For |
|---|---|---|---|---|
| National Post Office | ±0.05 kg (±0.1 lb) | Free–$5 | Most urban branches; rural vary | Last-minute checks; convenience at the airport (but cost may be higher) |
| UPS/FedEx/DHL Store | ±0.02 kg (±0.05 lb) | $0–$5 (w/ shipping) | Widely in suburban/urban areas | Those sending parcels concurrently or needing fast service |
| Pet Store / Vet Clinic | ±0.1 kg (±0.2 lb) | Typically free (ask) | Less common; not guaranteed | Small carry-ons; emergency backup when other options unavailable |
| Airport Self-Service Kiosk | ±0.05 kg (±0.1 lb) | $5–$10 | Major airports only | Small carry-ons; emergency backup when other options are unavailable |
Sources:
- Travel advice blogs and forum discussions on post office scales
- USPS and private shipping service guidelines
By leveraging the bathroom scale method with a conservative 1 kg buffer and utilizing public postal or shipping centers’ calibrated scales, you’ll have reliable backups that help you avoid overweight fines, even when your handheld luggage scale is unavailable. Always verify scale accuracy where possible and account for location-specific fees and availability to streamline your travel preparation.
Troubleshooting Common Issues
Before troubleshooting, remember that a handful of simple checks—ensuring the bag hangs still, swapping batteries, and confirming the scale isn’t overloaded—can resolve most digital luggage scale issues.
If your readings jump up and down, it’s often because the bag is swinging or the scale’s sensors are struggling to stabilize; holding the scale perfectly still until the number locks is crucial.
Low batteries frequently cause erratic displays or “Err”/“Lo” messages, so replacing cells immediately when you see these warnings often solves the problem. When the screen shows “Err,” it typically means the load exceeds the maximum capacity (often 50 kg/110 lb), so double-check the bag’s weight and redistribute items if needed.
A “Lo” indicator signals low battery voltage; installing fresh alkaline cells—ideally CR2032 or AAA, depending on your scale—restores consistent power and accurate readings.
If the display fails to turn on, inspect battery orientation and clean the contacts with a cotton swab dipped in isopropyl alcohol to remove corrosion—this often revives unresponsive units.
If all else fails, use a bathroom-scale backup or visit a post office to weigh your luggage and consider replacing the scale if issues persist after basic fixes.
Fluctuating or Inaccurate Readings
- Bag Swing Causes Jumping Readings. When the luggage swings under the hook, sensors register shifting forces, and the display can jump erratically. Hold the scale completely still—keep your arm locked and vertical—until the “lock” icon or a stable number appears, typically within 3–5 seconds.
- Low Batteries Lead to Instability. Weak or dying batteries can’t maintain consistent voltage, causing the display to flicker or show random values. If your readings fluctuate wildly, replace the batteries with fresh alkaline cells immediately to restore stable performance.
- Uneven or Curved Surfaces Affect Precision. If you rest the scale’s hook or strap against a curved surface when it’s still pressed against your hand or a table, the tension may change slightly. Always lift the bag fully off any contact points—avoid walls, tables, or your body—and wait for the number to lock in place.
“Err” or “Lo” Messages
- “Err” Indicates Over-Capacity or Sensor Fault. Most luggage scales show “Err” when the weight exceeds the maximum rating, often 50 kg (110 lb) or 80 lb (36 kg) on some models. Check your user manual or the scale’s backside for the official capacity. If you exceed that limit, remove heavy items and reweigh. If the bag is under capacity but “Err” still appears, the sensors may be misaligned or damaged. In that case, tap the scale gently on a firm surface to reseat internal components, zero it, and try again.
- “Lo” Signals Low Battery. When “Lo” appears, the scale’s voltage is too low to operate accurately. Simply swap in new high-quality alkaline batteries (or rechargeable NiMH if the unit supports them) to clear the warning. Some brands (like Eufy and CoachCare) explicitly confirm that “Lo” means “low battery” and advise immediate replacement.
- Multiple Beeps with “Err.” Some digital scales emit a series of short beeps in addition to displaying “Err” (e.g., Conair Ts601X) when overloaded. Remove the load immediately, power‐cycle the unit by removing batteries for 10 seconds, and let it auto-calibrate to zero before testing again.
Scale Display Not Turning On
- Check Battery Orientation & Corrosion. If the screen stays dark, first verify that each battery is oriented correctly according to the +/- polarity markings. Second, inspect the contacts—if they’re coated in white or green corrosion, dip a cotton swab in isopropyl alcohol and clean them gently. Corrosion can block current flow, mimicking dead batteries.
- Reseat or Replace Batteries. Even new batteries can sit improperly. Remove and reinsert each cell, ensuring a snug fit. If the issue persists, test with brand-new AAA or CR2032 cells from a fresh pack—older or off-brand cells sometimes read “full” but fail under load.
- Electronic Failure & Backup Options. If cleaning contacts and new batteries don’t restore power, the scale’s internal electronics may be burned out, especially if dropped or exposed to moisture. In that case, use a bathroom-scale fallback (weigh yourself empty and then with the bag) or head to a post office or shipping store to use their calibrated digital scale. Finally, consider replacing the unit if it repeatedly fails basic power tests.
Table: Troubleshooting Summary
| Issue | Primary Cause | Immediate Fix | Further Action |
|---|---|---|---|
| Fluctuating/inaccurate readings | Dead/poor batteries, corroded contacts; drop damage | Hold still until lock; replace batteries; ensure vertical lift | Recalibrate; consider sensor or firmware fault |
| “Err” message | Over-capacity; sensor misalignment | Remove load; tap to reseat; zero display | Use rechargeable ones rated for 1.5 V; keep a spare set |
| “Lo” message | Low battery voltage | Replace with fresh alkaline cells | Bag swinging, low batteries; uneven lift angle |
| Display not turning on | Bag swinging, low batteries, uneven lift angle | Verify orientation; clean contacts; reseat batteries | Backup with bathroom or postal scale; replace unit if needed |
By following these targeted troubleshooting steps—holding still to prevent swings, addressing “Err”/“Lo” warnings promptly, and cleaning or replacing power components—you’ll resolve most digital luggage scale issues at home. When basic fixes fail, rely on bathroom scales or public postal/shipper scales as backup solutions, ensuring your travel plans remain uninterrupted.
Ready, Set, Travel!
Overcoming luggage woes starts with thoughtful preparation, like emptying pockets, zeroing your scale properly, lifting bags smoothly, and adhering to airline weight limits to sidestep surprise fees at check-in. Practicing by weighing a sample bag at home helps build confidence; it’s a small step that prevents last-minute repacking and saves up to $100–$200 in overweight charges.
Remember, even a high-quality digital scale can mislead if not calibrated or powered correctly, so test it regularly and replace batteries annually. If your scale shows “Err” or “Lo,” address those errors immediately—either the bag is overweight or the batteries are low.
When in doubt, use a bathroom-scale fallback or visit a local post office’s calibrated scale to verify your bag’s weight within a ±0.5 kg accuracy window. Learning these steps not only saves money but also fosters smarter packing habits, making travel smoother and more enjoyable.
We’d love to hear how you’ve mastered your own weighing routine—share your tips and experiences in the comments below to help build a community of savvy travelers.
FAQs
1. How accurate are digital luggage scales compared to bathroom scales?
Digital luggage scales typically provide 0.05 kg (0.1 lb) precision up to 50 kg, whereas bathroom scales often have ±0.5 kg (±1 lb) tolerance. Always allow at least a 1 kg (2 lb) buffer with bathroom scales to avoid overweight fees.
2. Can I switch between kilograms and pounds on a digital scale?
Yes. Most digital luggage scales feature a “Unit” button to toggle between kg, lb, and sometimes oz. Always switch units while the scale reads “0.0” to prevent rounding errors.
3. Why does my scale show “Err” or “Lo”?
“Err” indicates overload—your bag likely exceeds the scale’s max capacity (commonly 50 kg/110 lb). “Lo” means low battery; replace cells immediately with fresh alkaline batteries (1.5 V) to restore accurate readings.
4. What’s the best way to weigh a soft-shell suitcase?
Hook the scale’s strap through the reinforced “hang handle” or internal loop, not the top zipper pull. This supports the bag’s center and prevents fabric compression that skews readings.
5. How often should I calibrate my luggage scale?
Perform a calibration check every 3–6 months using a known weight (e.g., a 5 kg dumbbell). If readings drift more than ±0.05 kg (±0.1 lb), follow the manufacturer’s calibration steps or replace the scale.
6. Can I use a bathroom scale as a backup?
Yes. Weigh yourself alone, then weigh yourself holding the luggage, and subtract your weight from the combined total. Allow a 1 kg (2 lb) buffer to compensate for bathroom scale tolerance.
7. Are airline weight limits always the same?
No. While IATA recommends a 23 kg (50 lb) limit and a 32 kg (70 lb) cap per bag, each airline, class, and route can differ. Budget carriers may charge per kilogram; premium cabins often allow 32 kg per piece


Right? I was always guessing until now. This will save me so much stress!
Thanks, Jessica! Glad to hear you found it helpful. Let us know how it goes with your new scale!
Wow, this guide is super helpful! I’ve always struggled with packing weights and ended up paying extra fees. The section on choosing the right scale was especially useful! Can’t wait to try this out on my next trip! ✈️
You’re welcome, Tommy! Using a scale correctly can make a huge difference.
Same here! I think I was just guessing all along too. ????
I got a digital scale last year, but I honestly have no idea how to use it properly. The troubleshooting tips are a lifesaver! Thanks for breaking it down!