
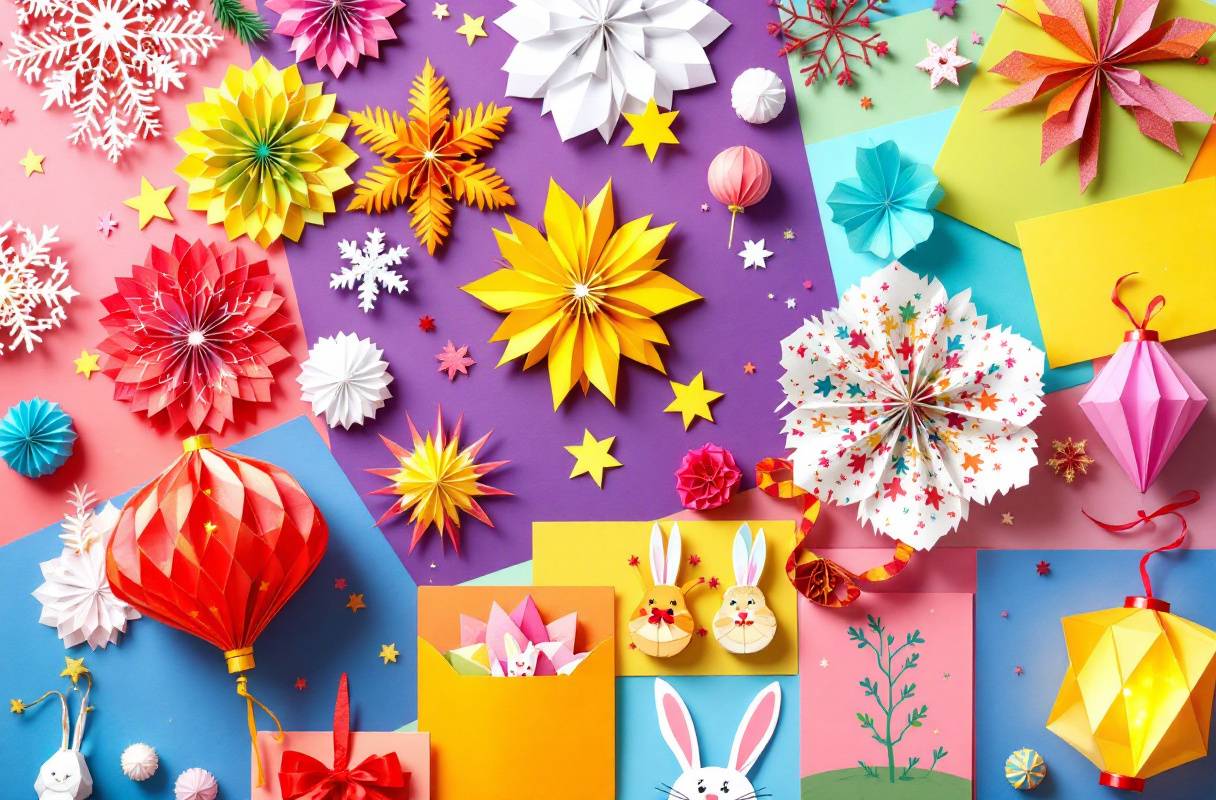
Imagine transforming a simple sheet of paper into a dazzling holiday decoration that brings joy to your home year after year. According to a recent survey, over 60% of people engage in paper crafting as a favorite hobby, highlighting its enduring popularity and the creative satisfaction it offers. Whether you’re a seasoned crafter or just starting out, paper crafting provides a versatile and enjoyable way to celebrate every season.
Importance of Seasonal Paper Crafts
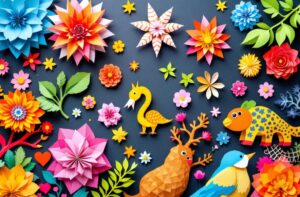
Seasonal paper crafts play a pivotal role in enhancing the festive spirit and adding personalized touches to your holiday decorations. These crafts not only brighten up your living space with unique, handcrafted items but also offer creative and engaging activities for all ages. From crafting intricate origami for Easter to designing spooky paper masks for Halloween, each project allows you to express your creativity while celebrating the essence of each holiday.
Additionally, paper crafts are a cost-effective and customizable way to create memorable decorations and heartfelt gifts, making them an excellent choice for those looking to add a personal flair without breaking the bank.
Overview of the Article
In this article, we will explore a variety of seasonal paper craft projects tailored for major holidays throughout the year. Whether you’re planning for New Year’s celebrations, Valentine’s Day, Easter, Halloween, Thanksgiving, or Christmas, you’ll find a plethora of ideas to inspire your next crafting session.
We’ll also provide tips for selecting projects based on your skill level and the materials you have on hand, ensuring that every craft enthusiast, from beginners to advanced, can find something that suits their needs and sparks their creativity.

General Tips for Seasonal Paper Crafting
Essential Materials and Tools
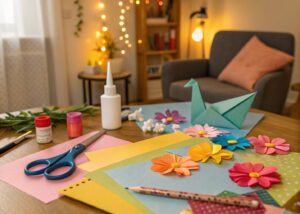
Embarking on your seasonal paper crafting journey begins with gathering the right materials and tools. Choosing the appropriate types of paper is crucial for achieving the desired results in your projects. Popular options include:
- Construction Paper: Ideal for vibrant decorations and simple projects.
- Origami Paper: Perfect for intricate folding and detailed designs.
- Cardstock: Sturdy and versatile, great for greeting cards and embellishments.
- Craft Foam Sheets: Adds texture and depth to your creations.

In addition to paper, having the basic crafting tools on hand will streamline your process:
- Scissors: A sharp pair is essential for clean cuts.
- Glue: Choose from glue sticks, liquid glue, or double-sided tape depending on your project needs.
- Cutting Machines: Tools like the Cricut or Silhouette can help with precise cuts and complex designs.
- Rulers and Templates: For accurate measurements and consistent shapes.
Preparation and Planning
Successful paper crafting begins with thoughtful preparation and planning. Start by sketching your designs and planning the layout of your project. This initial step helps you visualize the final product and identify any additional materials you might need.

Organize your workspace by sorting and arranging materials specific to each project, ensuring that you have everything within reach before you start. Creating a clear plan not only saves time but also enhances the overall quality of your crafts.
Safety Considerations
Safety should always be a priority, especially when crafting with children. Safe handling of tools is essential to prevent accidents. Here are some key safety tips:
- Use child-friendly scissors with rounded tips for younger crafters.
- Supervise the use of sharp tools and cutting machines.
- Store tools and materials out of reach of children when not in use.
- Ensure proper ventilation when using adhesives or other crafting materials that emit fumes.
By adhering to these safety guidelines, you can create a secure and enjoyable crafting environment for everyone involved.
Creative Techniques
Elevate your paper crafts by incorporating various creative techniques that add texture and dimension to your projects. Some popular methods include:
- Layering: Building multiple layers of paper to create depth and intricate patterns.
- Embossing: Adding raised designs to your paper for a sophisticated look.
- Quilling: Rolling and shaping strips of paper to form decorative patterns and images.
- Paper Cutting: Crafting detailed and delicate designs using precision cutting techniques.
Experimenting with these techniques can transform simple paper projects into stunning works of art, allowing you to explore new creative avenues and enhance your crafting skills.
Storage and Preservation
Proper storage and preservation of your completed crafts and materials ensure that your creations remain beautiful for years to come. Here are some tips to keep your paper crafts in pristine condition:

- Use acid-free storage boxes to prevent yellowing and deterioration of paper over time.
- Frame delicate pieces behind glass to protect them from dust and damage.
- Store unused materials in labeled containers to keep them organized and easily accessible for future projects.
- Consider laminating items that are frequently handled or displayed to add an extra layer of protection.
By taking the time to store and preserve your crafts thoughtfully, you can maintain their beauty and functionality, allowing you to enjoy and showcase your handiwork for many seasons to come.
By following these general tips and embracing the joy of paper crafting, you’re well on your way to creating beautiful, seasonal decorations and gifts that celebrate every holiday with creativity and personal flair.
Holiday-Specific Paper Craft Projects
Embracing seasonal paper crafts not only enhances your holiday decorations but also adds a personal touch to your celebrations. Below are creative and easy-to-follow paper craft projects tailored for each major holiday. Whether you’re preparing for New Year’s festivities or celebrating Diwali, these projects cater to various skill levels and bring festive cheer to your home.
New Year
1. Paper Fireworks Decorations
Celebrate the arrival of the New Year with vibrant paper fireworks that light up your space.
- Materials Needed: Material Description Colored paper Various colors for different fireworks Scissors For cutting paper shapes Glue To assemble the decorations Glitter Adds sparkle and shimmer
- Steps to Create:
- Cut Star Shapes: Use colored paper to cut out star shapes of varying sizes.
- Assemble Layers: Glue multiple layers of stars together to create depth.
- Add Glitter: Sprinkle glitter onto the glue while it’s still wet to add a sparkling effect.
- Display: Hang your paper fireworks around the room to mimic a festive fireworks display.
2. Countdown Calendars
Build anticipation for the New Year with a handmade countdown calendar.
- Materials Needed: Material Description Paper Base for creating the calendar pockets or flaps Numbers To label each day leading up to New Year Markers For decorating and personalizing Decorative elements Stickers, ribbons, or other embellishments
- Steps to Create:
- Design Layout: Decide whether you want pockets, flaps, or envelopes for each day.
- Create Pockets/Flaps: Fold and glue paper to form individual sections for each day.
- Number Each Day: Clearly label each section with numbers from 1 to 31.
- Decorate: Personalize each section with markers, stickers, and other decorative elements.
- Fill with Surprises: Add small notes, treats, or activities for each day to enjoy as you count down to the New Year.
Valentine’s Day
1. Handmade Greeting Cards
Express your love and appreciation with personalized handmade greeting cards.
- Materials Needed: Material Description Cardstock Sturdy paper for the base of the card Decorative paper For adding patterns and layers Stickers Heart shapes, arrows, and other themed stickers Ribbons To add texture and embellishments
- Steps to Create:
- Fold the Cardstock: Decide on the size and fold the cardstock to form the base of your card.
- Design the Front: Use decorative paper to add layers, patterns, or cut-out shapes like hearts and flowers.
- Add Embellishments: Enhance your design with stickers, ribbons, and other decorative elements.
- Personalize the Message: Write a heartfelt message inside the card to convey your sentiments.
2. Paper Heart Garland
Decorate your space with a charming paper heart garland that spreads love and warmth.
- Materials Needed: Material Description Red and pink paper Various shades for a vibrant look String To string the hearts together Hole punch For creating holes to attach to the string
- Steps to Create:
- Cut Heart Shapes: Use red and pink paper to cut out numerous heart shapes of different sizes.
- Punch Holes: Use a hole punch to make a hole at the top of each heart.
- String the Hearts: Thread the hearts onto the string, alternating colors and sizes for a dynamic look.
- Hang Your Garland: Drape the garland across a wall, mantel, or doorway to add a festive touch to your Valentine’s decor.
Easter
1. Paper Easter Eggs
Brighten your Easter celebrations with beautifully decorated paper eggs.
- Materials Needed: Material Description Colored paper For creating vibrant egg designs Glitter Adds sparkle to the eggs Markers For drawing patterns and designs Scissors For cutting out egg shapes
- Steps to Create:
- Fold the Paper: Fold colored paper in half to create an egg shape.
- Cut Out Egg Shapes: Trim the edges to form perfect egg shapes.
- Decorate: Use markers to draw patterns, add glitter for sparkle, and embellish with other decorative elements.
- Display: Arrange your paper Easter eggs in baskets or hang them as decorations around your home.
2. Bunny Origami
Create adorable paper bunnies to celebrate the Easter season.
- Materials Needed: Material Description Origami paper Square paper specifically for origami Markers For adding facial features and details
- Steps to Create:
- Fold the Paper: Follow step-by-step origami instructions to fold the paper into a bunny shape.
- Add Details: Use markers to draw eyes, noses, and other features to bring your bunny to life.
- Customize: Experiment with different colors and patterns to create a variety of bunnies.
- Display: Arrange your paper bunnies in a festive display or use them as charming decorations.
Halloween
1. Paper Lanterns
Illuminate your Halloween decorations with spooky paper lanterns.
- Materials Needed: Material Description Black and orange paper Traditional Halloween colors Scissors For cutting out intricate patterns Glue To assemble the lanterns
- Steps to Create:
- Design the Lantern: Draw spooky patterns or shapes on black and orange paper.
- Cut Out Patterns: Carefully cut out the designs to allow light to shine through.
- Assemble the Lantern: Glue the sides together to form a lantern shape.
- Light Up: Insert a small LED candle or string light inside to illuminate your spooky creations.
2. Paper Masks
Craft fun and frightening masks to complete your Halloween costumes.
- Materials Needed: Material Description Cardstock Durable base for the masks Elastic bands To secure the masks on your face Markers For drawing facial features and designs Decorative items Glitter, feathers, sequins, etc.
- Steps to Create:
- Draw the Mask Outline: Sketch the shape of your mask on cardstock.
- Cut Out the Mask: Carefully cut along the outline to create the mask shape.
- Decorate: Use markers and decorative items to personalize your mask with spooky or fun designs.
- Attach Elastic Bands: Punch holes on the sides and thread elastic bands to secure the mask.
- Wear and Enjoy: Put on your mask for a Halloween party or display it as a festive decoration.
Thanksgiving
1. Paper Turkey Centerpieces
Create a festive centerpiece with colorful paper turkeys that celebrate the season of gratitude.
- Materials Needed: Material Description Brown, orange, and yellow paper For crafting the turkey body and feathers Feathers Optional embellishment for added texture Glue To assemble the turkey parts
- Steps to Create:
- Form the Turkey Body: Use brown paper to create the base shape of the turkey.
- Add Feathers: Cut out feather shapes from orange and yellow paper and glue them around the base.
- Decorate: Enhance your turkey with additional details like eyes, beaks, and decorative patterns.
- Assemble the Centerpiece: Arrange multiple paper turkeys together as a centerpiece for your Thanksgiving table.
2. Gratitude Trees
A gratitude tree is a beautiful way to reflect on what you’re thankful for during Thanksgiving.
- Materials Needed: Material Description Brown paper For creating the tree trunk and branches Colored paper For cutting out leaf shapes
- Steps to Create:
- Construct the Tree: Cut and assemble brown paper to form the trunk and branches of the tree.
- Create Leaves: Cut out leaf shapes from colored paper in various colors.
- Write Messages: On each leaf, write something you’re grateful for.
- Attach Leaves: Glue the leaves onto the branches of the tree.
- Display: Place your gratitude tree as a centerpiece to inspire reflection and appreciation.
Christmas
1. Paper Snowflakes
Add a touch of winter magic to your home with intricate paper snowflakes.
- Materials Needed: Material Description White paper For creating snowflake patterns Scissors For precise cutting
- Steps to Create:
- Fold the Paper: Fold a square piece of white paper into a specific pattern to create symmetry.
- Cut Patterns: Carefully cut out shapes along the folds to form unique snowflake designs.
- Unfold: Gently unfold the paper to reveal your intricate snowflake.
- Display: Hang your snowflakes in windows, on walls, or from the ceiling to bring a snowy ambiance indoors.
2. Holiday Ornaments
Craft personalized ornaments to decorate your Christmas tree.
- Materials Needed: Material Description Colored paper For creating vibrant ornament shapes Glitter Adds sparkle and festive flair Ribbons For hanging the ornaments on the tree
- Steps to Create:
- Design the Ornament: Choose shapes like stars, circles, or Christmas-themed designs.
- Cut and Decorate: Cut out the shapes and decorate them with glitter and other embellishments.
- Add Ribbons: Attach ribbons to the top of each ornament for hanging.
- Assemble: Combine multiple ornaments to hang on your Christmas tree, adding a personal touch to your holiday decorations.
3. Advent Calendars
Build excitement for Christmas with a handmade advent calendar filled with daily surprises.
- Materials Needed: Material Description Paper Base for creating the calendar structure Small envelopes or pockets To hold daily surprises or notes Decorative elements Stickers, ribbons, and other embellishments
- Steps to Create:
- Design the Calendar: Decide on the layout, whether it’s a wall calendar, a hanging garland, or a tabletop version.
- Create Daily Sections: Attach small envelopes or pockets to the calendar structure, labeling each with a day leading up to Christmas.
- Decorate: Personalize the calendar with festive decorations and themes.
- Fill with Surprises: Add small gifts, notes, or activities to each day to enjoy as you countdown to Christmas.
- Display: Place your advent calendar in a prominent location to track the days and build excitement for the holiday.
Other Holidays and Celebrations
Beyond the major holidays, there are numerous other celebrations where paper crafts can add a festive touch. Here are some ideas to inspire your creativity:
1. St. Patrick’s Day: Paper Shamrocks and Leprechauns
- Create green shamrock decorations and playful leprechaun figures to celebrate Irish heritage.
2. Fourth of July: Patriotic Banners and Paper Fireworks
- Craft red, white, and blue banners and vibrant paper fireworks to honor Independence Day.
3. Hanukkah: Paper Menorahs and Dreidels
- Design beautiful paper menorahs and dreidels to celebrate the Festival of Lights.
4. Diwali: Paper Lanterns and Rangoli Designs
- Illuminate your home with colorful paper lanterns and intricate paper rangoli patterns for the Hindu festival of lights.
5. Birthday Celebrations: Customized Paper Decorations and Party Favors
- Personalize birthday parties with themed paper decorations, banners, and handmade party favors to make the day special.
Embracing these seasonal paper craft projects not only enhances your holiday decorations but also provides a fun and engaging way to celebrate with family and friends. Whether you’re a beginner or an experienced crafter, these projects offer something for everyone, ensuring that each holiday is marked with creativity and joy.
Adapting Projects for Different Skill Levels and Ages
One of the greatest advantages of paper crafting is its versatility, allowing crafters of all ages and skill levels to create beautiful projects. Whether you’re a beginner looking to start your crafting journey or an experienced artist seeking a challenge, there’s a paper craft project that’s perfect for you. Below, we break down how to adapt paper crafting projects to suit different skill levels and age groups, ensuring everyone can enjoy the creative process.
Beginner-Friendly Projects
Starting with simple projects builds confidence and foundational skills. Beginner-friendly paper crafts typically involve straightforward techniques such as basic cutting and gluing.
Simple Cuts and Basic Gluing Techniques
For those new to paper crafting, projects that require minimal cutting and easy-to-follow instructions are ideal. Examples include:
Paper Chains: Creating colorful chains by linking strips of paper.
Basic Greeting Cards: Folding cardstock and adding simple decorations.
Bookmarks: Cutting paper into strips and decorating with stickers or drawings.
Benefits:
Ease of Execution: Minimal steps and tools needed.
Quick Results: Immediate satisfaction from completing projects.
Skill Building: Introduces fundamental crafting techniques.
Materials Needed:
Material Description Construction paper Versatile and easy to cut Scissors For cutting shapes and strips Glue sticks Quick and mess-free adhesion Markers and stickers For adding personal touches
Intermediate Projects
As your crafting skills grow, intermediate projects introduce more complexity through intricate designs and layering techniques.
Incorporating More Intricate Designs and Layering Intermediate projects challenge crafters to explore new techniques and add depth to their creations. Examples include:
Layered Paper Flowers: Creating flowers with multiple layers for a fuller appearance.
3D Paper Models: Building three-dimensional shapes and structures.
Paper Collages: Combining various paper types and colors to form detailed images.
Benefits:
Enhanced Creativity: Encourages experimentation with different designs and techniques.
Skill Development: Improves precision and attention to detail.
Visual Impact: Produces more sophisticated and visually appealing crafts.
Materials Needed: Material Description Cardstock Sturdier paper for structural integrity Decorative paper Adds variety in texture and color Craft knife For precise cutting of intricate shapes Double-sided tape Provides strong adhesion for layering Rulers and templates Ensures accuracy in measurements
Advanced Projects
Advanced paper crafts are designed for seasoned crafters seeking to push their creative boundaries. These projects often involve complex structures and multi-dimensional techniques.
Complex Structures and Multi-Dimensional Crafts Advanced projects require a higher level of skill and patience, resulting in impressive and detailed artwork. Examples include:
Intricate Paper Sculptures: Creating lifelike models or abstract art with multiple layers and components.
Pop-Up Cards: Designing cards that feature moving parts and depth when opened.
Advanced Origami: Folding paper into elaborate shapes and figures that require precise techniques.
Benefits:
Creative Fulfillment: Offers a rewarding challenge for experienced crafters.
Skill Mastery: Enhances advanced techniques and problem-solving abilities.
Showpiece Quality: Produces standout pieces suitable for display or gifting.
Materials Needed: Material Description Specialty paper High-quality or patterned paper for detail Precision cutting tools Such as craft knives and cutting mats Glue guns and adhesives For strong and durable bonds Embellishments Beads, sequins, and other decorative elements Templates and patterns Guides for complex designs
Crafting with Children
Crafting with children fosters creativity, improves motor skills, and provides a fun bonding activity. Projects should prioritize safety and simplicity to ensure an enjoyable experience for young crafters.
Safe Materials and Easy-to-Follow Steps When crafting with children, it’s essential to use materials that are safe and projects that are easy to execute. Examples include:
Paper Plate Crafts: Decorating plates to create masks or animals.
Handprint Art: Using handprints as the base for various creative designs.
Simple Origami: Folding basic shapes like boats or hats with supervision.
Benefits:
Safety: Minimizes the use of sharp tools and toxic materials.
Engagement: Keeps children interested with fun and colorful projects.
Development: Enhances fine motor skills and encourages creativity.
Materials Needed: Material Description Non-toxic glue Safe for children to handle Safety scissors Blunt tips to prevent accidents Colored paper Bright and appealing for kids Stickers and stamps Adds fun and easy decorations Markers and crayons For coloring and personalizing
Crafting with Adults
Adult crafters often seek projects that offer a higher level of detail and sophistication, allowing for personal expression and intricate designs.
Detailed Designs and Sophisticated Techniques Projects for adults can incorporate advanced techniques and more refined aesthetics. Examples include:
Elegant Paper Lanterns: Using delicate folding and cutting techniques to create beautiful lanterns.
Artistic Paper Mosaics: Combining small paper pieces to form intricate mosaic patterns.
Personalized Scrapbooks: Designing detailed scrapbooks with layered papers, embellishments, and custom layouts.
Benefits:
Personal Expression: Allows for unique and personalized creations.
Stress Relief: Engaging in detailed crafting can be therapeutic and relaxing.
Skill Enhancement: Provides opportunities to master sophisticated techniques and tools.
Materials Needed: Material Description High-quality paper For a professional finish Fine-tip pens and markers For detailed designs Specialty tools Such as embossers, die-cutters, and precision knives Embellishments Metallic foils, ribbons, and beads Adhesives Advanced glues for secure bonding
Incorporating Mixed Media and Personalization
Adding mixed media elements and personalizing your paper crafts can elevate your projects, making them unique and reflective of your personal style. Combining different materials and techniques not only enhances the visual appeal but also adds depth and texture to your creations.
Combining Paper with Other Materials
Integrating various materials with paper crafting opens up endless creative possibilities. By blending textures and mediums, you can create more dynamic and visually interesting projects.
Incorporating Fabric, Beads, and Other Embellishments Mixing paper with other materials such as fabric, beads, and sequins can add dimension and tactile interest to your crafts. Examples include:
Fabric-Covered Journals: Binding paper with fabric covers for a personalized touch.
Beaded Paper Jewelry: Decorating paper jewelry pieces with beads for added sparkle.
Mixed Media Collages: Combining paper, fabric scraps, and other materials to create layered artwork.
Benefits:
Enhanced Texture: Adds a tactile dimension to your projects.
Creative Variety: Opens up new avenues for design and decoration.
Unique Aesthetics: Creates one-of-a-kind pieces that stand out.
Materials Needed: Material Description Fabric scraps Adds texture and color variety Beads and sequins For embellishing and adding sparkle Ribbon and lace Introduces delicate and decorative elements Buttons and charms Provides unique decorative accents Wire and string For attaching and securing embellishments
Personalizing Crafts
Personalization makes your paper crafts more meaningful and tailored to specific occasions or individuals. Adding personal touches can transform a simple project into a cherished keepsake.
Adding Names, Dates, and Custom Messages Customizing your crafts with names, dates, and personalized messages adds a special significance. Examples include:
Customized Greeting Cards: Featuring the recipient’s name and a heartfelt message.
Personalized Photo Frames: Incorporating names and dates into the design.
Monogrammed Ornaments: Adding initials or names to holiday decorations.
Benefits:
Meaningfulness: Creates a deeper emotional connection with the recipient.
Uniqueness: Ensures each piece is one-of-a-kind.
Memorability: Makes gifts and decorations more memorable and special.
Materials Needed: Material Description Stencils and stamps For adding precise names and dates Letter stickers Easy way to incorporate text Metallic pens Adds a touch of elegance to messages Photo corners For attaching personal photos Personalized labels Custom labels for unique identification
Enhancing with Color and Texture
Using a variety of colors and textures can significantly enhance the visual and tactile appeal of your paper crafts. By thoughtfully selecting and combining different elements, you can create more dynamic and engaging projects.
Using Different Paper Types and Decorative Elements for Depth Experimenting with various paper types and decorative elements can add layers of depth and interest to your crafts. Examples include:
Layered Paper Projects: Combining different paper thicknesses to create depth.
Textured Papers: Incorporating papers with patterns, embossing, or other textures.
Colored Tissue and Crepe Papers: Adding soft colors and flowing textures to designs.
Benefits:
Visual Interest: Creates a more engaging and attractive appearance.
Tactile Appeal: Enhances the feel of the craft, making it more interesting to touch.
Professional Finish: Adds sophistication and polish to your projects.
Materials Needed: Material Description Varied paper types Includes matte, glossy, textured, and metallic papers Decorative elements Such as sequins, glitter, and embossing powder Colored tissue paper Adds soft colors and layers Crepe paper For adding flowing and flexible textures Stamped patterns To introduce intricate designs and textures
Incorporating Mixed Media and Personalization
Enhancing your paper crafts with mixed media elements and personalized touches not only elevates the aesthetic appeal but also makes each piece uniquely yours. By blending different materials and techniques, you can create sophisticated and memorable projects that stand out.
Combining Paper with Other Materials
Integrating various materials into your paper crafts can add texture, depth, and visual interest. This combination allows for more creative expression and results in more dynamic projects.
Incorporating Fabric, Beads, and Other Embellishments
- Fabric Accents: Adding fabric pieces can introduce new textures and colors. For example, fabric-covered journals or greeting cards with fabric appliqués.
- Beaded Embellishments: Beads and sequins can be glued onto paper crafts to add sparkle and dimension, perfect for jewelry or decorative items.
- Ribbon and Lace: Incorporating ribbons or lace can provide a delicate and elegant touch to your projects, such as in handmade cards or scrapbooks.
Benefits:
- Enhanced Texture: Adds a tactile dimension that makes crafts more engaging.
- Creative Flexibility: Opens up new possibilities for design and decoration.
- Unique Aesthetics: Results in one-of-a-kind pieces that reflect personal style.
Materials Needed:
| Material | Description |
|---|---|
| Fabric scraps | Adds color and texture |
| Beads and sequins | For sparkle and dimensional accents |
| Ribbon and lace | Introduces elegance and detail |
| Glue gun | For securely attaching embellishments |
| Decorative buttons | Provides unique decorative elements |
Personalizing Crafts
Personalization transforms generic crafts into meaningful and unique creations. Adding personal elements like names, dates, and custom messages makes each project special and tailored to the recipient or occasion.
Adding Names, Dates, and Custom Messages
- Customized Greeting Cards: Include the recipient’s name and a personalized message to make the card more heartfelt.
- Monogrammed Ornaments: Add initials or names to holiday decorations for a personal touch.
- Personalized Scrapbooks: Incorporate names, dates, and personal stories to create a cherished memory book.
Benefits:
- Emotional Connection: Personal touches make crafts more meaningful and memorable.
- Uniqueness: Ensures each piece is one-of-a-kind.
- Thoughtfulness: Shows extra effort and care, enhancing the value of the gift or decoration.
Materials Needed:
| Material | Description |
|---|---|
| Stencils and stamps | For precise and consistent text |
| Letter stickers | Easy addition of names and dates |
| Metallic pens | Adds a touch of elegance to messages |
| Photo corners | For attaching personal photos |
| Personalized labels | Custom labels for identification |
Enhancing with Color and Texture
Utilizing a variety of colors and textures can significantly enhance the visual and tactile appeal of your paper crafts. Thoughtful color choices and the addition of textured elements can make your projects more dynamic and engaging.
Using Different Paper Types and Decorative Elements for Depth
- Layered Papers: Combining papers of different thicknesses and colors can create a sense of depth and complexity.
- Textured Papers: Incorporate papers with embossed patterns, glitter, or other textures to add visual interest.
- Colored Tissue and Crepe Papers: These can be used to add soft colors and flowing textures, perfect for backgrounds or decorative accents.
Benefits:
- Visual Appeal: Creates a more attractive and engaging look.
- Tactile Interest: Enhances the feel of the craft, making it more enjoyable to touch.
- Professional Finish: Adds sophistication and polish to your projects, making them suitable for display or gifting.
Materials Needed:
| Material | Description |
|---|---|
| Varied paper types | Includes matte, glossy, textured, and metallic papers |
| Decorative elements | Such as sequins, glitter, and embossing powder |
| Colored tissue paper | Adds soft colors and layers |
| Crepe paper | For flowing and flexible textures |
| Stamped patterns | Introduces intricate designs and textures |
Conclusion
Adapting paper craft projects to different skill levels and incorporating mixed media elements can transform simple creations into stunning works of art. Whether you’re crafting with children, enhancing your projects with fabric and beads, or personalizing your crafts with names and dates, there’s a limitless array of possibilities to explore.
By embracing these techniques and ideas, you can create unique, meaningful, and beautiful paper crafts that celebrate every holiday with creativity and flair.
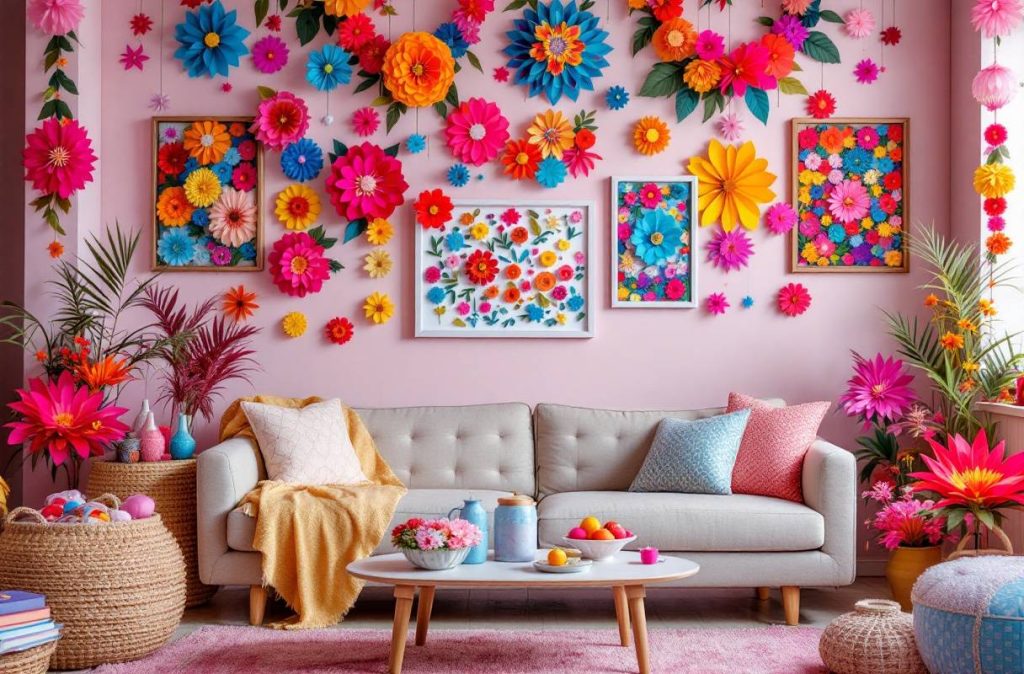
Showcasing and Displaying Your Paper Crafts
Once you’ve poured your creativity into crafting seasonal paper decorations, it’s time to showcase your masterpieces. Displaying your paper crafts not only highlights your hard work but also enhances the ambiance of your living space. Here are some creative ways to exhibit your paper creations:
Creative Display Ideas
Transform your home into a gallery of festive paper art with these innovative display ideas:
Hanging Decorations
- Paper Garlands: String together paper shapes like hearts, snowflakes, or stars and hang them across walls, windows, or doorways.
- Mobiles: Create three-dimensional mobiles using layered paper pieces that gently sway and catch the light.
- Paper Lanterns: Suspend colorful paper lanterns from the ceiling or outdoor trees for a magical effect.
Table Centerpieces
- Paper Flowers: Arrange vibrant paper flowers in a decorative vase to add a pop of color to your dining table.
- Themed Arrangements: Design paper-themed centerpieces that align with the holiday, such as paper turkeys for Thanksgiving or paper bunnies for Easter.
- Layered Paper Sculptures: Build multi-layered paper sculptures that serve as eye-catching focal points.
Wall Art
- Framed Paper Art: Frame intricate paper cutouts or collages to create stunning wall art pieces.
- Paper Mosaics: Assemble small paper pieces into a larger mosaic design and mount them on the wall for a striking visual impact.
- Shadow Boxes: Use shadow boxes to display dimensional paper crafts, adding depth and texture to your wall decor.
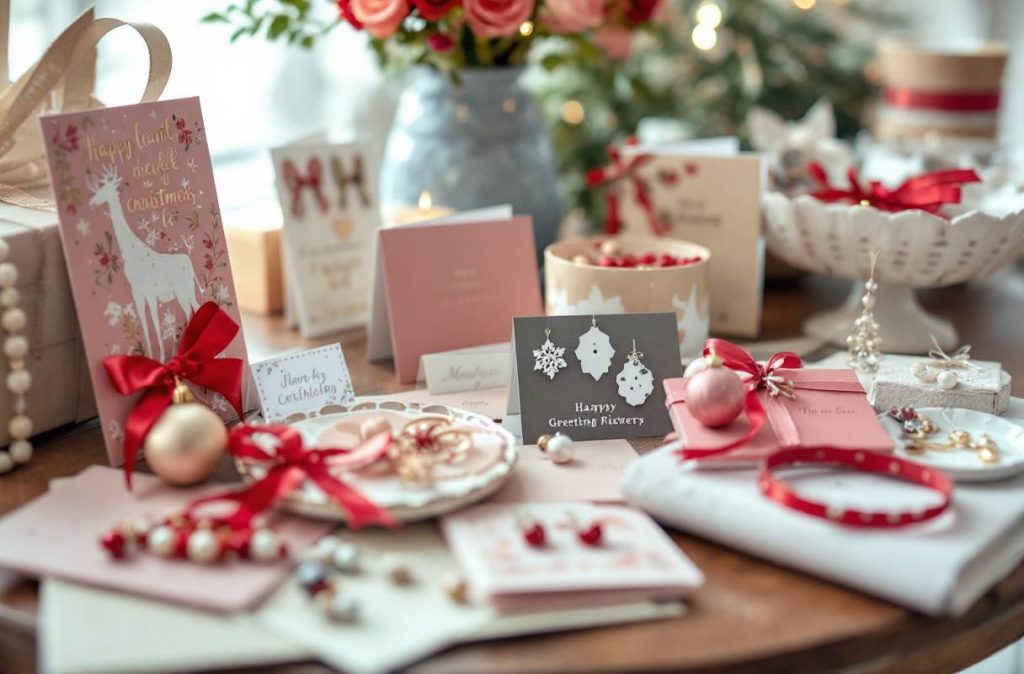
Gifting Your Crafts
Handmade paper crafts make thoughtful and personalized gifts for family and friends. Here’s how to turn your creations into cherished presents:
Customized Greeting Cards
- Personalize greeting cards with the recipient’s name and a heartfelt message.
- Incorporate elements from their favorite colors or hobbies for a unique touch.
Decorative Ornaments
- Create paper ornaments that reflect the holiday spirit, such as snowflakes for Christmas or hearts for Valentine’s Day.
- Include the recipient’s initials or special dates to make the gift more meaningful.
Paper Jewelry
- Craft delicate paper earrings, necklaces, or bracelets adorned with beads and sequins.
- Package them in decorative boxes or pouches for an elegant presentation.
Handmade Photo Frames
- Design and assemble paper photo frames that showcase cherished memories.
- Add decorative elements like ribbons, buttons, or patterned paper to enhance their appearance.
Preserving Your Work
To ensure your paper crafts remain beautiful for years to come, proper preservation is essential. Here are some tips for safeguarding your creations:
Framing
- Frame delicate paper art behind glass to protect it from dust and damage.
- Use acid-free mats and backing to prevent yellowing and deterioration over time.
Laminating
- Laminate frequently handled items, such as greeting cards or bookmarks, to increase their durability.
- Choose a high-quality laminating service or use a home laminator for best results.
Storing Crafts
- Store completed crafts in acid-free storage boxes or portfolios to maintain their condition.
- Keep them away from direct sunlight, moisture, and extreme temperatures to prevent warping and fading.
Digital Preservation
- Photograph or scan your paper crafts to create digital archives.
- Share your digital creations online or use them to recreate your crafts in the future.

Conclusion
Engaging in seasonal paper crafts offers numerous benefits that go beyond creating beautiful decorations. Here’s a quick recap of why paper crafting is a fantastic hobby:
- Creativity: Paper crafting allows you to express your artistic side and experiment with various designs and techniques.
- Personalization: Handmade paper crafts add a unique and personal touch to your holiday decorations and gifts.
- Bonding Activities: Crafting together with family and friends fosters meaningful connections and creates lasting memories.
- Cost-Effective: DIY paper crafts are often more affordable than store-bought decorations and gifts, allowing you to save money while still celebrating in style.
Don’t be afraid to step out of your comfort zone and try new paper craft projects. Exploring different techniques and materials can help you develop your skills and discover new passions. Here are some ways to keep your crafting journey exciting:
- Try New Projects: Challenge yourself with projects that push your creative boundaries, such as advanced origami or intricate paper sculptures.
- Develop Skills: Continuously learn and refine your crafting techniques through tutorials, workshops, and practice.
- Make Memories: Use paper crafting as a way to document and celebrate special moments, turning them into beautiful keepsakes.
Ready to take your paper crafting to the next level? Here’s how you can get involved and stay inspired:
- Share Your Creations: Post your paper crafts on social media using the hashtag #SeasonalPaperCrafts to inspire others and join a community of fellow crafters.
- Subscribe for More Ideas: Sign up for our newsletter to receive the latest craft ideas, tutorials, and tips straight to your inbox.
- Explore Additional Resources: Visit our resource page for access to step-by-step guides, downloadable templates, and recommended crafting supplies to support your creative endeavors.
Additional Resources (Optional)
To further support your seasonal paper crafting journey, here are some valuable resources to enhance your skills and inspire your creativity:
Tutorials and Templates
Access a wide range of tutorials and downloadable templates to guide you through your paper craft projects:
- Step-by-Step Guides: Follow detailed instructions for various projects, from beginner to advanced levels.
- Printable Templates: Download and print templates for shapes, patterns, and designs to streamline your crafting process.
- Video Tutorials: Watch visual demonstrations to better understand complex techniques and designs.
Recommended Supplies and Tools
Ensure you have the best materials and tools for your paper crafting projects with these recommended suppliers and brands:
- Craft Stores: Visit popular craft stores like Michaels, Hobby Lobby, or Joann Fabrics for a wide selection of paper and crafting supplies.
- Online Retailers: Shop online at Amazon, Etsy, or specialized craft websites for unique and hard-to-find materials.
- Quality Brands: Invest in high-quality brands such as Cricut for cutting machines, Fiskars for scissors, and Sakura for markers to enhance your crafting experience.
Community and Inspiration
Join online communities and social media groups to connect with other paper crafters and find endless inspiration:
- Forums and Groups: Participate in forums like Reddit’s r/papercrafting or Facebook groups dedicated to paper crafting.
- Social Media Platforms: Follow crafting influencers and hashtags on Instagram and Pinterest to discover new ideas and trends.
- Local Workshops: Attend local crafting workshops or join a crafting club to learn new techniques and meet fellow enthusiasts.


