

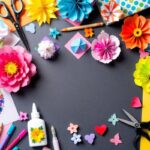
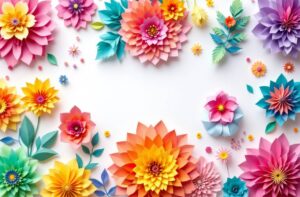
5D diamond painting has quickly become a beloved hobby for crafters of all ages, blending art and relaxation in a uniquely satisfying way.
Unlike traditional painting methods, 5D diamond painting involves placing tiny ‘diamonds’ onto a canvas to create a shimmering, textured masterpiece. Its appeal lies in the meditative, almost therapeutic process of meticulously placing each diamond, as well as the stunning end result that sparkles in the light.
What sets 5D diamond painting apart is the depth, dimension, and brilliance of the finished pieces, which often resemble dazzling mosaics. This makes it an incredibly rewarding activity, not just for artists, but for anyone looking to unwind and create something beautiful. From beloved characters to breathtaking landscapes, there is a wide variety of designs to choose from, catering to all tastes and skill levels.
In this ultimate guide, we will cover everything you need to know to get started with 5D diamond painting. We’ll break down the necessary materials, provide step-by-step instructions for beginners, share advanced tips and tricks, and offer solutions for troubleshooting common issues.
By the end of this guide, you’ll be well-equipped to dive into your own 5D diamond painting project with confidence and creativity.

What is 5D Diamond Painting?
Definition and Basic Concept
5D diamond painting is an art form that combines the principles of mosaic and paint-by-numbers to create a sparkling, three-dimensional piece of artwork. The term “5D” refers to the five facets or sides of the tiny resin ‘diamonds’ used in the process, which reflect light beautifully and add depth to the finished piece.
To create a diamond painting, you adhere these diamonds onto a pre-printed canvas with a design, using a corresponding color code. Each section of the canvas is clearly marked to indicate which colored diamond should be placed where making the process straightforward and enjoyable.
The Difference Between 5D and Traditional Diamond Painting Techniques
While traditional diamond painting also involves placing small beads or ‘diamonds’ onto a canvas, 5D diamond painting stands out due to the intricate 5-faceted diamonds that bring an extra layer of sparkle and dimension to the artwork. Traditional techniques often use square-shaped beads, whereas 5D diamonds are typically round, making them easier to handle and more reflective.

The result is a far more vibrant and dynamic image that captures light from all angles, creating a mesmerizing effect. This extra depth and brilliance are what makes 5D diamond painting particularly popular among crafters.
Brief History and Origin of Diamond Painting
Diamond painting as a craft is relatively new, originating in Asia in the early 2010s. The technique quickly gained popularity due to its accessibility and the stunning results it produces. While specific details about its exact inception remain unclear, it is believed to have evolved from a combination of mosaic art and cross-stitch.
Over the past decade, the craft has spread globally, capturing the hearts of both novice and experienced artists. The increasing availability of kits and a wide range of designs have only added to its widespread appeal, making it a beloved hobby for many.
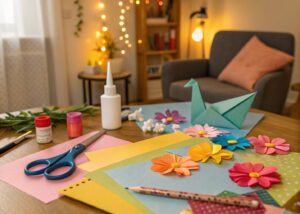
Necessary Materials
When embarking on your 5D diamond painting journey, having the right materials is crucial for a smooth and enjoyable crafting experience. Here’s a list of the essential tools and materials you’ll need:
Canvas
The canvas is the foundation of your diamond painting project, pre-printed with the design and corresponding color codes. Look for durable canvases with a strong adhesive layer to securely hold your diamonds in place.
Diamond Beads
These tiny resin diamonds, often referred to as drills, come in various shapes and colors. Quality beads are uniform in size and have clean facets that reflect light beautifully. Ensure you have an ample supply of each color needed for your design.
Applicator Tools
An applicator tool, or pen, is used to pick up and place each diamond onto the canvas with precision. Look for a comfortable, ergonomic pen that makes the process easy and enjoyable.
Wax
Wax is used to help the applicator tool pick up diamonds. Dab the tip of your pen into the wax to ensure it can grab and hold onto the tiny beads before placing them on the canvas.
Storage Containers
Keeping your diamonds organized is key to an efficient workflow. Small, labeled containers or a compartmentalized storage box can help you manage your beads and keep them from getting mixed up.
Tips on Selecting Quality Materials
- High-Quality Canvas: Choose a canvas that is wrinkle-resistant with a clear and easy-to-read print for the best results.
- Precision-Cut Diamonds: Opt for diamonds with clean cuts and multiple facets for optimal sparkle and uniformity.
- Reliable Adhesive: Ensure the canvas’s adhesive layer is sticky enough to hold the diamonds securely but not so strong that adjustments are difficult.
- Comfortable Tools: Select an applicator tool that feels comfortable in your hand, especially if you’ll be working on large projects over extended periods.
- Organized Storage: Invest in a good storage system to keep your diamonds sorted by color and easily accessible. This minimizes frustration and keeps your workspace tidy.
You’ll set yourself up for a rewarding and hassle-free diamond painting experience by carefully selecting high-quality materials.
Getting Started
Choosing Your First Design
Selecting your first 5D diamond painting design can be a fun and exciting process. As a beginner, you might want to start with a smaller canvas that features a simple and clear image.
This will allow you to get used to the techniques without feeling overwhelmed. Popular choices for first-time projects include flowers, animals, or simple geometric patterns. Look for designs that not only appeal to you visually but also offer a manageable level of detail and complexity.
Understanding the Symbols and Color Codes
Each diamond painting kit comes with a canvas imprinted with various symbols and color codes. These codes correspond to specific colors of diamonds that need to be applied to each section of the canvas. Familiarizing yourself with this key is essential for a smooth crafting process.
Make sure to keep the legend (usually found on the side of the canvas) handy while working. This guide will prevent any mix-ups and ensure that your final piece is as vibrant and accurate as intended.
Preparing Your Workspace
Creating a well-organized and comfortable crafting area will make your diamond painting experience much more enjoyable. Choose a flat, well-lit surface where you can easily spread out your canvas and materials.
Gather all your tools, including your canvas, diamonds, applicator pen, wax, and storage containers. It’s helpful to have a dedicated space that you can leave set up, especially if you’re working on a larger project. A tidy and efficient workspace keeps all necessary items within reach and reduces the chances of losing any small diamonds.
Step-by-Step Instructions to Begin Your First Project
- Unpack Your Kit: Open your 5D diamond painting kit and inventory all items to ensure you have everything you need.
- Layout the Canvas: Spread out the canvas on your flat workspace and use small weights or clips to keep the edges flat.
- Organize Your Diamonds: Sort the diamonds by color and place them into your storage containers, labeling each with the corresponding symbol or color code.
- Prepare Your Applicator Pen: Press the tip of your applicator pen into the wax to fill it, ensuring it can easily pick up diamonds.
- Start Placing Diamonds: Begin with a section of the canvas. Peel back the protective film from the adhesive surface just a bit at a time to prevent it from getting dirty.
- Match Symbols to Diamonds: Using the color code legend, pick up a diamond with your applicator pen and place it on the corresponding symbol on the canvas. Press gently to secure it in place.
- Continue Methodically: Work in small sections, gradually peeling back more of the protective film as you progress, and continue placing diamonds until the section is complete.
- Review and Adjust: Once your section is done, review it to ensure all diamonds are properly placed and make any necessary adjustments.
- Final Touches: After completing the entire canvas, press down on the diamonds to secure them firmly in place.
By following these steps and maintaining a well-prepared workspace, your first 5D diamond painting project is sure to be a relaxing and rewarding experience. Happy crafting!
Techniques and Tips
Proper Use of the Applicator Tool
Mastering the applicator tool, or pen, is key to a smooth diamond painting process. Hold the pen comfortably in your hand, much like you would a regular writing pen. Make sure the pen’s tip is properly filled with wax to ensure it can easily pick up the diamonds. A gentle touch is often enough to pick up the diamond securely, thanks to the wax’s adhesive properties. Periodically, re-dip the pen into the wax to maintain its usability.
Efficient Methods to Place the Diamonds
When placing the diamonds, it’s helpful to start from the top of the canvas and work your way down, preventing your hand from resting on completed sections and disturbing the diamonds.
You can also work in sections, using a piece of parchment paper or release paper to cover the adhesive area you’re not working on. This keeps the canvas clean and reduces the sticky surface area exposed to dust and debris.
Maintaining Alignment and Neatness
Maintaining neatness and alignment is essential to ensure your final piece looks polished and professional. Use a straight edge, such as a ruler or the side of a credit card, to gently push rows of diamonds into alignment. This can be particularly useful when finishing a section, as it ensures all diamonds sit flush against each other, creating a seamless look.
Take your time to place each diamond accurately to avoid having to reposition them frequently, which can weaken the adhesive.
Time-Saving Tips and Tricks
To save time, consider using a multi-placer tool, which allows you to pick up and place several diamonds at once. This can be especially useful for larger sections of the same color. Another tip is to pre-label and organize your diamonds before starting. This upfront organization can substantially reduce the time spent searching for the right color.
If you need to step away from your project, cover the adhesive with the protective film to keep it clean and ready for your return.
By implementing these techniques and tips, you can enhance your diamond painting efficiency and ensure a beautifully aligned and neat final product. Happy crafting!
Advanced Tips and Tricks
If you’ve completed a few diamond paintings and are looking to elevate your crafting skills, there are several advanced techniques to explore.
Firstly, to combat static in your diamond drills, consider using a small piece of dryer sheet; simply rub it on your trays or even place it in the storage containers to prevent diamonds from sticking together.
Additionally, working under magnified light or using a light pad can make it easier to see the smaller symbols and ensure precise placement. These tools can significantly reduce eye strain and enhance accuracy, especially for more detailed sections.
Customizing Your Diamond Painting
For those seeking a more personalized touch, customizing your diamond painting can be incredibly rewarding. You can customize by adding special drills like AB (Aurora Borealis) diamonds, which have a unique coating that reflects light beautifully, giving your painting an extra sparkle.
You can mix these with regular drills to highlight certain areas or patterns. Additionally, many crafters enjoy creating custom diamond paintings from personal photos.
Websites and services offer the ability to convert your images into diamond painting kits, allowing you to create a piece of art that holds personal significance.
Blending Techniques for More Depth
Blending techniques can add a layer of sophistication to your diamond painting, making the final piece look more dynamic and realistic. Instead of strictly following the provided color codes, you can blend different shades subtly to create a gradient effect. This technique is particularly useful for backgrounds, skies, seas, and other areas where a smooth transition of colors can depict more depth.
To achieve this, experiment with placing darker shades at the edges and lighter shades toward the center or vice versa, based on your desired effect. It’s like painting with diamonds and can dramatically enhance the visual interest of your artwork.
Creating Your Patterns from Photos
Turning your cherished photographs into diamond paintings is a fantastic way to combine art with personal memories. Many online platforms offer services to convert your pictures into diamond painting patterns.
When choosing a photo, select one with clear details and high contrast for the best outcome. Once converted, the photo is mapped into a canvas with designated symbols and color codes.
You can further enhance the result by customizing the kit with different types of diamonds, such as round or square drills, to achieve the desired texture and finish. This approach allows you to create unique, one-of-a-kind pieces that can be treasured for years to come.
By embracing these advanced techniques and customization options, you can take your diamond painting projects to new heights, creating intricate, personalized works of art that are both stunning and meaningful. Happy crafting!
Troubleshooting Common Issues
Even with meticulous care, you may encounter some common issues while diamond painting. These challenges can be easily managed with the right approach and tools.
How to Fix Misplaced Diamonds
If you’ve mistakenly placed a diamond in the wrong spot, don’t worry! Use a pair of tweezers to gently lift the misplaced diamond without damaging the adhesive. If the adhesive layer gets affected, you can touch up the spot with a tiny amount of clear tacky glue to restore its stickiness. It’s helpful to work slowly and double-check your placement as you go to minimize errors.
Dealing with Sticky Canvas Problems
Sometimes, despite your best efforts, the canvas can lose its stickiness. Dust, pet hair, and other debris can adhere to the surface, diminishing its tackiness. To restore the adhesive, use a lint roller or a piece of slightly damp cloth to carefully clean the area. Be sure to let it dry completely before continuing. If the stickiness doesn’t return, you can apply a thin layer of clear adhesive, like fabric glue, to the affected area.
Addressing Issues with Bead Quality or Inconsistency
Quality or consistency issues with your beads can be frustrating, but they’re not insurmountable. If you encounter irregularly shaped or flawed diamonds, set them aside and use the extras typically provided in your kit.
For better organization, sort through and separate the good beads from the bad ones before starting your project. Should you find that you’re running low on a particular color, most suppliers offer additional diamonds for purchase.
By understanding and addressing these common issues, you can ensure your diamond painting projects continue smoothly and result in beautiful finished artwork.
Displaying and Preserving Your Artwork
Completing a diamond painting is a rewarding achievement, and displaying your finished piece can bring a sense of pride and joy. There are several methods to showcase and preserve your artwork.
Framing Your Finished Piece
Framing your diamond painting is one of the best ways to display and protect it. You can choose from traditional frames or opt for custom-framed solutions. To frame your artwork, carefully remove any excess fabric around the edges of your canvas. You might want to use a mat board to create a clean and professional look.
Make sure the frame’s glass doesn’t press too tightly against the diamonds, as this could damage their sparkle. You may also consider using a shadow box frame, which provides depth and protects the piece without direct contact.
Storage Solutions for Ongoing Projects
If you’re working on multiple diamond paintings or taking breaks between sessions, storing your projects properly is essential. Use large, flat plastic containers or storage tubes to keep your canvases dust-free and unwrinkled. For your drills, compartmentalized storage boxes or bead organizers are excellent choices.
Label each compartment clearly to easily find the colors you need. Additionally, keeping the protective film over the adhesive area when not in use helps maintain the canvas’s tackiness.
Caring for and Cleaning Your Diamond Paintings
Over time, your diamond paintings may gather dust or require a bit of upkeep. To clean your finished artwork, gently use a soft brush or a lint roller to remove any dust or debris. If you notice any diamonds becoming loose, reattach them with a small dab of clear tacky glue.
For deeper cleaning, you can lightly wipe the surface with a slightly damp cloth but be cautious to avoid soaking the adhesive.
Framing your artwork and employing proper storage and cleaning techniques will ensure that your diamond paintings remain vibrant and beautiful for years to come. Enjoy showcasing your dazzling creations!
Conclusion
Diamond painting is a delightful and rewarding hobby that allows you to create stunning, sparkly works of art with ease. Through this guide, we’ve explored a host of techniques and tips to help you master the craft.
From choosing the right canvas and converting personal photos into unique patterns to troubleshooting common issues like misplaced diamonds, sticky canvas, and bead quality, you’re now equipped with the knowledge to tackle any diamond painting project with confidence.
We’ve also covered key aspects of displaying and preserving your finished pieces to ensure they remain beautiful over time.
As you complete your current projects, don’t hesitate to start a new diamond painting journey. Embrace the creative process, experiment with advanced techniques, and don’t shy away from making your artwork personal and meaningful. Remember, every stitch of your canvas holds the promise of something extraordinary and unique.
For further resources and to connect with fellow diamond painting enthusiasts, consider joining online communities and forums. There, you can share tips, seek advice, and find inspiration from others who share your passion. Websites like Pinterest, Facebook groups, and specialized forums offer a wealth of information and support to keep you motivated and informed.
Happy crafting, and may your future projects sparkle just as brilliantly as your enthusiasm for this wonderful art form!
FAQs: Common Questions Answered
What is Diamond Painting?
Diamond painting is a form of art that combines cross-stitch and paint-by-numbers. It involves placing tiny resin “diamonds” onto a sticky canvas to create a sparkling mosaic pattern.
How Long Does a Diamond Painting Take to Complete?
The time it takes to complete a diamond painting can vary greatly depending on the size and complexity of the design, as well as the amount of time you dedicate to it daily. Smaller projects might take a few days, while larger, more intricate designs could take several weeks or even months.
What Tools and Supplies Do I Need?
Basic diamond painting kits include a pre-printed canvas, colored resin diamonds, a tray, a pen tool, and wax. Additional helpful items might include tweezers, storage containers for the diamonds, and a light pad to illuminate the canvas and make it easier to see the symbols.
How Do I Start a Diamond Painting?
To start, lay out your canvas and secure it to a flat surface. Pour a small amount of diamonds into the tray, and use the pen tool with wax to pick up each diamond. Place the diamonds on their corresponding symbols on the canvas. Work in small sections to avoid losing the adhesive’s stickiness.
What Should I Do If I Run Out Of Diamonds?
If you run out of diamonds, check if your kit includes a contact for customer service; many manufacturers will send you extra diamonds. Alternatively, you can purchase replacement diamonds online from various suppliers.
Additional Resources for Beginners and Advanced Painters
Online Tutorials and Classes
- YouTube: Find a variety of tutorial videos, from beginner tips to advanced techniques.
- Skillshare: Offers structured classes on diamond painting and related crafts.
Community Forums and Groups
- Facebook Groups: Join groups dedicated to diamond painting to share your work, ask questions, and get inspired.
- Reddit: Check out subreddits like r/diamondpainting for community support and advice.
Websites for Inspiration and Supplies
- Pinterest: Browse thousands of diamond painting ideas and tips.
- Etsy: Shop for unique diamond painting kits and accessories.
- Amazon: Find a wide range of diamond painting supplies, from novice to expert levels.
By exploring these resources, you can expand your knowledge, connect with other enthusiasts, and elevate your diamond painting experience. Happy crafting!
Additional FAQs
What Are the Different Types of Diamond Drills?
Diamond drills come in two main shapes: round and square. Round drills are easier to pick up and place, making them great for beginners. They leave small gaps between the diamonds, which can give a slightly less detailed finish.
Square drills, on the other hand, fit together perfectly without gaps, providing a more polished and detailed look. Choosing between them depends on your preference and the type of project you are working on.
Can I Seal My Diamond Painting?
Yes, you can seal your diamond painting to protect it from dust and ensure that all diamonds stay in place. Various sealants are available, including brush-on types and spray adhesives. Before sealing, make sure your artwork is clean and all diamonds are firmly attached.
Apply the sealant according to the manufacturer’s instructions and allow it to dry completely. This additional step will help preserve your masterpiece for years to come.
How Should I Deal with Static Cling on Diamonds?
Static cling can make handling diamonds tricky. To reduce static, try placing a dryer sheet in the container with your diamonds for a few minutes. Lightly shaking the container can also help distribute the anti-static properties. Alternatively, you can use a small amount of anti-static spray on the tray before pouring in the diamonds.
Can I Iron My Canvas?
If your canvas has wrinkles or creases, you can iron it to smooth it out. Place the canvas face down on a towel, cover it with a piece of cloth, and use a warm iron. Avoid using high heat, as it can damage the adhesive. Gently move the iron over the covered canvas until the wrinkles diminish. Be cautious and check often to prevent overheating.
What Is the Best Way to Display Finished Diamond Paintings?
Displaying your finished diamond painting is a fun way to enjoy your hard work. Popular options include framing your artwork or mounting it on a canvas stretcher. When framing, make sure to use a frame deep enough to accommodate the raised surface of the diamonds.
If mounting, you can simply wrap the canvas around a wooden frame and staple it to the back. Both methods will showcase your sparkling creation beautifully.
How Do I Prevent the Canvas Edges from Fraying?
To prevent the edges of your canvas from fraying, consider using masking tape or a clear sealant along the edges before you start your project. This simple step will help maintain the integrity of your canvas and keep it looking neat and tidy throughout the diamond painting process.


