
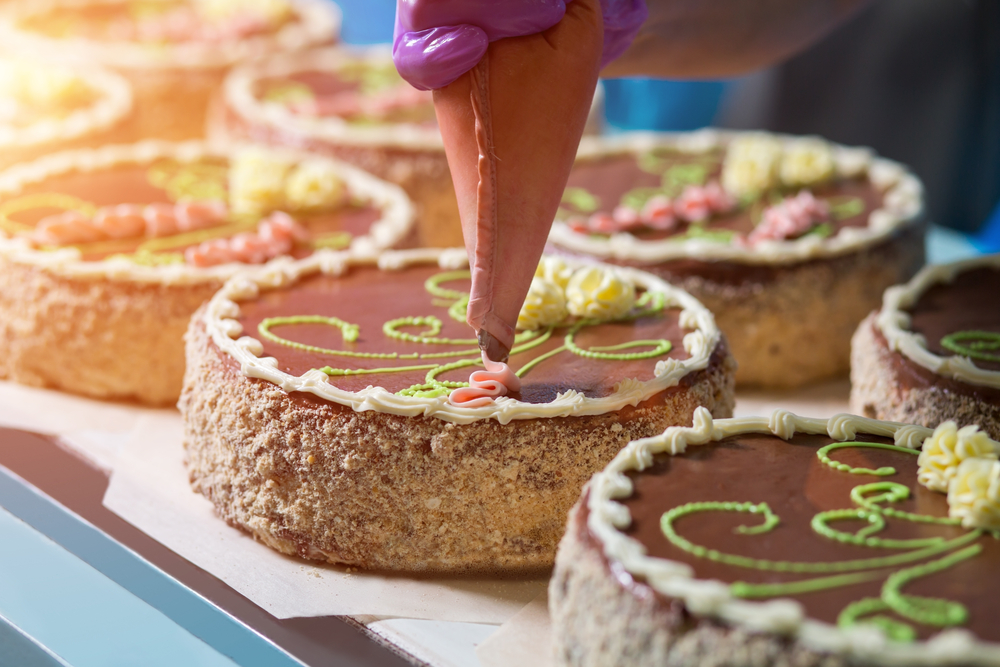
Cake decorating has evolved into an art form that goes beyond simple baking. It provides a unique opportunity to express creativity while celebrating special occasions. A beautifully decorated cake can serve as the centerpiece of any event, leaving a lasting impression on guests and adding a personal touch to celebrations.
The visual appeal of a cake can elevate the overall experience, making moments more memorable.
The purpose of this blog is to inspire you with unique and innovative cake decorating ideas that will wow your guests. Whether you are an experienced baker or a novice, these creative techniques can help you craft stunning cakes that are sure to impress.
Let’s explore these exciting decoration methods and take your cake designs to the next level!
Idea 1: Edible Flower Decorations
Using edible flowers to decorate cakes can add a natural and elegant touch that is sure to impress your guests. Both fresh and crystallized edible flowers offer a unique aesthetic, elevating the visual appeal of your cake.

Using Fresh or Crystallized Edible Flowers
Fresh edible flowers, such as pansies, violets, and marigolds, bring vibrant colors and delicate textures to your cake. Alternatively, crystallized flowers, which are coated in sugar, add a sparkling and sweet element that enhances both the look and taste of your cake.
Arranging Flowers for Maximum Visual Impact

When arranging the flowers, think about the overall design and balance of your cake. You can cluster flowers to create a focal point or scatter them for a more whimsical effect. Consider using varying sizes and colors to create depth and visual interest. It’s often effective to place larger flowers around the base or as a topper, with smaller blooms filling in spaces and adding detail.
Tips for Sourcing and Safely Using Edible Flowers
It’s crucial to ensure that the flowers you use are safe to eat. Purchase them from reputable suppliers, ensuring they are labeled as edible and pesticide-free. Always wash the flowers gently under cool water and pat them dry before use. If you’re using flowers from your garden, make sure they haven’t been treated with chemicals. Store any unused fresh flowers in the refrigerator to keep them fresh until they’re needed.
By carefully selecting and arranging edible flowers, you can create a cake that is not only beautiful but also memorable and delicious.
Idea 2: Geode Cakes
Geode cakes are a stunning way to bring the natural beauty of crystalline formations to your cake design. They mimic the look of geode rocks, which reveal sparkling crystals when cut open. This trend has become a favorite for its dramatic and eye-catching results.
Explanation of What Geode Cakes Are

Geode cakes incorporate edible rock candy, sugar crystals, or isomalt to create a dazzling, gem-like effect. These cakes usually feature a carved-out section that is filled with these edible crystals, designed to look like the inside of a geode. The vibrant and realistic appearance of geode cakes makes them perfect for milestone events and special celebrations.
Step-by-Step Guide to Creating a Geode Effect with Sugar Crystals
- Prepare Your Cake Base: Start with a baked and cooled cake. Frost it with a layer of buttercream, which will act as the base for your design.
- Carve the Geode Shape: Use a small knife to carve out a section of the cake where you want to place the geode. The shape can be customized to your liking, whether it’s a small window or a large, deep cavity.
- Apply a Thin Layer of Icing: Spread a thin layer of icing in the carved-out section to help the crystals adhere to the cake.
- Place the Sugar Crystals: Begin placing the larger sugar crystals or rock candy pieces in the deepest part of the carved-out section. Gradually add smaller pieces and crystals to fill in the space, layering them to create depth and dimension.
- Create the Illusion of Layers: Use varying sizes and shades of crystals to mimic the natural layers found in real geodes. Darker shades should be placed deeper, with lighter crystals layered on top.
- Finish with Edible Gold or Silver Paint: To enhance the luxurious feel, use edible gold or silver paint to accent the edges of the crystals and the carved section. This will give the cake a polished and realistic appearance.
Color Variations and Design Tips
Geode cakes are incredibly versatile and can be adapted to fit any color scheme. Popular choices include rich amethysts, bright aquamarines, and classic clear crystals. To make your geode cake truly unique, consider the following tips:
- Color Schemes: Choose colors that complement the overall theme of your event. For a more natural look, stick to pastel hues and earth tones. For a bolder statement, use vibrant and contrasting shades.
- Metallic Accents: Use metallic edible paints to add a touch of luxury. Gold, silver, and bronze can make the crystals pop and add an extra element of sophistication.
- Experiment with Shapes: Geode shapes don’t have to be symmetrical. Try different carvings such as multiple smaller geodes around the cake or a large, asymmetrical one for a more dramatic effect.
By following these steps and incorporating your unique design touches, you can create a show-stopping geode cake that is sure to impress.
Idea 3: Watercolor Painting Technique
Watercolor painting on cakes is a delicate and artistic method that results in a beautifully soft and dreamy aesthetic. It allows you to blend colors seamlessly and create various effects that can transform your cake into an edible masterpiece.
Materials Needed for Watercolor Painting on Cakes
To get started with watercolor painting on cakes, you will need the following materials:
- Edible Gel Food Colors: These provide vibrant and blendable colors suitable for cake decorating.
- Clear Alcohol or Lemon Extract: Mixing gel food colors with clear alcohol or lemon extract helps to achieve a watercolor consistency.
- Quality Paintbrushes: Use fine, soft brushes for detailed work, and broader brushes for larger areas and blending.
- Fondant or Smooth Buttercream Cake: A smooth surface on which to paint.
- Palette: For mixing colors.
- Paper Towels: To blot excess color and clean brushes.
Basic Techniques for Blending and Creating Effects
Mastering the watercolor painting technique involves a few key steps to ensure beautiful, blended effects:
- Mix Your Colors: Dilute gel food colors with clear alcohol or lemon extract to achieve a watercolor consistency. Use your palette to blend and create different shades.
- Prepare Your Cake Surface: Ensure your cake’s fondant or buttercream is smooth and chilled. A firm surface makes it easier to paint.
- Apply the Base Layer: Use a wide, damp paintbrush to apply a light wash of color to the cake’s surface. This base color will set the tone for your design.
- Build Layers and Blend: Gradually build layers of color, blending with a clean, damp brush. For a gradient effect, blend the edges of each color layer while still wet.
- Add Details and Effects: Use finer brushes for detailed elements such as abstract patterns, organic shapes, or floral designs. To create soft edges and unique blends, lightly blot with a paper towel.
- Dry Fully: Allow each layer to dry fully before adding more color to avoid unwanted blending and smudging.
Ideas for Color Schemes and Patterns
The versatility of watercolor painting means you can adapt the technique to fit any theme or occasion. Consider these ideas for inspiration:
- Soft Pastels for a Romantic Theme: Use blush pinks, soft lavenders, and mint greens for an elegant, romantic look, perfect for weddings or anniversaries.
- Bold and Vibrant for a Modern Look: Incorporate bright blues, purples, and reds for a contemporary, eye-catching design suitable for birthdays and celebrations.
- Ombre Effects for Subtle Elegance: Create seamless ombre designs by blending from dark to light shades of the same color for a sophisticated finish.
- Floral and Botanical Patterns: Combine shades of green for leaves with a variety of pastel colors for flowers to create a lush, garden-inspired cake.
- Abstract Art Designs: Experiment with bold, irregular patterns and splashes of color for an artistic and modern twist.
With these materials, basic techniques, and creative ideas, watercolor painting can turn your cake into a stunning work of art that will captivate and delight your guests.
Idea 4: Metallic Accents
Adding metallic accents to your cakes can elevate them to a new level of sophistication and glamour. Whether you’re aiming for a subtle sheen or a bold statement, edible metallic paints offer a versatile solution. Here’s a guide to understanding the types of edible metallic paints available and how to effectively use them.
Types of Edible Metallic Paints and How to Use Them
- Liquid Metallic Paints: These are ready-to-use and provide a smooth, lustrous finish. They can be applied directly with a paintbrush or airbrush for even coverage. Use them sparingly for small details or cover larger areas for a striking effect.
- Luster Dust: These fine powders can be mixed with a few drops of clear alcohol or lemon extract to form a paint-like consistency. Ideal for dry brushing on fondant or chocolate, luster dust creates a shimmering surface.
- Edible Gold and Silver Leaf: These ultra-thin sheets of metallic foil can be carefully applied to the cake’s surface for a luxurious, high-impact decor. They work best on smooth surfaces, like fondant or ganache.
- Spray Paints: Available in aerosol cans, edible metallic spray paints are perfect for covering large areas quickly and evenly. They’re excellent for creating gradients and adding an overall metallic tint.
Techniques for Adding Metallic Details to Cakes
- Brush Painting: Use fine-tip brushes for intricate designs like filigree, lace patterns, or writing. Broader brushes can be used for larger accents such as borders and edges.
- Stenciling: Place a stencil on your cake and gently apply metallic paint with a sponge or brush to create detailed patterns. This technique is great for replicating complex designs.
- Airbrushing: An airbrush allows for smooth, even application of metallic paints. This technique is ideal for soft, gradient effects and large surface areas.
- Dry Brushing: For a more subtle shine, lightly brush luster dust over the cake surface. This works well on textured fondant or chocolate to highlight the details.
- Applying Leaf: Use a soft brush to gently press gold or silver leaf onto the cake. Smooth it out carefully to prevent tearing, creating a stunning, mirror-like finish.
Inspirational Design Examples
- Golden Drip Cakes: Combine a classic drip cake with metallic gold drips cascading down the sides for a luxurious look.
- Gilded Floral Designs: Paint metallic accents onto sugar flowers or fondant flowers to add a touch of elegance.
- Metallic Geode Cake: Enhance the edges of a geode cake with metallic gold or silver to mimic the natural luster of real geodes.
- Modern Metallic Stripes: Use edible metallic paint to create bold, horizontal or vertical stripes for a contemporary design.
- Elegant Lace Patterns: Apply intricate lace stenciling with metallic paint for a vintage-inspired, sophisticated finish.
Adding metallic details to your cakes can transform them into show-stopping creations that reflect luxury and creativity. Exploring different types of edible metallic paints and techniques allows you to design truly unforgettable cakes.
Idea 5: Drip Cakes
Drip cakes have become a trendy and beloved addition to the cake decorating world, known for their visually stunning and indulgent appearance. What makes drip cakes unique is their ability to combine elegance with a sense of playful decadence.
The drips cascading down the sides of the cake create a dynamic and eye-catching effect that can be customized with a variety of colors and flavors, making them perfect for any occasion.
How to Achieve the Perfect Drip Effect
- Choose Your Drip Medium: Ganache is the most popular choice for dripping, but you can also use buttercream, royal icing, or candy melts. Whatever you choose, ensure it has the right consistency—not too thick or too runny.
- Prepare the Cake: Your cake should be chilled and have a smooth, even surface. A well-chilled cake helps the drips set quickly and stay in place.
- Create the Drip: If using a ganache, pour a small amount into a squeeze bottle or use a spoon. Start by gently applying the ganache around the edges of the cake, allowing it to flow down naturally. You can vary the pressure to create drips of different lengths.
- Cover the Top: Once you’ve achieved your desired drip pattern, pour the remaining ganache onto the center of the cake and spread it evenly with an offset spatula.
Combining Drip Cakes with Other Decorating Techniques for Added Flair
- Fresh Flowers and Fruits: Adorn the top and sides of your drip cake with fresh flowers or fruit for a natural and elegant decoration.
- Macarons and Meringues: Place colorful macarons or meringues to add texture and a pop of color, complementing the drips beautifully.
- Sprinkles and Edible Glitter: Add a touch of whimsy by sprinkling edible glitter or colorful sprinkles on the drips while they are still slightly wet.
- Piped Buttercream Flowers: Decorate the top of the cake with intricately piped buttercream flowers for additional texture and detail.
- Chocolate Shards and Decorations: Embed chocolate shards or other edible enhancements to give your cake a too-good-to-resist appearance.
Drip cakes offer a versatile and spectacular way to make any cake stand out. By mastering the perfect drip effect and combining it with other decorations, you can create breathtaking cakes that are both delicious and dazzling.
Idea 6: Stenciling and Airbrushing
Stenciling and airbrushing are fantastic techniques for adding precision and intricate designs to your cakes. These methods offer unparalleled control and detail, allowing both novice and experienced decorators to achieve professional-grade results.
Benefits of Stenciling and Airbrushing for Precision Designs
Stenciling and airbrushing open up a realm of creative possibilities for cake decorators. By using stencils, you can replicate complex patterns and designs with consistent accuracy, making it perfect for achieving uniformity on themed cakes.
Airbrushing, on the other hand, provides a smooth and even application of color, enabling you to create stunning gradients, shading, and even 3D effects. These techniques are excellent for highlighting details, adding layered textures, and making your cake designs pop with precision and finesse.
Essential Tools and Materials
- Stencils: Available in various designs and sizes, custom or pre-made stencils allow you to add patterns ranging from simple shapes to complex lacework.
- Airbrush and Compressor: An airbrush kit includes an airbrush gun and compressor, essential for spraying edible colors evenly and smoothly.
- Edible Colors: Specialized airbrush colors are essential for achieving vibrant and food-safe results. These are typically available in liquid form.
- Sponges and Brushes: For stencil work, having a selection of sponges and brushes ensures even application of the color through the stencil.
- Turntable: A cake turntable facilitates easy rotation, ensuring consistent application when stenciling or airbrushing around the cake.
- Masking Tape or Clips: To hold stencils securely in place while you apply color.
How-to Guide for Beginners
- Preparing the Cake: Ensure your cake has a smooth, even surface, whether covered in fondant, buttercream, or ganache. If using fondant, roll it out and cover the cake evenly.
- Stenciling:
- Position the stencil on the cake and secure it with masking tape or clips to prevent movement.
- Use a sponge or a brush to apply the color gently, patting it through the stencil openings. Repeat as needed to achieve the desired intensity.
- Carefully remove the stencil and allow the design to set.
- Airbrushing:
- Fill the airbrush gun with the chosen edible color. Test on a piece of paper to ensure the spray pattern and color intensity.
- Hold the airbrush gun at a 45-degree angle, about 6-8 inches away from the cake.
- Apply color in light, even strokes, moving the airbrush consistently for a smooth finish. Layer the color gradually to build up the desired shade.
- Cleaning and Maintenance:
- Clean the airbrush gun thoroughly after each use to prevent clogging and ensure longevity. Most airbrush kits come with instructions on disassembling and cleaning the parts.
Both stenciling and airbrushing can turn a simple cake into a masterpiece by adding delicate, multi-dimensional elements. With the right tools and a bit of practice, these techniques can significantly elevate your cake decorating skills, giving your creations a professional touch.
Idea 7: 3D Sculpted Elements
Introduction to 3D Cake Elements
Adding 3D elements to your cake can bring your creations to life, making them not just desserts but true works of art. Whether it’s a realistic fondant figure, whimsical sugar sculpture, or an intricate edible topper, 3D elements offer a dynamic and eye-catching dimension to cake decorating.
These techniques allow decorators to explore their creativity fully, transforming simple cakes into themed masterpieces that tell a story.
Basic Sculpting Tips and Tools Required
Creating 3D elements involves a blend of artistic skill and the right tools. Here are some essential tips and tools to get you started:
- Fondant and Gum Paste: Fondant is versatile and easy to mold for basic figures, while gum paste dries harder and is ideal for more delicate details and intricate structures.
- Modelling Tools: A set of sculpting tools can help create precise shapes, textures, and fine details. Common tools include ball tools, veining tools, and cutting wheels.
- Edible Glue: This helps attach different fondant or gum paste pieces securely.
- Paint Brushes: Useful for applying edible color, adding details, and blending seams.
- Drying Racks: Allow pieces to dry evenly to maintain shape and integrity.
- Templates and Guides: Use templates or printable guides to maintain proportions and consistency.
Integrating 3D Elements into Overall Cake Design
To successfully incorporate 3D elements into your cake design, consider the following:
- Plan Your Design: Sketch your cake and plan the placement of each 3D element. Make sure your elements enhance the overall theme without overwhelming the cake.
- Balance and Proportion: Ensure that the size and scale of your 3D pieces are proportionate to the cake. This creates a visually pleasing composition.
- Secure Attachment: Use supports, such as dowels or edible glue, to attach heavier elements to the cake securely. Ensure that they are stable and won’t shift during transportation.
- Harmonious Colors: Coordinate the colors of your 3D elements with the rest of the cake to create a cohesive look. Use edible paints, powders, and airbrush techniques to add realistic details.
- Complement with 2D Techniques: Pair 3D elements with stenciling, drips, or piping techniques to add depth and contrast, enhancing the overall visual impact.
By incorporating 3D sculpted elements into your cake designs, you can achieve stunning, show-stopping masterpieces that are sure to impress at any event. With practice and creativity, the possibilities are endless.
Conclusion
Embracing these unique cake decorating ideas can open up a world of creativity and artistic expression. Don’t be afraid to experiment with stenciling, airbrushing, and 3D sculpted elements. Each technique offers a distinct way to elevate your cake designs, making them visually stunning and memorable.
We encourage you to try out these methods and discover the joy of transforming simple cakes into masterpieces. Share your cake decorating experiences and photos with us; inspiration and learning come from seeing what others create. Your creativity might even spark new ideas for fellow cake enthusiasts!
In the end, nothing compares to the joy and pride of presenting a beautifully decorated cake to your guests. It’s a testament to your hard work, creativity, and passion, making every celebration extra special.
Remember, with practice and patience, you’ll continue to improve and impress with your incredible cake creations. Happy decorating!


