
Moving day is hard enough without playing “mystery box” in your new place. A simple system of moving box labels can be the difference between a chaotic pile of cardboard and a smooth, almost stress‑free unpacking.
In this guide, you will learn exactly how to use moving box labels like a pro, whether you are hauling a few small moving boxes up an apartment stairwell or coordinating a big family move with dozens of rooms and helpers.
Why moving box labels matter more than you think
Labeling can feel like one more chore, especially when you are surrounded by half‑packed cardboard moving boxes. It is tempting to scribble “misc.” on the top and call it good.
Taking a few extra seconds per box to label properly pays you back in hours saved later. According to professional organizers, a clear labeling system:
- Speeds up unloading because helpers instantly know where every box goes
- Makes it easy to find essentials on the first night in your new home
- Reduces lost or misplaced items because each box has a clear identity
- Helps prevent damage since fragile boxes are marked and handled with care
You do not need a fancy label maker to get these benefits. You just need a consistent system that you actually use on every box.

Choose the right labeling method
There is no single “right” way to label. The best method is the one you will stick to from the first packed box to the very last.
Common labeling systems
Here are four popular approaches you can mix and match:
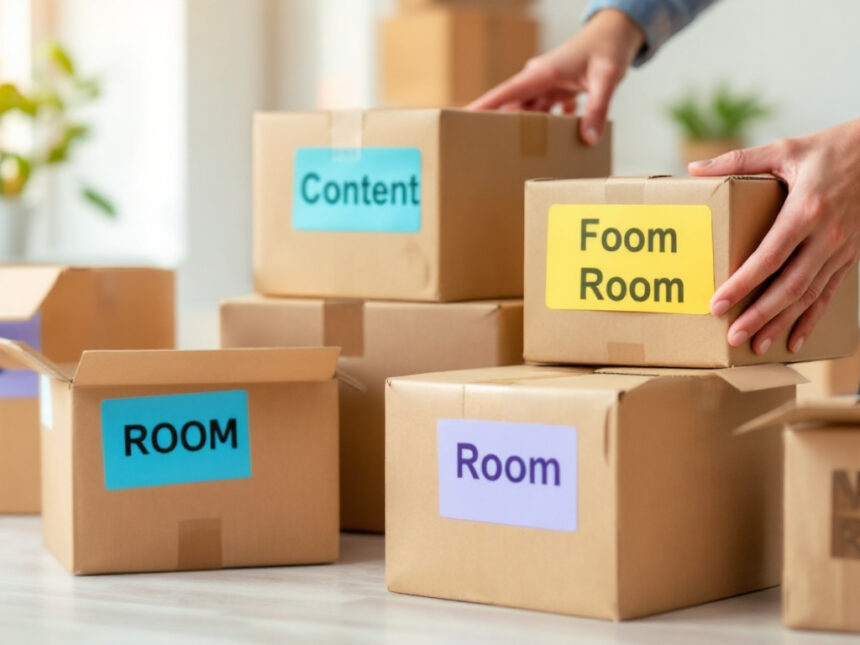
- Room name only
The simplest method. You write “Kitchen,” “Bedroom,” or “Living Room” on each box. This works for small moves with fewer boxes, especially if you are the only one unpacking. - Room + content summary
You write “Kitchen – pots and pans” or “Bedroom – bedding” so you know what is inside at a glance. Organizing expert Kathryn Kelly recommends this simple but specific format for most households. - Numbered boxes with a master list
Each box gets a unique number and a short label like “Kitchen 07 – baking.” Then you keep a separate inventory (paper or digital) that lists detailed contents for each number. This works very well for bigger family moves and long‑distance relocations. - Color coding by room
Each room gets its own color. For example, blue for the kitchen, yellow for the bedroom, and green for the bathroom. You can use colored tape, markers, or printed labels. Color coding makes unloading faster because movers only need to match colors to room signs.
Professional organizers often suggest combining these methods, like using color coding plus room names and content summaries, for maximum clarity.

What you will need for labeling
You probably have most of these supplies at home already:
- Thick permanent markers in dark colors
- Rolls of colored tape or colored stickers
- Pre‑printed or printable labels
- Clear packing tape to protect your labels
If you want a ready‑made system, you can use free printable moving box labels like those from Creating Mary’s Home, which are designed to be color-coded by room and speed up unpacking. These are designed to work with common label sheets like Avery 18163 and can be printed in different colors on white labels to create your own color system.
If you prefer blank labels you can fill out yourself, sites like OnlineLabels.com stock thousands of standard moving and box label configurations on sheets and rolls. They also provide free templates and design tools so you can create professional‑looking labels that match your system.
Build a simple color‑coding system
Color coding is one of the easiest ways to organize a move, especially when you have multiple helpers or professional movers handling your moving boxes.
Assign colors to each room
Start by listing every room or zone in your new home, then assign a color to each. For example:
Blue = Kitchen
Green = Living room
Yellow = Bedroom 1
Pink = Bedroom 2
Orange = Bathroom
Purple = Office
You can use colored labels, colored construction paper, or colored tape. Some people print labels on white sheets and then use a different ink color for each room. Others print on colored paper that matches each space, for example, red for the office or yellow for the bedroom.
If you have uniquely named spaces like “Basement TV area” or “Craft room,” simply add more colors or repeat a color with a clear written label. The key is consistency.
Make color coding obvious for helpers
On moving day, tape a sheet of paper with each color and its room name on the door or wall of the destination room. That way, anyone carrying boxes can match colors without needing directions.
For example, a bright orange “Bathroom” sign on the bathroom door tells everyone that every box with an orange label goes right there.
What every moving box label should include
Even if you are in a hurry, try to include the same core information on every box. Stack Moves recommends a clear, consistent format to reduce stress and keep everything organized.
At minimum, aim to add:
- Destination room
Where the box should end up in the new place. For example, “Kitchen,” “Bedroom 2,” or “Storage closet.” - Summary of contents
A few words that describe what is inside, such as “books,” “winter coats,” or “coffee mugs and glasses.” - Handling instructions
Any special care the box needs. Use clear phrases like “FRAGILE,” “THIS SIDE UP,” “HEAVY,” or “TOP LOAD ONLY” so movers know how to stack and carry it. - Unique box number
A simple number like “Kitchen 03” or “Box 27 of 54.” This helps you cross‑reference your master list and notice quickly if something goes missing. - Priority level if needed
For boxes with first‑day essentials, add “OPEN FIRST” so you do not have to dig for those items when you are tired and hungry after the move.
According to Stack Moves, you will get the best results if you place labels on at least two sides of each box plus the top, and then cover the labels with clear packing tape so they survive moisture, scuffs, and rough handling.
Create a master inventory list
If you are moving more than a handful of boxes, a simple inventory list can save time and headaches.
How to build your list
As you pack and label each box, write its number and contents in your master list. You can use a notebook, a spreadsheet, or an organizing app.
For example, your list might look like:
- Kitchen 01 – everyday plates, bowls, cereal bowls
- Kitchen 02 – pots and pans
- Living Room 01 – throw blankets, couch pillows
- Books 01 – cookbooks, travel guides
Professional organizers recommend this approach because it helps you quickly spot if anything goes missing and gives you an easy way to find specific items without opening every box (The Spruce).
If you want to go digital, apps like ToteScan let you attach QR codes to boxes and then track contents on your phone, which can be especially handy for higher value items (The Spruce).
When an inventory is worth it
You may not need a full inventory for a quick studio move with a few medium moving boxes. It becomes more valuable when:
- You are moving an entire family home with many similar boxes
- You will be storing some boxes long term
- You have valuable items and want clear records for insurance
- Your move involves multiple stops or a long distance
In those cases, the extra few seconds per box are well worth it later.
Label strategies for different box types
Not every box should be treated the same. Heavier, more fragile, and oversized boxes need special attention so movers know how to handle them.
Heavy boxes like books and tools
For heavy items, it is important to combine the right container with clear labels. If you are loading up moving boxes for books or tools, try these tips:
- Use smaller or small moving boxes instead of large ones so weight stays manageable
- Mark these boxes “HEAVY” in big letters on multiple sides
- Add “TEAM LIFT” if one person should not attempt to carry them alone
- Put heavy boxes on the bottom of stacks, so you avoid crushing lighter items
If you are unsure which sizes to choose, you can review typical moving box sizes and moving box dimensions before you shop.
Fragile items like dishes and glasses
For fragile kitchen items, your labels need to shout “Handle with care.”
If you are using specialized moving boxes for dishes or moving boxes for glasses, clearly mark:
- “FRAGILE” and “HANDLE WITH CARE” on multiple sides
- “KITCHEN – wine glasses,” “KITCHEN – plates,” or similar
- “THIS SIDE UP” if you packed items in a specific direction
Stack Moves also suggests using bright colors like red or orange on fragile or high value boxes, so movers can recognize them instantly even from a distance (Stack Moves).
Wardrobe and clothing boxes
For clothes, especially if you are using taller moving boxes for clothes or wardrobe boxes:
- Label the room plus clothing type, for example “Primary closet – dresses and jackets”
- Add “HANGING CLOTHES” or “DO NOT CRUSH” on the sides
- Mark any seasonal or off‑season items clearly so you know what can stay boxed longer
This makes it easy to put the right boxes in the correct closets and to decide what to unpack immediately.
Artwork and specialty items
Artwork, framed photos, and decor need a mix of protection and clear instructions. If you use dedicated moving boxes for artwork:
- Label them “FRAGILE ARTWORK – front” and “THIS SIDE UP”
- Note if the item is glass‑fronted or especially valuable
- Add “TOP LOAD ONLY” so they are not crushed under heavier boxes (Stack Moves)
Use “Open first” and essentials labels
The first night in your new place should not require digging through twenty large moving boxes just to find toilet paper or pajamas.
Create dedicated “Open first” boxes
Pack a few clearly labeled “Open First” boxes for:
- Bathroom basics like toilet paper, hand soap, towels, and shower supplies
- Kitchen essentials like a few dishes, cups, basic utensils, snacks, and a skillet
- Personal items like pajamas, a change of clothes, medication, and phone chargers
- Kid comfort items like favorite toys, blankets, and bedtime books
Follow Kathryn Kelly’s suggestion and label these boxes with “Open First” plus the room name, and if possible, transport them in your car rather than the moving truck so you know exactly where they are when you arrive (The Spruce).
Mark priority on the labels
You can write “OPEN FIRST,” “DAY ONE,” or even use a separate color only for essentials. The important part is that these labels look different from all your others, so you and your helpers spot them right away.
Protect and place your labels correctly
A clear label does not help if it falls off or is hidden on the one side of the box you cannot see.
Where to place labels
Stack Moves recommends labeling:
- At least two adjacent sides of each box
- Plus the top of the box, especially if boxes may be stacked high
This way, you can identify the box no matter how it is rotated in the truck or in a room later (Stack Moves).
Always write on the side panels after the box is packed and sealed so your labels reflect what is actually inside.
How to keep labels readable
To prevent smudging or peeling:
- Use permanent markers rather than pens or gel ink
- Stick labels onto a flat, clean part of the box, not over seams or corners
- Cover paper labels with clear packing tape to protect from moisture and scuffs
If you are using printed label sheets, check their material. Many moving labels are made from durable stock that can handle varied environments during moving and storage (OnlineLabels.com).
Adapt your labels for apartments, families, and fragile moves
Different types of moves benefit from slightly different labeling priorities. You can tweak your system to match your situation.
Apartment moves with tight stairs and elevators
If you are moving in or out of an apartment with limited space and maybe no elevator, your labels should make carrying and stacking safe and efficient.
Focus on:
- Weight warnings on heavy duty moving boxes and book boxes
- Clear floor or unit numbers on each box if your building has multiple levels
- Smaller packing boxes for moving for heavy items so each trip is manageable
- Simple room labels like “Studio – kitchen zone” or “Living area – media” if rooms are combined
If you need to keep costs down, consider mixing purchased boxes with free moving boxes or other free boxes for moving. Just make sure used boxes are sturdy enough and label them just as clearly as new ones.
Family moves with many rooms and helpers
For families with lots of stuff and multiple people helping, clarity is everything.
Try combining:
- Color coding by room
- Room name plus content summary
- Box numbers tied to a shared inventory list
You can even create a simple chart on moving day that explains your color and number system so friends, kids, and movers can all follow it. If you are buying a moving boxes kit, look for sets that include labels, or add your own colored labels to the mix.
For big households, buying moving boxes bulk can help keep the moving boxes cost reasonable. Once you know how many boxes you need from your inventory or a moving box calculator, you can shop around with different moving box suppliers or look at moving boxes for sale.
Fragile and high‑value moves
If you are especially concerned about fragile or high‑value items, make your labels impossible to miss.
According to Stack Moves, using bright colors like red or orange for fragile or valuable boxes, plus clear wording such as “Handle with care” or “Top load only,” helps ensure safer handling and easier unpacking (Stack Moves).
You can reserve those bright labels for:
- Artwork and framed photos
- Electronics and small appliances
- Collectibles, heirlooms, and valuables
- Dish and glassware boxes
Remember to note these box numbers and contents in detail in your inventory so you can quickly verify that everything arrives safely.
Use ready‑made and printable labels to save time
If you do not want to handwrite every label, printable templates and pre‑designed moving labels can speed things up.
Free printable moving labels
Creating Mary’s Home offers free printable moving box labels that:
- Are designed to be color coded by room
- Help place boxes in the right rooms quickly
- Include large, easy‑to‑read room names
These labels work well with Avery 18163 stickers and a standard printer, so you can print different colors for different rooms on white labels (Creating Mary’s Home).
Some people even print them on colored construction paper that matches each room color, so there is an extra visual cue when identifying boxes from across the room (Creating Mary’s Home).
Blank label sheets and design tools
If you want more control over design or need many labels, OnlineLabels.com sells a wide range of blank label sizes for moving boxes on sheets and rolls, plus design tools and templates that work with every label size they offer (OnlineLabels.com).
You can:
- Create your own label layout with room name, box number, and checkboxes for “fragile” or “open first”
- Save and reprint labels for future moves or storage projects
- Match label sizes to the particular standard moving box sizes you are using
Pairing these types of labels with sturdy best moving boxes or extra large moving boxes gives you a moving setup that is both practical and easy to manage.
Labeling used, free, or mixed‑quality boxes
Not every move uses brand‑new boxes. You might be combining store‑bought cartons with used moving boxes and where to find free moving boxes from friends or local shops.
A few extra labeling habits can keep this mix from turning chaotic:
- Mark weaker or reused boxes “LIGHT ITEMS ONLY” so you do not accidentally overload them
- Add “OLD BOX” or a dot in a specific color so you remember which boxes to recycle first after the move
- Reinforce labels with extra tape if the box surface is worn
- Use the same room and color system across all boxes so helpers are not confused
When you are collecting free boxes for moving or searching for moving boxes near me, look for boxes that are clean, dry, and not crushed. Then treat them just like any other box in your labeling system.
Double‑check your labels before moving day
The last step in “labeling like a pro” is to do a quick quality check before everything leaves your old place.
According to Stack Moves, a final double‑check can prevent misplaced boxes, damage, and a lot of moving‑day stress (Stack Moves).
Before your truck or moving service arrives, walk through these questions:
- Does every box have a clear destination room?
- Are fragile and heavy boxes clearly marked on multiple sides?
- Is each box number unique and matched in your inventory list, if you are using one?
- Are “Open first” boxes easy to spot and set aside?
- Are labels legible from a short distance, or do any need to be rewritten or darkened?
If you find unlabeled or vaguely labeled boxes, fix them now. Future you will be glad you did.
Putting it all together
A good labeling system does not need to be complicated. It just needs to be consistent from the first roll of packing tape to the last box on the truck.
You can start with three simple steps:
- Pick a color for each room and gather your label supplies.
- Decide on a standard format, like “Room – contents – box number – handling instructions.”
- Label every box right after you seal it, and update your list if you are using one.
Once your labels are in place, you can focus on other details like choosing the right moving boxes for clothes, planning how to how to pack moving boxes, or deciding where to buy moving boxes or get moving boxes for sale at a good price.
Start with your very next box. Add a clear room name, a quick content summary, and one simple instruction such as “FRAGILE” or “OPEN FIRST.” You will feel the difference on move‑in day when you can actually find what you need without tearing through a mountain of mystery boxes.
FAQs
What is the best way to label moving boxes?
The most effective method combines three elements: a destination room name, a brief contents summary, and handling instructions (such as “FRAGILE” or “HEAVY”). Adding color coding by room makes it even faster for helpers to place boxes correctly without direction. Place labels on at least two sides and the top of each box for maximum visibility.
Do I really need a master inventory list for my move?
For small studio moves with fewer than 20 boxes, a simple label system may be sufficient. However, for family moves, long-distance relocations, or moves involving valuable items, a master inventory list is highly recommended. It helps you quickly locate specific items, identify missing boxes, and provides documentation for insurance purposes.
What should I put in my “Open First” boxes?
Your “Open First” boxes should contain everything you need to survive the first 24 hours in your new home comfortably. This includes bathroom essentials (toilet paper, soap, towels), kitchen basics (a few dishes, utensils, snacks), personal items (pajamas, medications, phone chargers), and comfort items for children (favorite toys, blankets). Transport these in your personal vehicle, not the moving truck, so you always know where they are.
What colors should I use for color-coded moving labels?
There’s no universal standard; choose colors that feel intuitive to you. A common system might be: Blue = Kitchen, Green = Living Room, Yellow = Bedroom, Orange = Bathroom, Purple = Office, and Pink = Secondary Bedroom. The key is to be consistent and post a color key chart on each room’s door on moving day so all helpers can follow it independently.
How do I label fragile items so movers handle them carefully?
For fragile items, use bold, high-visibility language such as “FRAGILE,” “HANDLE WITH CARE,” and “THIS SIDE UP” on multiple sides of the box. Consider using bright red or orange labels to make these boxes stand out visually from across a room or truck. Stack fragile boxes on top of heavier items and never beneath them.
Can I use free or recycled boxes and still have a good labeling system?
Absolutely. The labeling system works just as well on used boxes as on brand-new ones. Mark reused boxes with “LIGHT ITEMS ONLY” to prevent overloading, and reinforced labels with extra packing tape if the box surface is worn. Maintain the same color and room-naming conventions across all boxes to avoid confusing your movers.
Are printable moving labels worth it?
Yes, especially for larger moves. Free printable labels from resources like Creating Mary’s Home are designed to be color-coded by room and work with standard Avery 18163 label sheets. They save significant handwriting time and produce a cleaner, more legible result. Sites like OnlineLabels.com also offer blank templates and design tools if you want a fully customized system.


