
Airport security feels slowest when your backpack turns into a “where did I put it?” puzzle. If your liquids, laptop, and cables are buried under layers of clothes, you’ll end up repacking under pressure while the line stacks up behind you.
The fix is simple: pack for access, not just space. In this guide, you’ll build a backpack layout that matches how checkpoints work—electronics and liquids reachable in seconds, heavy items stable near your back, and small essentials living in predictable pockets. Less rummaging, fewer bag checks, and a calmer start to every trip.
Why efficient backpack packing speeds up airport security
If you are wondering how to pack a backpack efficiently so you are not the person holding up the security line, you are already ahead of most travelers. A well organized backpack does more than save space. It helps you glide through airport security, find what you need in seconds, and settle in quickly at your gate or hotel.
When your liquids, laptop, and bulky electronics are buried under a tangle of clothes and cables, you pay for it in stress and time. TSA-style checkpoints are designed around clear separation of certain items, so the more intentionally you pack, the smoother every checkpoint feels. The goal is simple: everything critical is easy to pull out, easy to put back, and safely cushioned in between.
This guide walks you through a step-by-step system that works for frequent flyers, families with kids, and one bag travelers. You will map your backpack into “security zones,” use smart containers, and pack in layers so your bag works with security rules instead of against them.
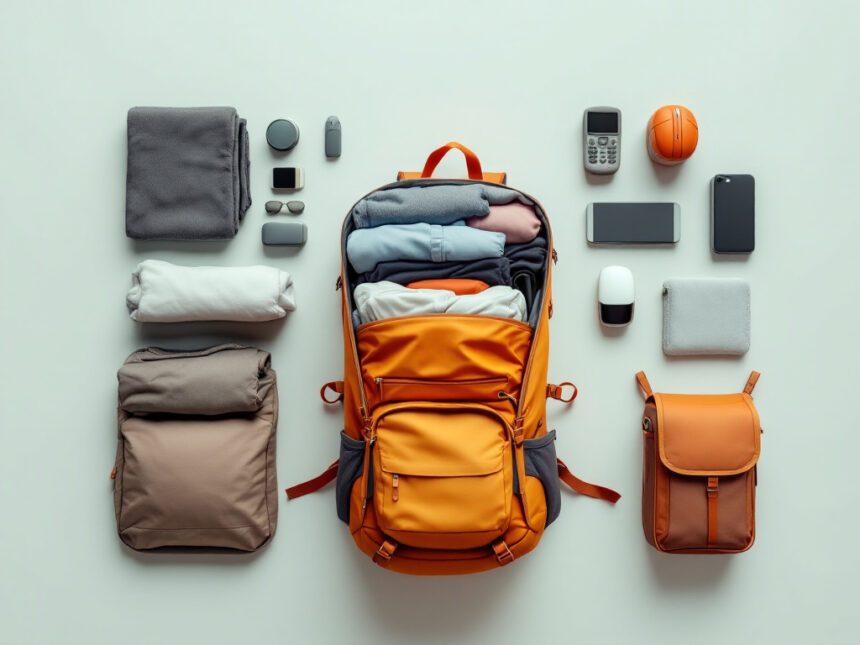
Step 1: Start with the right backpack
Before you decide what goes where, you need a backpack that makes efficient packing possible. Even a perfect system will feel frustrating in a bag that opens poorly or has no structure.
Features that make security easier
Look for a backpack that has:
- A full or wide opening, like clamshell or book style, so you can lay it open flat
- A dedicated laptop sleeve that is padded and close to your back
- At least one quick access top pocket for keys, boarding pass, or phone
- A front organizer pocket for small tech, pens, and documents
- Side pockets sized for a water bottle or an umbrella
These features help you build predictable “homes” for each category of item. Efficient packing is less about squeezing every inch and more about knowing exactly where something lives.
If you often travel with a lot of tech or work gear, check for a TSA friendly laptop compartment that can lay flat. Some airports will still ask you to remove your laptop, but being able to unzip that section quickly is a small time saver in busy lines.
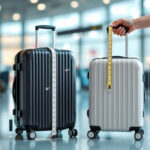
Weight, size, and comfort considerations
Aim to keep your fully packed backpack under about 20 percent of your body weight. Hiking research suggests that loads above this threshold strain your back and shoulders and increase fatigue on longer walks between terminals, especially if you are also rolling a suitcase.
Choose a size that fits under the seat or in the overhead bins comfortably. For most adults, a 20 to 30 liter backpack is ideal for personal item or one bag travel. If you are traveling with kids, consider a smaller backpack for each child and a single larger “family base” backpack for shared items, so you can divide weight and keep essentials close at hand.
Step 2: Clear, edit, and plan your load
The fastest way to slow down security is to pack more than you need. Extra items mean more layers on the X ray and more chances for a bag check. Before you start filling compartments, clear and edit.
Empty your backpack completely. Shake out crumbs and old receipts. Remove anything that does not belong on this trip so you are not layering new items on top of forgotten ones. Starting with a completely empty bag gives you a clean slate and helps prevent clutter from building up again.
Next, group what you plan to bring into clear categories. This helps you later when you use a packing system for organized trips.
Common groups include:
- Tech and electronics, laptop, tablet, chargers, headphones
- Liquids and toiletries
- Clothing and spare layers
- Documents and travel papers
- Snacks and small comfort items
- Kids’ supplies, toys, wipes, small games
Lay these groups out where you can see them. Anything that does not fit into a category is a candidate to leave behind. If you want help trimming down, you can use ideas from minimalist packing organization or packing light and organized to decide what really earns a place in your bag.
Step 3: Create “security zones” in your backpack
Security checkpoints care about access and visibility. Instead of treating your backpack as one big space, think in terms of zones based on how security sees your bag.
The four main zones
You can imagine your backpack in four layers:
- Bottom zone: soft, rarely accessed items like extra clothing
- Core zone: heavy items and dense electronics close to your back
- Top zone: frequently accessed travel essentials
- Outer zone: pockets for very small or must grab items
This approach mirrors how hikers pack their backpacks, with light, squishy items at the bottom, heavier dense items in the center, and quick access items at the top. That balance keeps weight close to your body and makes the bag more comfortable to carry, similar to guidance from outdoor guides such as Australian Hiker, who recommend heavier gear in the core to stabilize load and lighter gear in top and peripheral pockets.
Map your items to each zone
For airport security, you can assign items like this:
- Bottom: extra clothes, sweater, travel pillow, spare shoes
- Core: laptop sleeve, tablet, larger power bank, compact camera
- Top: liquids bag, snacks, light jacket, kids’ activity kits
- Outer pockets: passport, boarding pass, phone, wallet, hand sanitizer, tissues
Try to keep heavy electronics in the core and close to your back. Research on backpacking shows that heavy items placed in the center, near your shoulder blades, improve stability and reduce energy use compared with heavy items on top, which can throw you off balance on stairs or escalators. The same comfort principles that apply on the trail help you in the airport as well.
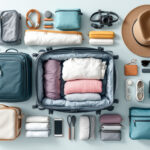
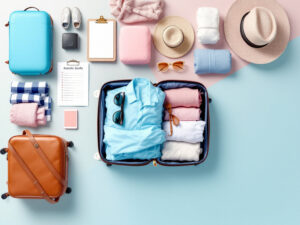
Step 4: Use containers to control clutter
Loose items slow down both security checks and your own unpacking. Small cases, pouches, and organizers keep everything in place and easier to scan.
You can find many packing accessories for organization, but you do not need anything fancy to get started. Simple zip pouches, small bags, or even labeled zip lock bags can work.
Containers that help your bag scan clearly
Consider using:
- A clear quart size bag for liquids, required for carry on
- A slim tech pouch for chargers, cables, adapters, and a mouse
- Packing cubes or folders for clothing, especially for one bag travel
- A small flat pouch for documents, passport, and printed confirmations
- Tiny cases for earplugs, jewelry, or medication
Grouping like with like is also how hikers keep their gear manageable in various conditions. For example, Australian Hiker recommends color coded dry bags for clothing, food, and other gear, which makes each category easy to spot and adds water resistance for outdoor trips. On your flights, you can use color or clear materials for the same quick recognition, even if you do not need full waterproofing.
If you want more ideas for categories and container types, take a look at packing containers for organization and packing bags organization ideas.
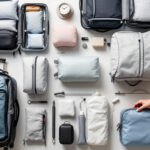
Step 5: Build a security friendly packing layout
Now you are ready to put it all together. The key to how to pack a backpack efficiently is not just what you bring, but the order you load it.
Step by step packing order
- Start with the laptop section
Slide your laptop into its dedicated sleeve, closest to your back. If your bag opens book style, keep this section flat and clear of other objects. Your tablet can sit in a neighboring slot if you use one. - Pack the bottom zone with soft items
Fill the bottom of the main compartment with squishy clothing or a compressible jacket. This creates cushioning and helps your backpack keep its shape. If you are using packing cubes organization ideas, place the largest cube flat at the bottom. - Add the core zone with heavier gear
Place any heavier items that you are not required to remove at security, such as a camera in a padded case, a compact umbrella, or a small book, in the middle of the main compartment and close to your back panel. This copies the backpacking principle where heavy items go in the core, which Australian Hiker notes keeps your center of gravity stable and directs load downward rather than pulling you backward. - Layer in medium weight clothing or cubes around the core
Surround those heavier items with medium weight packing cubes or folded clothing so that nothing hard presses outward. Filling small gaps, the way hikers “stack cordwood” in their packs, prevents your gear from shifting and keeps the X ray image crisp. - Place your liquids and quick access items at the very top
Put your quart size liquids bag right on top or in a shallow pocket at the front of the main compartment. This way, it is the first thing you see when you unzip. Add snacks, a scarf, or a light jacket on top if there is space, but do not bury the liquids. - Use the front organizer for small tech and documents
Slip your tech pouch, pens, notebook, and any printed itineraries into the front pocket. Keep your passport and boarding pass in one slim pouch that you can move from backpack to your person when you reach the front of the security line. - Fill side and top pockets thoughtfully
Place a water bottle in an exterior side pocket, empty before security if your airport requires it. Use a top pocket for headphones, a pack of tissues, or lip balm, so you are not opening the main compartment every few minutes.
Why this layout scans quickly
Security agents are looking for clear outlines of electronics and liquids, along with any unusual density. By layering your items, you avoid confusing overlaps. Heavy electronics are close to your back, rather than in the center of the main compartment where they can be hidden under clothes.
At the checkpoint, you should be able to:
- Unzip the main compartment
- Lift out your laptop, tablet, and liquids bag in one smooth motion
- Place them in a tray
- Zip your bag closed without loose items falling out
Once you are through, you reverse the steps in seconds instead of digging around.
If you want extra detail on smaller bag layouts, you can connect this method with organized carry-on packing tips and efficient packing techniques.
Step 6: Special strategies for frequent flyers
If you fly often, shaving even a few minutes off each security pass adds up quickly. Treat your backpack as a semi permanent setup, not something you rebuild every trip.
Keep a standing travel core
Create a dedicated travel kit that always lives in your backpack:
- Travel sized toiletries in a compliant liquids bag
- A universal power adapter and spare charging cables
- Neck pillow or eye mask if you use one
- Pen, small notepad, and basic medicine
When you get home, refill anything you used, then return it to the same spot. Over time, this habit means you no longer “pack from zero.” You only add trip specific items like clothes and work materials.
You can refine this system over time using ideas from travel packing organization tools or travel packing organization hacks.
Create a repeatable security routine
Efficient packing goes hand in hand with a predictable security routine. As you approach the front of the line:
- Move your passport and boarding pass to your hand or a pocket you can reach easily
- Unzip the compartment where your laptop and liquids live
- Remove belt, watch, or metal items and place them directly into your backpack pocket, not loose in a tray
The more often you repeat the same steps with the same layout, the more automatic it feels.
If work trips are part of your routine, combine this approach with organized packing for business trips so your backpack stays ready for both client meetings and quick getaways.
Step 7: Family and kids’ backpack strategies
Traveling with children adds complexity, so your backpack has to work harder. You want fast access to snacks, entertainment, and emergency clean up supplies without forcing a full unpack every time.
Give kids their own mini zones
If your children are old enough, let each one have a small backpack with clear categories:
- Front pocket: small toy, coloring pages, crayons
- Main compartment: labeled pouch with snacks, a water bottle, and a light sweater
- Inside zip pocket: spare socks or underwear
You can use organizing kids’ travel bags to help them learn the pattern. For airport security, remind them that their liquids bag, usually toothpaste or tiny shampoo, needs to be reachable near the top.
Turn your backpack into a “family base camp”
Your own backpack can carry backup supplies:
- A shared bag of extra snacks
- A small pouch for wipes, tissues, and a few plastic bags
- A change of clothes or pajamas for the youngest child, stored in a packing cube
- Compact games or a deck of cards in a flat pouch near the top
Pack the kids’ backup clothes in a single cube labeled by child or outfit. This is where organizing packing by outfit is especially useful. One cube can hold a full change for the flight or the first night, so if luggage is delayed you are not unpacking everything in the airport bathroom just to find pajamas.
Place the wipes and emergency items near the top of your bag, since spills and accidents do not wait patiently until you reach the gate.
Step 8: One bag and minimalist travel layouts
If you are a one bag traveler, your backpack is your entire luggage. Efficient airport security is still important, but you also have to think about hotel unpacking and daily use at your destination.
Use a clear internal structure
Since you carry more in one bag, rely on a structured system of cubes and pouches, such as:
- One cube for tops
- One cube for bottoms
- One cube for underwear and sleepwear
- A slim folder for work shirts if you need them
- A dedicated shoe bag or two for sandals and sneakers
You can compare different systems using guides like packing cubes vs packing folders and best packing cubes for organization.
Load your clothing cubes at the bottom and sides of the main compartment, keeping the area directly above the laptop as light as possible. Place your liquids bag and a small toiletries pouch near the top so that they remain reachable during security checks, but also easy to access in the bathroom once you reach your destination.
If you want to refine what actually goes into your one bag, you can follow broader advice on how to pack efficiently for travel and pack smart and organized.
Keep shoes contained and stable
Shoes are heavy and awkward, and they can press oddly against your back. To keep your bag balanced:
- Place shoes near the bottom of the main compartment, heel toward the back panel
- Fill them with socks or small items so they do not collapse and waste space
- Use a washable shoe bag or plastic bag to protect other items
Similar rules show up in hiking efficiency as well. Outdoor packing lists from REI emphasize placing bulky items such as boots where they can be stabilized by surrounding clothing and tightened compression straps, in order to prevent shifting and snagging during hikes. Following a similar pattern in your travel backpack keeps your center of gravity stable during long walks through airports.
If you want more detailed ideas on how to manage shoes specifically, look at packing shoes organization tips.
Step 9: Toiletries, liquids, and airport rules
Liquids are often the weak point in otherwise well organized backpacks. When they are buried deep, you delay the line. When they are loose, you risk spills. The trick is to respect airport limits while keeping your kit practical.
Build a dedicated security ready liquids kit
Use a clear, sturdy quart size bag for all liquid and gel items such as toothpaste, lotion, face wash, and travel sized shampoo. Keep this bag in the top of your main compartment or in a front pocket that is large enough so it never gets caught on the zipper.
When you reach the trays, pull this bag out first and place it separately. Then reach for your laptop. This one-two motion, liquids then laptop, becomes automatic over time.
If you are not sure what is considered liquid or how to shrink your kit, you can follow more focused advice for organizing toiletries for travel.
Non liquid toiletries and dry alternatives
To reduce the number of liquid items, consider swapping to:
- Solid shampoo or conditioner bars
- Solid lotion bars or balm
- Tooth powder or chewable toothpaste tablets
Backpacking guidance from sources like Australian Hiker highlight the benefits of compact, lightweight toiletries since they reduce both bulk and spill risk, especially on multi day trips. Those same products work well for air travel and simplify security screening.
Non liquid items can stay in a separate toiletry pouch, which you keep near the liquids but do not need to remove.
Step 10: Test your system before you fly
The last step in learning how to pack a backpack efficiently is to test your setup at home, while you still have time to adjust.
Do a full “mock security check”
Once your backpack is packed:
- Place it on the floor as if you were approaching the tray
- Start a timer on your phone
- Unzip the bag and remove your laptop and liquids bag
- Set them aside, then zip the bag closed
- Reverse the process: put items back in and zip
If you cannot do this in under about thirty seconds without things falling out or getting stuck, refine your layout. Maybe your liquids bag needs to move upward one layer, or your laptop compartment needs to be less crowded with papers.
Australian Hiker recommends doing fully loaded trial runs of packs at home for hiking trips, partly to check comfort and partly to test organization before committing to long days on the trail. A quick home practice session with your travel backpack plays the same role for your flights.
Walk around fully loaded
Put on your backpack and walk around your home or outside for ten to fifteen minutes. Notice:
- Does anything dig into your back?
- Does the bag pull you backward or to one side?
- Do straps need tightening to prevent shifting?
REI’s backpacking checklists note that tightening compression and stabilizer straps after packing helps keep loads from shifting and throwing off balance, especially when moving over uneven ground. In the airport, a snug, stable backpack keeps you more comfortable on long walks between distant gates.
If the bag feels unbalanced, adjust the weight distribution. Bring heavier pouches closer to your back and move softer items outward or upward. Small changes can make a big difference in both comfort and how cleanly your bag moves through the scanners.
Putting it all together
When you use a clear structure and repeatable habits, your backpack becomes an asset instead of a hassle at airport security. You map your bag into zones, use simple containers, and follow a specific order that respects how security works.
To recap the core ideas:
- Choose a backpack that opens wide and has a good laptop sleeve
- Edit your packing list and group items before you load the bag
- Place light and soft items at the bottom, heavy dense items in the core, and quick access items at the top
- Keep your liquids bag and laptop immediately reachable
- Use pouches, cubes, and cases to control clutter and keep X ray images clean
- Practice a simple security routine before you fly
If you want to expand this into a full system for all your trips, connect these steps with your broader packing organization tips, packing checklist for organized travel, and organized packing for vacation. Over time, you will spend less energy thinking about what goes where, and more time actually enjoying your journey.
FAQs
What should I take out at airport security?
In many standard lanes, you’ll be asked to remove laptops (and often larger electronics) and place them in a separate bin. Procedures can vary by airport/technology, but planning for quick removal is the safest bet.
Do liquids have to be in a clear quart-size bag?
For carry-on screening under TSA’s 3-1-1 approach, liquids, gels, aerosols, creams, and pastes are typically limited to 3.4 oz (100 ml) containers inside one quart-sized bag per traveler (exceptions exist for medical/baby items).
Where should I pack my liquids bag for fastest screening?
Put it on top of the main compartment or in a pocket you can open instantly—so you can remove it in one motion before you reach for your laptop.
How should I pack heavy items in a backpack?
Keep dense/heavy items centered and close to your spine/back panel to stabilize your load and avoid a “tippy” feel while walking long terminals.
What’s the best way to avoid a bag check?
Minimize clutter, avoid tangled cables, separate categories into pouches, and keep electronics/liquids easy to see and remove. TSA notes that clutter can obstruct clear X-ray images.
Is a TSA-friendly laptop compartment worth it?
It helps because it makes the laptop easy to access fast—though some lanes still require laptop removal regardless, so convenience is the real win.


