
Airports can feel confusing even if you have flown before. Security lines, rules about liquids, shoes on or off, laptops in or out of your bag, it can all blur together quickly.
These must-know airport security tips will walk you through each step so you know exactly what to do, what to wear, and how to pack, whether you are a first-time flyer or a frequent traveler trying to streamline your routine.
Understand how airport security works
When you know what to expect, you are much less likely to feel rushed or flustered in line.
Most airports follow a similar flow:
- You show your ID and boarding pass.
- You enter the screening line and load your items into bins.
- You walk through a metal detector or advanced imaging scanner.
- You collect your belongings and repack.
Behind the scenes, the Transportation Security Administration (TSA) screens about 3.3 million carry-on bags and 1.3 million checked bags every day in the United States for explosives and other dangerous items. They use X-ray machines, explosive trace detection, advanced imaging technology, and physical inspections to keep flights safe.

You may be screened by:
- A walk-through metal detector
- An advanced imaging technology scanner
- A pat-down, performed by an officer of the same sex, often if a machine alarms or randomly as an added security step
If a pat-down is needed, you can always ask for a private screening.
Treat security as a predictable checkpoint, not a mystery, and you will move through it with more confidence.
Arrive with plenty of time
Rushing is the fastest way to make security stressful.
Experts generally recommend that you arrive:
- 2 hours before a domestic flight
- 3 hours before an international flight
This buffer gives you time to park or get dropped off, check bags if needed, clear security, refill your water bottle, and reach your gate.
Crowded airports, peak travel seasons, holidays, and early Monday mornings can all mean longer lines. Check your airport’s website or app for typical wait times so you can adjust if your location is especially busy.
If you want to avoid parking shuttles and long walks, consider using a rideshare like Lyft that can drop you right at your terminal. You can schedule rides in advance so you are not scrambling on departure day.
Prepare your documents and ID
Having your documents ready is one of the simplest but most powerful airport security tips.
You will typically need:
- A valid government-issued photo ID
- Your boarding pass, paper or mobile
- Your passport for international flights
Starting in May 2025, you must have a REAL ID compliant license or another accepted form of identification for U.S. domestic flights.
Keep your passport, ID, and boarding pass in an easy-to-reach pocket so you are not digging through your backpack at the front of the line. A slim travel wallet or neck pouch can help you keep everything together and secure.
If you forget an acceptable ID, TSA may still be able to verify your identity, but as of current regulations, you may have to pay a 45 dollar fee for screening. That is an expensive and stressful way to start a trip, so double-check your ID before you leave home.
Printed boarding passes are a useful backup in case your phone dies, the airline app glitches, or the scanner cannot easily read your screen.
Know your security program options
If you fly even a few times a year, expedited screening programs can save you a lot of time and frustration.
CLEAR and CLEAR+
CLEAR+ is a membership program that verifies your identity with biometrics, usually your eyes and face, at security. At participating airports, you can use CLEAR+ lanes to skip to the front of the standard security line. CLEAR+ is currently available at about 60 airports nationwide.
If you want an even more guided experience, CLEAR Concierge, available to CLEAR+ members, offers curb-to-gate assistance. A CLEAR Ambassador meets you at the curb, helps with your luggage, and escorts you through security to your gate.
CLEAR does not replace TSA screening. You still go through the X-ray and scanner, but you bypass much of the waiting in line.
TSA PreCheck
TSA PreCheck is one of the most traveler-friendly airport security tips you can act on.
With TSA PreCheck:
- You usually keep your shoes, belt, and light jacket on.
- Your laptop and liquids can stay in your bag.
- You use a dedicated expedited lane.
TSA reports that 99 percent of PreCheck passengers waited less than 10 minutes to clear security in 2024. While expedited screening is not absolutely guaranteed on every trip, it typically means a much faster and simpler experience.
To apply for TSA PreCheck, you:
- Complete an online application at TSA.gov/precheck.
- Schedule an in-person appointment to verify your identity and provide fingerprints.
- Wait for approval, which usually takes 3 to 5 weeks.
Membership is valid for five years.
Global Entry
If you travel internationally, Global Entry can save you time when you return to the United States.
Global Entry gives you:
- Expedited processing at U.S. customs via dedicated kiosks
- TSA PreCheck benefits for domestic security screening
To apply, you create a Trusted Traveler Programs account, complete an online application, then attend an in-person interview with necessary documents. According to U.S. Customs and Border Protection, about 80 percent of applicants are approved within two weeks.
For frequent travelers, combining Global Entry with TSA PreCheck and programs like CLEAR can make airports significantly smoother.
Dress for easy screening
What you wear directly affects how quickly you move through security.
Choose:
- Slip-on shoes instead of boots with complex laces
- A light jacket or cardigan that you can quickly take off
- A belt without metal or one you can easily remove
- Minimal jewelry, especially metal pieces
You will usually be asked to remove:
- Shoes (unless you have TSA PreCheck)
- Belts with metal buckles
- Jackets and coats
- Watches, metal bracelets, and large necklaces
Placing these items in a jacket pocket or your personal item before you get to the front of the line keeps you from fumbling at the conveyor belt.
If you have body piercings or metal implants that may trigger detectors, let the TSA officer know before you walk through the scanner.
Comfortable, nonrestrictive clothing also makes long flights and layovers more pleasant, so consider both security and in-flight comfort when you pack your outfit.
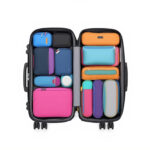
Pack your carry-on the smart way
A well-organized bag moves through security faster and reduces the chance of extra screening.
TSA advises packing bags in neat layers and avoiding clutter. Overstuffed bags, tangled cables, and random items can look suspicious on X-ray screens and often lead to manual searches.
Keep these items easy to access:
- Your clear liquids bag
- Your laptop and any larger electronics
- Items you might need to declare or separate, such as powders or baby food
Try to pack only what you really need in your carry-on. The lighter your bag, the easier it is to handle during screening and the less likely you are to misplace something.
For a broader view of safe packing practices and what to carry with you, you can also review our travel safety checklist and travel safety gear guides.
Follow the 3-1-1 liquids rule
The 3-1-1 rule is one of the most important airport security tips if you are new to flying.
For carry-on bags:
- Containers must be 3.4 ounces (100 milliliters) or less.
- All containers must fit in 1 clear, quart-sized bag.
- Each traveler is allowed 1 such bag.
This applies to liquids, aerosols, gels, creams, and pastes, including shampoo, conditioner, toothpaste, lotion, hair gel, and similar items.
To avoid delays:
- Pre-pack your 3-1-1 bag at home.
- Use travel-size containers or transfer products into small bottles.
- Place the bag at the top of your carry-on so you can quickly remove it if needed.
Alcoholic mini bottles in your carry-on must also fit comfortably inside your quart-sized bag, and beverages with more than 24 percent but not more than 70 percent alcohol are limited to 5 liters in checked bags and must be in unopened retail packaging.
If you want a deeper overview of staying healthy and hydrated while traveling, including how to manage food and drink safely, explore our guide on travel safety and health.
Know special rules for baby items and medicine
The 3-1-1 rule has important exceptions, especially for families and travelers with medical needs.
Baby and toddler items
You can bring formula, breast milk, toddler drinks, and baby or toddler food in quantities greater than 3.4 ounces in your carry-on. These items do not need to fit in your quart-sized liquids bag.
You must:
- Inform the TSA officer at the beginning of the screening process.
- Remove these items from your bag for separate screening.
Expect that containers might undergo additional checks, but you do not have to discard or reduce medically necessary amounts for your child.
Medication and medical liquids
TSA allows you to bring medication in pill or solid form in your carry-on without special labeling, and you typically do not need to present or notify officers unless it is in liquid form.
Liquid medications, such as certain prescriptions or insulin, are allowed in reasonable quantities above 3.4 ounces but must be screened separately. It is wise to:
- Keep medications in their original containers if possible.
- Pack them in a dedicated pouch.
- Tell the officer about liquid medications before screening.
If you have diabetes or another condition that involves devices like insulin pumps or continuous glucose monitors, inform the TSA officer before screening. You can request that these devices not be removed and instead be inspected visually or via pat-down. Travelers with diabetes may also bring liquids such as juice boxes larger than 3.4 ounces for medical needs, which will undergo additional screening.
For any medical device, you can carry a doctor’s note describing your condition and needs, although it is not required.
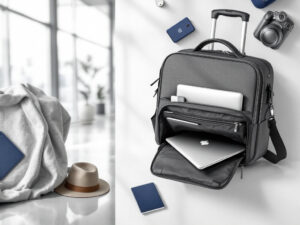
Handle electronics and batteries correctly
Electronics are a focus of modern airport security, so it helps to know what is expected before you reach the conveyor belt.
You must remove from your carry-on for separate X-ray screening:
- Laptops
- Tablets larger than a phone
- Game consoles
- Other large personal electronic devices
Phones usually stay in your bag or pocket unless an officer asks otherwise.
TSA officers may ask you to power up your electronic devices. If a device will not turn on, it may not be allowed on board. Make sure your phone, laptop, and other important electronics have at least some battery before you reach security.
For batteries:
- Devices with lithium metal or lithium ion batteries should be carried in your carry-on.
- Most consumer devices are permitted in both carry-on and checked bags, but spare lithium batteries must be in carry-on only.
- If you use a mobility device with a battery, inform the airline ahead of time so they can follow FAA safety rules and handle it properly.
Organizing your chargers and cables in a small pouch can prevent tangles that might look suspicious on the X-ray and makes repacking much easier.
For more on safe tech use on the road, see our guide to travel security technology and travel security best practices.
Use the right locks and check your luggage
Checked bags are also screened, often out of your sight.
TSA recognizes certain locks that can be opened by security officers using universal master keys. These are sometimes marketed as TSA-approved locks. If your checked bag is locked and TSA cannot open it, they may cut the lock to complete their inspection. When this happens, they place a Notice of Baggage Inspection inside the bag.
Using locks designed for security access protects both your belongings and your hardware.
Avoid packing:
- Sharp objects in carry-on bags, such as large knives or tools
- Sporting equipment that can be used as a bludgeon, like bats or clubs
These items belong in checked baggage, wrapped or sheathed to prevent injury. Aerosol insecticides are also prohibited in carry-on bags, but may be allowed in checked bags if they are not labeled as hazardous material.
If you are unsure whether an item is allowed, you have several options:
- Use the “What can I bring?” tool on the TSA website.
- Check the MyTSA app.
- Contact @AskTSA on Twitter or Facebook Messenger for live assistance between 8 a.m. and 6 p.m. Eastern Time.
If you want a broad overview of common travel security risks and how to avoid them before, during, and after you pack, our dedicated guide is a good next stop.
Move smoothly through the security line
Once you reach security, your goal is to keep yourself and your belongings flowing forward without backtracking or repacking.
Here is a simple step-by-step you can follow:
- Before you get to the front, empty your pockets into your bag, not the bin.
- Place your liquids bag and large electronics in the bin first so they are easy to retrieve.
- Lay your shoes and jackets flat in a bin if required.
- Place your carry-on and personal item directly on the belt if there is room.
- Walk through the scanner or metal detector when instructed.
- Retrieve your items in the order they come through, starting with your wallet, passport, and phone.
If you are selected for extra screening, stay calm and follow the officer’s instructions. Remember that pat-downs are done by someone of the same sex, and you can request a private room if that feels more comfortable.
Keeping your bag uncluttered, separating foods and powders if requested, and following the 3-1-1 rule will make secondary screening less likely.
Consider your health and comfort at security
Security checkpoints are crowded, shared spaces, so a few health-conscious habits go a long way.
You can:
- Carry an empty refillable water bottle and fill it after security.
- Pack a few snacks in your carry-on in case of delays.
- Use hand sanitizer or wash your hands after handling bins and before eating.
Wearing comfortable shoes with socks can make it easier if you need to remove them, and a lightweight layer helps you adjust quickly to temperature changes between terminals, planes, and outdoor curbs.
For more detailed guidance on staying healthy on the road, from hydration to jet lag, review our resources on travel safety and health and broader travel safety guidelines.
Plan for special assistance or disabilities
If you or someone you are traveling with has a disability, medical condition, or simply needs more assistance through security, you do not have to navigate it alone.
You can:
- Contact TSA Cares online or by phone at 855-787-2227 at least 72 hours before travel.
- Request advice tailored to your medical devices or accommodations.
- Ask for assistance at the airport if you feel uncertain about the process.
TSA can arrange help with mobility devices, medical equipment, and communication needs. Remember that you can always ask questions and clarify what is happening at any stage.
If you are planning solo or first-time travel with medical needs, it may also help to review our advice on personal safety for travelers and travelers safety and security so you can build a complete plan.
Simple preparation before you leave home often matters more than anything you do at the checkpoint itself. A few organized routines can turn airport security from a source of stress into just another brief stop on your way.
Connect security to your overall travel safety
Airport security is only one part of your bigger safety picture. When you connect what happens at the checkpoint with your plans before and after you fly, you create a more secure and less stressful trip.
To round out your plan, you can:
- Use travel safety apps to store documents and get alerts.
- Review travel safety insurance so you have backup if things go wrong.
- Read traveling abroad safety tips before international trips.
- Learn how to stay safe while traveling day to day at your destination.
If you are a solo traveler, our guides on safe solo travel tips and travel security advice walk through what to do before, during, and after flights. Women traveling alone can dive deeper into travel safety for women and travel safety tips for solo female travelers.
Students, seniors, backpackers, and drivers on road trips will find tailored advice in our resources on travel safety for students, travel safety for seniors, travel safety for backpackers, and travel safety driving tips.
If you like to think in checklists and concrete actions, explore our guides on traveling safety measures, travel security precautions, and emergency travel safety tips. These can be paired with this airport-focused checklist for a full, practical plan.
Quick airport security checklist
Use this short list before your next trip to put these airport security tips into action:
- Check your ID and passport. Confirm validity and REAL ID compliance for U.S. domestic flights.
- Arrive early. Plan for 2 hours before domestic flights and 3 hours before international.
- Dress for speed. Slip-on shoes, minimal metal, easy layers.
- Pack smart. Follow the 3-1-1 liquids rule and keep your bag organized.
- Prep electronics. Charge devices, keep large electronics easy to remove, and pack spare batteries in carry-on.
- Secure your luggage. Use locks that TSA can open and keep prohibited items out of your carry-on.
- Plan for your needs. Notify TSA about medical devices, baby items, or special assistance in advance if possible.
- Consider programs. Enroll in TSA PreCheck, Global Entry, or CLEAR+ if you travel often.
As you get ready for your upcoming trip, pick one or two improvements from this list to try, such as organizing your carry-on differently or applying for TSA PreCheck. With each flight, your personal routine will get smoother, and airport security will feel like a brief, manageable step instead of a major hurdle.
FAQs
Do I really need a REAL ID to fly domestically in the U.S.?
Yes—starting May 7, 2025, U.S. travelers 18+ need a REAL ID-compliant license/ID or another acceptable ID (like a passport).
What is the TSA 3-1-1 liquids rule?
Carry-on liquids/gels/aerosols must be 3.4 oz (100 ml) or less, all inside one quart-size clear bag, one bag per traveler.
Are baby formula and breast milk exempt from 3-1-1?
Yes—formula, breast milk, juice, and baby/toddler food can exceed 3.4 oz. Declare them and expect separate screening.
Can I bring liquid medication over 3.4 oz?
Generally yes in reasonable quantities, but declare it for separate screening. (Keep it accessible and ideally in original packaging.)
Where do power banks and spare batteries go?
Carry-on only. Spare lithium batteries and power banks are not allowed in checked bags.
What if I’m not sure an item is allowed?
Use TSA’s “What Can I Bring?” database or AskTSA for live help (8am–6pm ET).
What happens if I get pulled for extra screening?
Stay calm, follow instructions, and ask questions. You can request clarification at any step, and you can request private screening if needed (when available).


